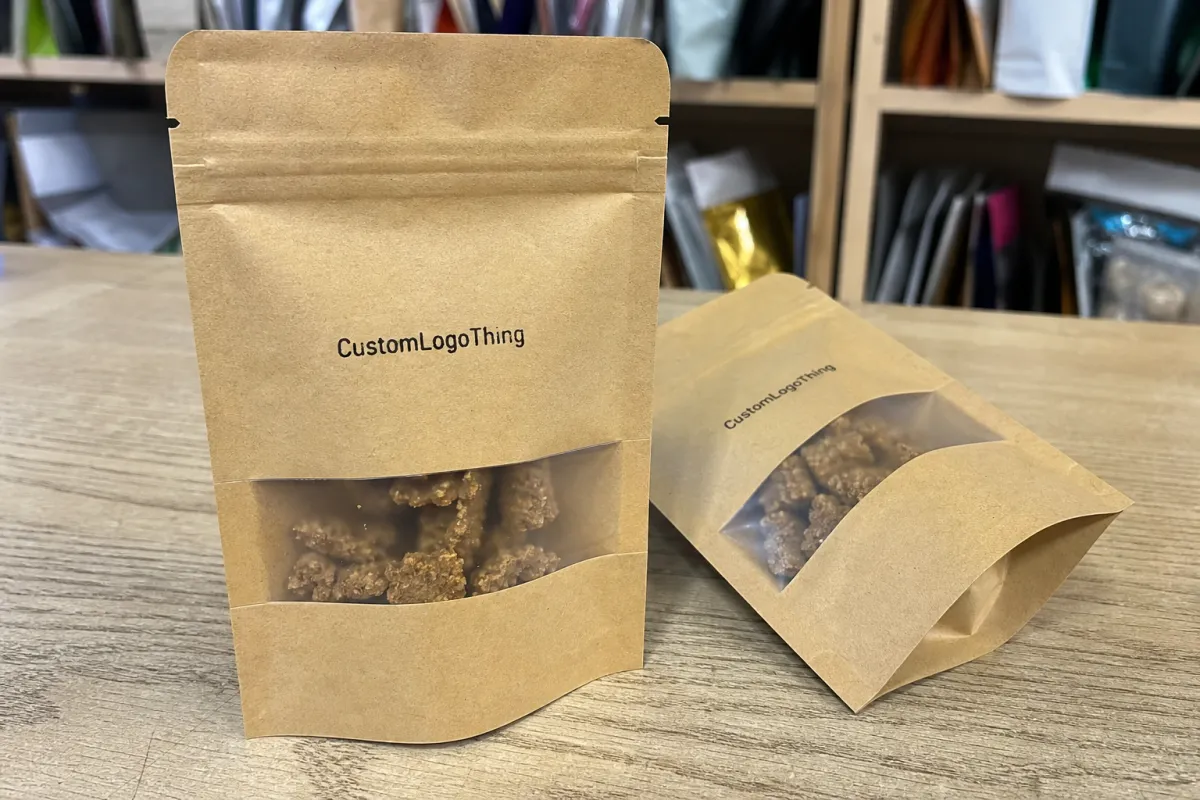
A three-inch patch on a canvas treat pouch has to work harder than its size suggests. It may be the only branded surface a shopper notices at a farmers market, inside a subscription box, on a retailer counter, or clipped to a dog-walking kit. That is why this Logo Patches Material guide for Pet Treat Brands starts with a practical point: the material carries brand meaning, not just artwork.
Pet treat companies naturally spend more time on recipes, ingredient claims, shelf stability, pouch structure, and fulfillment. But once a brand moves into reusable pouches, sampler bags, staff aprons, caps, event totes, or premium bundle packaging, the logo patch becomes a small engineered component. It has fibers, backing layers, adhesive films, borders, stitch density, heat limits, abrasion behavior, and cleaning expectations.
Logo Patches Material Guide for Pet Treat Brands: What You’re Really Choosing
A logo patch is not simply a small label with a dog icon. It can be made from tightly woven thread, raised embroidery thread, molded PVC, soft rubber, faux leather, faux suede, felt, twill, printed polyester, heat-transfer adhesive, pressure-sensitive adhesive, or hook-and-loop material. Each layer changes how the finished patch looks, feels, applies, and survives handling.
Pet treat use cases are different from fashion patches or casual merch badges. A treat pouch may collect pet hair. A staff apron may be washed every week. A dog-walking bag may see rain, sunscreen, leash hardware, muddy hands, and oily treat residue. A retail sampler bag may sit near kraft paper displays, corrugated shippers, freezer-adjacent backroom storage, or crumb dust from repeated filling.
The “best” patch is rarely the prettiest one on a mockup. A better choice matches five things:
- Brand personality: rustic, premium, playful, technical, natural, rescue-focused, or boutique.
- Treat price point: a $4 impulse pouch carries a different expectation than a $28 gift bundle.
- Handling environment: retail shelf, outdoor event, washable apparel, reusable tote, or promotional giveaway.
- Application method: sew-on, heat-press, adhesive, hook-and-loop, or supplied with no backing.
- Cleaning expectation: dry handling only, spot cleaning, machine washing, or wipe-down use.
Food-contact thinking also matters. Most patches belong on outer packaging, reusable bags, staff apparel, display pieces, and accessories, not directly against treats. Still, placement needs scrutiny. Avoid loose fibers near primary food areas, do not position adhesive-backed patches where they can lift into a fill path, and test heat-applied patches before applying them to coated films or laminated pouches.
If your brand already uses recycled materials, FSC certified hangtags, biodegradable packaging, or post-consumer waste mailers, the patch should not feel bolted on as an afterthought. A shiny rubber badge may be perfect for rugged outdoor merch. The same badge may fight the tone of a natural kraft bundle. Materials have a visual language, and customers read it quickly.
How Different Patch Materials Look, Feel, and Perform
The material family sets the personality of the patch before anyone reads the logo. A useful buyer comparison should cover more than appearance. Detail limits, edge finish, hand feel, moisture resistance, substrate compatibility, and application method all influence the final result.
Woven patches
Woven patches are usually the cleanest choice for tiny lettering, thin outlines, small paw pads, whiskers, badge text, and mascot details. The design is built from tightly woven threads rather than raised stitches, so the surface stays flatter and line work can be more precise. For a 2-inch to 3-inch patch on a treat pouch, woven construction often gives better readability than embroidery.
Use woven patches for ingredient-inspired graphics, small flavor labels, QR-adjacent branding, and retail-ready logos that need crisp edges. They pair well with fabric pouches, caps, totes, and stitched-on outer packaging panels.
The tradeoff is texture. Woven patches look polished, but they do not have the thick, raised hand of embroidery. If the brand depends on a handmade or heritage look, woven may feel a little too flat unless the artwork and border are designed with warmth.
Embroidered patches
Embroidered patches feel classic. Raised thread gives the patch a tactile, premium quality, especially on simple shapes such as circles, rectangles, shields, bones, and paw badges. The limitation is detail. Tiny type can close up, thin outlines can break, and small facial features on a mascot may soften once stitches are built at physical scale.
Embroidery works best when the logo is bold: a large brand name, a simple icon, 3 to 7 thread colors, and enough open space for thread movement. On staff aprons, caps, work shirts, and event jackets, it can look excellent. On a small pouch where fine flavor text matters, it may need simplifying.
PVC and soft rubber patches
PVC and soft rubber patches are waterproof, wipeable, and visually strong. They suit dog-walking pouches, outdoor market gear, leashes, rugged totes, and items that may get wet or dirty. Raised and recessed layers can create crisp color blocks, and molded shapes hold up well.
They are less natural-looking than thread or leatherette. That does not make them wrong; it just narrows their best use. A freeze-dried adventure-treat brand may benefit from a rubber badge. A small-batch bakery-style brand using kraft paper and cotton cord may not.
PVC also usually involves a mold or tooling step, so it tends to make more financial sense for repeat designs or larger quantities. If the design changes every season, the setup cost can become hard to justify.
Leatherette, faux suede, and printed fabric
Leatherette and faux suede patches bring warmth. They look good with canvas, denim, kraft-style packaging, premium treat bundles, and gift sets. Debossing, laser engraving, or foil effects can create a boutique finish without adding much visual noise.
Heat settings need care. Some faux leather surfaces darken, curl, glaze, or mark if the press temperature, pressure, or dwell time is wrong. Test the exact patch on the exact pouch or fabric before approving bulk application.
Printed fabric patches are best for full-color artwork, gradients, pet photography, watercolor illustration, seasonal launches, or complex graphics that thread cannot reproduce cleanly. They can look sharp and modern, but print durability depends on ink type, base fabric, coating, abrasion, and laundering conditions.
Chenille and felt
Chenille and felt are specialty choices. They can be charming for cozy, playful, varsity-style merch or gift packaging. They are not usually the first pick for small product labels with fine detail.
Both have a softer, bulkier character and may collect more lint or pet hair than flatter materials. That matters for brands selling around dogs, treat crumbs, outdoor events, and reusable bags.
Key Factors Before You Pick a Patch Material
Start with artwork complexity. If the logo includes tiny bone icons, thin whiskers, small paw pads, ingredient illustrations, flavor names, a rescue-dog badge, or curved microcopy, woven or printed fabric should be on the shortlist. Embroidery and PVC can both be strong options, but they need simplified shapes at small sizes.
Patch size matters just as much. A 1.5-inch patch on a small pouch follows different rules than a 4-inch patch on a staff jacket. Retail patches need fast readability from a few feet away, often under uneven lighting. Staff apparel can carry more texture because people see it up close during conversation.
Here is a practical comparison to use before narrowing the specification:
| Patch Material | Best Use | Detail Level | Typical Cost Tendency | Buyer Watchout |
|---|---|---|---|---|
| Woven | Small logos, pouch labels, fine type | High | Often efficient at volume | Less raised texture than embroidery |
| Embroidered | Aprons, caps, classic merch | Medium | Rises with stitch coverage | Tiny letters may fill in |
| PVC or rubber | Outdoor bags, rugged gear, wipeable merch | Medium | Mold cost upfront, better on repeats | Less natural-looking |
| Leatherette | Premium bundles, canvas, denim, kraft-style branding | Medium | Depends on engraving, deboss, foil, backing | Heat and abrasion need testing |
| Printed fabric | Full-color art, photos, watercolor graphics | Very high visually | Varies by print method and finish | Durability depends on coating and wash exposure |
Durability should be specified by use case, not guessed. A patch on a reusable customer bag may flex hundreds of times. A patch on a staff apron may need repeated washing. A patch on a limited-run sampler bag may only need to survive packing, shipping, display, and light handling.
Transit can be rougher than a tabletop test. If finished pieces ship in corrugated cartons or sit tightly packed in master cases, think about abrasion from stacking, vibration, and rub marks. A patch that looked perfect after application can still scuff or curl if the carton packing plan is wrong.
Attachment is a core spec. Sew-on backing is reliable for fabric but adds labor. Heat-press backing can speed production, often using temperatures around 275°F to 325°F depending on the patch and substrate, but the range is not universal. Adhesive backing is useful for short-term promotional use, not always for long-term fabric durability. Hook-and-loop works well for removable patches on staff bags, event gear, or rotating campaign badges.
Practical rule: choose the backing after you know the surface. A good-looking patch with the wrong adhesive or heat layer can fail faster than a cheaper patch specified correctly.
For packaging and distribution testing, brands moving into larger retail programs may also want to understand transit expectations from groups such as ISTA. Patch adhesion is not tested in isolation during shipping. It is affected by case packing, compression, vibration, humidity, and how finished items rub against neighboring units.
Process and Timeline: From Artwork to Finished Patches
The normal patch process has more steps than many first-time buyers expect: artwork review, material recommendation, size confirmation, color matching, backing selection, digital proof, optional sample approval, bulk manufacturing, quality control, and packing. If one of those steps is rushed, the risk shows up later as poor readability, color mismatch, lifting corners, or missed launch timing.
Artwork often needs redrawing. A logo that looks sharp on a screen at 8 inches wide may not translate into thread, molded rubber, or debossed leatherette at 2.25 inches wide. Thin outlines may need to be thickened. Small text may need to be removed. A mascot’s eye, nose, and collar tag may need simplification so the patch reads cleanly at actual size.
Color matching is material-specific. Thread colors do not behave like printed CMYK ink. PVC colors are mixed or selected differently. Leatherette debossing changes color through shadow and surface compression rather than ink. Foil reflects light and can appear brighter in photos than it does on a shelf.
For serious retail work, provide brand color references and approve a proof with realistic expectations. A Pantone reference helps, but it does not make every material match perfectly. Texture, reflectivity, and base color all shift perception.
A digital proof is usually enough for simple repeat patches, especially when size, material, and backing have already been proven. A physical sample is safer for new materials, small details, unusual backings, premium packaging launches, or any patch that must survive washing or outdoor use. Sampling can add several business days, sometimes more if revisions are needed, but it can prevent a costly production miss.
Lead time depends on complexity, order quantity, mold creation for PVC, sampling, backing type, finishing, shipping method, and how quickly revisions are approved. Simple woven or embroidered patch orders may move faster than molded PVC designs that need tooling. Individual bagging, multiple versions, rush freight, or late artwork changes can add time quickly.
If there is a trade show, subscription box drop, seasonal flavor launch, farmers market restock, or new retailer onboarding date, build a buffer. Many small brands plan labels and pouches carefully but leave patches too late, even though the patch may require its own proofing and application testing.
Pricing, MOQ, and Unit Cost Drivers
Patch pricing is built from several parts: material, size, stitch count or weave density, color count, mold or setup requirements, backing type, edge finish, quantity, packaging, and shipping. A useful quote should show enough detail that you can compare options instead of choosing the lowest unit price without context.
As a broad purchasing guide, simple woven patches often become attractive at moderate and larger quantities because the setup is spread across more pieces. Embroidery can climb with heavy stitch coverage, larger sizes, metallic thread, or complex borders. PVC may include a mold or setup charge, then settle into a more favorable unit cost on reorders if the same design is used again. Leatherette pricing depends on whether the finish is debossed, laser engraved, printed, foiled, or layered.
Minimum order quantity, or MOQ, is the smallest batch that can be produced economically on the equipment. It varies by material and customization level. A simple woven patch may have a different MOQ from a custom molded rubber patch because setup, material prep, and machine time are different.
Typical unit costs range widely. A small woven or embroidered patch in a common size might land around $0.45 to $1.50 per piece at higher quantities, while short runs can be noticeably higher. PVC patches with custom molds may carry an upfront setup or mold fee before the unit cost becomes more favorable. Leatherette patches can sit in a similar range, but foil, custom shape cutting, thicker substrates, and premium backing push the number upward.
Hidden cost triggers are common. Metallic thread, merrowed borders, laser-cut silhouettes, heat-seal films, individual polybagging, multiple flavor versions, rush shipping, and late artwork edits can all change the final total.
If your brand values recycled materials or FSC certified paper components elsewhere in the pack, ask whether patch packaging can be reduced or packed in bulk instead of individually bagged. For broader packaging systems that include certified paperboard, hangtags, or kraft paper elements, responsible sourcing expectations can be reviewed through FSC.
Quote with real use details. Do not send only a logo and size. Include where the patch will be applied, expected quantity, artwork file, desired backing, deadline, packaging surface, cleaning expectation, shipping location, and whether reorders are likely. Custom Logo Things also shares examples of project thinking on the Case Studies page, which can help buyers frame practical questions before requesting pricing.
Matching Patch Material to Pet Treat Packaging
A material guide becomes useful when it turns into a checklist. Use the steps below before approving artwork or requesting samples.
-
Identify the patch location.
List the exact surface: canvas treat pouch, resealable outer bag, display basket liner, staff apron, event tote, mailer insert, cap, leash accessory, or reusable customer bag. A flat cotton pouch and a coated stand-up pouch do not accept the same attachment method.
-
Decide what the patch must communicate first.
Choose one primary message. Brand name, flavor family, premium positioning, handmade feel, rescue-dog mission, natural ingredients, or playful personality. One small patch cannot carry everything.
-
Match detail level to material.
Pick woven for small type and crisp mascots, embroidery for bold tactile marks, PVC for waterproof durability, leatherette for rustic premium packaging, and printed fabric for full-color art. If the design has more than 6 to 8 visual elements, simplify before production.
-
Choose backing by substrate.
Sew-on backing is strongest for fabric. Heat-press backing is faster when the substrate can tolerate temperature and pressure. Adhesive works best for short-term promotional use. Hook-and-loop is useful for removable branding. No backing makes sense when a cut-and-sew operation will stitch the patch later.
-
Confirm the edge finish.
Merrowed edges suit classic circles, rectangles, ovals, and shields. Laser-cut edges suit custom silhouettes such as bones, heads, badges, or ingredient shapes. Heat-cut borders keep slim woven patches neat and flat.
-
Review the proof at actual size.
Print it. Hold it at retail viewing distance. Put it near the pouch, tote, or apron color. Many patch decisions fail because the proof was approved enlarged on a screen, where line weight and spacing looked more forgiving.
For a pet treat pouch with a natural kraft paper hangtag and cotton drawstring, a woven or leatherette patch may feel more aligned than a glossy PVC badge. For a dog-walking event kit that may get rained on, PVC could be the smarter choice. For a limited seasonal flavor with watercolor chicken, pumpkin, or blueberry art, printed fabric may preserve the illustration better than thread.
Common Mistakes That Make Brand Patches Harder to Use
The most common mistake is overcrowding. A small patch should not carry the brand name, flavor name, tagline, ingredient claim, city, established date, paw icon, social handle, and web address all at once. Pick the main message, then move secondary details to a hangtag, printed pouch, insert card, or corrugated display header.
Another frequent problem is choosing embroidery for tiny typography. Raised stitches need physical room. If letters are too small, the thread closes the counters, softens corners, and makes the text look muddy. On a 2-inch patch, woven thread or printed fabric will usually protect small lettering better.
Backing mismatches can be expensive. Heat-applied patches should not be assumed safe for heat-sensitive films, textured pouches, coated fabrics, or uneven seams. Pressure, dwell time, and temperature need testing. Adhesive patches can lift on dusty, oily, textured, or flexible surfaces, especially after shipping or repeated handling.
Contrast is another quiet failure point. Tan thread on tan leatherette may look tasteful in a mockup, then disappear under warm retail lighting or in a market photo. Low-contrast tone-on-tone branding can be beautiful at 6 inches away and nearly invisible from 4 feet away. If the patch has to sell from a shelf or table display, readability wins.
Cleaning gets overlooked too. Staff uniforms, event totes, and washable pet accessories need different durability expectations from decorative patches on limited-run packaging. Ask about wash behavior, abrasion resistance, and whether edges are likely to curl after repeated flexing. Not every patch is intended to survive machine washing, and that should be clear before ordering.
Approve at real scale. Print the proof at the exact patch size, then check border thickness, line spacing, logo legibility, and color contrast. If the patch will sit beside biodegradable packaging, post-consumer waste mailers, or other natural materials, view the proof with those materials nearby so the whole presentation feels intentional.
Next Steps Before You Request Samples or a Quote
Before asking for pricing, make a simple use-case list with three columns: where the patch goes, how customers will handle it, and whether it needs to survive moisture, abrasion, washing, shipping, or repeated flexing. That exercise usually removes half the wrong material options.
Prepare artwork in vector format when possible. Include brand colors, preferred patch size, acceptable simplifications, and any details that cannot be removed from the logo. If the logo has tiny type, give clear permission to enlarge, delete, or convert it into a cleaner mark for patch production.
Select two or three material candidates instead of asking for every possible option. Compare woven versus embroidered for a fabric pouch, PVC versus leatherette for outdoor market merch, or printed fabric versus woven for a detailed mascot. Focused sampling saves time and gives you a clearer decision.
Ask for backing recommendations based on the exact surface. Attachment failure is usually more expensive than choosing the right backing upfront. A patch that peels during fulfillment, curls after washing, or lifts in shipping can damage the customer’s perception of the whole treat brand.
Request a quote that separates patch cost, setup or mold charges, sampling, backing, packaging, shipping, and reorder assumptions. If you expect repeat orders, say so. Reorder planning can influence material choice, tooling value, packaging method, and unit cost. For more practical project context, review the Custom Logo Things Case Studies and note the kinds of details that make custom branding easier to quote accurately.
Use this logo patches Material Guide for Pet Treat brands as a specification checklist before approving artwork, samples, or a full production run. The right patch should look good, attach properly, match the brand’s price point, and survive the real handling conditions your pet treat packaging will face.
FAQs
What is the best material in a logo patches material guide for pet treat brands?
There is no single best material for every pet treat brand. Woven patches are best for fine detail, embroidered patches are best for classic raised texture, PVC is best for wipeable durability, and leatherette is best for a warm premium look. The right choice depends on patch size, artwork detail, backing method, handling environment, and whether the patch is used on packaging, apparel, totes, or promotional gear.
Are embroidered or woven logo patches better for small pet treat logos?
Woven patches usually handle small letters, thin lines, and detailed mascots better because the design is created with a tighter thread structure. Embroidered patches are better when the logo is bold, simple, and benefits from raised texture. Very small text may need to be enlarged, simplified, or removed.
Can logo patches be used directly on pet treat packaging?
Logo patches are commonly used on outer packaging, reusable bags, fabric pouches, display pieces, staff apparel, and promotional totes rather than directly touching treats. If a patch is near food packaging, confirm placement, adhesive behavior, shedding risk, and heat-application compatibility with the pouch or fabric surface.
How do backing choices affect custom patches for pet treat brands?
Sew-on backing is durable for fabric items, heat-press backing speeds application when the substrate can tolerate heat, adhesive works best for short-term or promotional uses, and hook-and-loop works for removable branding. Choose the backing after confirming the surface material, expected handling, cleaning needs, and production workflow.
What information should pet treat brands provide for a patch quote?
Provide artwork, patch size, quantity, material preference, backing type, edge finish, deadline, shipping location, and where the patch will be applied. Also mention whether the order is a one-time launch, seasonal design, or expected reorder, because repeat production can affect setup planning and unit cost.


