Logo Printed Tissue Paper: Specs, Cost, and Ordering
What Logo Printed Tissue Paper Actually Adds to Packaging
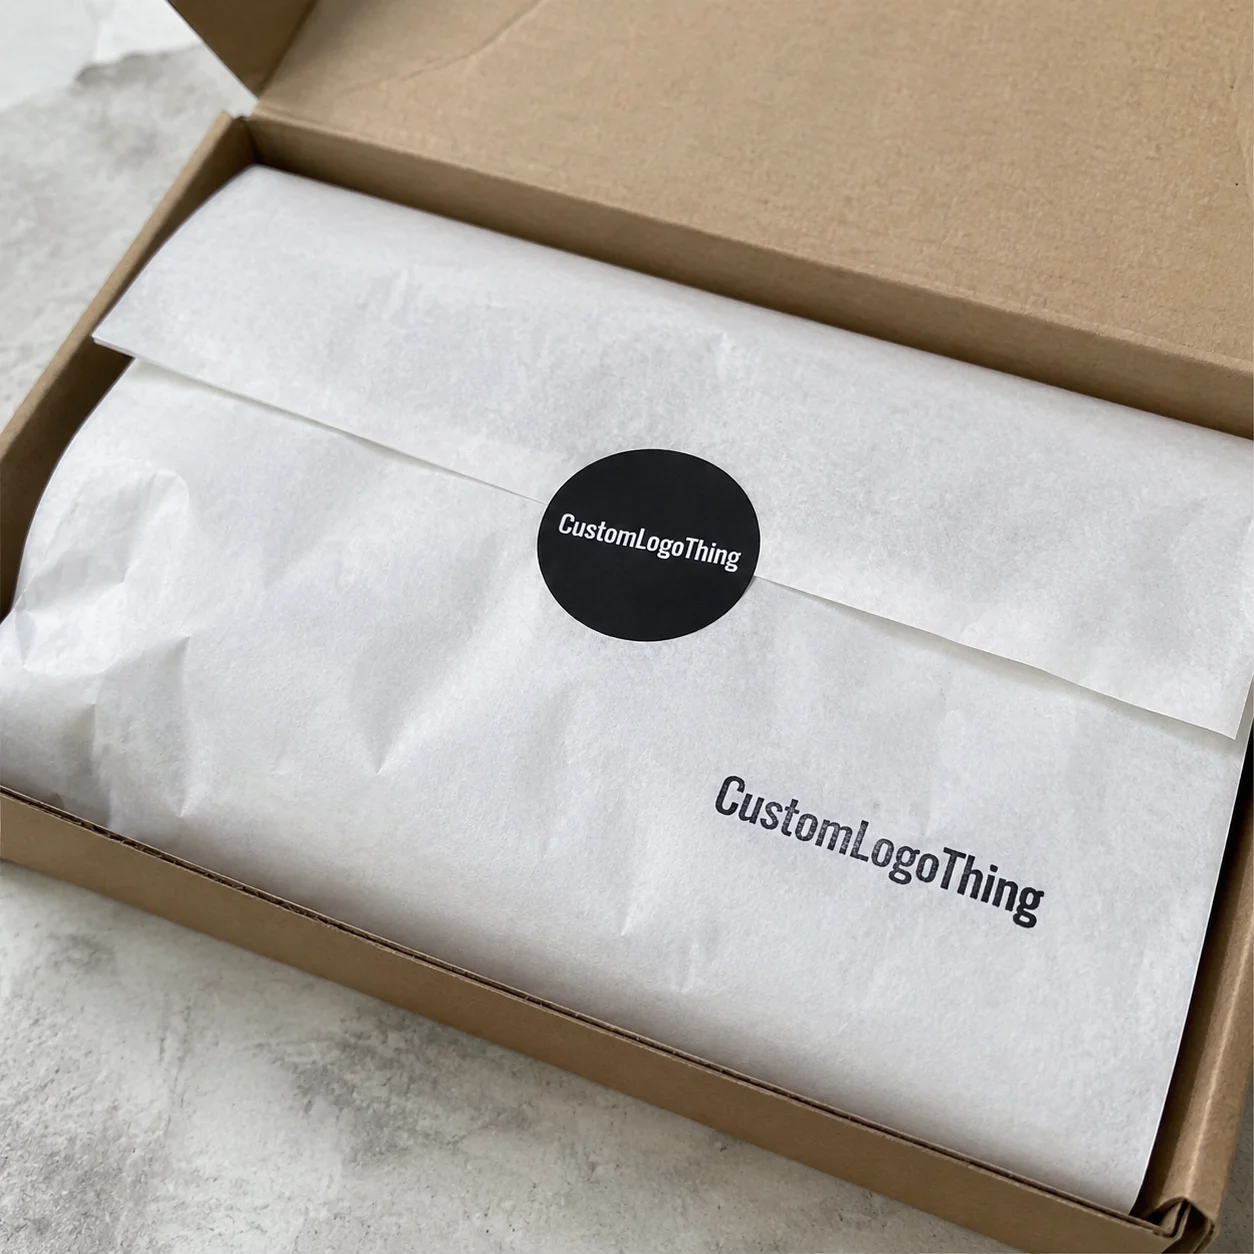
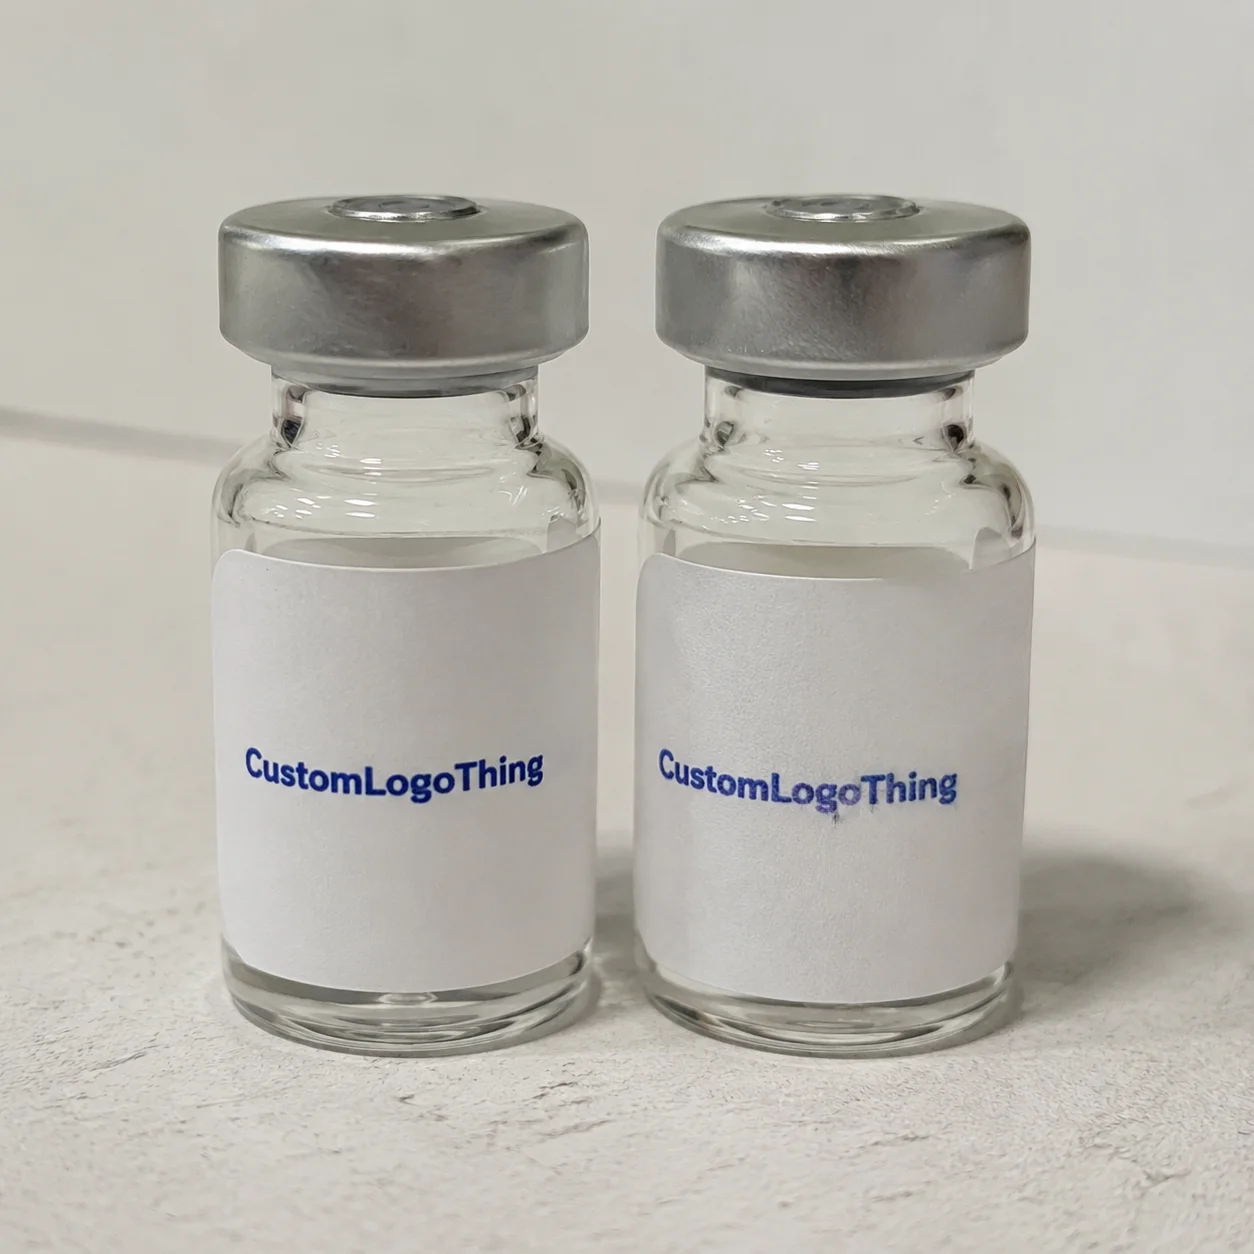
A customer opens the shipper, sees the wrap before the product, and makes a judgment in about two seconds. If the item costs $90 but the inside looks like it was packed with whatever was closest to the tape gun, the product feels cheaper. Logo printed tissue paper is often the first branded surface a buyer touches, so it carries more weight than its GSM suggests.
In plain terms, it is lightweight wrapping tissue printed with a logo, repeat pattern, short message, icon, seasonal graphic, or simple brand mark. It shows up in retail bags, ecommerce boxes, subscription kits, PR mailers, gift sets, event packaging, boutique wrapping, and product launches where the inside presentation needs to look intentional.
It is not only decoration. Good branded tissue protects light surfaces from scuffs, fills small voids in a box, hides the product until the reveal, separates items that might rub together, and makes a plain kraft mailer feel planned rather than improvised. A single sheet costing roughly $0.12 to $0.45 can change the perceived value of the whole order. Packaging math is rude like that.
The category works especially well for apparel, jewelry, cosmetics, candles, accessories, skincare, stationery, boutique food gifts, and secondary food packaging where the tissue does not directly touch unpackaged food. If direct food contact is involved, ask for appropriate food-safe materials and documentation before approving anything. “Paper” does not automatically mean safe for every application.
Set expectations early. Tissue is thin, flexible, and often semi-translucent. It is not a rigid box, coated card, or business card. Artwork has to be designed for a soft, absorbent material that folds, wrinkles, shifts, and moves. Ink and paper still obey physics.
How Custom Tissue Printing Works From Artwork to Finished Sheets
The normal production flow sounds simple: review the artwork, confirm sheet size, select tissue stock, check ink requirements, prepare a proof, print the sheets, dry or cure the ink, trim, fold or flat-pack, then carton everything for shipping. The complications start in the small decisions: color, coverage, paper weight, repeat spacing, and how the sheet will be handled at the packing bench.
Most custom tissue is produced with one of several print methods. Flexographic printing is common for larger runs and repeat patterns because it handles roll-fed production efficiently. Screen or spot printing can work for bold, simple marks with limited colors. Digital printing may be available for low-volume tests or multi-color artwork, although it can limit paper choices, sheet sizes, and ink options.
Repeat patterns usually outperform one giant centered logo in real packing conditions. A small diagonal logo pattern every 3 to 6 inches tends to remain visible after folding, crumpling, and tucking. One large logo can look polished on a flat proof, then disappear under the product flap during actual use. Great on screen. Useless in the box.
Printed tissue is less forgiving than rigid packaging. Thin sheets can shift slightly, absorb ink unevenly, and show minor variation across a run. A buyer should expect a soft branded finish, not photo-grade detail. For most brands, that is exactly the point. Tissue should feel tactile, light, and layered, not like a glossy catalog page.
Proofing deserves more attention than it usually gets. A digital proof checks layout, logo scale, repeat spacing, sheet orientation, and general placement. A physical sample or pre-production proof is better for color-sensitive orders, metallic ink, custom-colored tissue, subtle contrast, or large first runs. The tradeoff is time. A digital proof may be ready for review in 1 to 2 business days. A physical proof can add 5 to 10 business days or more, depending on setup and shipping.
Practical rule: If color accuracy affects brand approval, request a physical proof. If the tissue is a one-color repeat inside a mailer box, a digital proof is often enough.
Approval should not be casual. Check whether the artwork repeats cleanly, whether the logo reads after folding, and whether the print direction makes sense for how the product is wrapped. Tissue is rarely displayed flat by the end customer. Judge the design in the form it will actually be seen.
Paper Weight, Sheet Size, Ink Color, and Finish Specs That Matter
Tissue weight is usually discussed in GSM, or grams per square meter. Lighter tissue, often around 17gsm to 22gsm, feels delicate, folds easily, and works well for apparel, jewelry, and smaller items. Midweight tissue, around 25gsm to 30gsm, feels more substantial and gives better opacity. Heavier options, around 35gsm and up, can feel more premium, but they cost more, take more carton space, and may not drape as softly.
Sheet size should be chosen by use, not vibes. Small sheets such as 15 x 20 inches work for jewelry, cosmetics, accessories, and compact gift boxes. Medium sheets around 20 x 30 inches are common for apparel, soft goods, and ecommerce orders. Larger sheets such as 24 x 36 inches or 30 x 40 inches help with bulky products, layered wrapping, and high-end presentation.
The real number to watch is cost per packed order. A 15 x 20 inch sheet may look cheaper on a quote, but if packers use two sheets every time, the saving disappears. The opposite happens with oversized sheets: the quote may look reasonable, yet the finished box ends up bulky, wrinkled, and wasteful.
Base color changes almost everything. White tissue gives the cleanest ink color and strongest readability. Colored tissue creates a stronger brand impression and can reduce the need for heavy print coverage. Kraft or natural tissue works for handmade, organic, rustic, or minimal brands. Specialty stocks can look excellent, but textured or colored papers can shift ink appearance, so test them before committing to a large run.
Ink choices should stay practical. One-color printing is the reliable workhorse for logo printed tissue paper. Two-color printing can look premium when the artwork is clean and the contrast is strong. Metallic or specialty inks may be possible, but they usually require more testing, higher setup costs, and careful proofing. If the budget is tight, a strong single-color mark on the right base paper often beats a complicated print that turns muddy.
Artwork rules are not suggestions. Use vector files such as AI, EPS, or print-ready PDF. Keep the logo high contrast. Simplify thin lines. Avoid tiny text under 8 points because it may disappear once the paper is crumpled. Build safe margins of at least 0.25 to 0.5 inches from the sheet edge, and confirm repeat spacing before approval.
Finish expectations should also be grounded. Tissue is usually matte and soft, not glossy. A mirror shine on tissue belongs in the same purchasing conversation as a waterproof sponge: theoretically interesting, practically awkward.
| Spec Choice | Best For | Tradeoff |
|---|---|---|
| 17gsm to 22gsm white tissue | Budget-friendly ecommerce, apparel, accessories | More translucent and less premium in hand |
| 25gsm to 30gsm colored tissue | Boutique retail, gift boxes, strong brand color | Ink contrast must be checked carefully |
| One-color repeat logo | Most brands, faster approval, clean presentation | Less visual depth than two-color artwork |
| Two-color or metallic ink | Luxury packaging, PR kits, premium launches | Higher cost, longer proofing, more production risk |
Cost, Pricing, MOQ, and What Changes Your Unit Cost
The cost of Custom Printed Tissue depends on order quantity, sheet size, tissue weight, number of ink colors, print coverage, setup fees, proofing, folding, packing method, and freight. There is no universal price that survives contact with real specifications. A quote without questions is usually a guess with a delivery date attached.
Cost behavior is predictable, though. Small runs carry higher per-sheet costs because setup is spread across fewer sheets. A 500-sheet test order may cost several times more per sheet than a 10,000-sheet run. Larger runs reduce unit cost, but they require more storage space, more cash upfront, and better demand planning.
As a rough planning range, simple one-color custom tissue may land around $0.18 to $0.45 per sheet for moderate quantities, depending on sheet size and print coverage. Higher-volume runs can drop below that. Small specialty runs, metallic inks, custom tissue colors, oversized sheets, or rush production can push above it. Freight can bite, too, because tissue cartons are bulky even when the product itself is lightweight.
MOQ exists because presses, screens, plates, and setup time do not become free for 200 sheets. Annoying, yes. Economically real, also yes. Some suppliers support lower digital runs, but flexographic or screen-printed custom tissue often starts around 1,000 to 5,000 sheets, with better pricing at 10,000 sheets and above.
One-color printing is usually the right choice if you are testing a new brand look, building packaging on a tight budget, using a clean logo pattern, or letting tissue support other branded pieces such as stickers, mailer boxes, belly bands, or thank-you cards. Spend more for premium gift packaging, PR boxes, retail launches, luxury product lines, influencer kits, and brands with a high average order value. A $150 order has more room for packaging to earn its keep than a $14 order.
A useful quote request includes sheet size, tissue color, paper weight, ink colors, quantity, artwork file, packing preference, delivery location, and target in-hand date. If sustainability claims matter, ask about FSC-certified paper through the Forest Stewardship Council and recycling guidance from the EPA recycling resources. Claims should be specific. “Eco-friendly” by itself is not a spec.
Ask for carton counts and dimensions before ordering, especially if storage is tight. Tissue can occupy more space than expected because it ships in protective cartons and cannot be crushed without affecting presentation. A low unit price loses some charm when the order blocks a stockroom door.
Process, Timeline, and Lead Time for Ordering Custom Tissue
A clean ordering process follows the same path: choose specs, submit artwork, receive a quote, approve the digital proof, approve a physical sample if needed, enter production, complete quality checks, pack cartons, ship, and receive the order. The boring steps are the ones that keep your launch from turning into a group text full of panic.
Lead time depends on the supplier, print method, order size, paper availability, proofing needs, and shipping distance. As a practical range, simple repeat orders may take 7 to 15 business days from proof approval. First-time orders with custom colors, physical proofs, specialty inks, or larger quantities often need 15 to 30 business days. International freight can add another 5 to 25 days depending on method, customs, and port congestion.
Delays usually come from predictable places: missing vector files, unclear sheet sizes, late proof approvals, Pantone confusion, unavailable tissue colors, holiday capacity, and last-minute artwork changes after production starts. That last one is expensive. Once plates, screens, or production files are prepared, changing the logo scale or ink color can reset the clock.
Quality control should cover more than “does it have the logo?” Check print registration, ink rub-off, sheet count, trim size, fold consistency, carton labeling, visible color variation, and whether the tissue sticks or transfers ink under normal handling. For colored stocks, compare the delivered sheet against the approved proof or swatch under neutral light. Warehouse lighting lies.
Work backward from the event date, launch date, retail restock, or campaign drop. Then add buffer. If tissue must arrive by the 20th, approving the proof on the 18th and asking production to “just go faster” is not a plan. It is a stress experiment.
Rush orders may be possible, but expect tradeoffs. Rush fees can apply. Material options may be limited. Artwork may need to stay simple. Physical proofing may be skipped. If timing is tight, a one-color logo on in-stock white tissue has a better chance than a custom-dyed sheet with metallic ink and a five-color pattern. Beautiful idea. Terrible emergency plan.
Reordering before you run out is the cheapest form of operational sanity. Track monthly usage by multiplying average sheets per order by order volume, then add 10% to 15% for waste, training, returns, retail wrapping, and seasonal spikes. Keep at least one reserve carton if tissue is part of your standard packaging presentation.
Step-by-Step Guide to Choosing the Right Tissue Paper Specs
Start by deciding the job of the tissue. Is it protecting surfaces, creating a reveal, building brand recognition, adding gift value, separating products, color blocking the inside of a box, or doing several of those jobs at once? A single sheet can carry multiple responsibilities, but the priority affects the specs.
- Test the wrap with plain tissue first. Use the actual product, box, bag, or mailer. Count how many sheets are needed per order. If one 20 x 30 inch sheet barely covers the product, staff will use two. Your “cheap” small sheet just doubled in real cost.
- Choose the base color for contrast. White tissue gives predictable logo color. Dark tissue with dark ink is a classic way to spend money on invisible branding. Bold choice, bad result.
- Select the artwork style. Options include centered logo, diagonal repeat, scattered pattern, border print, seasonal message, or alternating logo and icon pattern. For fast packing, repeat patterns are usually safer.
- Calculate quantity with real usage math. Average sheets per order multiplied by monthly orders gives the baseline. Add waste, returns, staff training, retail wrapping, influencer sends, and seasonal peaks.
- Review the proof like production depends on it. Because it does. Check logo scale, repeat spacing, margins, spelling, color callouts, sheet orientation, and whether the pattern reads correctly after folding.
For many ecommerce brands, a practical starter spec is a 20 x 30 inch white or brand-colored sheet, 17gsm to 25gsm tissue, one-color repeat logo, packed folded in cartons for easy station use. That setup is not flashy, but it works. Working is underrated.
If you sell jewelry, cosmetics, or small accessories, smaller sheets may reduce waste. If you sell hoodies, robes, blankets, or gift bundles, larger sheets may save packing time even if the per-sheet price is higher. Compare the packed order, not the isolated sheet.
Also think about staff behavior. Tissue that is hard to grab, oversized for the box, or confusing to orient will be used inconsistently. The best packaging spec is the one people can repeat accurately at 4:45 p.m. during a rush.
Common Mistakes That Make Branded Tissue Look Cheap
The fastest way to ruin logo printed tissue paper is to use artwork that was never meant for tissue. Thin lines, tiny text, gradients, photographic detail, and delicate script marks often break down on soft paper. Tissue is not a billboard and not a museum print. Keep it clean.
Contrast is the second common failure. Low-contrast ink on colored tissue may look sophisticated on a screen and completely disappear in real life. If the tissue is blush pink and the ink is pale beige, the final result may whisper so quietly no one hears it. A physical swatch or sample is worth the delay for subtle color combinations.
Heavy print coverage can also cause problems. Large flooded areas use more ink, cost more, may affect drying, and can change the soft feel of lightweight tissue. If you want a bold brand color, it may be smarter to choose colored tissue and print a lighter pattern instead of covering white tissue with a wall of ink.
Sheet size mistakes are expensive in disguise. A too-small sheet forces packers to use two or three sheets, which erases the savings and slows fulfillment. A too-large sheet wastes material and creates bulky corners in small boxes. Measure the product, test the wrap, and choose based on packed order cost.
Packing format matters as well. Flat sheets look neat and can work well for retail wrapping, but they need more shelf space. Folded packs are easier for packing stations and smaller storage areas. Bulk cartons can lower handling costs but may be less convenient if staff need quick, consistent presentation. The right choice depends on order volume, storage space, and how many people touch the packaging daily.
Another mistake is treating tissue as the only branded element. Tissue performs best as part of a system: mailer, sticker, insert, ribbon, box, or bag. It does not need to shout if the rest of the packaging is doing its job. In fact, quieter tissue often looks more expensive than tissue covered edge to edge with oversized logos.
Timing is the final trap. Custom printing has steps. Skipping planning because the launch date is tomorrow does not make production faster. It just makes everyone sweat.
Next Steps Before You Request a Custom Tissue Quote
Before requesting a quote, measure the product and test the wrap with plain tissue. Try one or two sheet sizes in the actual box, bag, mailer, or gift set. Note how many sheets are needed, how the tissue folds, whether the product shows through, and whether the presentation still looks good after normal handling.
Prepare the artwork properly. Send a vector logo file, brand color references, preferred print color, pattern direction, logo size preference, and any icons or slogans that belong in the design. If you only have a low-resolution PNG pulled from a website, say so early. A decent supplier can tell you whether it is usable or whether the file needs cleanup before production.
Create two quote scenarios: a lower MOQ test order and a better-value bulk order. For example, compare 1,000 sheets against 5,000 or 10,000 sheets using the same size and ink color. That makes the cash-flow tradeoff clear instead of guessing in the dark, a beloved but terrible purchasing strategy.
Ask about proofing, lead time, carton dimensions, shipping method, reorder process, and whether the same artwork can later be adapted for stickers, bags, hang tags, box inserts, or custom mailers. Keeping artwork systems consistent across custom packaging saves design time and makes the brand feel more controlled.
Once specs, artwork, quantity, and delivery date are clear, requesting a quote for logo printed tissue paper becomes faster, cleaner, and far less likely to produce a packaging surprise nobody asked for.
FAQ
What is the best logo size for custom printed tissue paper?
For repeat patterns, many brands use smaller logos spaced every 3 to 6 inches so the branding stays visible after folding and crumpling. For centered designs, the logo should be readable on the open sheet but not so large that it disappears once wrapped around the product. The right size depends on sheet dimensions, product size, and whether the tissue is used flat, folded, or tucked inside a box.
How much does logo tissue paper usually cost?
Pricing depends on quantity, sheet size, tissue weight, number of ink colors, print coverage, proofing, packing style, and shipping. Simple one-color tissue may fall around $0.18 to $0.45 per sheet for moderate quantities, but exact pricing needs actual specs. Higher quantities usually lower the unit cost because setup is spread across more sheets.
What file type do I need for logo printed wrapping tissue?
Vector files such as AI, EPS, or print-ready PDF are preferred because they keep logos sharp at different sizes. PNG or JPG files may work for rough review, but they often cause production quality problems. Artwork should include color references, repeat pattern direction, and any required safe margins.
Can logo printed tissue paper be made with metallic ink?
Metallic ink may be possible depending on the tissue stock, print method, quantity, and supplier capability. It usually costs more than standard ink and may require extra proofing to confirm the final look. For tight budgets, a strong one-color logo on premium colored tissue often gives a cleaner result.
How long does custom printed tissue paper take to produce?
Lead time depends on artwork readiness, proof approvals, order quantity, material availability, print method, and shipping distance. Simple reorders may take 7 to 15 business days after proof approval, while first-time or specialty orders often need 15 to 30 business days before shipping. Build in extra time before launches, holidays, trade shows, or retail restocks so packaging is not the thing holding up sales.