OPP Header Bags Artwork Proof Checklist for Restaurant Groups
A clean proof can still hide a bad bag. An OPP Header Bags Artwork Proof checklist for restaurant groups is not extra paperwork; it is the last practical checkpoint before a cookie bag, pastry pack, grab-and-go snack pouch, or retail add-on turns into 5,000, 25,000, or 50,000 matching pieces.
Restaurant packaging mistakes usually look small on a screen and expensive in cartons. A logo sits too close to the hang hole. A nutrition panel drifts into the heat seal. A barcode that scanned from a PDF fails on glossy film once the bag is filled and curved. A seasonal mark looks right over a white background, then disappears against a dark brownie.
Those problems are preventable if the proof is reviewed as a production document, not as a design preview.
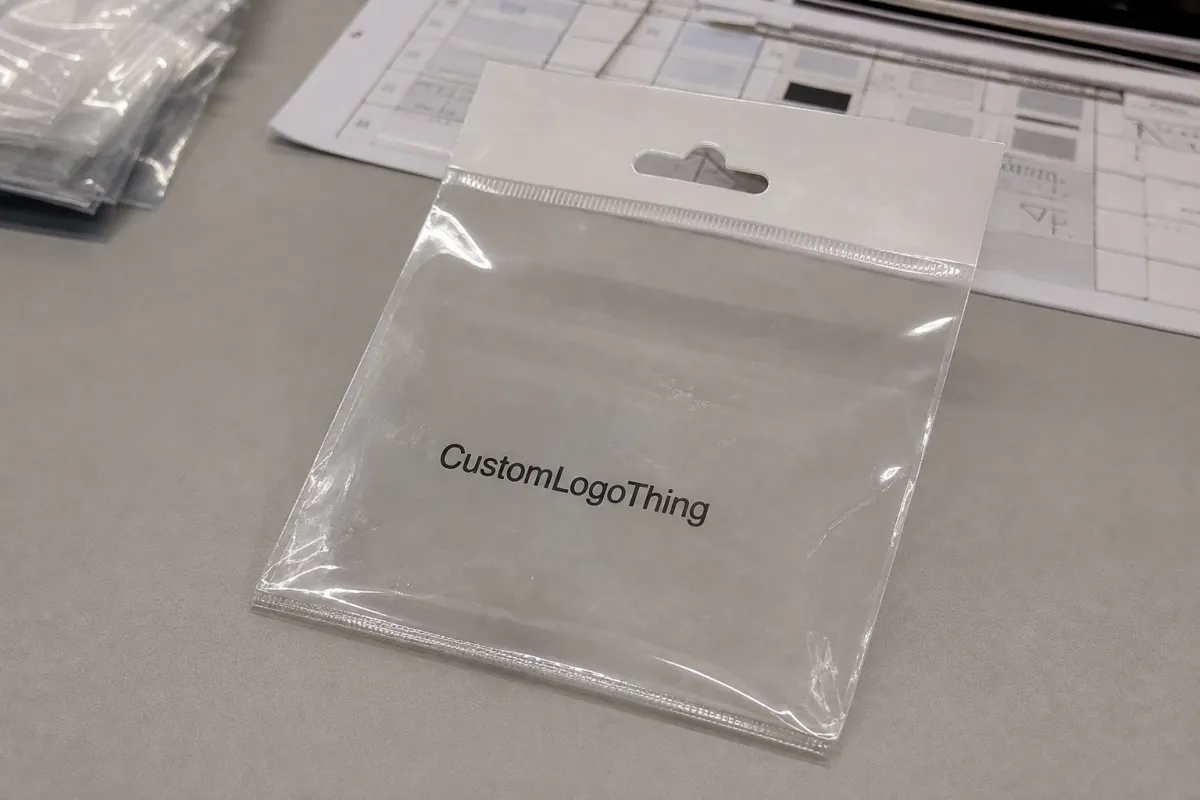
OPP Header Bags are clear oriented polypropylene bags with a printed, labeled, or carded header area at the top. Restaurants use them for cookies, brownies, biscotti, roasted nuts, packaged snack mixes, retail meal kit components, small merchandise, sauce-and-dry-good pairings, and checkout-counter add-ons. OPP is glossy, clear, and crisp enough to present well on a peg hook or in a basket, while remaining lighter and often less costly than rigid retail packaging.
For one bakery counter, a flawed bag may be a nuisance. For a restaurant group with 12, 40, or 100 locations, the same flaw touches commissary packing, store merchandising, delivery add-ons, franchise standards, warehouse receiving, and brand consistency across regions. The proof has to confirm finished dimensions, film clarity, header placement, print color, barcode readability, required copy, lot-code space, and packing orientation before tooling, plates, or digital production move forward.
Practical rule: approve the bag as if the proof is a production instruction. The press operator, finishing crew, packers, warehouse team, and store staff will all live with what gets signed off.
The cheapest place to be strict is before production. A good proofing checklist helps prevent misregistered logos, unreadable ingredient panels, weak shelf presentation, hand relabeling, emergency reprints, rush freight, and awkward location-level workarounds that no one budgeted for.
How OPP Header Bag Artwork Proofs Work Before Production
A useful OPP header bag proof shows the front layout, back layout, finished bag width and height, header height, usable artwork area, hang hole position, seal lines, fold lines, adhesive flap if used, and any clear window or no-print zone. The more clearly those areas are marked, the fewer surprises tend to appear when finished bags are filled.
Three files are easy to confuse: the dieline, the digital artwork proof, and the physical sample. The dieline is the map. It shows where the bag is cut, sealed, folded, punched, or left clear. The digital proof is the print layout placed onto that map for approval. The physical sample confirms how the film feels, how the product fits, how the header stands up, and whether the bag behaves the way the team expects once it is filled and displayed.
Proofs commonly arrive as PDF sheets with marked dielines, color callouts, barcode placement notes, and mockups that simulate the filled bag hanging on a peg or sitting in a display basket. Mockups are useful for merchandising discussions, but the flat proof still carries the technical truth. A shift of 0.125 inch can be enough to move small type into a seal area or crowd a barcode quiet zone.
OPP behaves differently from paperboard, pressure-sensitive labels, and kraft bags. The film is slick, glossy, flexible, and transparent. Brand colors may look weaker without white ink underneath. Fine type can lose contrast over chocolate, toasted pastry, oily crackers, or dark merch. Trap between colors, opacity, ink laydown, and the order of print layers matter more than many teams expect the first time they move from a label to a printed bag.
Restaurant groups often need marketing, operations, purchasing, food safety, and sometimes franchise or legal reviewers to look at the same proof. That makes clarity part of quality control. If only the designer understands the file, the team has not truly reviewed the package. The proof should be annotated, dimensioned, and easy enough for a store operations lead or purchasing manager to read without guessing.
Key Artwork Checks: Size, Header Space, Color, and Barcode Placement
Start with size. A 6 x 9 inch OPP header bag does not provide 6 x 9 inches of usable product room. The header, bottom seal, side seals, product thickness, and any gusset or fold reduce the working space. A 2.5 ounce cookie stack may need a different bag than a flat 2.5 ounce brittle pack, even if the net weight matches.
Header planning deserves careful attention because the top of the bag carries both merchandising and mechanics. Confirm the logo height, hang hole clearance, top seal position, staple or label zones if used, and quiet space around brand marks. On a retail rack, the header is often the first thing a guest sees. Crowded artwork can make an otherwise thoughtful product feel cheaper than it is. When the bag size allows it, I like to see at least 0.25 inch of breathing room around major marks.
Color review is practical, not just aesthetic. Confirm Pantone or CMYK targets, whether white ink prints under brand colors, which areas remain transparent, and whether the supplier is matching to a coated reference, an uncoated reference, or a prior packaging sample. A red logo printed directly onto clear film may look bright over shortbread and muddy over a dark chocolate cookie. That is a material reality, not a design failure.
Barcode and QR code placement should be treated as a function check. Keep codes away from seals, folds, curves, hang holes, and heavy product distortion. Preserve quiet zones on all sides. Many retail barcodes need roughly 80% to 100% magnification of the standard size, depending on format and scanner environment, but the correct size depends on the code type and selling channel. Scanning a phone screen only proves so much; a printed proof or sample scan is far more useful.
Compliance-adjacent content belongs in the same review. Ingredient panels, allergen statements, net weight, storage instructions, recycling marks, date-code areas, and location-neutral wording should be checked by the restaurant group’s responsible team. Requirements vary by product and sales channel, so this is not legal advice, but packaging copy should never be treated as placeholder text once a proof is circulating for approval.
| Proof Area | What to Check | Typical Risk if Missed |
|---|---|---|
| Finished size | Bag width, height, header height, product thickness, fill weight | Product crowds the seal or hides back-panel copy |
| Header | Hang hole, logo clearance, staple zone, top seal | Brand mark gets punched, clipped, or visually cramped |
| Color | Pantone or CMYK values, white ink backing, transparent areas | Brand color shifts on clear film or over dark product |
| Barcode | Quiet zone, contrast, flat placement, minimum size | Store scanners fail or slow down checkout |
| Required copy | Ingredients, allergens, net weight, storage, lot-code space | Relabeling, repacking, or delayed launch |
For multi-unit teams, these checks should be marked directly on the proof. Email notes such as “move the barcode slightly” or “make the logo bigger” are too easy to misread once prepress, purchasing, and production are all working from different threads.
Process and Timeline From Proof Request to Approved OPP Bags
The normal sequence is straightforward: submit artwork and specifications, confirm the dieline, review the first digital proof, request revisions, approve the final proof, move to prepress or plate setup, then enter production scheduling. Clean inputs make that sequence faster and less expensive.
The common delays are familiar: missing vector logos, low-resolution product photos, late ingredient changes, unclear bag sizing, barcodes supplied after the proof has already been built, or five decision-makers sending five separate markups. None of those issues is unusual. They simply add days, and sometimes they add another proof cycle.
A simple proof may be reviewed in 1 to 3 business days if the artwork is complete and the bag format is standard. A restaurant group with multiple concepts, seasonal flavors, regional copy, separate SKU barcodes, or several approval departments should plan more review time. Production timing varies by print method, order size, queue, material availability, and freight distance, but custom printed OPP Header Bags often require several weeks from final approval once setup, manufacturing, transit, warehouse receiving, and distribution to locations are counted.
Work backward from the launch date. If a seasonal cookie program must be in stores on a Monday, do not count only press days. Add time for proofing, revision, production scheduling, transit, warehouse check-in, internal allocation, and delivery to restaurants. Packaging that reaches the central office on time but misses the store set date still missed the job.
Version control is not glamorous, but it protects multi-unit programs. Name files by brand, item, bag size, revision date, and approval status. A file name such as Brand-CranberryCookie-5x8-RevB-Approved is not elegant, but it is much safer than “final_final_new2.pdf.”
Cost, Pricing, and MOQ Factors Hidden Inside the Proof
Pricing for OPP header bags is driven by more than size. Artwork choices can affect plate costs, setup time, ink usage, print method, number of colors, white ink coverage, order quantity, and whether several SKUs can share common specifications. A design that looks simple on screen may become more expensive if it requires tight registration, heavy white ink, and many separate short runs.
For rough planning, custom printed OPP header bags may land around $0.12 to $0.35 per unit at moderate quantities, depending on size, film thickness, print coverage, color count, freight, and finishing details. Very small runs can cost more per bag because setup is spread across fewer pieces. Larger programs may bring the unit price down, but only if specifications are controlled and SKUs are organized efficiently.
MOQ is where restaurant groups need discipline. Separate graphics for every concept, flavor, or region can be justified, but splitting 20,000 bags across 12 designs may push each version into a less efficient tier. Standardizing bag sizes, keeping header dimensions consistent, sharing back-panel information where appropriate, and using variable front labels for short-lived items can reduce cost without weakening the brand system.
Proofs reveal cost triggers early. Full-coverage printing, large white ink blocks, metallic effects, matte or specialty finishes, multiple barcode versions, and tight color-to-color alignment all show up before production. A buyer should ask whether those choices change the quote before approving the proof, not after the purchase order has moved forward.
Proof accuracy also protects the operating budget. A wrong barcode after approval can mean reprinting bags, hand-labeling finished inventory, delaying a rollout, or paying rush freight to cover locations waiting on packaging. Those costs usually sting more than the original print bill because they hit during launch pressure, when teams have less time and fewer good options.
Ask for quotes that separate bag size, film thickness, print color count, setup charges, proofing expectations, freight, and reorder assumptions. If sustainability claims or chain-of-custody paper header cards are involved, ask about credible standards such as the Forest Stewardship Council. For distribution testing of packed units, ISTA procedures can also be relevant, especially if bags ship in mixed cartons, catering kits, or e-commerce assortments.
Step-by-Step Proof Review Checklist for Restaurant Packaging Teams
Use one marked proof. That single habit prevents more confusion than a complicated approval chain with scattered comments. The checklist below is built for restaurant workflows, where marketing wants the pack to look right, operations needs it to pack quickly, purchasing has to control cost and inventory, and food safety needs the required information to be accurate.
- Confirm physical fit. Check product width, height, thickness, fill weight, crumb level, oil exposure, and whether the pack hangs, lies flat, stands in a basket, or fits into a delivery kit.
- Review the dieline. Confirm finished size, header height, hang hole, bottom seal, side seals, fold direction, front/back orientation, and no-print zones.
- Check the header. Look at logo clearance, top margin, punch hole position, staple zone, label space, and how the header reads from 3 to 5 feet away.
- Verify brand elements. Confirm the correct logo version, approved colors, typography, tagline, photography, icon spacing, and any franchise or concept-specific rules.
- Test readability with product behind it. Place the actual cookie, pastry, snack, or merchandise item behind a printed proof area when possible. Dark products and uneven textures change contrast.
- Check operational content. Review SKU, item name, barcode, QR code, ingredient or allergen panel, net weight, storage notes, lot-code space, and date-label area.
- Assign final approval. Collect comments in one proof, document the approved revision, and require a named approver before production release.
If a change comes after approval, treat it as a formal revision. Verbal changes are risky because prepress, purchasing, and production may not all receive the same instruction. Even a small edit should be reflected in a new proof or written approval record before the run proceeds.
Common Proofing Mistakes That Cause Reprints, Delays, or Store Confusion
The first mistake is reviewing artwork only at screen size. Small type, fine rules, barcode quiet zones, and logo spacing can look comfortable on a large monitor. Printed at actual size on glossy film, the same elements may feel cramped, faint, or poorly positioned.
The second mistake is ignoring product fill. A pastry can push against the header. A cookie stack can bow the film. Snack mix can create dark and light patches behind transparent areas. Product oil can also change the appearance of the bag after a few hours, depending on direct contact, inner wrap, holding temperature, and product formulation.
Version mix-ups are common across restaurant groups. The wrong concept logo, old allergen language, discontinued location list, outdated QR code, or barcode assigned to a different grab-and-go item can slip through if the team relies on memory instead of a marked proof. File names, revision status, SKU identifiers, and approver names are not administrative clutter; they are safeguards.
Another common problem is overloading the header. Claims, badges, social handles, QR codes, limited-time messages, flavor cues, and icons all compete for the same small zone. The header has one main job: identify the product and brand quickly. If everything is emphasized, nothing carries the first read.
Late-stage changes can also be expensive. Moving a barcode, changing white ink coverage, swapping a logo, or adjusting the header height may require new proofing, prepress adjustment, production rescheduling, and revised pricing. Small changes are not always small once plates, digital setup, press time, or finishing schedules are involved.
Production-minded advice: if the proof has been approved, pause before asking for “one tiny change.” Ask whether the change affects cost, timing, barcode function, color setup, or the current production slot.
Actionable Next Steps Before You Approve the Final Bag Proof
Print the proof at actual size. Then put a real product, or at least a close mockup, behind the artwork area. Check the package from the distance a guest would see it on a counter rack and from the distance a store associate would read it during packing. Those are different use cases, and both matter.
Create a simple internal route. Marketing reviews brand accuracy. Operations confirms pack-out, label workflow, and display method. Purchasing checks size, quantity, MOQ, freight, and reorder assumptions. Food safety or the regulatory contact reviews ingredients, allergens, storage, and net weight. One person should consolidate feedback so the supplier receives one clean markup.
Build a proof packet for the manufacturer. Include final vector artwork, barcode files, Pantone or color targets, bag dimensions, material preference, film thickness if known, fill weight, display method, quantity by SKU, delivery location, and required in-hand date. If film thickness is undecided, ask for guidance; many common OPP retail bags fall around 1.2 to 2.0 mil, but product weight, stiffness, display method, and presentation goals can change the recommendation.
Ask specific production questions before signoff: Which areas are no-print zones? Is white ink recommended under the logo or key type? How is barcode scannability protected? What color shift should we expect on clear film? When do changes become billable? What is the expected timeline after proof approval?
For restaurant groups managing several concepts or locations, keep the approved checklist with the final artwork file. It becomes a reference for reorders, seasonal updates, new flavor versions, and future packaging changes. That record is especially useful when staff changes or a new menu team inherits the program.
The final proof should not feel like a formality. It is the shared instruction set for every printed bag in the run, and it is the point where brand presentation, production reality, store workflow, and cost control all meet on one sheet.
FAQ
What should be included in an OPP header bags artwork proof checklist for restaurants?
Include finished bag size, header height, hang hole position, seal and no-print zones, logo placement, color specifications, white ink notes, barcode location, ingredient or allergen copy, net weight, lot-code space, and final approver details. For restaurant groups, also include brand version, SKU name, location-neutral wording, display method, and whether the same bag will be used across multiple concepts, regions, or seasonal menu items.
How do restaurant groups check if a barcode will scan on OPP header bags?
Keep the barcode on a flat area away from seals, folds, curves, hang holes, and heavy product distortion, with the required quiet zone around all sides. Ask for a full-size proof, verify barcode size and contrast, and scan a printed sample when possible because glossy OPP, clear film, and product color behind the code can all affect readability.
Does artwork proof approval affect the cost of custom OPP header bags?
Yes. The proof confirms design choices that can influence cost, including print coverage, number of ink colors, white ink use, registration complexity, SKU count, setup charges, and whether multiple designs share the same bag size. A clean approval also helps prevent reprints, rush freight, relabeling, and launch delays, which are often more expensive than taking extra time during proof review.
How long should a restaurant group allow for OPP header bag proofing?
Allow time for artwork submission, dieline setup, first proof review, revisions, final approval, production scheduling, manufacturing, freight, and distribution to restaurants or warehouses. The proofing portion is fastest when artwork is complete, barcodes are supplied early, one person consolidates feedback, and all required product information is final before the first proof is requested.
What is the biggest mistake when approving OPP header bag artwork for multiple locations?
The biggest mistake is approving the visual design without checking how the actual product, store workflow, barcode, and required labeling will perform on the finished bag. Multi-location teams should review the proof at actual size, test it against a real pack-out, confirm the right revision is being approved, and document one final signoff before production begins.

