The bag is rarely the expensive mistake. The expensive mistake is the missed line of copy, the barcode placed too close to a seal, or the color shift nobody caught before approving the print file. That is why an OPP Header Bags artwork proof Checklist for Coffee Shops is more than a tidy prepress document; it is a simple way to keep small packaging errors from becoming paid-for inventory.
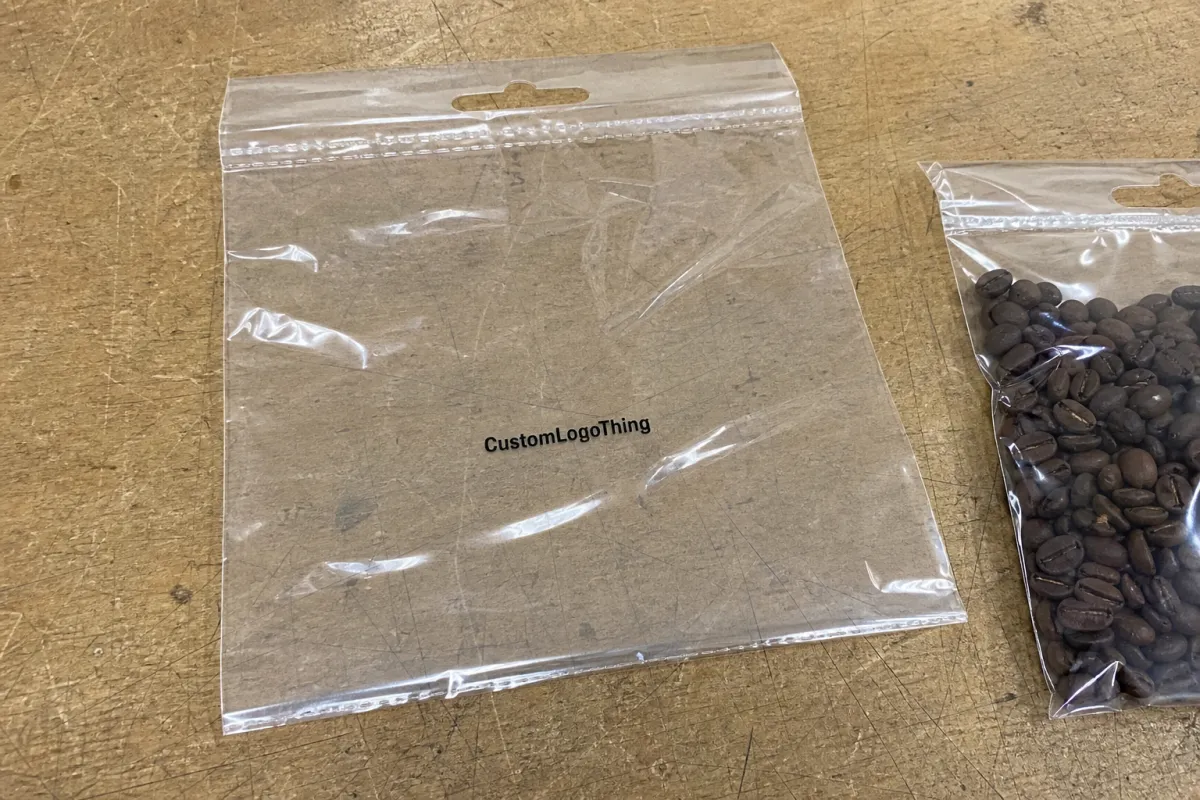
OPP Header Bags look straightforward on screen: clear front, printed header, hang hole, clean seal. In production, a few millimeters can change the result. A 30 mm header can reduce the usable design area, a fold can crowd the first line of type, and a filled coffee sample may sit differently than the flat dieline suggests. If a shop is packing 2 oz sample bags, single-serve promos, small retail accessories, loyalty gifts, or branded coffee add-ons, the printable space gets tight quickly.
A proof should not be treated as a polite formality. It is the last practical moment to check whether the bag size, artwork, print limits, barcode, and product information all belong together before the job moves into production.
Why coffee shop proofs fail on small details
Most proof failures start with ordinary assumptions. Someone reviews the PDF on a bright monitor, zooms in until the type looks comfortable, and approves it. The finished bags arrive later, and the origin note that looked refined on screen is barely readable at arm’s length. The roast level sits too close to the hang hole. The seasonal blend name is correct on three SKUs but wrong on the fourth.
Small-format packaging is unforgiving because coffee shops often need to fit a full retail message into a compact header. Brand name, roast name, grind type, flavor notes, net weight, QR code, origin line, and sometimes a short brewing cue all compete for space. A 4 x 6 inch OPP header bag with a 1.5 inch printed header does not offer the same breathing room as a flat label mockup on a designer’s artboard.
The proof is not only a design approval. It is a production control step. It confirms whether the artwork fits the bag structure, whether the copy matches the SKU, and whether functional elements such as barcodes and lot code areas still work after the bag is formed, sealed, filled, packed, and hung on a display peg.
Practical rule: if a detail affects scanning, sealing, filling, compliance, reorder accuracy, or customer readability, it belongs on the proof checklist rather than in someone’s memory.
That extra pause matters. Once printing, cutting, folding, and packing have started, even a small correction can mean wasted film, delayed launches, or a reorder that has to be remade.
What the artwork proof needs to confirm
An artwork proof is the final pre-production review of layout, copy, color, size, and technical fit before output is locked. Depending on the supplier and order, the production route may involve digital print setup, flexographic plates, gravure cylinders, or another print workflow. The result is the same: after approval, changes can cost money and time.
For OPP header bags, start with the physical structure. Confirm the overall bag width and height, header height, hang hole position, bleed, trim, safe area, seal zones, fold lines, and any flap or gusset detail if the format includes one. A common safe-area allowance is 3 mm inside trim, though some suppliers may request 5 mm for small bags, hand-filled packs, or designs with fine type near an edge.
Functional checks deserve the same attention as visual polish. A barcode needs a quiet zone, strong contrast, and a flat readable position. A QR code is usually safer at 20 mm x 20 mm or larger, although simple codes can sometimes scan smaller if the print is sharp and the background is clean. If the shop needs a roast date, batch code, best-by date, or lot number, that area should be clearly marked and left unprinted or lightly printed so applied coding remains legible.
Brand consistency is another layer. House blend, decaf, espresso, single-origin, and seasonal packs should feel related on a shelf or counter display. That does not mean every header needs to be identical. It means the logo size, type scale, weight statement, color system, and information order should follow a structure that can be repeated without guesswork.
For broader packaging guidance, industry groups such as the Packaging Machinery Manufacturers Institute and testing organizations like ISTA can be useful references, especially if header bags are part of a larger retail display, subscription, or shipping program.
Cost, pricing, MOQ, and unit cost factors
Pricing for custom OPP header bags changes with size, print coverage, number of colors, film thickness, header style, and order quantity. A one-color printed header on a standard clear OPP bag sits in a different cost bracket than a full-coverage branded header with several SKUs, heavy ink, and tight color matching.
For a small coffee shop run, rough unit pricing may land around $0.18-$0.35 per bag at 5,000 pieces for a straightforward custom header, depending on dimensions and print coverage. At 10,000-25,000 pieces, the unit cost may fall into the $0.10-$0.22 range if the format is standard and the artwork is clean. Those figures are only working ranges. Film markets, print method, freight, supplier setup, and regional labor costs can shift the final quote.
MOQ has a real effect on value. A low minimum sounds attractive, and for a seasonal blend or cafe opening it may be the right choice. But custom artwork, special film width, separate setups for five SKUs, or a header card effect can push the unit cost up because setup time is spread across fewer bags.
| Order scenario | Typical quantity range | Likely cost drivers | Buyer watchout |
|---|---|---|---|
| Short seasonal coffee run | 1,000-3,000 bags | Low MOQ, setup, rush proofing | Higher unit cost and less room for revisions |
| Core cafe retail program | 5,000-15,000 bags | Bag size, ink colors, number of SKUs | Version control across blends |
| Multi-location reorder | 25,000+ bags | Freight, storage, print consistency | Confirm the signed proof version before repeating |
Proof revisions can also affect total cost. One clean correction round is common in many custom packaging orders. A second or third layout round may add design or prepress charges, especially if copy changes after the proof has already been prepared. Freight, hard-copy samples, color drawdowns, and rush handling should be compared as part of total landed cost rather than treated as small extras.
Process and timeline from artwork upload to approval
A clean proof process has a simple rhythm: file submission, prepress review, proof generation, internal review, revision if needed, final sign-off, then release to production. The work sounds linear, but delays often happen before the first useful proof is even created.
Missing source files slow everything down. So do low-resolution logos pulled from a website, fonts that are not outlined, linked images that are not included, and instructions split across several email threads. For print, a vector logo in AI, EPS, or press-ready PDF format is much safer than a 600-pixel PNG. Raster images should usually be 300 dpi at final size unless the supplier specifies otherwise.
A realistic timeline depends on art condition and production load. Prepress review may take 1-3 business days. A first digital proof may follow shortly after if the dieline is standard and all assets are supplied. Revisions can add another 1-2 business days per round. Once approved, production for custom printed OPP header bags may take 10-20 business days, with freight on top.
Rush schedules can be possible, but they reduce the margin for careful correction. Holiday promotions, new cafe openings, subscription box launches, and menu changes need extra padding. If finished bags must be on hand by a launch date, work backward from that date and include proof approval, production, freight, receiving, and packing time.
OPP header bags artwork proof checklist for coffee shops
Use this opp header bags Artwork Proof Checklist for coffee shops line by line. A proof may look attractive and still be wrong for production.
File and order basics
- Confirm that the bag size, header height, film style, and quantity match the purchase order.
- Check the SKU name, blend name, roast level, grind type, and net weight against the final product list.
- Verify the correct artwork version, especially if names include “whole bean,” “ground,” “decaf,” or seasonal wording.
- Confirm the print method, finish, and any special notes such as matte ink, gloss header area, or clear window placement.
Structure and production fit
- Check the header height against the dieline, not just the visual mockup.
- Keep essential copy out of folds, punch holes, seals, heat-affected areas, and heavy glare zones.
- Confirm that the hanging hole does not interrupt the logo, product name, QR code, or required information.
- Leave room for filling and sealing variation, especially on small bags that may be packed by hand.
Visual hierarchy and shelf readability
The brand should read first, then the product name, then the supporting details. On a peg display or counter rack, shoppers often scan from 2-4 feet away. If the blend name only works at 12 inches, increase the type size or reduce competing copy.
- Use strong contrast for roast level, flavor notes, and weight statement.
- Keep recurring SKUs consistent so customers can compare blends quickly.
- Print the proof at 100% scale and check it at normal viewing distance.
- Make sure transparent areas do not reduce legibility once coffee or inserts sit behind the film.
Technical proof checks
- Bleed extends beyond trim as specified, commonly 3 mm or more.
- Safe-area text stays inside the supplier’s recommended margin.
- Barcode has quiet zone, contrast, and a scannable size.
- QR code is tested from the proof at printed scale, not only on screen.
- Compliance text, allergen statements if relevant, and lot code space are present.
- Registration marks, dieline notes, and non-printing layers are identified correctly.
Copy, compliance, and reorder records
- Match every blend name, flavor note, origin reference, and roast level to the approved product record.
- Check net weight, ingredient language, allergen wording if used, and any required business information.
- Open every QR destination and confirm that the page is live, correct, and not a temporary staging URL.
- Record who approved the proof, what changed in the last round, and which PDF is locked for production.
Version control is not the glamorous part of packaging, but it prevents a surprising amount of waste. A signed proof tied to the purchase order gives the shop and supplier a shared reference for production and reorders.
Common proof mistakes that cause reprints
Approving only on a monitor is the first mistake. Screens make colors brighter, hide weak contrast, and encourage people to zoom far beyond real viewing size. Print the proof at 100% scale if possible. Even a basic office print can reveal type that is too small, a QR code that feels crowded, or a logo that overpowers the product name.
Another frequent issue is copy too close to the header fold or top seal. On a flat PDF, the spacing may look balanced. On the finished bag, the seal and hang hole can visually compress the design. Leave more quiet space than feels necessary, particularly around the brand mark, barcode, and any small legal or weight text.
Version-control problems show up often with coffee packaging because shops may run several blends at once. House blend, espresso, decaf, and limited roast files can all look similar in a folder. A file named “final_final_revised.pdf” is not a production system. Use a naming format such as brand-product-size-version-date, and make sure the approved file name matches the proof record.
Barcode and QR failures deserve special respect. A barcode printed over a busy background may pass a casual glance and fail at the register. A QR code with too much ink spread, low contrast, or reduced size may frustrate customers trying to reach brew guides, subscription pages, or origin details. Test codes at final printed size with more than one phone or scanner.
Color mismatch is another quiet troublemaker. Deep browns, warm creams, metallic accents, and black type over transparent film can shift depending on ink opacity and what sits behind the bag. OPP is a glossy polypropylene film, so glare and transparency affect color differently than paper labels, kraft sleeves, or folding cartons. If the brand depends on exact color, ask whether a hard proof, press sample, ink drawdown, or color target is available.
One more mistake is treating every SKU as a separate design project. That creates small inconsistencies: a net weight moves, a roast level changes position, or a barcode box shrinks on one blend but not another. Customers may not describe the issue in production terms, yet they notice when a retail set feels uneven.
Practical tips for cleaner approvals and better print results
Send better files and the proof process gets cleaner. Vector logos, outlined fonts, packaged links, and press-ready PDF exports reduce guessing in prepress. If the design includes photography, texture, or illustrated coffee beans, check that raster assets are high enough resolution at final size. A low-resolution image can look acceptable on a laptop and fuzzy once printed.
Build one master layout system. Coffee shops create avoidable errors when every SKU is redesigned from scratch. A stronger approach is to lock the logo position, header structure, barcode zone, weight statement, and compliance copy, then swap only product-specific lines such as origin, roast level, tasting notes, and grind. It is less exciting than starting fresh each time, but it is far more reliable.
Ask for a proof marked with dimensions and production notes. A pretty proof is useful, but a technical proof is safer. You want to see the bag width, bag height, header depth, trim, bleed, seal zone, hang hole, barcode area, and any non-printing layers. If a layer is unclear, ask before signing.
For color-critical work, a realistic sample review can be worth the extra cost. That may be a digitally printed sample, a hard-copy proof, or a production sample depending on the supplier’s process. Not every order needs it. A simple black logo on a clear header bag may be fine with a digital proof. A premium retail program using rich browns, cream typography, and metallic detail needs more caution because film, ink, and background color all influence the final look.
Material choice also matters. OPP is clear, crisp, glossy, and economical, but it is not the same as kraft paper, PET/PE laminated film, or a foil coffee pouch with a degassing valve. It works well for many header bag applications, especially small items, sample packs, and display-friendly add-ons. It may not be the right material for whole-bean coffee requiring barrier protection over a longer shelf life unless the product is packed inside another protective format.
If sustainability claims are part of the packaging, be careful with language. General claims should be supportable, specific, and aligned with the actual material and disposal pathway. Resources from the EPA’s sustainable materials management guidance can help teams avoid vague wording that sounds appealing but is difficult to substantiate.
Before you approve the final proof
Gather the final art files, confirm the SKU list, and match each design to the correct bag size before sending approval. If there are five blends, review five proofs against five SKU records. Do not assume the espresso file and decaf file share the same net weight, barcode, or roast note.
Assign one internal reviewer. More opinions can help during early design, but final proof approval needs one accountable person checking against a written list. That person should review copy, dimensions, barcode placement, QR destination, launch timing, quantity, and shipping details. If the cafe owner, roaster, and designer all send separate comments, combine them into one clean revision note before sending it back.
Lock the approval in writing. Archive the signed proof PDF, save the version number, and tie it to the purchase order. For reorders, that record is valuable because it tells the supplier exactly which file was approved and gives your team a reliable comparison point if anything changes later.
Use the checklist again whenever a blend changes, a promotion starts, a QR code points to a new page, or a seasonal package goes live. The goal is not paperwork for its own sake. It is a practical guardrail that keeps small packaging decisions from turning into reprints, missed launch dates, and avoidable waste.
FAQs
What should a coffee shop check on an OPP header bag artwork proof first?
Start with bag size, header height, and the exact product name so the proof matches the intended SKU. Then verify the main copy, barcode placement, QR code position, net weight, and any required regulatory text before spending time on color or finish.
How many proof rounds are normal for coffee shop packaging?
One clean round is common when the artwork is press-ready and the instructions are complete. Extra proof rounds usually happen because copy changes late, multiple blends need matching layouts, source files are missing, or technical corrections are required before production.
What affects the price of OPP header bags for a coffee shop order?
Size, print colors, print coverage, MOQ, film thickness, header style, and the number of SKUs all affect unit cost. Rush timing, sample requests, freight, and artwork revisions can also change the final quote, so compare total landed cost rather than only the per-bag number.
How long does the proof-to-production process usually take?
Clean files move faster because prepress can review and release them with fewer corrections. A typical path may include 1-3 business days for prepress review, 1-2 business days for each revision round, and roughly 10-20 business days for production after approval, depending on supplier capacity and order details.
What is the biggest mistake coffee shops make with OPP header bag proofs?
The most common mistake is approving the proof without checking the seal area, barcode readability, and final file version. A close second is letting multiple people make untracked edits, which creates conflicting instructions and delays that could have been avoided with a written OPP Header Bags Artwork Proof checklist for coffee shops.

