Order Custom Automotive Vinyl Stickers That Last Longer
Learn how custom automotive vinyl stickers are made, priced, finished, and ordered so your decals survive sun, car washes, and road abuse.
What Custom Automotive Vinyl Stickers Actually Need to Survive
A sticker on a vehicle has a harder job than most outdoor signs. Custom automotive vinyl stickers deal with heat, UV, rain, salt, pressure washing, road grime, waxes, fuel splash, and constant flexing from panels that move more than buyers expect.
These decals are used on cars, trucks, trailers, motorcycles, service fleets, dealership inventory, racing equipment, aftermarket parts, and retail accessories. They can be window decals, bumper stickers, door logos, tailgate graphics, warning labels, club decals, QR promo stickers, small brand marks, or product decals applied to packaged components.
A paper sticker belongs on a notebook, not a bumper. Shocking, I know. Paper breaks down outdoors because moisture attacks the sheet, the adhesive weakens, and the print scuffs away. Basic vinyl is better, but “vinyl” alone does not mean it is ready for a work truck in Arizona or a trailer washed every Friday.
An automotive-grade decal is a construction, not just a graphic. The film, adhesive, ink system, laminate, cut style, surface preparation, and expected lifespan all matter. A cheap decal can look fine on day one and start curling, fading, cracking, or shrinking after a few months. That is not brand visibility. That is your logo slowly giving up in public.
Good buying decisions start with the use case. Customer vehicles, fleet doors, dealership promos, and retail-facing product packaging all carry different risk. The wrong decal specification can cost more than a reprint because the failure happens where people can see it.
How Automotive Vinyl Decals Are Made and Finished
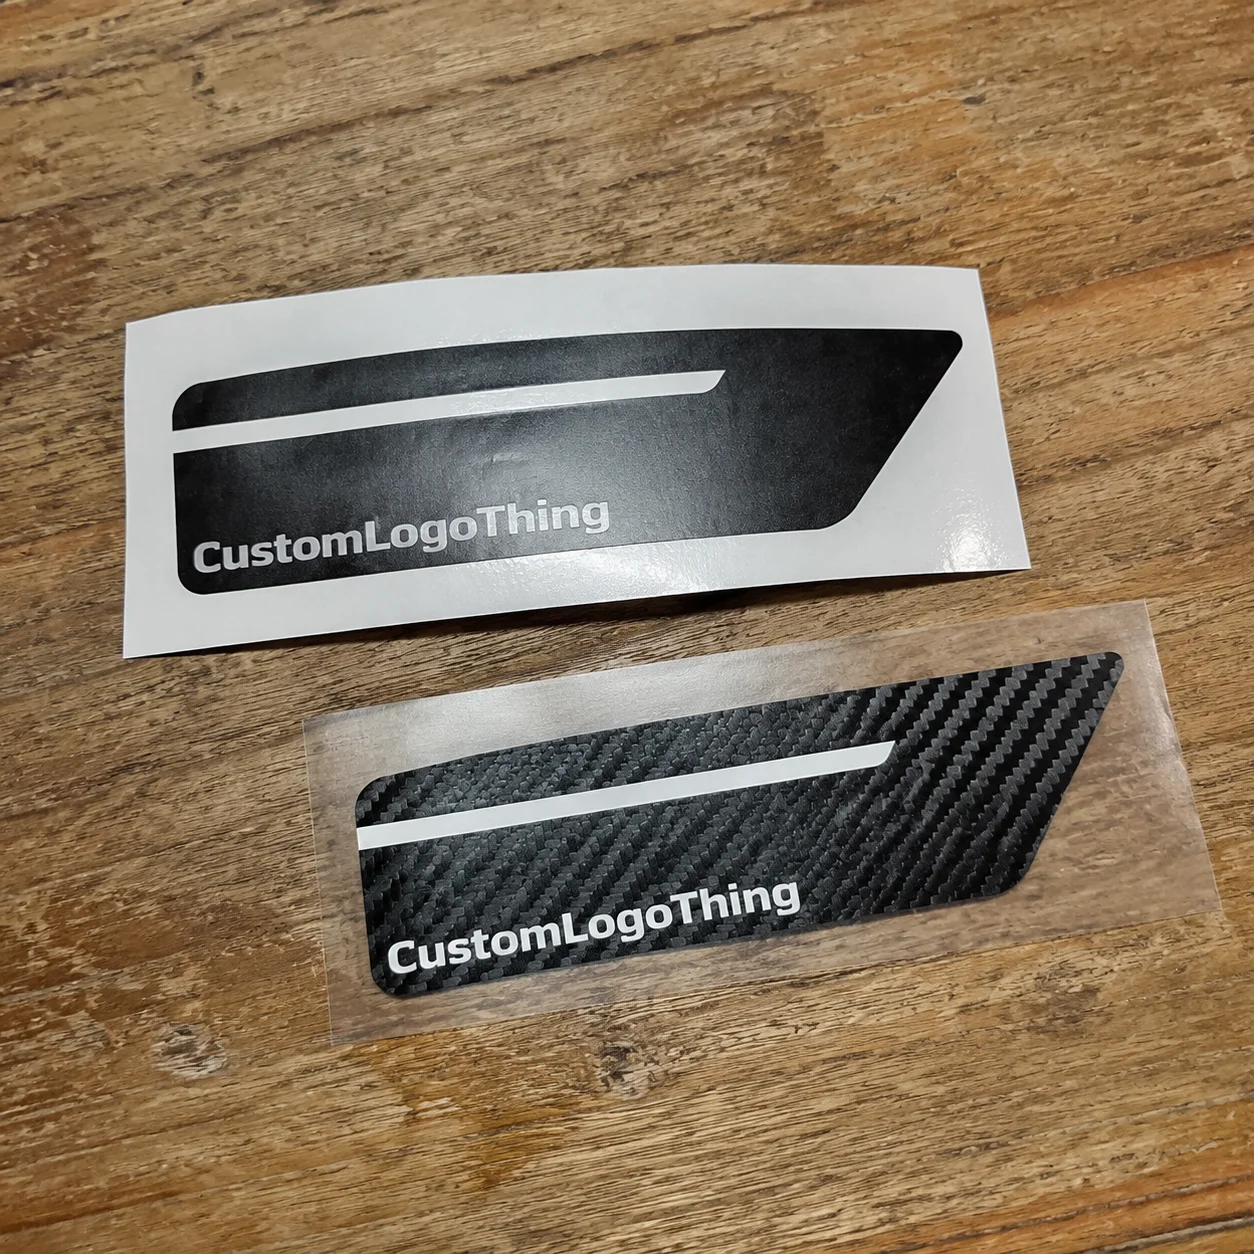
Most automotive decals follow one of two production paths: printed vinyl decals or cut vinyl decals. Printed decals are used for full-color logos, gradients, photos, QR codes, safety graphics, and designs with multiple colors. Cut vinyl works for single-color lettering, numbers, simple icons, racing names, windshield banners, and layered graphics where each color is a separate film.
For printed decals, artwork is digitally printed onto vinyl using eco-solvent, latex, or UV inks. The print is cured, laminated when needed, contour cut, weeded if small internal spaces are involved, inspected, and packed. The laminate is not decoration. It adds abrasion resistance, UV protection, chemical resistance, and a finish choice such as gloss, matte, or satin.
Cut vinyl skips ink entirely. A solid-color vinyl film is cut into letters or shapes, the extra material is removed, and transfer tape is applied so the installer can place the design cleanly. Transfer tape is especially useful for door lettering, windshield graphics, small fleet logos, and any design with separate pieces that must stay aligned.
Adhesive choice matters as much as the face film. Permanent adhesive is common for long-term exterior decals. Removable adhesive is better for short campaigns, dealership promos, service reminders, or temporary event graphics. Air-release adhesive helps with larger graphics because small channels in the adhesive reduce trapped bubbles during installation.
Ask what vinyl, adhesive, ink, and laminate are being used. “Premium quality” is not a specification. Premium compared to what, a banana sticker?
Cut format changes handling and cost. Kiss cutting cuts through the vinyl but leaves the backing paper intact, which works well for sheets. Die cutting separates each decal into an individual piece. Contour cutting follows the printed shape. None is automatically superior. A small window club decal has different needs than a 24-inch fleet door logo exposed to commercial washing.
Finishing also includes practical quality-control checks: color consistency, clean edges, correct cut path, laminate bond, registration, count accuracy, and packing method. For transfer-taped vinyl, the tape must lift the cut pieces without stretching or distorting the design. For printed decals, the laminate should not silver, tunnel, or trap contamination. Small defects become very visible on glossy vehicle surfaces.
Key Specs That Affect Durability, Fit, and Appearance
Before requesting a quote, define the technical choices that control performance: size, shape, vinyl film, adhesive, finish, thickness, color coverage, surface type, and exposure. Guessing here is how buyers end up comparing three quotes that are not quoting the same decal.
The big material split is calendered vinyl versus cast vinyl. Calendered vinyl is typically more affordable and works well for flat or lightly curved surfaces. It is common for bumper stickers, windows, flat panels, and short to mid-range outdoor use. Cast vinyl is thinner, more conformable, and better for curves, rivets, compound surfaces, and longer exterior performance. It costs more because it behaves better under stress. Funny how that works.
Surface type changes everything. Glass is usually friendly. Smooth painted metal is workable if clean and fully cured. Powder-coated panels, plastic trim, rubberized surfaces, oxidized paint, and textured bumpers are less predictable. Adhesion problems often show up first on edges, corners, recessed areas, and surfaces that hold wax, silicone, oil, or dressing residue.
Size and shape affect failure risk too. Long thin designs can stretch during installation. Sharp corners lift faster than rounded corners. Tiny text may disappear from six feet away, especially on moving vehicles. For fleet decals and warning labels, contrast beats clever subtlety. For enthusiast branding or premium aftermarket products, tone-on-tone effects can work, but only if readability is not the main job.
| Spec Choice | Best Use | Typical Tradeoff |
|---|---|---|
| Calendered vinyl with laminate | Flat panels, windows, bumper stickers, promo decals | Lower cost, less conformable on curves |
| Cast vinyl with laminate | Curved panels, rivets, fleet graphics, long-term exterior use | Higher unit cost, better installation and durability |
| Removable adhesive | Dealership promos, short campaigns, event decals | Easier removal, usually shorter service life |
| Transfer-taped cut vinyl | Letters, numbers, club decals, simple logos | Clean install, more production labor |
Expected lifespan depends on construction and exposure. Short-term promotional decals may be built for a few months. Mid-range outdoor decals often target one to three years. Longer-life laminated automotive decals can perform for several years on suitable surfaces with proper installation. Desert sun, snow-belt salt, frequent pressure washing, and fuel splash shorten that window. So does poor surface prep.
Finish is not only aesthetic. Gloss usually makes color look deeper and is common for retail and promotional decals. Matte reduces glare and can look cleaner on certain vehicle colors, but it may show scuffs differently. Satin sits between the two. If decals will be handled before installation, stacked in kits, or shipped inside product packaging, ask how the finish resists abrasion during packing and transit.
Pricing, MOQ, and Unit Cost for Vehicle Sticker Orders
Pricing for vehicle decals is driven by size, material, laminate, print coverage, cut complexity, quantity, setup time, packaging, and whether transfer tape is required. Two decals can look identical in a PDF and behave completely differently on a truck. Comparing only the total price is rookie behavior.
Small simple decals get cheaper fast as quantity rises because setup and proofing are spread across more units. Oversized laminated graphics stay material-heavy, so the price does not drop as dramatically. A 3-inch window decal and a 24-inch fleet door logo are not cousins. They are barely in the same family.
MOQ depends on the producer and process. Some manufacturers can run low quantities, but the unit cost may look ugly because artwork review, proofing, print calibration, cutting, weeding, and packing still take time. For a small batch of 25 to 50 pieces, buyers may see several dollars per decal. At 250 to 500 pieces, small laminated decals may land closer to $0.60 to $2.50 each depending on size and finish. At 1,000 to 5,000 pieces, simple small decals may move into the $0.18 to $0.85 range, while larger laminated graphics can still sit above $2.00 to $8.00 each.
Those are planning ranges, not a magic price sheet. Exact costs depend on square inches, waste, color coverage, material grade, finishing, packing, and quality-control requirements. Retail-packaged decals cost more because bagging, barcode labels, header cards, inserts, and count accuracy add labor. If decals are part of broader Custom Packaging Products, align the sticker specs with the rest of the product packaging so the presentation feels intentional.
Skipping laminate lowers cost but reduces durability. Removable adhesive helps temporary campaigns but may not last as long. Cast vinyl costs more but installs better on curves. A cheaper quote can become expensive if decals fade, peel, and need to be reprinted. Worse, they may already be on customer vehicles by then.
For a clean quote, provide final size, quantity, artwork file, intended surface, indoor or outdoor use, expected lifespan, finish, individual cut or sheet format, transfer tape needs, and packaging requirements. If the decal supports retail packaging, branded packaging, or aftermarket package branding, say that early. The producer may recommend a different finish, adhesive, or packing method.
Process and Timeline from Artwork to Delivered Stickers
A normal order follows a clear path: define the use case, choose specs, submit artwork, receive a quote, approve the proof, produce, finish, inspect, pack, and ship. Simple enough. The messy part is usually the artwork and the assumptions buyers forget to mention.
Artwork review checks resolution, bleed, cut paths, color mode, tiny text, line thickness, and whether the design will cut cleanly. Vector files are best for logos, lettering, contour cutting, and sharp edges. High-resolution raster art can work for printed decals, but a 600-pixel logo pulled from a website will not become crisp because someone says “make it high quality.” Computers are useful, not magical.
Proofing deserves real attention. Check size, spelling, colors, cut line, orientation, finish, and quantity before approval. The proof is not decorative paperwork. If the proof says 4 inches wide and you needed 6 inches wide, production will usually follow the proof, not the conversation someone vaguely remembers.
Samples are smart for larger orders, retail programs, dealership rollouts, racing sponsors, or customer-facing fleet work. A sample can add several business days, sometimes more if shipping is involved, but it reduces the risk of discovering an issue after 5,000 pieces are already printed. That is not a fun invoice to stare at.
Turnaround varies. A simple repeat order may move in 3 to 7 business days after proof approval. Custom shapes, lamination, transfer tape, specialty vinyl, large quantities, or retail packing can push production to 8 to 15 business days or longer. Shipping time is separate. A three-day production window does not mean the box teleports to your dock.
Common delays include missing vector files, unclear sizing, low-resolution logos, last-minute color changes, unapproved proofs, and unrealistic delivery deadlines. If the decals are needed for a launch, race event, trade show, fleet install, or retail packaging program, build in time for proofing, sample review if needed, production, QC, and freight.
For buyers who also source Custom Labels & Tags, the same planning discipline applies. Label and decal production may look similar on a screen, but outdoor automotive exposure is much less forgiving than a carton label sitting on a shelf.
Common Ordering and Installation Mistakes to Avoid
The biggest mistake is ordering from a polished mockup without confirming the actual surface, adhesive, finish, and outdoor exposure. Mockups sell the idea. Specs make the decal survive.
Low-resolution artwork is another classic problem. Buyers upload tiny web logos, screenshots, or social media images and expect crisp printed decals. That creates fuzzy edges, soft type, and weak brand presentation. If the decal is going on a vehicle, it will be seen in daylight, at close range, and often beside cleaner graphics. Bad art has nowhere to hide.
Designs with tiny lettering, thin strokes, and overly complex cut paths are risky, especially for small decals or transfer-taped graphics. A 2-inch decal cannot carry a paragraph, a QR code, a phone number, five icons, and a slogan unless the goal is to make people squint in a parking lot. Print a paper mockup at actual size. Then stand back. Reality is a terrific editor.
Installation mistakes kill good decals. Applying vinyl to dirty, waxed, wet, cold, or freshly painted surfaces can cause adhesion failure. Most vinyl installs best in moderate conditions, often around 50°F to 80°F, depending on the film and adhesive. Freezing panels are bad. Sun-baked metal is also bad. Apparently vinyl enjoys basic working conditions. Reasonable.
Do not wash or pressure wash immediately after application. Adhesive needs time to build bond strength, often 24 to 72 hours depending on conditions. High-pressure spray aimed at an edge can lift even a good decal, especially if the installer left sharp corners or trapped contamination under the film.
Textured plastic, rubberized surfaces, oxidized paint, and heavily curved bumpers may need special material or may not be suitable at all. Fresh paint is another trap. Many coatings need time to cure before adhesive graphics are applied. If the vehicle has repainted panels, peeling clear coat, or existing damage, removal can also be risky.
If decals will be distributed to customers, dealers, or installers, request application instructions. A great decal plus bad instructions equals one-star reviews. Fun little trap. Include cleaning steps, temperature guidance, squeegee instructions, cure time, and washing warnings in the pack.
Next Steps Before You Request a Sticker Quote
Before asking for pricing, measure the application area. Photograph the surface. Decide the expected lifespan. Define whether the decal is promotional, permanent, retail-facing, or part of a fleet identity system. Also decide if the sticker will face indoor storage only, normal outdoor exposure, commercial washing, road salt, fuel splash, or constant handling.
Prepare artwork in vector format when possible: AI, EPS, SVG, or print-ready PDF. Outline fonts. Mark cut paths clearly. Include bleed if the print extends to the edge. For raster images, provide high-resolution PNG or TIFF files at final size, ideally 300 dpi for close-viewed graphics. If you only have a tiny JPG, say so early. The producer may need to rebuild the art.
Choose two or three target sizes instead of asking for a vague quote on “a sticker.” Vague in, vague out. That is how quoting works. A 3-inch decal, a 5-inch decal, and a 10-inch decal have very different material use, cut time, and visibility.
- Measure: confirm width, height, and clearance around seams, trim, handles, and curves.
- Define exposure: short promo, multi-year outdoor use, fleet washing, or retail resale.
- Choose format: individually cut, kiss-cut sheets, rolls, or transfer-taped cut vinyl.
- Pick finish: gloss for pop, matte for low glare, satin for a balanced look.
- Confirm packing: bulk packed, counted bundles, retail bags, barcode labels, or inserts.
Samples or a small pilot batch are worth it when decals go on customer vehicles, fleet vehicles, racing equipment, dealership inventory, or retail products. One small test can reveal sizing issues, installation problems, edge lift, or visibility problems before the full order lands.
Compare final quotes by material, laminate, adhesive, quantity breaks, proofing process, production timeline, shipping method, and replacement policy for manufacturing defects. If sustainability documentation matters for your broader packaging design or Custom Printed Boxes, ask separately about paper components, cartons, or inserts. Organizations such as the Forest Stewardship Council are more relevant to paper-based packaging than vinyl film, but mixed programs often include both. For shipping validation on packaged retail kits, ISTA testing standards can help frame transit expectations.
Before ordering custom automotive vinyl stickers, confirm the surface, lifespan, artwork quality, finish, adhesive, and installation plan. The finished decals need to perform in the real world, not just look clean on a screen.
FAQ
How long do automotive vinyl decals usually last outdoors?
Basic unlaminated vinyl decals may last months to a couple of years depending on exposure. Laminated automotive-grade decals can often last several years on suitable surfaces. Sun exposure, washing frequency, road salt, surface prep, vinyl type, ink, and laminate all affect lifespan, so ask for the expected outdoor durability of the exact construction being quoted.
Are custom car vinyl stickers safe for vehicle paint?
Quality vinyl with the right adhesive is generally safe for healthy, factory-cured paint when installed and removed properly. Risk increases on repainted panels, peeling clear coat, oxidized paint, or surfaces with existing damage. Use removable adhesive for temporary promotions and follow heat-assisted removal instructions during removal.
What artwork file is best for custom vehicle stickers?
Vector files such as AI, EPS, SVG, or print-ready PDF are best for clean edges, accurate sizing, and contour cutting. High-resolution PNG or TIFF files can work for printed decals if they are large enough at final size. Avoid tiny web JPGs, screenshots, and logos pulled from social media unless blurry stickers are somehow the goal.
Do automotive stickers need laminate?
Laminate is strongly recommended for decals exposed to sun, rain, washing, road grime, chemicals, or handling. It protects printed graphics from UV fading, scratches, and abrasion. Short-term indoor decals or temporary event stickers may skip laminate to reduce cost, but that is a real durability tradeoff.
What is the best size for custom automotive vinyl stickers?
The best size depends on placement. Small window decals are often 3 to 5 inches wide, bumper stickers are usually wider, and fleet door graphics need enough height for readability from a distance. Measure the exact application area, leave clearance around curves and trim, and print a paper mockup at actual size before ordering custom automotive vinyl stickers for a larger rollout.


