Order Custom Large Stickers That Fit Your Brand Goals
What Custom Large Stickers Are Really Used For
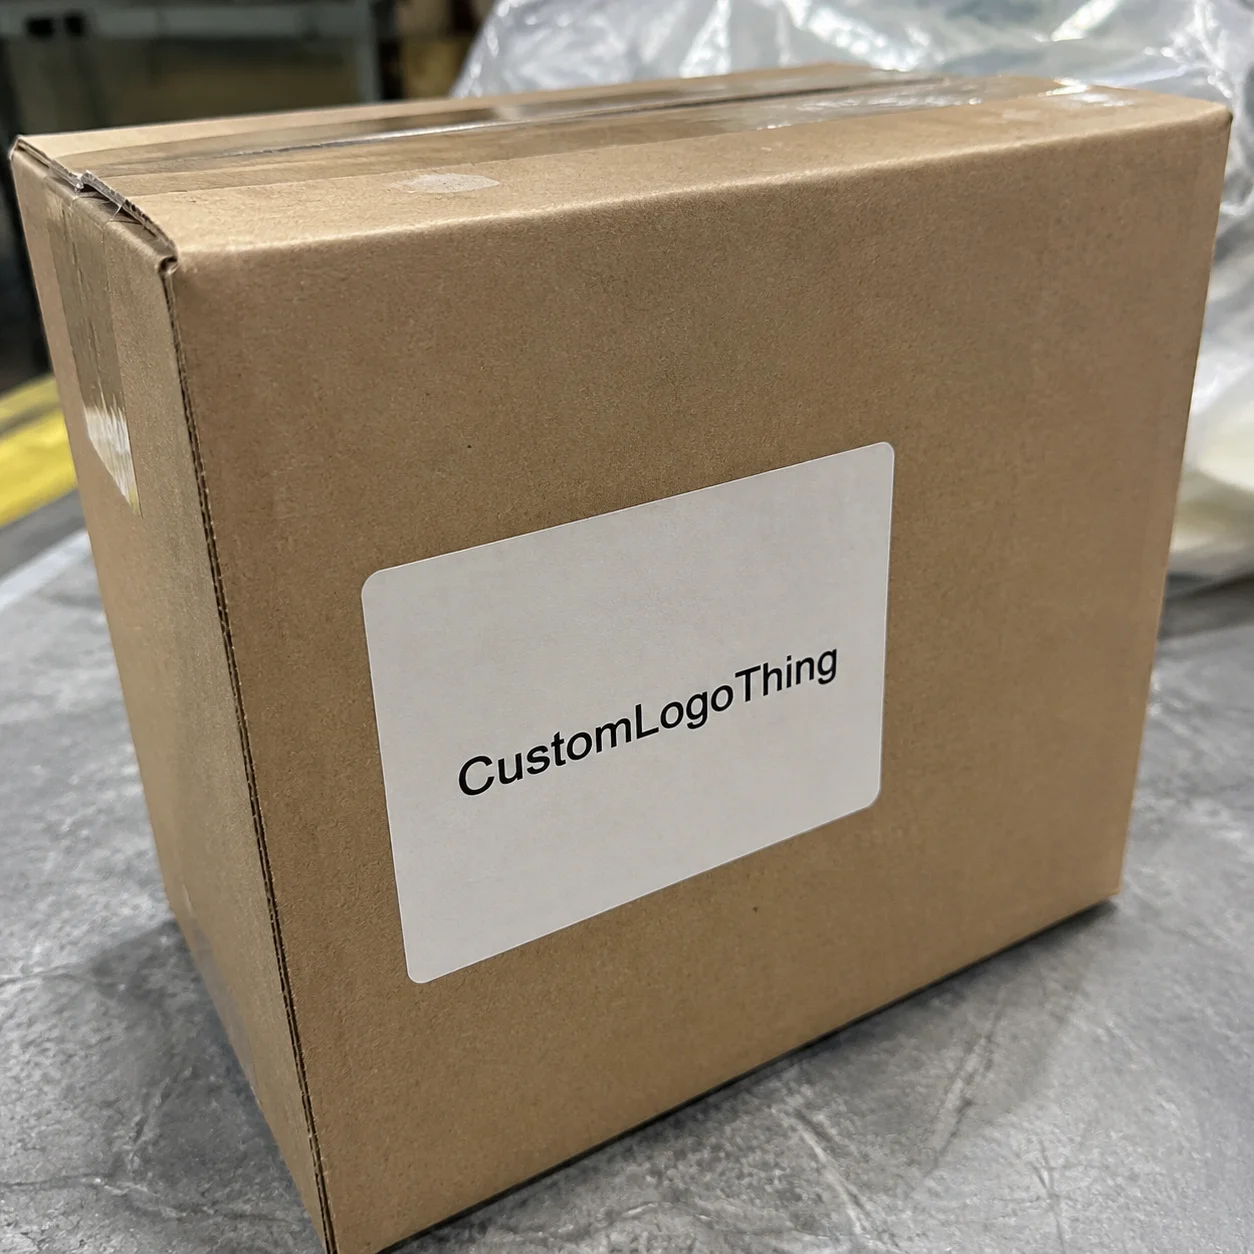
A plain shipping box can become a branded package in under 10 seconds. Add a large sticker that is placed cleanly, sized correctly, and readable from arm’s length, and suddenly a brown carton carries brand color, product instructions, a promotion, a seal, or a return cue.
That is the useful packaging question: when does a sticker stop being decoration and start acting like a packaging tool?
Custom Large Stickers are oversized adhesive graphics produced to a buyer’s dimensions, artwork, material, finish, and use case. They might seal a mailer. They might brand a kraft retail bag. They might sit on a glass door, warehouse bin, food sleeve, promotional kit, product bundle, or the lid of a subscription box. The size changes the job. A 2-inch logo sticker usually decorates. A 6-inch, 10-inch, or 12-inch sticker can direct attention, cover a panel, carry instructions, support unboxing, or replace more expensive printed packaging on short runs.
That replacement angle matters. Custom printed boxes work well, but they often require higher minimums, longer lead times, and separate inventory by SKU. A large sticker lets a brand use one stock box, mailer, bag, sleeve, or insert and then change the message by season, campaign, flavor, region, compliance need, or bundle type. From a packaging buyer’s point of view, that flexibility can be worth more than the sticker itself.
Common applications include branded mailers, retail packaging, event giveaways, window decals, equipment labels, warehouse organization, food packaging, product packaging inserts, promotional kits, and shipping identification. For companies building a broader packaging program, oversized stickers can sit beside Custom Labels & Tags and other Custom Packaging Products without forcing a full redesign.
Large stickers are also useful when a product line is changing quickly. A brand may need to test several flavors, bundle names, limited-edition offers, or channel-specific messages before committing to printed cartons. Instead of buying printed boxes for every version, a common approach is to keep the base package neutral and use oversized stickers to customize the outside panel. This can reduce dead stock when artwork changes, although the best economics depend on run size, labor, and the price difference between printed packaging and applied labels.
The catch is simple: large stickers are less forgiving than small ones. Weak adhesive, thin material, poor file setup, and rushed application all show up fast. A crooked 2-inch label is annoying. A crooked 12-inch front-panel sticker makes the packaging look careless. For that reason, custom large stickers should be specified with the same practical thinking used for labels, folding cartons, mailers, and retail boxes.
How Oversized Stickers Work: Materials, Adhesive, and Finish
A sticker looks simple because the buyer sees one printed surface. The converter sees three working layers: face stock, adhesive, and liner. Each layer affects durability, application speed, curling risk, edge lift, and final appearance.
The face stock is the printable material. Paper is usually the cost-efficient choice for dry indoor packaging: subscription boxes, retail bags, product sleeves, gift sets, short-life promotional labels, and e-commerce inserts. Paper can look excellent on kraft packaging, coated cartons, or natural-fiber bags, but it usually performs best away from heavy moisture, abrasion, oil, and condensation.
Film materials are often chosen when the sticker needs more strength or resistance. Vinyl, polypropylene, polyester, and similar films can be useful for refrigerated packs, delivery coolers, warehouse bins, bottles, jars, tubs, reusable containers, outdoor promotions, and packaging that may be handled repeatedly. A matte laminated vinyl decal on a delivery tote is a different product from an uncoated paper sticker on a candle box. Both may be “large stickers,” but they are not interchangeable.
Adhesive choice should follow the environment, not just the design. Permanent adhesive is commonly used for boxes, coated paperboard, and product labels that should stay put. Removable adhesive fits temporary campaigns, window signage, sample packs, and event graphics where residue is a concern. Repositionable adhesive can help with larger formats because the installer gets a small correction window. Freezer-grade adhesive is often used for cold-chain packaging, refrigerated products, frozen food packs, and surfaces that may be affected by condensation.
The surface matters as much as the adhesive. Smooth coated paperboard usually accepts stickers more easily than rough corrugated board. Kraft paper, molded fiber, textured stock, powder-coated surfaces, and flexible pouches can require more testing. Some recycled boards have surface fibers or coatings that make adhesion less predictable. Some plastic containers have low surface energy, which may require a more aggressive adhesive or a different material. When the packaging surface is unusual, a small production sample is usually smarter than guessing.
Finish adds the last layer of performance and feel. Gloss makes color look brighter and can make promotional stickers feel energetic. Matte reduces glare and often feels more premium. Soft-touch can elevate retail packaging, especially on rigid boxes, cosmetic kits, electronics accessories, and gift packaging. Lamination adds abrasion resistance and moisture protection; it also increases cost, thickness, and sometimes lead time. Varnish is often lighter and less expensive than lamination, but it usually provides less protection.
Large stickers are not just scaled-up small stickers. More surface area means more opportunity for trapped air, liner curl, edge lift, wrinkles, and misalignment. Die-cut versus kiss-cut format also becomes more practical than aesthetic. A die-cut sticker is cut to the finished shape. A kiss-cut sticker stays on a surrounding liner, which can make peeling easier for awkward shapes or larger sizes. For very large labels, split-back liners or scored liners may improve application speed because the installer can expose part of the adhesive first and position the graphic more accurately.
Packaging rule of thumb: the same 8-inch sticker may need three different specifications if it is applied to a candle box, a delivery cooler, and a storefront window.
For larger compliance or transport applications, buyers sometimes reference test expectations from groups such as ISTA, especially if labels, seals, or package markings must survive distribution handling. Not every sticker order needs lab testing. But if label failure creates a shipping, safety, traceability, or return-processing problem, durability is no longer cosmetic.
Sizing, Shape, and Artwork Decisions for Packaging
Large sticker sizing should begin with the package panel, not the artwork. A design may look balanced on a screen but feel oversized once it wraps across a carton flap, mailer crease, handle cutout, or bag gusset. For packaging use, it is common to measure the available flat area first, then subtract a safety margin so the sticker does not collide with folds, edges, seams, tape lines, or high-friction corners.
Typical large sticker sizes vary widely. A 4 x 6 inch sticker may work well on a small e-commerce box or pouch. A 6 x 8 inch sticker can cover a broad mailer panel or retail bag. An 8 x 10 inch or 10 x 12 inch sticker may be used for oversized cartons, kits, event packs, or promotional displays. Larger decals are possible, but handling and application become more important as size increases. In many production settings, the practical limit is not whether the printer can make the sticker; it is whether the packing team can apply it straight and bubble-free at the required speed.
Shape influences both appearance and waste. Rectangles and circles are usually efficient because they nest well on sheets or rolls. Custom die-cut shapes can look more distinctive, especially for brand mascots, product silhouettes, or seal-style graphics, but they can increase setup complexity and material waste. Thin points, narrow bridges, and sharp interior cuts can be fragile on large stickers. If the sticker will be applied by hand, rounded corners are often safer because they are less likely to lift during handling.
Artwork for custom large stickers should be built for real viewing distance. Tiny type, thin lines, low-contrast color combinations, and complex backgrounds become harder to read once the sticker is applied to a box or bag. Packaging stickers often need a clear hierarchy: brand mark first, main message second, supporting details third. If the sticker carries instructions, warnings, QR codes, batch details, or product variants, those elements should be checked at actual printed size before approval.
Bleed and safe area are especially important. A common production setup may require approximately 0.125 inch bleed beyond the cut line, although the exact value depends on the supplier and process. Important text and logos should usually sit inside a safe margin away from the trim edge. On large die-cut stickers, the safe area matters even more because small cutting shifts are more visible around borders, frames, and symmetrical designs.
Color also needs practical control. Screen colors do not always match printed colors because monitors use light and printing uses ink or toner. CMYK artwork is commonly preferred for print, while spot colors may be used when brand consistency is critical. Metallic inks, white ink, clear materials, and specialty finishes can add impact, but they often require more precise file setup. If a sticker will be placed on brown kraft, dark board, clear film, or a colored bag, the background can change the perceived color. White ink underprinting may be needed on clear or metallic materials to keep artwork readable.
For packaging teams, application orientation should be decided before printing. If the sticker is placed manually, adding a subtle liner shape, notch, or consistent sheet layout may help workers align it faster. If the sticker is applied by machine, roll direction, core size, unwind direction, gap, and label repeat become essential. Even for hand application, it is worth asking whether the stickers should arrive on sheets, rolls, or individually cut pieces. Sheets are convenient for short runs and kits. Rolls are often better for higher-volume packing lines. Individual decals can work for inserts or promotional packs but may take longer to peel.
Cost and Pricing Factors That Move the Quote
Sticker pricing is not based on size alone. The quote is usually shaped by material, adhesive, print method, finish, quantity, shape, artwork complexity, packing format, and expected lead time. Two stickers with the same dimensions can have very different costs if one is a simple paper rectangle and the other is a laminated film decal with custom die-cutting and removable adhesive.
Quantity has a strong effect because setup time is spread across more pieces. A short run of 100 large stickers may have a much higher unit cost than a run of 1,000 or 5,000. Digital printing is often practical for shorter runs, multiple versions, and quick changes. Flexographic or other production methods may become more economical for larger recurring orders, especially when the same design repeats. The best option depends on artwork, material, size, finish, and volume.
Material choice is another major driver. Uncoated or coated paper is usually more economical than film. Specialty papers, textured stocks, clear films, metallic films, weather-resistant vinyl, polyester, and freezer-grade constructions usually cost more. Laminates and coatings add protection but also add cost. A buyer may not need premium film for a short-life retail sticker on an indoor box, but the same buyer may need a durable film for a cooler, returnable tote, or outdoor pickup station.
Shape and cutting method influence cost as well. Standard rectangles, squares, circles, and ovals are often efficient. Custom shapes may require additional die setup or slower cutting. Very tight cut tolerances, intricate outlines, and multiple internal cuts can raise production complexity. If cost control is important, simplifying the shape or using a standard radius corner may protect the budget while still looking branded.
Finishing and packing format also matter. Stickers supplied on rolls may be ideal for a packing line, but roll labels require attention to unwind direction, core size, and label spacing. Sheets may be easier for fulfillment teams applying stickers by hand at stations. Individually cut stickers can support sample kits or promotional handouts but may cost more to pack and handle. If workers spend extra time peeling, aligning, or sorting stickers, that labor cost can outweigh a small savings in print cost.
Typical cost ranges depend heavily on supplier, size, material, and quantity, so exact pricing should come from a current quote. As a general planning idea, small paper labels may cost only a few cents each at high volume, while oversized specialty decals can cost significantly more per piece. For packaging budgets, it is often better to compare the total applied cost: sticker price, application labor, waste, packaging inventory savings, and avoided printed-box minimums.
Shipping and storage should not be ignored. Large stickers can curl or scuff if packed poorly. Rolls may require specific carton sizes and should be stored away from heat, humidity, and dust. Paper stickers can absorb moisture. Some adhesives have recommended storage windows and temperature ranges. If stickers will sit in inventory for months, ask about shelf life and storage guidance before ordering a large quantity.
Process, Timeline, and Production Steps From File to Delivery
A smooth custom large sticker order usually follows a predictable path: define the use case, select material and adhesive, prepare artwork, proof the file, print, finish, cut, pack, and ship. The order may sound simple, but skipping one step can create avoidable problems.
The first production question is where the sticker will be applied. A sticker for a coated carton, kraft mailer, glass window, refrigerated pouch, reusable bin, or corrugated shipper may need a different construction. The second question is how it will be applied. Hand application allows flexibility but can create variation. Machine application can be faster and more consistent, but only when roll format and label spacing are correct.
Artwork review is the next checkpoint. Production-ready files are commonly supplied as vector artwork or high-resolution print files. Fonts should be outlined or embedded. Linked images should be included or embedded. Bleed, safe area, cut lines, white ink layers, and spot color callouts should be clear. If the sticker has a custom shape, the cut path should usually be supplied as a separate vector line rather than a flattened image.
Proofing can prevent expensive surprises. A digital proof checks layout, spelling, sizing, cut line, color callouts, and general placement. A printed proof or sample may be worth requesting when color matching, adhesive performance, or material feel is important. For new packaging surfaces, a small application test is often the best protection. Apply the sticker to the actual box, bag, pouch, or container, then check it after handling, stacking, refrigeration, or shipping simulation if those conditions are relevant.
Production timelines vary. Simple digitally printed stickers may be produced quickly, while specialty materials, custom dies, laminates, color matching, or large quantities can add time. A common planning range may be several business days for straightforward short runs and longer for complex or high-volume orders. Shipping time, proof approval delays, artwork corrections, and material availability can all affect the final delivery date.
Quality control should include more than counting pieces. For large stickers, useful checks include print registration, color consistency, cut accuracy, liner release, adhesive tack, curling, scratches, laminate bubbles, and packing condition. If the sticker is part of retail packaging, the visual standard should match the rest of the package. If it is part of shipping or compliance, scannability and durability may matter more than decorative finish.
Once delivered, storage can preserve performance. Keep stickers in clean, dry conditions, away from direct sunlight and extreme temperatures. Store rolls upright or as recommended by the supplier. Let cold stickers acclimate before application because condensation can reduce adhesion. Keep dust, oil, lotion, and packing debris away from the adhesive side and the application surface.
Step-by-Step Guide to Ordering Large Branded Stickers
Start with the packaging job, not the sticker shape. A good order request explains what the sticker must do, where it will go, and what conditions it must survive. That gives the supplier enough context to recommend a construction rather than simply quoting the lowest-cost option.
- Measure the package panel. Record the usable flat area and avoid seams, folds, handles, tape paths, barcodes, and areas that will rub during shipping.
- Define the surface. Note whether the sticker will be applied to kraft paper, coated board, corrugated, glass, plastic, metal, flexible film, or another material.
- Describe the environment. Mention indoor use, outdoor exposure, refrigeration, freezing, moisture, abrasion, sunlight, oil, or repeated handling if relevant.
- Choose the application method. Decide whether stickers will be applied by hand, at a packing bench, in kitting, or on a label applicator.
- Select material and adhesive. Match paper, film, permanent, removable, repositionable, or freezer-grade options to the real use case.
- Confirm finish. Decide whether gloss, matte, soft-touch, varnish, or laminate supports the brand and durability needs.
- Prepare artwork correctly. Include bleed, safe margins, cut lines, outlined fonts, high-resolution images, and clear color instructions.
- Request a proof or sample when needed. Use samples for new materials, critical color, unusual surfaces, or large-volume orders.
- Plan packing format. Specify sheets, rolls, or individual pieces and confirm roll direction if automatic application is planned.
- Build in schedule time. Allow time for proofing, revisions, production, shipping, and internal application testing.
For many packaging teams, the most useful request includes a photo or drawing of the package with the sticker area marked. Even a simple dimensioned sketch can reduce confusion. If the sticker is replacing printed packaging, include the number of versions, expected reorder pattern, and whether artwork changes are likely. That information can influence whether digital printing, roll labels, sheeted decals, or another format makes the most sense.
It is also helpful to think about how the sticker fits the full customer experience. On an e-commerce box, the sticker may need to look good after the package has been handled by carriers. On a retail bag, it may need to resist rubbing against other bags. On a gift box, it may need to align with a ribbon, belly band, or lid edge. On a food container, it may need to stay readable near condensation or oil. These practical details often decide whether the finished sticker feels premium or improvised.
Common Mistakes That Make Big Stickers Fail
The most common mistake is choosing material by price alone. A low-cost paper sticker can be perfect for dry indoor packaging, but it may wrinkle, tear, or lift on a cold container or rough shipping carton. A premium film can be unnecessary for a short-life promotional box. The right specification is the one that matches the job.
Another common issue is poor scale. Artwork designed for a small label may look empty, blurry, or awkward when expanded to a large size. Low-resolution logos, compressed images, and thin decorative lines become more obvious. A file that looks acceptable on a monitor may fail at print size if the image resolution is too low or the vector paths are poorly built.
Application problems are also common. Large stickers need clean, dry surfaces and steady placement. Dust, loose fibers, humidity, condensation, oil, and cold surfaces can reduce adhesion. If workers peel the entire liner off at once, the sticker can stretch, fold onto itself, or trap air. For larger pieces, it is often better to expose part of the adhesive, anchor the sticker, then smooth outward with a squeegee or firm hand pressure.
Ignoring package geometry causes visible problems. Stickers placed across folds, flaps, corners, gaps, or flexible seams are more likely to lift. A sticker that wraps too close to a box edge may catch during packing or shipping. A label placed over a curved jar or tapered container may wrinkle unless the shape and material are designed for that surface.
Overloading the sticker with information can weaken the design. Large does not mean unlimited. A packaging sticker should usually communicate one primary message quickly. If it must include instructions, ingredients, QR codes, batch details, or promotional copy, the layout needs hierarchy and spacing. Crowded stickers can look cheaper than smaller, cleaner labels.
Finally, some buyers forget the packing team. If a sticker is hard to peel, hard to align, or supplied in the wrong format, the packaging line slows down. A design that saves a few cents in print may cost more in labor if every piece takes extra time to apply. Before ordering thousands of custom large stickers, test how long one trained worker needs to apply the sticker cleanly and consistently.
Next Steps Before You Request a Sticker Order
Before requesting a quote, gather the basics: finished size, quantity, application surface, environment, artwork file, desired finish, packing format, and deadline. If you are unsure about material, describe the packaging and use conditions instead of guessing. A practical supplier can usually narrow the options when they know whether the sticker is for a dry retail box, a refrigerated pouch, a corrugated shipper, or a reusable container.
If the order supports a larger packaging system, consider whether the sticker should coordinate with other labels, hang tags, boxes, mailers, sleeves, or inserts. Consistent color, typography, finish, and material choices help the package feel intentional. Custom large stickers can be a flexible bridge between plain stock packaging and fully custom printed packaging, especially when order volume, SKU count, or campaign timing makes printed boxes less practical.
For best results, treat the first order as a specification test. Confirm the material, adhesive, finish, size, and application method before scaling up. Keep a record of what worked: stock type, adhesive, laminate, roll direction, file version, application surface, and storage conditions. That record makes reorders faster and helps prevent small changes from creating new problems.
When specified well, custom large stickers can improve packaging without adding unnecessary complexity. They can brand plain boxes, support seasonal campaigns, identify product versions, seal bundles, improve unboxing, and help teams move faster. The key is to choose the sticker as a packaging component, not just a printed graphic.
FAQ
What size counts as a custom large sticker?
There is no single universal cutoff, but stickers larger than typical small product labels are often treated as large format for packaging purposes. Common examples include 4 x 6 inch, 6 x 8 inch, 8 x 10 inch, 10 x 12 inch, and larger custom sizes. The right size depends on the package panel, viewing distance, application method, and message.
Are large stickers better than printed boxes?
It depends on the order. Printed boxes can look highly integrated and may be efficient at larger volumes. Large stickers are often useful for short runs, multiple SKUs, seasonal campaigns, test launches, or brands that want to customize stock packaging. Many companies use both: printed packaging for stable core products and stickers for flexible or changing messages.
What material is best for custom large stickers?
Paper is usually suitable for dry indoor packaging and short-life applications. Film materials such as vinyl, polypropylene, or polyester are often better for moisture, abrasion, refrigeration, outdoor exposure, or repeated handling. The best material depends on the surface, environment, durability requirement, and budget.
Will a large sticker stay on corrugated cardboard?
It often can, but adhesion depends on the board surface, dust, recycled fiber content, coating, humidity, and handling. Smooth corrugated surfaces are usually easier than rough or dusty ones. Testing is recommended when the sticker is large, the surface is textured, or the package will be exposed to moisture or heavy handling.
Should large stickers be ordered on rolls or sheets?
Sheets are common for short runs, hand application, and kitting. Rolls are often better for higher-volume packing lines or automatic label application. Individually cut stickers can work for promotional packs but may take longer to handle. The best format depends on how the stickers will be stored, peeled, applied, and counted.
Do custom large stickers need lamination?
Not always. Lamination is useful when the sticker needs extra resistance to scuffing, moisture, handling, or outdoor exposure. For simple indoor packaging, a paper sticker with an appropriate coating may be enough. Lamination adds cost and thickness, so it should match the actual performance need.
How can I avoid bubbles when applying large stickers?
Use a clean, dry surface, avoid applying over seams or curves, and expose the liner gradually instead of removing it all at once. Start from one edge or the center and smooth outward with steady pressure. For larger decals, a squeegee and a split-back liner can make application easier.
What artwork file is best for oversized sticker printing?
Vector artwork is usually preferred for logos, type, and cut lines because it scales cleanly. High-resolution raster images can work when they are sized correctly for print. Files should include bleed, safe margins, outlined or embedded fonts, clear cut paths, and color instructions. For clear, metallic, or specialty materials, ask whether white ink or spot layers are required.


