Custom printed foil stickers add metallic shine to labels, seals, and promos. Learn materials, costs, timelines, and artwork checks before ordering.
Custom Printed Foil Stickers: Small Detail, Big Shelf Impact
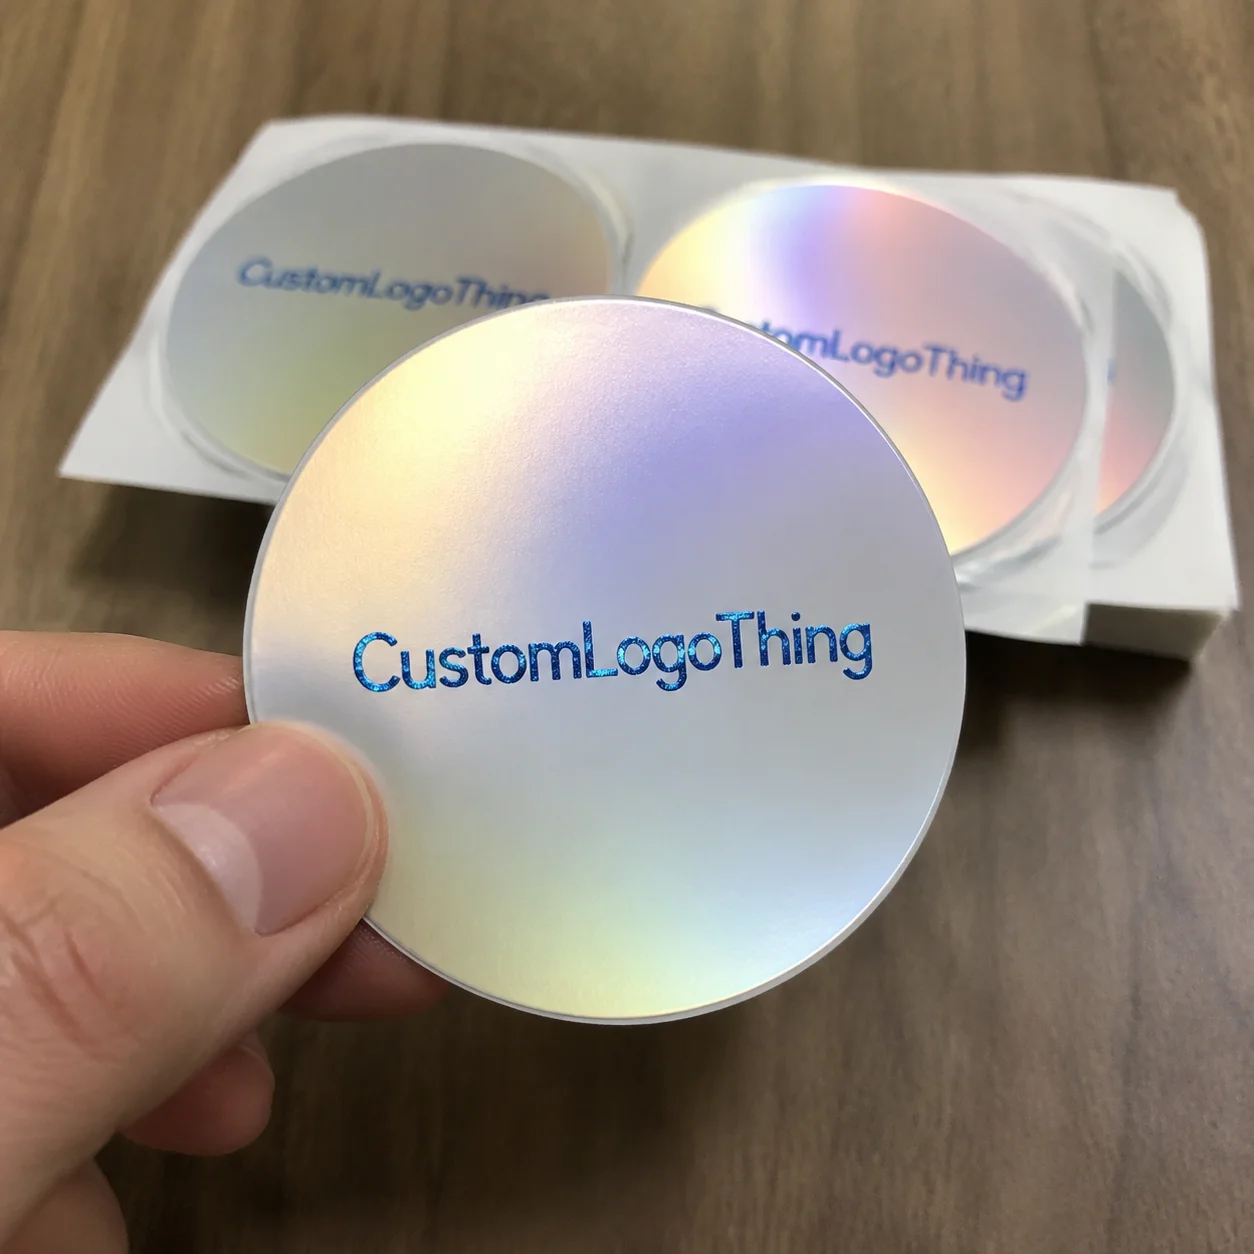
A metallic seal is small, but it can change how a package is read before anyone opens it. That is the practical reason brands order custom printed foil stickers: a controlled flash of gold, silver, copper, rose gold, holographic, or another specialty foil can make a pouch, jar, envelope, gift set, or carton feel more deliberate.
These stickers combine printed artwork with a metallic foil effect. The ink may carry the logo, product name, ingredient notes, batch code, QR code, pattern, or regulatory copy. The foil is usually treated as a separate production element, reserved for shine and contrast. Strong foil designs rarely shout. They use the effect on one mark, a fine border, a small badge, or short copy such as “limited edition,” “handmade,” “sealed for freshness,” or “thank you.”
That restraint is not just taste. It is hierarchy. If every square inch reflects light, the customer’s eye has nowhere useful to land. A selective accent gives the sticker a focal point, especially on crowded retail shelves where similar jars, cartons, and tins compete at arm’s length.
Common uses are direct: product labels, box seals, subscription packaging, certificate seals, event giveaways, envelope closures, tamper-style stickers, luxury inserts, and branded retail details. Foil stickers also pair well with Custom Labels & Tags when one label needs to do the practical work and a second piece provides the premium cue.
Production reality: shine is only one part of the result. Artwork setup, face stock, adhesive, finish, shape, production method, and inspection standards all affect how the sticker looks after it leaves the press.
How Foil Sticker Printing Works Behind the Scenes
Ordinary ink can imitate a gold or silver color, but it cannot create true metallic reflection. Foil reflects because a metallic layer is transferred, laminated, or already built into the material. That difference is why foil areas should be separated from CMYK print during file setup, proofing, and quality control.
The main production methods differ by quantity, detail, and budget. Hot foil stamping uses heat, pressure, a foil roll, and a die to press foil onto the sticker surface. It can produce a crisp premium finish, particularly on paper stocks, but it often requires tooling and careful setup. Cold foil transfer uses adhesive and foil on press, usually making sense for larger runs or broader metallic coverage. Digital foil is useful for shorter runs because it may avoid traditional dies, though fine detail still needs review. Metallic substrate printing starts with a reflective face stock, then uses ink and sometimes white ink to hide or reveal shine.
Vector artwork makes a measurable difference. Logos, borders, icons, and type should be supplied as clean vector paths whenever possible. A 0.25-point hairline may look elegant on screen but can break, fill in, or appear uneven after transfer and die cutting. On stickers under 1.5 inches wide, foil text below roughly 6 to 7 points is risky unless the font is open, simple, and approved by the printer.
White ink changes the equation. Gold foil on matte white paper looks warm and classic. Gold foil over clear polypropylene on a glass jar feels lighter and more modern. Gold foil on metallic film can create strong reflectivity across the whole label, but printed colors may need white ink behind them or they can look muddy, especially pastels and skin tones.
Finish choice also alters the effect. Gloss laminate brightens printed color and increases surface shine. Matte laminate cuts glare and often makes the foil pop harder by contrast. Soft-touch laminate gives a velvety hand feel, common on premium packaging, but it can scuff if the construction is poorly matched to the shipping and handling environment. UV coating and varnish can add protection or spot contrast; heavy rub areas still deserve testing.
A flat PDF proof cannot show how foil catches light from different angles. Use the proof to check trim, bleed, safe area, foil placement, color separations, finish notes, and roll direction. If the sticker goes on retail packaging, wet products, curved jars, or a high-touch item, a physical sample is usually cheaper than discovering the problem after the full run arrives.
Materials, Adhesives, and Finishes That Change the Result
The face stock is the top material of the sticker. It influences texture, durability, opacity, and how cleanly foil appears. Coated paper is clean, economical, and common for dry indoor use. Textured paper adds a boutique feel for candles, stationery, chocolate boxes, wine-style labels, gift packaging, and specialty inserts. Kraft paper creates a natural look, although foil on kraft needs enough contrast because the brown base can visually soften the metal.
White polypropylene is a strong all-around film for cosmetics, bath products, chilled beverages, and jars that get handled often. Clear polypropylene works when the package surface should show through, such as glass, clear plastic, or colored tins. Vinyl is tougher and more flexible, so it suits outdoor decals, promotional stickers, and surfaces exposed to abrasion. Metallic film creates a reflective base across the entire sticker; ink opacity then controls which areas remain shiny.
Paper is often right for dry boxes, envelopes, tissue seals, gift sets, and premium labels where texture supports the brand. Film is safer for moisture, oil, cold storage, curved containers, squeezable tubes, and shipping exposure. A candle dust-cover sticker may perform well on paper. A shower scrub jar usually needs polypropylene or vinyl with a laminate and an adhesive that tolerates moisture.
Adhesive choice is equally practical. Permanent adhesive suits most product labels and packaging closures. Removable adhesive fits temporary promotions or labels that should peel away cleanly. Freezer-grade adhesive is built for cold conditions. High-tack adhesive helps on rough kraft boxes, textured cartons, and low-energy plastics. Low-tack adhesive can protect delicate surfaces, but it may struggle on curves, textured stocks, or packaging that flexes. Specialty adhesives may be needed for squeezable tubes, oily containers, waxed surfaces, or tight-radius jars.
| Material | Best Fit | Typical Notes |
|---|---|---|
| Coated paper | Dry boxes, envelopes, inserts | Often economical; works well with hot foil and matte or gloss finish |
| Textured paper | Boutique labels, gift packaging | Premium tactile feel; fine foil detail may need testing on heavy texture |
| White polypropylene | Cosmetics, jars, chilled products | Moisture-resistant; common thickness around 2.0 to 3.0 mil |
| Clear polypropylene | Glass, tins, transparent containers | May need white ink behind printed areas for opacity |
| Vinyl | Durable decals, promos, handling exposure | Flexible and tougher; usually costs more than basic paper |
| Metallic film | High-shine labels and decals | Creates broad reflectivity; ink opacity must be planned carefully |
Finish selection is a design decision as much as a durability decision. Matte gives contrast. Gloss gives brightness. Soft-touch adds a luxury hand feel. Textured stocks support handmade or heritage positioning. Before approving a run, apply samples to the real container, rub the surface, check edges on curves, and let the sticker sit for at least 24 hours. Adhesives often reveal their true grip after dwell time, not during the first 30 seconds.
Pricing, MOQ, and Unit Cost Factors to Know Early
Foil sticker pricing is shaped by size, shape, material, number of designs, foil coverage, finish, order quantity, die-cutting complexity, and delivery format. A 1-inch round gold seal on sheets is not the same job as a 4-inch clear polypropylene product label with white ink, foil logo, matte laminate, and roll orientation for automatic application.
Unit cost usually drops as quantity rises because setup time, tooling, foil calibration, material waste, press handling, and inspection are spread across more stickers. As a planning range, a simple 1.5-inch paper foil seal may land around $0.18 to $0.35 each at 1,000 pieces, then drop closer to $0.06 to $0.14 each at 10,000 pieces. Film labels with specialty adhesive, white ink, laminate, and tighter registration may cost more, often around $0.20 to $0.60 each in moderate quantities. Actual pricing depends on the supplier, specs, waste allowance, and shipping.
Small does not automatically mean cheap. Scalloped edges, tiny internal cutouts, multiple foil colors, dense metallic patterns, and very fine lettering can raise cost because they slow die cutting, foil registration, or inspection. Version count matters too. Ten designs at 500 pieces each may cost more than one design at 5,000 pieces because each version needs proofing, setup, tracking, and quality checks.
Delivery format affects both price and usability. Rolls are best for machine labeling, dispensers, or fast hand application. Sheets are easier for office teams, retail staff, and fulfillment stations handling mixed designs. Individual pieces work for giveaways, insert packs, events, and mailers, but the added cutting and packing can raise the unit cost.
| Format | Good For | Cost and Handling Notes |
|---|---|---|
| Rolls | Production lines, dispensers, repeated application | Efficient for higher quantities; confirm core size, gap, unwind direction, and label orientation |
| Sheets | Manual use, office packing, mixed designs | Easy to count and store; slower for high-volume hand labeling |
| Singles | Promos, inserts, event handouts | Convenient for distribution; added cutting and packing can raise unit cost |
MOQ depends on the production method. Digital foil can be friendly for short runs, sometimes starting in the low hundreds. Traditional hot foil or cold foil methods often make more financial sense at 1,000, 2,500, 5,000, or higher because tooling and setup are spread over the run. For a useful quote, provide final size, quantity, material preference, adhesive need, foil color, finish, roll or sheet format, application surface, and in-hand date. Photos of the box, jar, pouch, or mailer help remove guesswork.
Process and Timeline From Artwork to Finished Stickers
A typical order follows a practical path: define the use case, choose size and material, prepare artwork, request pricing, review a proof, approve production, manufacture, inspect, pack, and ship. The proofing stage often controls the schedule more than the printing itself.
Unclear foil layers, missing cut lines, low-resolution logos, last-minute copy changes, and artwork built at the wrong size can add days. A good proof should show the trim line, bleed, safe area, printed color, foil area, finish notes, roll direction, quantity, and version details. For roll labels, orientation is not a footnote. A label feeding left-edge-first instead of top-edge-first can stop a dispenser or automatic applicator from working correctly.
Timelines vary by method and workload. A straightforward digital foil short run may take about 5 to 8 business days after proof approval, plus shipping. A foil-stamped label with tooling, custom material, specialty adhesive, or higher quantity may take 10 to 18 business days after approval. Add time for physical sampling if the sticker goes on curved bottles, wet products, cosmetics, refrigerated items, or packaging handled repeatedly in fulfillment.
Material availability can stretch the schedule. Standard white paper and white polypropylene are usually easier to source than specialty textured stock, freezer adhesive, holographic foil, or unusual metallic film. Seasonal production volume matters too. If a launch date, trade show, or fulfillment window cannot move, build in at least one to two weeks beyond the quoted production time.
For performance-sensitive packaging, sampling is not fuss; it is risk control. The International Safe Transit Association publishes testing resources for packaged products at ista.org. A foil sticker is only one component, but shipping vibration, abrasion, temperature swings, and moisture can expose weak adhesive or finish choices. If sustainability claims are part of the packaging plan, review material claims carefully and confirm whether paper components align with standards such as FSC sourcing through fsc.org.
A simple planning rule holds up: approve final artwork only after checking the actual dimensions against the real package. A digital proof can look perfect at 200% zoom and still be too small, too close to a carton edge, or awkward on a curved jar.
Common Artwork and Ordering Mistakes That Dull the Shine
The first mistake is making everything metallic. Foil should guide attention, not compete with every ingredient line, slogan, border, and pattern on the sticker. Too much reflection can reduce contrast, especially under bright store lighting, and small text often becomes harder to read.
Fine detail is the next trap. Very small type, hairline borders, delicate script fonts, tight spacing, and intricate foil textures may fill in, break up, or register unevenly. For custom printed foil stickers under 2 inches, keep the foil message short and the artwork clean. A bold logo mark usually performs better than a paragraph of shiny copy.
Prepress problems are common and preventable. Missing bleed can leave a white sliver at the edge after cutting. Weak safe margins can place text too close to the trim. Rasterized logos may print soft. Incorrect color modes can shift printed tones. Unclear foil callouts can cause confusion about what should shine and what should remain ink. A separate layer named “FOIL” or “Gold Foil” is far better than an email note saying, “make the logo metallic.”
Material mismatch causes expensive frustration. Rough kraft boxes may need high-tack adhesive. Flexible pouches may need a film label that tolerates bending. Cold glass can create condensation that challenges paper and standard adhesive. Oily containers, waxed surfaces, powder-coated tins, and tight jar curves should be sample-tested before full production.
Roll details are easy to miss. If stickers will be applied by machine or dispenser, confirm roll direction, gap spacing, core size, outside roll diameter, and label orientation. A common roll core is 3 inches, but some tabletop dispensers or applicators use 1-inch cores. The gap between labels might be 0.125 inch or another equipment-specific requirement. Those mechanical details can matter as much as the artwork.
Ask for a dieline or template before finalizing the design. Build the artwork around the actual cut shape from the start, including bleed and safe area. It saves revisions and keeps the strongest part of the design from being trimmed too close.
Next Steps Before You Request a Foil Sticker Quote
Before asking for pricing, gather the basics. Measure the application area with a ruler, not a guess. Photograph the package surface in normal lighting. Decide whether the sticker needs to seal, decorate, label, promote, or handle more than one job. A tissue-paper closure seal has different requirements than a waterproof jar label or a promotional decal handed out at an event.
Choose a rough size next. Even simple dimensions help: 1.25-inch round, 2-by-3-inch rectangle, 1.5-inch scalloped seal, or 3-inch custom die cut. If the sticker will be used across several box or pouch sizes, check proportions on each package instead of assuming one size will work everywhere.
- Quantity: include total pieces and number of artwork versions.
- Material: note paper, textured paper, polypropylene, vinyl, clear film, or “please recommend.”
- Foil color: specify gold, silver, rose gold, copper, holographic, or another finish.
- Finish: choose matte, gloss, soft-touch, varnish, UV coating, or no added finish.
- Adhesive: describe the surface, temperature, moisture exposure, and whether removal matters.
- Format: request rolls, sheets, or singles, plus any dispenser or applicator requirements.
- Deadline: give the in-hand date, not only the launch date.
Artwork should ideally include separate layers for print, foil, cut line, bleed, and safe area. If those terms are unfamiliar, ask for setup help or a template before the design gets too far. A capable manufacturer would rather correct the file early than fight it during proofing.
Order a sample or production proof for Premium Retail Packaging, wet environments, curved containers, or any project where adhesive performance matters as much as appearance. For larger launches, test the sticker alongside other Custom Packaging Products so finish, color, scale, and placement work together as one packaging system.
The best foil sticker is not always the flashiest one. It is the one with a clear job: identify, seal, elevate, authenticate, or draw the eye to a specific detail. With real dimensions, clean artwork, suitable material, the correct adhesive, and a foil accent used with restraint, a small sticker can make packaging feel sharper without making production harder than it needs to be.
Foil Sticker FAQs
What are custom foil labels best used for?
Custom foil labels work well for premium product labels, box seals, Jar and Bottle accents, certificate seals, gift packaging, promotional handouts, and branded inserts where a metallic detail adds perceived value. They are most effective when the foil highlights one or two important elements, such as a logo, badge, border, or limited-edition mark.
Are custom printed foil stickers waterproof?
They can be water-resistant or waterproof if made with a film material such as polypropylene or vinyl, paired with the right adhesive and protective finish. Paper foil stickers are usually better for dry indoor use unless the construction is specifically designed and tested for moisture exposure.
How much do metallic foil stickers cost?
Cost depends on size, quantity, material, foil coverage, shape, finish, number of designs, delivery format, and production method. Larger quantities usually lower the unit cost, while complex die cuts, multiple foil colors, specialty adhesives, and rush timelines can increase the price.
How should artwork be prepared for foil sticker printing?
Use vector artwork whenever possible, keep foil areas on a separate clearly named layer, include bleed and safe margins, and provide a defined cut line. Avoid tiny foil text, extremely thin lines, and overly detailed metallic patterns unless the manufacturer confirms they can hold cleanly at the chosen size.
How long does it take to produce custom printed foil stickers?
Timeline depends on proof approval, material availability, quantity, foil method, die-cutting needs, finishing, quality checks, and shipping. The fastest way to prevent delays is to submit complete specs, approve a clean proof quickly, and test the sticker on the real package before full production when performance is critical.


