Order Die Cut Custom Stickers That Fit Your Packaging
A plain kraft mailer can look like a supply closet item. Add one well-shaped sticker and the same package starts to feel intentional: branded, finished, maybe even photographed before it is opened. That is the practical appeal of die cut custom stickers. They give a box, pouch, jar, insert, tissue wrap, or shipping seal a designed moment without forcing every packaging component into a custom print run.
Why die cut custom stickers make small surfaces work harder
Die cut custom stickers are cut to the outer shape of the artwork, logo, illustration, product icon, or campaign graphic. Instead of placing a logo inside a standard square, circle, or rectangle, the sticker edge follows the design. The cut line becomes part of the brand system, not a manufacturing afterthought.
That detail matters more than many buyers expect. A 2.5-inch round label on a jar may be perfectly practical. A rectangle on a shipping carton may be the cheapest readable choice. But if the brand mark has a leaf, mascot, badge, lightning bolt, bottle silhouette, or flavor-specific illustration, a shaped edge can remove dead space and make the packaging look planned rather than patched together after the printed-box budget was cut.
There is a useful distinction here. Die cut stickers are cut through both the printed face and the backing liner, so the finished piece is already in its final shape. Kiss cut stickers are cut through the adhesive sticker layer only, leaving a larger backing sheet around the design. Kiss cut formats are often easier to peel for small shapes, thin lettering, or sticker sheets. Circle labels and roll labels are efficient for automated or semi-automated application. Standard rectangles still win for barcodes, ingredients, compliance text, and shipping information.
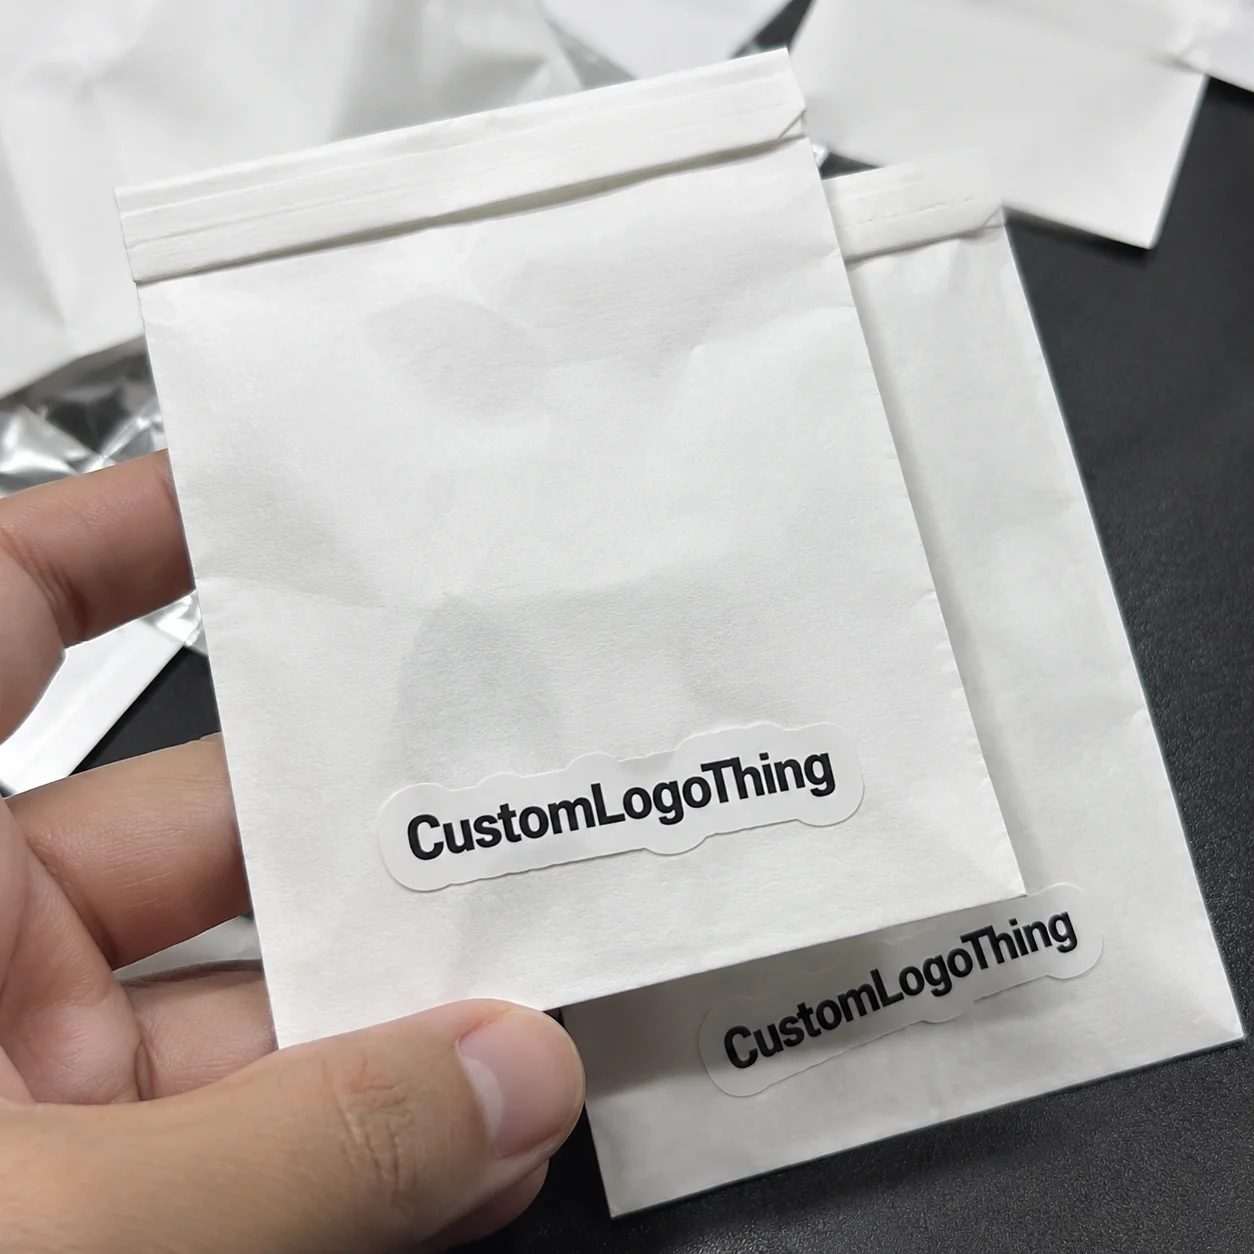
For product packaging, shaped stickers are commonly used to seal tissue, brand plain mailers, identify flavors, add batch details, personalize subscription kits, or support limited drops without reprinting cartons. The strongest examples usually tie shape to recognition: a honey brand using a hive outline, a coffee roaster using a bean mark, a cosmetics line using a contour around its monogram. The shape does some memory work.
Packaging buyer reality check: die cutting is not only decorative. A clean shape can improve shelf recognition, guide the unboxing flow, and lift perceived value, but only if the material, adhesive, and scale match the package surface.
The rest of the decision is more operational than aesthetic. Material, adhesive, finish, artwork setup, pricing, timeline, and proofing decide whether a sticker looks premium for three seconds in a product photo or holds up through storage, shipping, retail handling, and customer use.
How the cutting process turns artwork into sticker shapes
The production sequence sounds simple: artwork review, cutline setup, material selection, printing, lamination or finishing, cutting, weeding, quality control, and packing. The cutline is the quiet troublemaker. It tells the cutting equipment exactly where the sticker edge should go, and a shift as small as 1/16 inch can be visible on a tight border, dark background, or symmetrical logo.
Traditional steel dies are still used in many label and packaging operations, especially for repeat work at volume. A physical die can be efficient once it exists, but it may add tooling Cost and Lead Time. Many short-run custom shaped stickers now use digital cutting, where a plotter or finishing table follows a vector path. That reduces tooling requirements and makes seasonal graphics, short campaigns, and multiple shapes easier to produce.
Bleed and safe zones are the artwork terms buyers should not skip. Bleed means the printed color or image extends beyond the final cut edge, often by about 0.0625 to 0.125 inch depending on the supplier. Safe zone means text, QR codes, borders, and legal details sit comfortably inside the cut edge. If the cutter moves slightly, the design still looks clean.
Sharp points, tiny interior gaps, and thin bridges deserve suspicion. They may look crisp on a screen at 400% zoom, then create lifting corners, tearing, or inconsistent edges after cutting. A starburst sticker can work. A paper sticker with twenty needle-like spikes may not survive peeling, packing, or warehouse handling.
Lamination adds another variable. Gloss laminate can deepen color and improve scuff resistance. Matte laminate can improve readability and give retail packaging a calmer finish. Soft-touch laminate feels premium but may show oils from fingers. UV-resistant laminates help with outdoor exposure, though no sticker is invincible against months of sun, abrasion, and moisture.
The printer creates the image. The cutter decides whether the finished piece feels clean, premium, and easy to peel. That is why a neat cutline often matters as much as the artwork itself.
Material, adhesive, and finish choices that affect performance
The face material sets the tone and the lifespan. White vinyl is a common choice for durable packaging stickers because it handles moisture and repeated handling better than basic paper. Clear film works when the package color should show through, though it needs careful white ink planning if the design includes pale colors. Paper is cost-effective for dry indoor use. Kraft paper gives an earthy, tactile look. Metallic film adds shine, while textured stocks can make a small label feel closer to a specialty print piece.
Indoor and outdoor use are different engineering problems. A sticker on an e-commerce thank-you card may only need clean print and reliable adhesion. A sticker on a refrigerated drink bottle faces condensation, cold temperature changes, abrasion, and curved glass. A sticker on a candle jar may deal with oils, fingerprints, and nearby heat. For performance testing, standards such as ASTM D3330 for peel adhesion can be useful reference points, while transport testing bodies like ISTA help frame the broader packaging journey through distribution.
Adhesive choice should follow the surface. Permanent adhesive suits long-term package branding. Removable adhesive fits temporary promotions, short campaigns, and some retail decals. Freezer-grade adhesive helps with cold storage and condensation. High-tack adhesive may be needed for textured kraft mailers, low-energy plastics, or rough corrugated board. None of these adhesives performs equally well everywhere.
Packaging substrates behave differently. Corrugated board can be dusty and uneven. Glass is smooth but may be cold or wet. Plastic pouches flex, which can stress a stiff label. Coated boxes often bond well, but heavy soft-touch coatings or varnishes can reduce adhesion. If you are already sourcing Custom Labels & Tags, test sticker material on the exact carton, jar, pouch, or mailer before approving a larger order.
Finish changes appearance and function. Matte finishes are often easier to read under retail lighting and can make package branding feel more expensive. Gloss finishes photograph well and make saturated colors pop, but glare can obscure small text. Holographic film attracts attention for limited drops. Clear film can look minimal, although bubbles and fingerprints become more visible during application. UV-resistant laminate is useful for outdoor exposure or bright window displays.
Samples are cheap compared with a failed launch. If stickers will be applied to curved jars, squeezable pouches, refrigerated products, textured mailers, or anything handled repeatedly, test a few pieces for at least 24 to 72 hours under real conditions. Better still, test them after the package has been filled, sealed, chilled, stacked, or shipped. Adhesion failures often appear after pressure, moisture, temperature change, or flexing—not while the sample is sitting flat on a desk.
| Sticker Material | Best Packaging Use | Typical Strength | Watchout |
|---|---|---|---|
| White vinyl | Mailers, jars, pouches, outdoor-friendly promotions | Moisture resistance and flexible durability | Costs more than basic paper |
| Paper | Dry indoor boxes, inserts, tissue seals | Lower unit cost and good print clarity | Weak around water, oil, or abrasion |
| Clear film | Glass jars, bottles, colored cartons | Minimal “no-label” look | May need white ink behind light artwork |
| Kraft paper | Natural product packaging and handmade-style branding | Warm, tactile appearance | Color vibrancy is muted |
| Metallic or holographic film | Limited editions, cosmetics, gifts, retail promotions | High shelf visibility | Can reduce legibility if overused |
Pricing and unit cost factors buyers should check before quoting
Sticker pricing is driven by size, material, finish, order quantity, cut complexity, artwork readiness, packing format, and shipping. A small paper sticker with a simple rounded shape may be inexpensive. A large waterproof vinyl sticker with matte laminate, tight curves, and individual packing costs more because it consumes more material and more production time.
Unit cost usually drops as quantity rises because setup, proofing, machine calibration, and handling are spread across more pieces. As a rough planning range, a simple 2-inch custom shaped paper sticker might land around $0.08 to $0.18 per unit at several thousand pieces. A laminated vinyl version may sit closer to $0.18 to $0.40 depending on finish, shape, and order quantity. Very small runs can cost much more per unit because the job still needs review, setup, printing, cutting, and packing.
Size has a hidden cost. A 4-inch sticker is not merely “a little bigger” than a 3-inch sticker. It can reduce how many pieces fit on a sheet or roll, increase trim waste, and slow finishing. Complex shapes add another layer. Tight curves, fine points, and many small turns may slow cutting and weeding compared with a clean silhouette.
Premium materials change the math too. Clear film, metallic stock, holographic film, waterproof vinyl, soft-touch laminate, and UV-resistant laminate each add cost. Sometimes that premium is justified. A cosmetics launch or retail packaging refresh may benefit from a tactile finish. A shipping seal on an inner tissue wrap probably does not need the same specification.
MOQ, or minimum order quantity, depends on the production method. Digital cutting often supports lower quantities than tooled die production, but the cheapest total order is not always the lowest cost per usable sticker. If 500 pieces cost $150 and 1,000 pieces cost $210, the second option may be smarter if you need samples, application waste, influencer kits, press mailers, or replacement stock.
Give suppliers enough information to quote accurately: final size, quantity, artwork file, application surface, indoor or outdoor use, finish preference, packing method, and delivery deadline. Do not compare quotes by price alone. Check material thickness, adhesive type, laminate, proofing process, shipping, and whether the quote includes artwork cleanup. A cheaper quote can disappear quickly if the material fails on the actual package or the proofing process adds three extra days.
Timeline and production steps from proof to delivery
A typical order moves through quote request, artwork review, digital proof, approval, print production, cutting, quality control, packing, and transit. For a standard short-run sticker order using common materials, production might take 5 to 10 business days after proof approval. More complex jobs, specialty materials, or higher volumes can stretch to 12 to 15 business days or longer, especially if testing is needed.
The proof stage is where delays pile up. Missing cutlines, low-resolution logos, RGB artwork, unoutlined fonts, unclear sizing, and last-minute copy changes all pause production. From a packaging buyer’s point of view, “we already sent the file” is not the same as “the file is print-ready.”
Inspect the proof like it is a contract. Check sticker size, cutline position, bleed, safe area, spelling, color notes, finish, quantity, and orientation. If the sticker seals a mailer flap, confirm the direction it will be viewed after application. If it identifies flavor or scent, confirm the SKU name and color coding against the actual product packaging.
Production time generally starts after proof approval, not after the first email. That distinction causes real planning problems. A buyer may contact a supplier on Monday, revise artwork twice, approve the proof on Thursday, and still expect Monday delivery. Sometimes rush orders can work, but only when artwork is clean, materials are available, and the design does not require unusual testing.
Shipping adds its own uncertainty. Local delivery, ground transit, expedited freight, and warehouse receiving schedules can all affect the real arrival date. Event dates are especially unforgiving. Trade shows, product photography, retail resets, and seasonal campaigns should have buffer time because one missed truck can make a technically “on-time” production run useless.
Build extra time into first orders. Repeat orders are easier because the cutline, material, proof preferences, and package fit are already known. First runs still need decisions, and decisions are rarely as fast as the production calendar assumes.
Common artwork and ordering mistakes that create waste
Low-resolution artwork is the first offender. A logo pulled from a website header may be 600 pixels wide and look acceptable on a screen, but print with blurry edges or jagged curves at sticker size. Vector files such as AI, EPS, or print-ready PDF are preferred because the edges stay clean at any scale.
Missing bleed is the next expensive mistake. If a dark blue sticker is cut exactly on the artwork edge with no bleed, tiny shifts during cutting can leave thin white slivers. The darker the design, the more obvious the problem. A little extra image area beyond the cutline gives production room to work.
Text, borders, QR codes, and legal details should not sit too close to the edge. A QR code that loses quiet space may scan poorly. A border that is only 1/32 inch from the cut can look uneven even if the cutter is operating within normal tolerance. For small stickers under 2 inches, simplify the content. More words rarely make a tiny sticker better.
Overcomplicated shapes create waste in a different way. Tiny spikes, narrow gaps, fragile bridges, and interior cutouts can peel poorly or snag during packing. This is one of the most common screen-versus-reality problems in sticker buying: the design looks clever in a mockup, then the warehouse team struggles to apply it quickly. If the sticker must be hand-applied hundreds or thousands of times, peel speed matters.
Color expectations need management. RGB colors on a bright monitor do not always translate to CMYK print. Metallic effects shown on screen do not print as metallic unless metallic stock, foil, or special ink is specified. Uncalibrated monitors can make proofs look warmer, cooler, brighter, or duller than the final piece. For strict brand colors, ask about physical proofs, printed color targets, or acceptable tolerance before production starts.
Surface mismatch can undermine a technically good sticker. A permanent adhesive that performs well on a smooth coated box may fail on a dusty kraft mailer, oily bottle, or flexible pouch. If the sticker is used for retail packaging, compliance labels, tamper indication, or a product launch photo shoot, request a physical sample or pilot run before scaling up.
Quantity mistakes are quieter but costly. Ordering exactly 1,000 stickers for 1,000 units ignores application errors, damaged packaging, press checks, samples, replacements, and fulfillment extras. A 3% to 8% buffer is sensible for hand-applied stickers; more may be needed for new staff, tricky surfaces, or multi-location packing.
Next steps for preparing files and placing a smarter order
Start with the package, not the sticker. Measure the available space on the box, jar, pouch, insert, or mailer. Then decide whether the sticker is doing brand work, sealing work, information work, or promotional work. A sticker that looks huge on a laptop may look balanced on a 10-inch mailer and overwhelming on a 2-ounce jar.
Choose size based on packaging context. If the sticker is sealing tissue, a 1.5-inch to 2-inch shape may be enough. For a front-facing pouch accent, 2.5 to 3.5 inches may read better. For a shipping carton, larger marks can work, but only if they do not interfere with carrier labels, tape, handling marks, or required compliance information.
Prepare the cleanest file you can. Vector artwork is best for logos and flat illustrations. High-resolution raster files can work for photographic or painted artwork if they are large enough at final print size, ideally around 300 dpi. Outline fonts, embed linked images, include bleed, and keep critical details inside the safe zone. Create a separate cutline layer and name it clearly, such as “Cutline.” A visible spot color helps production separate printing instructions from cutting instructions.
If you are unsure about adhesive, scale, or placement, include photos or dimensions of the packaging surface. A straight-on image of the box panel or jar, plus width and height measurements, can prevent awkward sizing. For broader packaging programs, reviewing related Custom Packaging Products at the same time can also help keep labels, cartons, inserts, and seals visually aligned.
- Confirm the surface: corrugated board, coated carton, glass, plastic, kraft paper, pouch film, or tissue.
- Measure the space: use real package dimensions, not only a digital mockup.
- Pick the finish: matte for legibility, gloss for color pop, clear for minimalism, specialty film for promotion.
- Allow a buffer: add extras for application errors, samples, warehouse damage, and customer service replacements.
- Review sustainability claims: if using paper stocks, ask about certified sources such as FSC materials rather than relying on vague “eco” language.
Before ordering die cut custom stickers, confirm the surface, size, material, cutline, proof, and delivery date. Those six checks separate a sticker that looks deliberate on finished product packaging from one that feels improvised five minutes before launch.
FAQ
What are die cut custom stickers used for in packaging?
Die cut custom stickers are used for box branding, mailer seals, product labels, promotional inserts, limited-edition packaging, and unboxing details. They work best when the sticker shape reinforces the logo, product icon, flavor cue, or campaign artwork. They can also upgrade plain packaging without requiring a full custom box print run.
Are die cut stickers different from kiss cut stickers?
Yes. Die cut stickers are cut through the sticker and backing to the final outer shape. Kiss cut stickers are cut through the sticker layer only, leaving a larger backing sheet around the design. Kiss cut formats can be easier to peel for small or delicate shapes, while die cut formats often look more finished as giveaways or packaging accents.
How much do custom shaped stickers cost?
Cost depends on size, quantity, material, adhesive, finish, cut complexity, artwork setup, and shipping. Higher quantities usually reduce unit cost because setup and handling are spread across more stickers. The most accurate quote includes final dimensions, artwork, use environment, finish preference, and delivery deadline.
What file type is best for die cut custom sticker printing?
Vector files such as AI, EPS, or print-ready PDF are usually best because they keep edges clean at any size. High-resolution PNG or TIFF files may work for raster artwork if they are large enough for the final print size. A separate cutline layer, outlined fonts, embedded images, bleed, and safe margins help prevent proofing delays.
How long does it take to produce die cut logo stickers?
The timeline usually includes quote review, artwork proofing, approval, printing, cutting, quality control, packing, and shipping. Production time typically begins after proof approval, not after the first quote request. Rush timelines are easier when artwork is print-ready, materials are standard, and the shape is not unusually complex.


