Order Stickers Custom Shape for Standout Packaging
A sticker can be tiny and still become the most annoying part of your packaging day. That is the odd truth behind many stickers custom shape projects: the idea looks simple on screen, then turns expensive if the outline fights the package surface, slows application, or starts peeling before the product reaches the customer.
The real question is not “Can this be cut into any shape?” Most suppliers can cut a surprising range of outlines now. The better question is less glamorous: will the shape apply cleanly, protect the artwork, survive handling, and support the brand cue you are paying for?
What Stickers Custom Shape Really Means for Packaging
Stickers custom shape usually refers to labels cut to a unique outline instead of a standard circle, square, rectangle, or oval. The cut might follow a logo, product silhouette, seasonal graphic, badge, mascot, seal, or icon designed for retail packaging. Production may use kiss-cut, die-cut, or digital contour-cut equipment depending on order size, material, and final format.
Here is the detail buyers often miss: the printed artwork shape and the cutline shape are not automatically the same thing. The artwork is what the customer sees. The cutline is the manufacturing instruction that tells the cutter where the edge will be. If that cutline hugs tiny letters, sharp leaf tips, thin strokes, or decorative flourishes too closely, the finished sticker can look rougher than the proof.
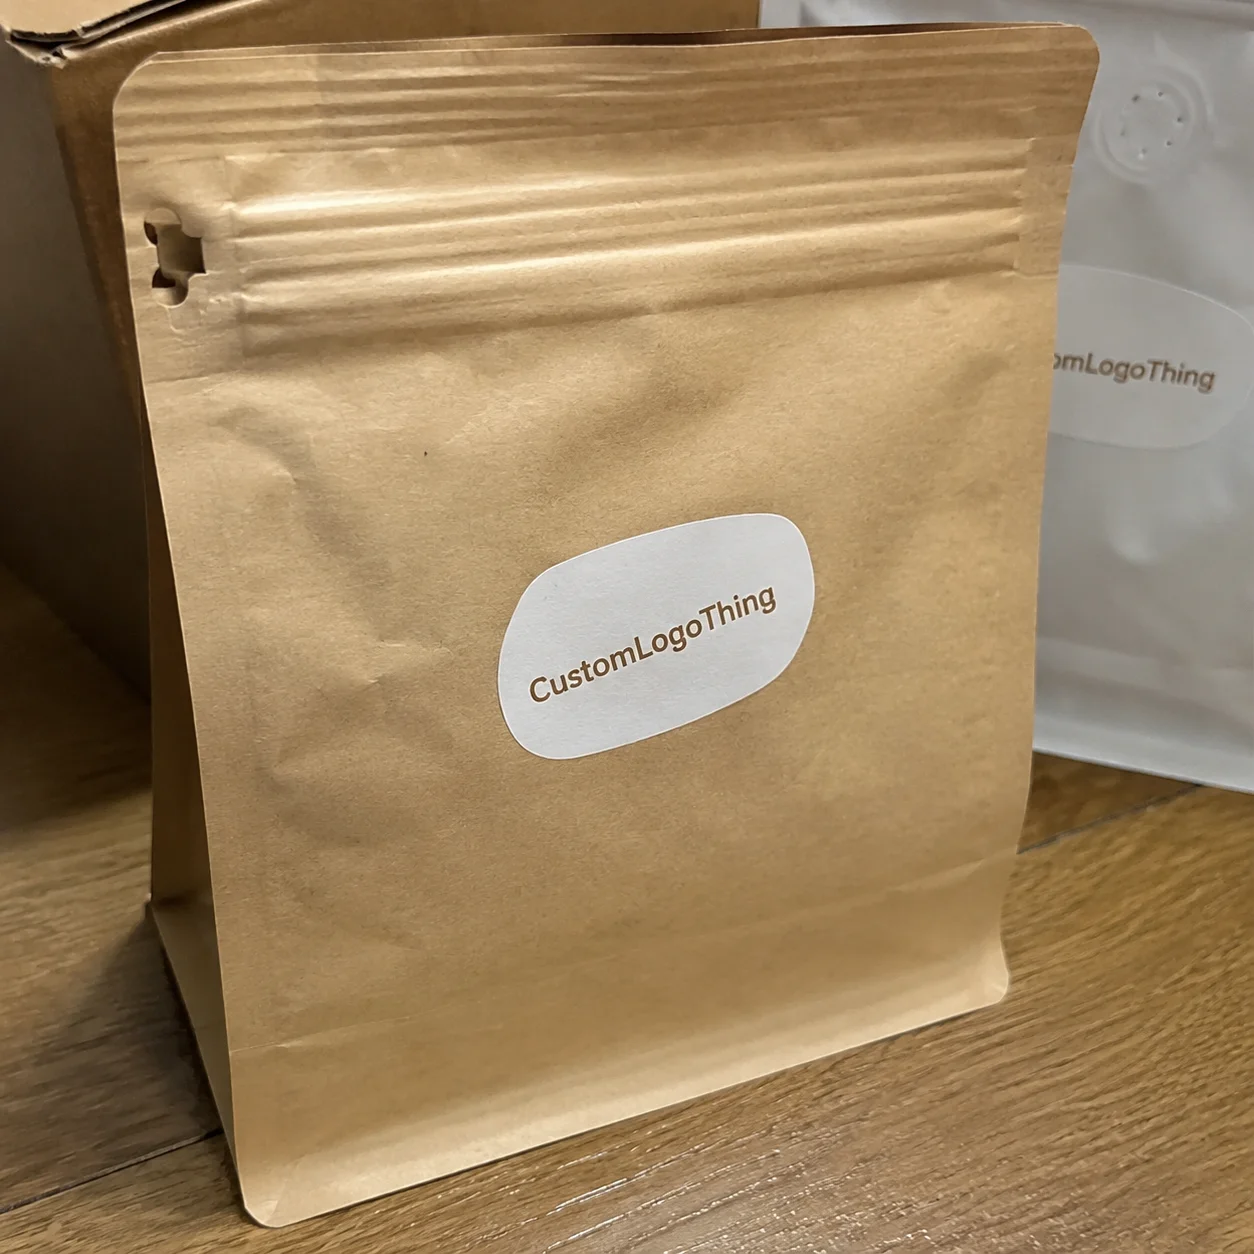
Custom shapes create obvious value on jars, bakery boxes, mailers, candle packaging, cosmetics, event kits, subscription boxes, retail seals, and product inserts. A honey brand may use a hexagon because it hints at honeycomb. A candle company may use a soft arch because it feels warmer than a square. A coffee roaster may use an irregular bean outline to make a small label feel intentional instead of improvised.
Shape affects recognition. On a crowded shelf, silhouette can work almost like color. But detail has a cost. A complex outline can weaken corners, create peel-prone points, slow the cutting pass, and increase waste during weeding or quality checks.
This is where packaging teams often get too optimistic. They design for the screen first, then remember a real sticker has edges, adhesive, release liner, tolerances, and human hands involved. Rude, but true.
Packaging reality check: a custom outline should make the product easier to recognize, not harder to apply. If the packing team needs 20 extra seconds per unit to align it, the design has created a labor cost.
How Custom Die-Cut and Kiss-Cut Sticker Production Steps Work
A typical custom sticker order moves through artwork upload, file review, proofing, material selection, printing, cutting, finishing, quality control, packing, and shipment. On short runs, that can move quickly if the file is clean. On larger runs, especially those with lamination, white ink, specialty film, or strict color matching, each stage adds another chance for delay.
Kiss-cut stickers are cut through the top sticker layer while the backing paper remains intact. They are easier to peel, especially when the sticker is small, fragile, or grouped on sheets. If five shapes need to sit together on one backing sheet for event packaging or product inserts, kiss-cut is often the calmer choice.
Die-cut stickers are cut through both the sticker material and the backing, so the whole piece follows the final custom outline. They feel more finished in the hand. That makes them popular for promotional giveaways, retail inserts, influencer mailers, and premium packaging where the sticker itself is part of the presentation.
Digital contour cutting is common for short and medium runs because it allows flexible shapes without dedicated metal tooling. Traditional dies still matter for larger repeat orders where the same shape runs thousands or tens of thousands of times. Tooling is not always expensive enough to kill a project, but it belongs in the quote conversation if the shape will repeat across many batches.
Proofing language matters. Before production starts, check the bleed, safe zone, cutline, border thickness, corner radius, and expected cutting tolerance. Many suppliers work around a tolerance near 1/16 inch, though that varies by equipment, material, and shape complexity. The printer handles color. The cutter behaves more like a route planner. Sharp turns, tiny gaps, and thin bridges make the route harder to follow accurately.
If your sticker is part of a broader branded packaging system, match the file requirements to the rest of your printed pieces. A jar label, box seal, and card insert may all need the same logo color, but each may require a different material, coating, and adhesive. Custom Logo Things also offers Custom Labels & Tags for buyers building a more complete packaging set.
Key Design Specs That Make Irregular Sticker Shapes Work
Good custom shapes usually look simpler than the original sketch. That is not a failure. It is production discipline.
A sticker with an intentional white or colored border often looks cleaner after cutting than artwork that relies on edge-to-edge micro details. For many small labels, a border of at least 1/8 inch gives the shape breathing room and helps hide tiny cut variation. Borderless designs can still work, but they need proper bleed and realistic expectations.
Bleed is the extra artwork that extends outside the cutline. It prevents an unwanted white sliver from appearing if the cutter shifts slightly. A common bleed allowance is 0.0625 to 0.125 inch, but the final requirement depends on the supplier and equipment. Safe zone works in the opposite direction: keep text, icons, QR codes, and key logo details inside the cutline so nothing important gets trimmed.
Fragile protrusions are the enemy. Hairline points, deep notches, tiny islands, and skinny bridges can lift during application, trap dust, or tear when the sticker is peeled from the liner. A leaf outline can be beautiful. A leaf outline with 28 sharp serrations may be a production nuisance. For custom shape stickers used on retail packaging, a softened interpretation usually beats a literal, highly detailed cut path.
Surface compatibility deserves the same attention as the artwork. A curved bottle creates different stress than a flat bakery box. Textured paperboard behaves differently from a coated cosmetic carton. Compostable mailers, chilled products, oily jars, waxed surfaces, and bathroom items may need adhesive upgrades. If the product is refrigerated, exposed to condensation, or handled frequently, basic paper stock may not be enough.
- Paper: economical and clean for dry, indoor, short-life packaging.
- BOPP film: strong for food, beverage, bath, and moisture-prone product packaging.
- Vinyl: durable for outdoor, promotional, or high-friction uses.
- Clear film: useful for a “printed-on” look, but white ink planning is critical.
- Kraft paper: warm and natural, though colors appear more muted.
- Holographic stock: bold for limited drops, cosmetics, events, and collectible packaging.
Finish changes perception and performance. Gloss laminate boosts contrast and makes colors look sharper. Matte laminate reduces glare in photography and often feels more premium on cosmetics, candles, and specialty foods. Writable finishes matter for batch codes, dates, or handwritten personalization. Clear stickers need a white ink layer behind light colors; otherwise, the package color shows through and can flatten the design.
Size needs context. A 2-inch sticker can feel bold on a lip balm box and almost invisible on a large shipping mailer. Test the sticker at actual size before approving the proof. Print it on office paper, cut it out roughly, and place it on the box, jar, pouch, or bottle. Primitive? Yes. Useful? Also yes.
Cost, Pricing, and MOQ Factors Buyers Should Compare
Sticker pricing is usually driven by size, shape complexity, material, finish, order quantity, printing method, cutting method, proofing needs, and shipping speed. A simple 2-inch paper sticker on sheets will price differently from a 4-inch clear BOPP label with white ink, gloss laminate, and a complex contour cut. No surprise there.
Unit cost falls as quantity rises because setup, proofing, calibration, file handling, material staging, and packing labor are spread across more pieces. A short test run might cost $0.35 to $0.80 per sticker depending on specs. A larger run of 5,000 simple custom shapes might land closer to $0.08 to $0.22 per unit. Specialty materials, white ink, rush service, and individually die-cut presentation can push costs higher.
Minimum order quantity, or MOQ, should be treated as a planning tool rather than an obstacle. Low minimums are useful for launches, seasonal packaging, pop-ups, influencer kits, or early SKU testing. Larger runs make sense for stable SKUs where the size, material, artwork, and package surface are already proven. If you are still testing a chilled bottle, waxed box, or flexible pouch, order fewer first.
Standard shapes are not always dramatically cheaper than custom outlines, especially with digital cutting. The gap appears when the shape becomes intricate, the waste between stickers increases, or the cutting speed drops. A rounded cloud may be easy. A snowflake with tiny points may require slower cutting, careful weeding, and more quality checks.
| Option | Typical Use | Cost Impact | Buyer Watchout |
|---|---|---|---|
| Kiss-cut sheets | Small labels, sticker packs, event inserts | Often economical for grouped shapes | Backing sheet size affects packing and application |
| Individually die-cut pieces | Giveaways, premium inserts, retail handouts | Moderate to higher due to full-shape finishing | Very detailed edges can bend in transit |
| Roll labels | Higher-volume product labeling | Efficient for repeat application | Roll direction and core size must fit applicators |
| Clear film with white ink | Glass jars, bottles, cosmetic packaging | Higher than standard paper | White ink areas must be specified clearly |
| Laminated BOPP | Moisture, handling, bath, and food packaging | Moderate upgrade | Adhesive must match temperature and surface |
Hidden quote variables matter. Ask whether pricing assumes rolls or sheets, individual pieces or sticker sheets, standard adhesive or upgraded adhesive, matte or gloss lamination, white ink, and specialty materials. Clarify whether file cleanup is included. Ten minutes of art adjustment may be absorbed. Rebuilding a logo and cutline from a low-resolution screenshot probably will not be.
Do not compare only the sticker price. A cheap sticker that peels off refrigerated packaging, jams an applicator, or arrives two days after a retail delivery appointment is not cheap. Packaging cost has a nasty habit of moving: what you save on the label can reappear as labor, waste, returns, or missed shelf time. For broader planning across boxes, labels, and inserts, review related Custom Packaging Products before locking the sticker spec in isolation.
Step-by-Step Guide to Ordering a Custom Shape Sticker
Start with the application. Is the sticker sealing a box, branding a jar, labeling a candle, decorating a mailer, supporting a promotion, carrying compliance information, or acting as a retail insert? A seal needs different thinking than a giveaway. A compliance label needs readability first. A decorative sticker can tolerate more drama.
- Measure the package surface. Check width, height, curves, seams, lid edges, folds, and textured areas. A 3-inch label may fit on a flat panel but wrinkle around a tapered jar.
- Choose the size in context. Test at actual size against the product. For custom printed boxes, consider how the sticker interacts with folds, tape lines, and existing graphics.
- Prepare artwork properly. Provide a clear cutline layer, bleed, safe zone, and notes about borders, transparent areas, foil effects, or laminate preferences.
- Select material and adhesive. Match the environment: indoor, outdoor, freezer, bathroom, shipping, retail shelf, food-adjacent, or short-term event use.
- Choose the format. Rolls work well for repeat application. Sheets are practical for mixed shapes. Individually cut pieces feel more premium for inserts and handouts.
- Submit complete order details. Include quantity, size, finish, delivery deadline, shipping location, and whether the stickers will be machine-applied or hand-applied.
- Review the proof slowly. Check spelling, color expectations, cutline placement, barcode readability, border consistency, and weak points in the outline.
Approve production only after confirming the in-hand date, shipping method, and any assumptions about file cleanup or color matching. For regulated or scannable packaging, barcodes and QR codes should be checked at final print size. A code that scans on a monitor can fail after shrinkage, matte coating, or placement on a curve.
There is also a sustainability angle. If FSC-certified paper stock matters to your brand, ask about chain-of-custody options and documentation. The Forest Stewardship Council explains certification principles for responsibly sourced forest products. Not every sticker material will qualify, and adhesive plus liner waste still need consideration, but the conversation is worth having early.
Timeline and Lead Time: What Can Speed Up or Slow Down Orders
A normal production timeline includes file review, proof creation, proof approval, material preparation, printing, cutting, finishing, quality control, packing, and transit. Depending on complexity, small clean orders may move in a few business days after proof approval, while more involved orders often need 7 to 15 business days plus shipping. Large quantities and specialty materials can take longer.
Proof approval is the buyer-controlled bottleneck. A same-day approval can protect the schedule. Two rounds of revisions can reset it. If five people need to approve the label, assign one person to consolidate comments before sending changes back. Production teams need clear decisions, not a chain of conflicting screenshots.
Fast-lane conditions are predictable: print-ready vector artwork, a simple cutline, common material, standard finish, realistic quantity, and no unusual adhesive testing. Delay triggers are just as predictable: low-resolution artwork, unclear cutlines, missing bleed, specialty stock, color-match requests, complex shapes, large volumes, and carrier congestion around peak shipping periods.
Rush production can compress queue time, but it cannot remove physics. Ink still needs proper handling. Lamination still needs alignment. Cutters still need accuracy. Carriers still need transit time. If a supplier promises impossible speed on a complex custom shape with special material, ask what is being skipped or what risk is being accepted.
For product launches, order samples or a small pilot batch before a major run, especially if the package surface is new. This is not just caution. It is cheaper data. A pilot can reveal whether the adhesive lifts on a textured mailer, whether the border looks uneven after cutting, or whether the sticker wrinkles on a curved bottle.
Work backward from the launch, pop-up, shipment date, or retail delivery appointment. Do not work forward from the day the order is placed. If a retailer expects product by Friday, the relevant date is not ship date; it is arrival date, with buffer for receiving, inspection, and rework if something goes wrong. Standards such as ISTA test procedures are a useful reminder that packaging lives through distribution, not just photography.
Common Mistakes and Next Steps Before You Send Artwork
The first mistake is using a beautiful logo shape that turns into a fragile cut path. Tiny islands, sharp points, narrow bridges, and peel-prone edges may look clever on the artboard, then fail during peeling or application. Simplify before production forces the issue.
The second mistake is forgetting that stickers are handled by real people. A warehouse associate, bakery worker, fulfillment temp, retail staffer, or customer has to peel, align, and apply the piece. If the shape is hard to hold or the backing is hard to separate, the design slows down the packing line. Multiply 12 seconds of extra handling by 2,000 units and you have more than six and a half labor hours.
The third mistake is choosing material by appearance alone. A matte kraft sticker may look perfect for natural package branding, but it may not survive moisture or abrasion. A clear film may look premium on glass, but without white ink, pale colors can disappear. An adhesive that works on a smooth carton may struggle on a waxy pouch or chilled jar.
The fourth mistake is approving the proof too quickly. Zoom in on the cutline. Check bleed. Read every word. Confirm the barcode position. Look at border consistency around the entire shape. If the design uses a stroke around the edge, make sure it is thick enough to tolerate minor cutting variation.
- Measure the application area in inches or millimeters, not by eye.
- Photograph the actual package surface, including curves, seams, and texture.
- Choose two or three quantity ranges for quoting, such as 250, 1,000, and 5,000 pieces.
- Decide whether rolls, sheets, or individually cut stickers fit the packing process.
- Prepare vector artwork if possible, with bleed, safe zone, and cutline separated clearly.
Before sending files, ask the supplier three practical questions. What material fits this surface? What shape details could fail? What change would lower unit cost without weakening the design? Those answers reveal more than a price list because they connect packaging design, production speed, and application reality.
Stickers custom shape can make branded packaging feel sharper, more specific, and more memorable, but only when the shape behaves like a package component rather than a decoration pasted on at the end. Confirm the size, surface, cutline, material, quantity, and deadline before the order moves forward. Design ambition is useful. Production friction is not.
FAQs
What are stickers custom shape used for most often?
They are commonly used for product labels, packaging seals, promotional giveaways, Jar and Bottle branding, candle labels, bakery boxes, mailers, and event packaging. They work best when the shape reinforces the brand or product, such as a leaf outline for natural goods or a flame shape for candles.
Are custom shape stickers more expensive than standard stickers?
They can cost more when the outline is complex, the material is specialty stock, or the order requires extra proofing and cutting time. Simple custom outlines in higher quantities may be close in price to standard shapes because setup costs are spread across more units.
What file type is best for custom shaped stickers?
Vector files such as AI, EPS, or print-ready PDF are usually best because they keep artwork and cutlines sharp at production size. If using PNG or JPG artwork, provide the highest resolution available and ask whether the supplier can create a clean cutline.
Should I order die-cut or kiss-cut custom stickers?
Choose die-cut stickers when you want each piece to follow the final shape, especially for giveaways, inserts, and premium brand presentation. Choose kiss-cut stickers when easy peeling matters, or when several shapes should be grouped on one sheet.
How long do stickers in custom shapes take to produce?
Lead time depends on proof approval, quantity, material availability, cut complexity, finishing, and shipping distance. Orders move faster when artwork is print-ready, the cutline is simple, the material is common, and the proof is approved quickly.


