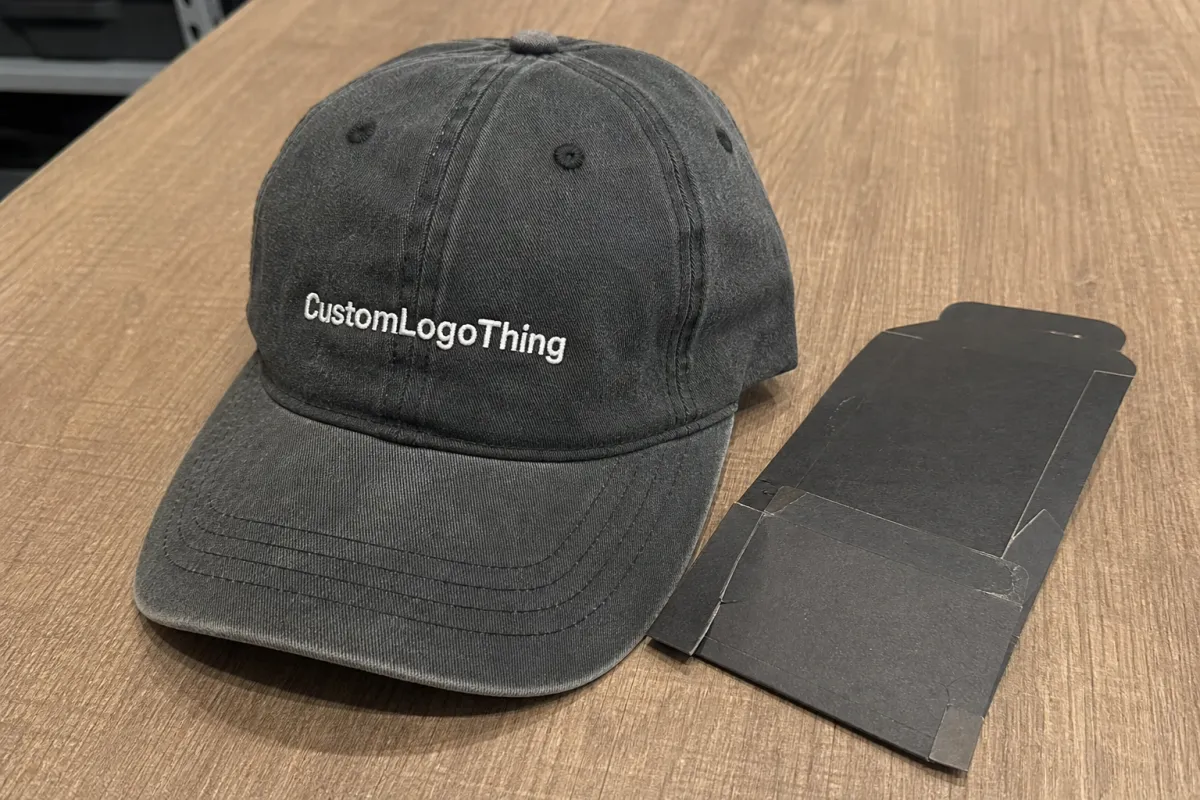
Order Vitamin Unstructured Dad Hats Digital Proof Checklist
Use this checklist to catch fit, logo, and color issues before production, and avoid paying for a reprint that should have been caught in proofing.
Why the proof matters on soft, low-profile dad hats
Soft dad hats are comfortable because they do not hold their shape like a structured cap. That same softness makes them harder to judge from a screen. The crown flexes, the front panel shifts, and a logo that looked centered in a mockup can land a few millimeters off once it is stitched onto fabric. That is why a proof should confirm the build, not just the look.
Unstructured caps behave differently from truckers or stiff five-panels. A cotton twill crown can shift during handling, and washed blanks can relax even more. On a low-profile hat, those small changes affect whether the logo feels balanced or crowded. A design that is too high can look like it is floating; one that is too wide can wrap awkwardly across the front panel.
The proof needs to lock down the basics: logo size, placement, decoration method, thread colors, label details, closure type, and any wash treatment. If those items are not visible, the approval is incomplete. Buyers usually remember the front artwork first, but the production team is building the whole cap, not just the hero image.
Blank choice matters too. Standard cotton twill, brushed chino cotton, and garment-washed finishes all behave differently under embroidery. A cleaner blank tends to hold edges better, while a softer wash can look more broken-in but shift more under stitch tension. If the hat is meant to feel premium, that tradeoff should be visible in the proof before the order is locked.
"Approve the build, not the picture."
That rule matters most when the order needs precision. Fine text, narrow spacing, or a seam-crossing logo can still look fine in a digital mockup and fail in production. The proof is there to catch that gap before it turns into stock you cannot sell easily.
How the proof checklist works before you print
The workflow is simple: send the artwork, receive a digital proof, check the notes, request revisions if needed, then approve. The proof only helps if it shows enough detail to make a real production decision. A polished image is not enough if it hides seam position, stitch style, or decoration scale.
A proper proof should show the hat angle, decoration area, logo placement, and any special instructions tied to the order. For embroidery, look for thread colors, stitch method, and whether the artwork needs cleanup before digitizing. If the cap uses a woven patch, leather patch, or appliqued badge, the proof should show patch size, border shape, and edge finish. Side or back placements should be shown too if they are part of the order.
Ask for missing details instead of guessing. It is better to receive one slightly over-explained proof than to approve a version that leaves seam alignment or placement undefined. On a soft crown, “close enough” can turn into a visible shift once the hat is sewn and packed.
Do not confuse a digital proof with a lifestyle mockup. A mockup sells the aesthetic; a proof defines the job. The proof should tell you what can actually be made on that blank, in that quantity, with that decoration method. That distinction matters most when the artwork includes thin lines, tiny type, gradients, or small outlined elements that may need simplification for embroidery.
Vector art helps, but production-ready art matters more. If the proof shows your original file without any production notes, ask for a revised version. Small fixes before approval are easier than solving thread breaks, bulky fills, or unreadable lettering after the order is already in queue.
Check for these items in the proof:
- Logo size and placement relative to the front seam
- Thread colors with readable color notes, not vague swatches
- Stitch method, patch type, or print method
- Fabric color, wash style, and closure type
- Back, side, or inside-label details if they are part of the order
Fit, stitch, and artwork factors that change the result
Crown shape changes placement
Unstructured crowns sit lower and softer, which is part of the appeal. They also give the logo less support. On a dad hat, a design usually needs a little more horizontal room and a slightly lower placement so it does not look perched on top of the cap. If the mark sits too high, the hat can feel top-heavy even when the blank is relaxed.
Stitch density changes texture
Heavy fill stitching can pucker lightweight cotton or washed twill, especially on a front panel with less support. If a proof shows a dense block of embroidery, ask whether the artwork can be simplified. Split fill, satin outline, or a smaller coverage area often gives a cleaner result than forcing a thick stitch count into soft fabric. On unstructured caps, less thread can produce a sharper finish.
Seams and fine detail are where good designs go sideways
Center seams are a common issue because the needle path can split letters or shift the middle of the design. Small text has the same problem. Anything around 0.2 inch letter height or smaller is risky for embroidery, and thin strokes can disappear once stitch tension pulls into the fabric. If the art depends on delicate detail, a woven patch or simplified embroidered version is usually the safer choice.
Material specs also change the result more than many buyers expect. Most custom Unstructured Dad Hats use cotton twill, chino cotton, or a washed cotton blend. Fabric weight, sweatband quality, and closure style all affect the hand feel. A front logo can look fine in proofing and still feel underbuilt if the crown is too flimsy or the hardware is cheap. The front decoration matters, but the blank determines whether the finished cap feels retail-ready.
If the order is meant for a premium program, ask about inside details too. A soft sweatband, clean taping, and a metal slide buckle generally feel more finished than a low-grade snap closure. Those parts do not always stand out in the hero image, but buyers notice them when they compare samples. The proof checklist should cover them because they affect perceived value.
If the art needs cleanup, do it before approval. Slight simplification is often the right move when a logo has thin strokes, tight spacing, or tiny copy. A machine-friendly version that stitches cleanly is better than a perfect file that creates bulky fills, broken threads, or unreadable letters.
Process and timeline: from proof file to production slot
Most orders follow the same path: artwork review, proof creation, revision if needed, final approval, production, then packing and shipment. The timeline is only fast when the proof is straightforward and the order stays close to standard decoration. Add custom labels, distressing, garment wash, or several thread colors, and the schedule becomes less predictable.
For a simple hat run, proof turnaround is often 24 to 72 hours. Production after approval commonly falls in the 10 to 15 business day range for standard embroidery. Patch work, specialty finishing, or more involved pack-outs can push that closer to 15 to 20 business days. Small runs may move faster in the proof stage but slower on unit cost because setup is spread across fewer hats.
That is why internal review needs to be tight. If the proof sits in email for three days while several people comment on it, the ship date moves even if nobody changed the production schedule. Once a queue fills, the next open window may be a week later than expected.
If the order will ship in cartons or mailers, ask about packaging durability and transit handling. Standard cartons are usually enough for domestic freight, but retail-ready mailers, insert cards, and hang tags need more planning. FSC-certified paper can matter if the brand has a sourcing policy, and packaging can affect how a soft cap arrives after time in transit.
Approval is the point where the calendar becomes real. Before you sign off, confirm whether the production queue is locked, whether revisions reset the slot, and whether shipping starts from approval or from completion. That one detail can decide whether a launch lands on time or slips into the next week.
Cost, MOQ, and unit cost drivers to price correctly
The quote on a dad hat usually comes down to five things: blank quality, decoration method, stitch count, customization level, and quantity. A basic embroidered front logo on a standard cotton unstructured hat is one price. A washed cap with a woven patch, custom inside label, and branded packaging is another. If a supplier gives a single number without explaining those variables, the quote is hiding the real work.
For common custom runs, these ranges are a practical starting point:
| Option | Typical quantity | Typical unit range | What drives the price |
|---|---|---|---|
| Simple front embroidery | 100-300 pcs | $5.50-$8.50 | Thread count, logo size, blank quality |
| Patch + embroidery combo | 100-300 pcs | $7.50-$11.50 | Patch type, border detail, extra setup |
| Premium washed blank | 100-500 pcs | $6.90-$10.75 | Fabric finish, crown shape, closure style |
| Small test run | Under 50 pcs | $9.00-$16.00 | Setup spread, digitizing, limited efficiency |
These are wholesale ranges, not fixed rules. Supplier class, decoration area, packaging, and shipment terms can move the number in either direction. They are still more useful than assuming every custom dad hat should cost the same.
Watch the extras. Digitizing often adds $25-$65, depending on complexity. Extra proof revisions may be included, or they may carry a small fee if the art keeps changing. Special labels, hang tags, and custom polybag inserts can add per-unit charges that look minor until the order reaches a few hundred pieces.
MOQ matters because setup costs get spread across fewer hats when quantities are low. A small minimum order can be convenient, but it usually raises unit cost. In many cases, the cheapest-looking order is the one with the weakest spec sheet. Compare the blank, decoration method, and packing line by line before comparing the final price.
If budget is tight, cut the right items first. Reduce decoration locations, simplify the patch structure, or drop custom inserts before dropping blank quality. A better cap body often protects the finished look more than a fancier box does.
Common mistakes that wreck approval on unstructured caps
Most failed approvals are small mistakes that stack up. The proof looked fine on a phone. Nobody checked seam position. The thread color seemed close enough on screen. The team assumed the blank matched a previous order. Then the hats arrived, and the problem became a real cost.
- Approving on a small screen. Fine detail disappears quickly, especially on low-contrast logos and small type.
- Ignoring the notes. If the proof calls out seam overlap, color shift, or changed placement, that is the part that matters.
- Assuming the blank stayed the same. Fabric weight, crown height, and closure style can all change the final look.
- Skipping side and back views. If the order includes a side mark, back label, or inside tag, inspect it before approval.
- Leaving artwork cleanup until after approval. Once the proof is signed off, edits get slower and more expensive.
Another common mistake is treating a proof as a formality because the design is “simple.” Simple designs still fail if the logo sits too high, the crown collapses under embroidery, or the thread color disappears into the fabric. Minimal does not mean automatic.
It is also easy to miss a mismatch between the proof and the spec sheet. The logo may be correct while the closure, wash finish, or label type is wrong. That is how an order gets approved with the wrong build and no one notices until cartons are opened. By then, the mistake has already turned into inventory you did not plan for.
Quick rule: if one detail is unclear, stop and ask for a revision. One more proof usually costs far less than fixing a finished run.
Expert checks and next steps before you approve
Use this as the final pass before approval. If any item is off, the proof is not ready.
- Logo placement is centered and measured from the seam, not eyeballed.
- Thread colors match the brand spec, not just the screen rendering.
- Stitch method fits the artwork, especially on small text and thin lines.
- Fabric color, wash finish, and closure type match the order sheet.
- Inside labels, side marks, or back placements are correct if included.
- Production quantity, ship window, and packing method are confirmed.
If the art is dense, ask for a second view or a closer crop of the decoration area. Full mockups can hide spacing issues, stitch collisions, and placement drift. On a soft crown, small misalignments usually look larger in hand than they do on screen.
For launch orders, set the approval deadline before the proof arrives. One internal approver is ideal. Three approvers and a group chat can turn a 24-hour review into a three-day delay.
Keep the spec sheet in the same thread as the proof. Separate emails are where people lose track of changes. If a revision was requested, make sure the updated file matches every note from the last round. The safest approval is the one that closes the loop cleanly.
Use the vitamin unstructured dad hats Digital Proof Checklist as a gate, not a suggestion box. When the proof is fully checked, approve it and move on. That is the cleanest way to avoid a headache and end up with hats that match the order instead of the mood board.
What should I check first in a vitamin unstructured dad hats digital proof checklist?
Check logo placement first, because crown shape and seam position change where the design sits. Then verify thread colors, stitch style, and any notes about fabric, closure, or labels. If any of those are missing, ask for a revised proof before approving.
How many proof revisions are normal for custom dad hats?
One revision round is common for clean artwork and standard decoration. Two rounds are normal if the logo needs resizing, seam adjustment, or thread color cleanup. More than that usually means the artwork file or spec sheet was not locked early enough.
Do unstructured dad hats need different artwork than structured caps?
Yes. Soft crowns bend and shift, so artwork usually needs more breathing room and a lower placement. Thin lines and tiny text are riskier because embroidery can distort them on flexible panels. A proof should reflect the actual hat shape, not a generic cap template.
What affects the price most on a dad hat proof order?
Stitch count, decoration method, and customization level are the biggest cost drivers. Low quantities raise unit cost because setup fees get spread across fewer hats. Extra labels, special packing, and sample revisions can also push the price up.
How long does approval and production usually take after the proof?
Proof turnaround is often quick, but production starts only after final approval. Standard runs move faster than custom finishes, complex embroidery, or special packaging. If your launch date matters, confirm the queue and shipping timeline before you approve.

