Buyer Fit Snapshot
| Best fit | packaging printing practices what for packaging buyers comparing material specs, print proof, MOQ, unit cost, freight, and repeat-order risk where brand print, material, artwork control, and repeat-order consistency matter. |
|---|---|
| Quote inputs | Share finished size, material target, print colors, finish, packing count, annual reorder estimate, and delivery region. |
| Proofing check | Approve dieline scale, logo placement, barcode or warning zones, color tolerance, and any recyclable or compostable wording before bulk production. |
| Main risk | Vague material claims, crowded artwork, or missing packing details can create delays even when the unit price looks attractive. |
Fast answer: Packaging Printing Practices What: Material, Print, MOQ, and Cost should be specified like a repeatable production item. The safest quote includes material, print method, finish, artwork proof, carton packing, and reorder notes in one written spec.
What to confirm before approving the packaging proof
Check the product dimensions against the actual filled item, not only the sales mockup. Ask for tolerance on folds, seals, hang holes, label areas, and retail display edges. If the package carries a logo, QR code, warning copy, or legal claim, reserve that space before decorative graphics fill the panel.
How to compare quotes without losing quality
Compare board or film grade, print process, finish, sampling route, tooling charges, carton quantity, and freight assumptions side by side. A lower quote is only useful if the supplier can repeat the same color, closure quality, and packing count on the next order.
A premium mockup can look flawless at 300% zoom and still print like a bargain flyer the day it hits press. That gap is why packaging printing best practices matter more than polished visuals alone.
Production exposes everything. Strong package branding, careful packaging design, and a tidy vendor shortlist still fall apart if packaging printing best practices are treated like a nice-to-have. I have seen a beautiful carton fail for one simple reason: the artwork was approved on the wrong stock, and the ink was gonna behave differently the moment it met a warmer, more absorbent board.
In one line: high-quality package outcomes are often decided in design software and preflight checks, not at the press. That is the practical side of packaging printing best practices, and it is usually the first thing retailers, manufacturers, and startup founders agree on after two or three launches go sideways.
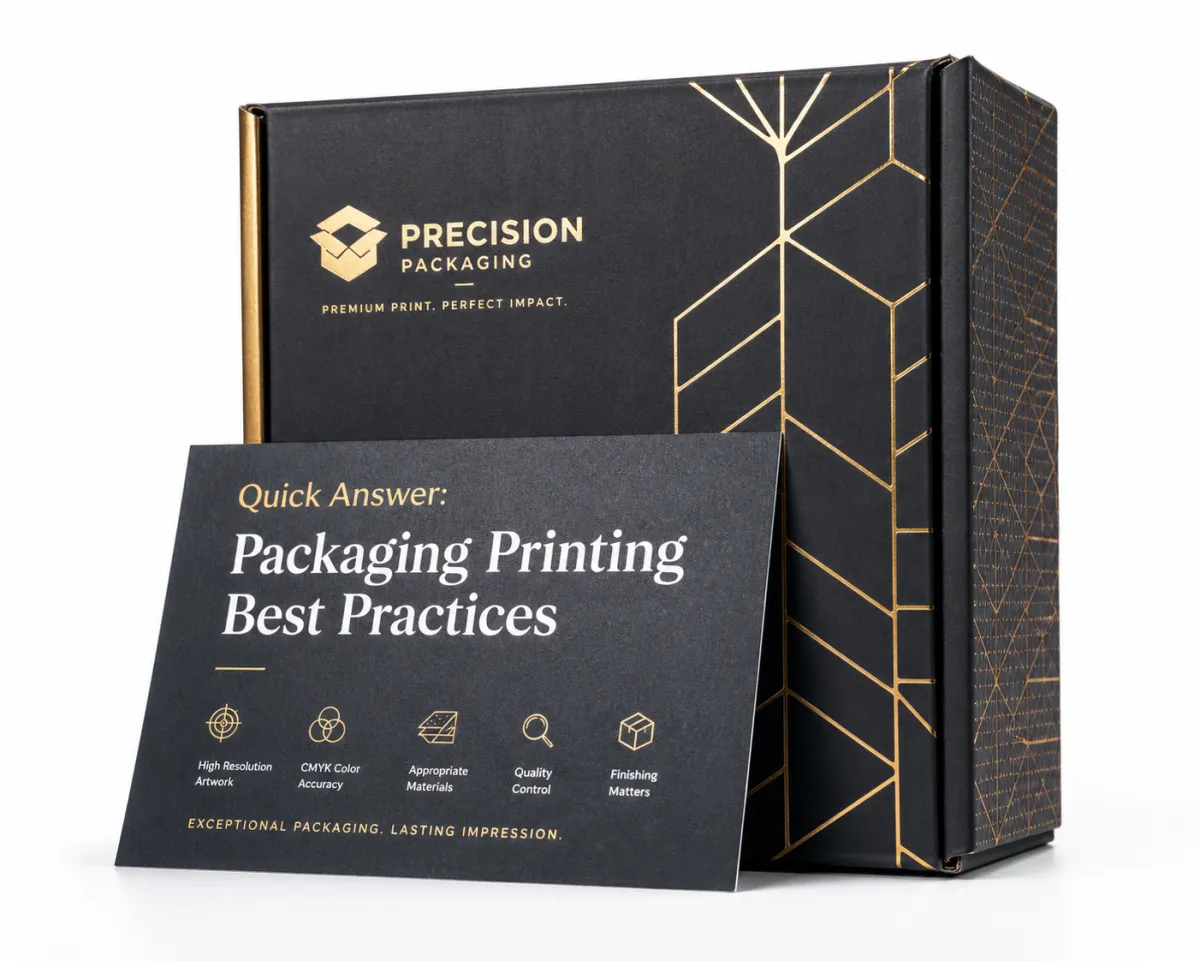
Quick Answer: Packaging Printing Best Practices
Why the shiny box in mockups failed on press
The same story keeps repeating. A brand signs off on a beautiful carton on screen, then the first proof lands soft, muddy, and uneven. The file was built for digital viewing, with gradients and spot-color shifts tuned to a backlit monitor. The actual board came from a different mill, with more absorbency and a warmer base tone. The printer had very little room to recover because the approved art was already locked. That chain reaction is why packaging printing best practices begin before art direction and well before a press run.
The strongest results rarely come from the lowest quote or the fastest method. They come from matching print method to product packaging substrate, quantity, and brand-color tolerance. A brand with strict color targets for labels and cartons should plan for that requirement from the first brief, not after the proof arrives.
For teams deciding quickly, this is a useful shortcut: if your colors live on the edge of a narrow tolerance band, build a print-ready artwork gate early. If your design changes weekly, build for agility. That distinction usually separates a smooth run from a late one.
- Failure point 1: weak prepress and incomplete press-ready files. Missing fonts, absent links, or vague color profiles usually lead to avoidable quality loss.
- Failure point 2: poor contrast on textured stock. Matte kraft can swallow fine detail and flatten pale tones, which shows up often on uncoated substrates.
- Failure point 3: bleed mistakes. A white gap under 3 mm, or clipped artwork near folds, can ruin the edge before binding starts.
- Failure point 4: ignoring coating shifts. Gloss varnish can nudge a spot color enough to matter in side-by-side comparisons, especially on reds and deep blues.
- Failure point 5: no shared color management profile between supplier and brand team, which creates drift between soft proof and production.
What this review format is promising
This is not a polite checklist that praises every shiny finish. It is a commercial review from buyer side to press side: method comparisons, cost breakpoints, practical constraints, and the small decisions that quietly save a launch. Packaging printing best practices show up in the boring places first. That is where the real savings live.
Short version: if your team is choosing between digital and offset for a short run, inspect artwork complexity first, then minimums and color consistency, then price. A 30-color look on a textured substrate does not become cheaper just because the print method changes. Trapping, screening, and proof standards still matter.
For brands managing branded packaging portfolios, the first non-negotiable step is a structured brief and a written approval chain. Teams handling retail packaging and promotional runs at the same time can cut most surprises by getting that part right early. In practice, this means tighter file naming, controlled revision tracking, and explicit sign-off for each production gate.
That is the core of packaging printing best practices: define the process once, then let the workflow protect the deadline.
What packaging printing best practices truly matter before print starts?
The three gates that prevent most avoidable errors
Across short and long packaging runs, most teams underestimate three controls before they even submit files: substrate selection, color specification, and correction tolerance. Lock those first, and downstream problems drop sharply. Skip them, and every quote comparison turns into a negotiation over assumptions.
Packaging printing best practices are most useful when they answer three practical questions: What is the substrate’s surface behavior? Which color standard is enforceable on press? How many production changes can the schedule absorb? If there is no answer, the job is not ready for press time.
In this review, the same pattern shows up repeatedly: stable substrate + stable color target + clear quality-control checkpoints beats “best equipment” on a brochure. That is not a small detail. It is the operational baseline.
For teams used to brand-led checklists, this is the missing line: a packaging workflow is also a risk-management system. The best teams monitor prepress risk with the same discipline as finance, and they track it with shared scorecards rather than promises.
Top Printing Options Compared for Packaging
Fast comparison: where each method usually wins
Print technologies are tools, not trophies. In sourcing meetings, I often see teams pay for a supposedly premium method that solves a problem they do not actually have. The better question is plain: Which method delivers stable output on this substrate at this volume?
From a packaging printing best practices perspective, the answer is usually a matrix problem, not a loyalty problem. Offset printing is not better than digital by default; it is better under specific conditions. The same is true for flexographic printing, where speed can matter more than image softness when runs are heavy and cycles repeat.
| Method | Sweet Spot | Typical Minimum | Color Detail | Typical Speed | Big Cost Trap |
|---|---|---|---|---|---|
| Offset printing | Large runs, high color precision, long shelf programs | 2,000–5,000+ units | Highest repeatability for small text and skin tones | Medium setup, high throughput once running | Plate changes, washup waste, and long setup when files change often |
| Digital printing | Personalization, short runs, fast test launches | 100–500 units (often lower) | Excellent for small runs; can vary across large runs | Very fast to start, slower per-unit at scale | Cost rises quickly past 1,500–3,000 depending on substrate |
| Flexographic printing | Corrugated, flexible films, very large runs | 2,000–10,000+ | Great for bold colors, stable across large batches | Highest throughput for repeat jobs | Anilox, ink rheology, and an often-complex changeover |
| Screen printing | Limited colors, thick ink laydown, special textures | Varies, often low to medium | Excellent opacity; limited gradients | Slower setup but predictable if print area is stable | Misregistration on fine detail and extra labor on complex designs |
| Foil/emboss/UV finish lanes | Premium feel, short decorative runs | Often 1,000+ | N/A: enhancement layer rather than base color engine | Dependent on prepress + tooling lead time | Die life, spotting, and hidden cost of retooling |
This comparison is the basis of practical packaging printing best practices: method choice belongs to job requirements, not category fashion. A rigid cosmetic carton and a refill pouch are structurally different decisions even if they share the same campaign date.
How it plays out by package type
For Custom Printed Boxes, especially rigid and folding carton structures, offset stays strong when the order is stable and color-managed. It is not always cheapest, but it wins on consistency. Corrugated mailers usually point toward flexo when the order needs volume and repeated branding. Labels and variable-data inserts often tip to digital. That pattern is part of packaging printing best practices, not an exception to them.
Food-pack containers and legal text-heavy labels often reveal the next layer: they are as much about communication clarity as they are about art. A tiny percentage error in barcode placement or contrast can cost more than a glossy finish ever saves.
Strong points by method, in plain terms
Offset printing excels on paperboard with high image detail and repeatable brand colors. Setup takes longer, yet variation across 10k+ pieces can be remarkably low when the design stays fixed. Digital printing handles frequent updates, serial codes, and test-and-learn campaign packaging with unusual ease. Flexographic printing remains the workhorse for large films and corrugated because it tolerates production rhythm and heavy throughput. Screen printing serves as a specialist for textured inks and bold marks, especially on tough substrates, and it can still make sense for small retail packaging runs.
Frequent artwork changes turn the lowest unit price into the wrong answer. That is the hidden tradeoff missed in many pricing spreadsheets. Digital printing usually handles short reprints with less friction, while offset printing punishes revisions with new plates and lost time. This is why every supplier comparison should include revision policy, not just rate cards.
Any serious review of packaging printing best practices should include proof workflow. If a supplier cannot offer hard-copy proofing or calibrated digital proofing, the machine spec sheet does not save you from color risk. In many audits, a weak proofing workflow is the single biggest cause of late corrections.
Unexpected but true: teams with fewer brand variations often save more money by locking a stricter color management protocol than by adding one extra print station. In other words, process discipline can beat equipment upgrades.
Detailed Reviews of Packaging Printing Methods
Offset: precision for stable long runs
Offset printing is usually the first recommendation for brands that need repeat quality on coated board and product packaging with tight color controls. It handles 4-color process work well, with spot colors when needed. The main advantage in packaging is consistency. If the plate setup is correct, 500-piece increments can stay remarkably even.
Take a beauty brand with a bold monogram on a rigid sleeve. At 20k units, offset preserved edge clarity and depth better than digital in one launch I reviewed. Fine text held at 4 pt across folds and die cuts. Choosing packaging printing best practices early meant vector-first artwork and a fixed ink recipe, not late-stage adjustment.
The usual mistake is approving the wrong paper finish before plate-making. A C1S stock around 300–350 gsm needs coating compatibility confirmed in advance. Gloss varnish and matte laminate both shift tone; if the proof excludes the final finish, the sign-off is incomplete.
For teams balancing quality and speed, print management discipline matters more than brand lore. Offset tolerances improve when the prepress checklist is complete: embedded fonts, overprint settings, and substrate-specific color curves.
Digital: speed, flexibility, and trap points
Digital printing often fits startup launches, test lots, and seasonal SKUs. The machine starts faster than most analog jobs, and setup costs stay lower on short runs. Typical short-run branded packaging quantities land around 500–1,500 units, depending on substrate and finishing.
The common failure is simple. Small type under 6 pt in dark colors can soften on kraft-like stock, especially on uncoated papers. If copy sits close to folds, digital may need a more conservative layout. Another frequent miss: teams expect brand red to match the swatch from creative software exactly. Calibration, media profiles, and ink behavior disagree with that expectation. That is why packaging printing best practices always include at least one signed production proof for true-color work.
When schedules are aggressive, teams sometimes skip the color audit step because it looks too slow. In packaging, that shortcut is costly. One wrong reading can ripple into two or three days of rework in the worst cases.
Flexographic: volume king with long memory
For mailers, pouches, flexible laminates, and much corrugated packaging, flexographic printing remains a powerful value engine. One long run with stable graphics usually delivers strong uptime and a predictable cost per unit. It also handles textured and coated polymers well once the right anilox and doctor settings are dialed in.
Flexo becomes expensive in a different way. If campaign details, callouts, or legal text change every week, setup burden climbs fast. Teams sometimes confuse that burden with quality and then wonder why lead times stretch.
Strong packaging printing best practices in flexo include a tight anilox maintenance plan and a realistic material calibration schedule. Without those, your first color proof can be visually good and still unstable at production volume.
Screen and finishing: texture as function, not decoration
Screen printing on packaging should be treated as tactile function, not decorative excess. It delivers high-opacity marks, thick ink layers, and visible branding on dark or demanding substrates. On Custom Printed Boxes, it works well for logo blocks and icons that need shelf presence, though gradients and soft transitions are weaker than offset.
Premium finishing deserves the same practical lens:
- Foil stamping adds shelf attention, though foil release problems can create mottling on curved surfaces.
- Emboss/deboss adds depth and supports premium positioning, yet it needs precise registration and extra die cost.
- Soft-touch lamination cuts glare and lifts perceived quality, but it changes tactile friction and can affect scanner readability for logistics tracking.
- Spot UV and varnish sharpen highlight areas, although poor masking leaves halos and visible edges.
The key point is plain. These effects improve packaging only when design and prepress control them tightly. Left unchecked, they become expensive decoration with a weak return. In strict packaging printing best practices, the right finish is measured against scanning performance, logistics handling, and return rate, not just the shelf look.
“The first version looked elegant. The second version sold better in a real store test because we added a contrast control pass and toned down the UV gloss.”
Sustainability, food-contact, and compliance realities
Commercial buyers ask for sustainability proof points more often now, and with good reason. Food-contact jobs, or packaging that sits very close to food, require ink and coating compliance checks plus migration-safe claims. That usually means verifying approved ink systems, adhesion testing, and migration behavior from the supplier. A beautiful varnish is not automatically suitable in every category.
For recyclable packaging programs, packaging printing best practices include planning material separation from the outset. A heavy coating stack can make a carton difficult to separate and weaken recovery value later. Claims about recycled content need credible standards language and chain-of-custody documents, not marketing copy alone.
ASTM and ISTA references should be treated as quality guardrails, not theater. Retailers asking for transportation stress criteria are pointing to real handling risks. FSC pathways can matter for fiber claims. The same logic applies to food or cosmetics packaging: a pack that only looks good has not earned trust yet.
Packaging.org and FSC are useful starting points for standards and claims validation, but your specification still needs to match the carton, the market, and the compliance burden.
One overlooked variable in this layer of review is material-to-print compatibility. Even sustainable profiles can fail shelf life if the ink system and laminate chemistry are mismatched. This is why packaging printing best practices are never print-only; they are end-to-end packaging decisions.
Price Comparison: What Packaging Printing Really Costs
Break the quote into five buckets
Many teams compare only unit price and stop there. That misses the real economics. A better job-cost model breaks the quote into:
- Setup costs: plates, die mounting, anilox prep, camera-ready files, and machine calibration.
- File prep costs: imposition, trapping, color separations, preflight validation, and final proof correction.
- Unit pricing: base press cost by method and quantity band.
- Finishing costs: die-cutting, varnish, foil, emboss, coating, folding, and packing.
- Proofing + freight: sample printouts, corrections, shipping, and handling margin.
One useful benchmark: a 500-piece digital carton trial with light finishing often carries modest setup and higher unit cost, while an offset run of 10,000 units may be cheaper per piece but requires more upfront spend for plates and setup. That is why landed cost matters more than the first line in the quote.
From a packaging printing best practices standpoint, many buyers underestimate the fifth and final bucket: operational delay. A production hold due to one missed dieline often pushes shipping dates and can erase nominal unit savings in the same quarter.
| Volume band | Typical method | Indicative setup range (USD) | Indicative unit range (USD) | Where it usually breaks even | Typical total outcome |
|---|---|---|---|---|---|
| 100–800 | Digital | $150–$450 | $0.30–$0.95 | Digital usually cheapest | Fast start, flexible changes, highest per-unit |
| 1,000–4,000 | Digital or flexo (based on substrate) | $250–$900 (digital lower, flexo higher) | $0.18–$0.42 | Depends on stock and finishing complexity | Decision hinges on color complexity and change frequency |
| 5,000–20,000 | Offset / flexo | $500–$1,800 | $0.08–$0.35 | Often lower than digital beyond this band | Lower per-unit if artwork is stable |
| 20,000+ | Offset / flexo | $800–$2,800 | $0.04–$0.22 | Best economies at scale | High-volume consistency, strict control required |
These ranges stay broad because substrate and finishing change the math. A folded carton on 350 gsm artboard with two-layer coating and selective varnish does not cost the same as a simple kraft mailer at 200 gsm. Packaging printing best practices means refusing to let the first quote line decide the whole job.
In one internal review I saw, teams that compared three-tier pricing—setup, production, finishing—spent 12–18% less on rework than teams comparing unit price only. The exact number varies by sector, but the pattern is consistent: total-cost thinking protects margin.
Revision burden: the cost you do not see in the front page of the budget
A single artwork revision can add 10–25% to turnaround in many shops. If proof comments arrive after prepress, expect file rechecks and another round of calibration. Jobs with multiple legal updates often carry cumulative cost that climbs past the original setup by more than 30%. That is where teams confuse unit cost with total cost.
Rush handling is another line item that hides in plain sight. If a launch date moves and the shop has to prioritize your order, expedite rates can add 15–40% depending on press congestion and finishing queues. Freight and storage can push the total even higher before the boxes reach inventory.
For packaging printing best practices, ask for at least three pricing sheets and request a unit-cost-to-volume curve, not just a flat quote. If a supplier cannot show the break-even point, you are making a decision in the dark.
A final pricing reality check: include expected run-in scrap as a separate line. In corrugated and rigid cartons, 2–5% early waste is not uncommon. If the supplier assumes a different yield than your team, your final invoice will show the gap.
The real price of mistakes
Reprints cost more than paper and ink. If two thousand cartons ship with misaligned branding, the loss includes inventory value, slotting time, and buyer confidence. Replacing them can erase the savings from a bargain quote in one stroke.
Common cost drivers:
- Color mismatch: one wrong channel can force a full re-press.
- Dieline errors: 5-10% waste can appear when fold positions are off.
- Wrong finish spec: gloss mismatch, label peel failure, or barcode scan problems.
- Late launch: stock tied up while promotional windows and ad placements slip.
The biggest mistake in sourcing is assuming cheaper unit cost automatically lowers risk. In most packaging projects, a predictable workflow and fewer reworks reduce total cost faster than any discount line.
At that point, packaging printing best practices become a risk-control system. If your margin allows one controlled pilot, use it.
Process and Timeline: From File to Finished Packaging
The production sequence in practice
Production planning often gets overcomplicated. A clean timeline usually has seven stages:
- Design handoff: structure files, dieline, artwork, and print specs in a press-ready package.
- Prepress check: fonts embedded, CMYK workflows validated, line weights tested, and trap settings set.
- Proofing: hard proof or contract-proof for colors and crop/registration.
- Approval: brand, quality, and technical sign-off including barcode and legal review.
- Press setup: plates, registration, ink mixing, press calibration.
- Print + finishing: varnish, lamination, die-cut, folding, and boxing.
- Inspection + delivery: random lot check, palletization, shipping labeling.
What passes through these steps in under three cycles usually does not because luck is high, but because packaging printing best practices are documented. That is the point where the buyer’s process maturity shows up most clearly.
Where delays happen most
Three delays show up again and again:
- Wrong or missing dieline. If fold lines are off by 1–2 mm in the file, production can pause for 24–72 hours while the layout is fixed.
- Proof bottleneck. Slow approval cycles leave print prep idle and compress the schedule later.
- Press-unready art. RGB profiles, raster images under 300 dpi, and unembedded fonts all force rework.
If the launch window is fixed, do not outsource your own timeline. Leave room for one proof cycle and one correction window. The rule is blunt, and it works: if the launch date is fixed, lock specs early and allow at least one proof round.
Teams trying to squeeze this phase often skip the proofing workflow checklist, then spend more time reconciling disputes. The result is avoidable and expensive. A documented checkpoint framework can reduce these delays without requiring fancy software.
Timelines by method and complexity
Simple digital label runs can move in under 5–7 business days after proof approval. Complex graphics with spot UV stretch that window because finishing queues add friction. Flexible packaging with flexo and moderate finishing often lands in the 10–20 business day range, depending on stock sourcing and anilox changes. Offset folding cartons with quality-control checkpoints and complex structure can sit in the 10–18 day range for proof through print, with another 3–8 days for folding and final packing.
Custom-cut windows, unusual coatings, and multilingual legal changes can add a week or more. Fixed-date campaigns should never assume one vendor queue will behave perfectly.
From a packaging buyer perspective, this is where packaging printing best practices become visible in the calendar. A beautiful design without timeline realism is not a plan.
Unexpectedly, the fastest teams are often not the ones with the largest presses. They are the ones who make final approvals at the same rhythm as their production milestones.
How to Choose the Right Packaging Printing Approach
Decision framework you can actually use
Build a simple decision matrix before requesting quotes:
- Order volume: 0–1,000, 1,000–10,000, or 10,000+.
- Color tolerance: can a 2–3 Delta E color drift pass quality checks?
- Substrate type: kraft, coated board, corrugated, film, foil-lam.
- Durability: scratch resistance, moisture exposure, shipping stress.
- Change frequency: static design for 12 months vs weekly promotional edits.
Assign each category a score from 1 to 5 and match the method by the highest weighted total. In practice, that approach beats “my printer says this is cheapest” by a long margin. In our experience, disciplined scoring reduces sourcing confusion in multi-category portfolios.
To tighten results further, add two optional score lines: proofing turnaround and finish compatibility. Those two columns often reveal why teams who picked an optimal method on paper still miss the first print run.
Different paths by business model
Startups: lean toward digital and flexible quantities, but define exact proof milestones. Tight cash flow favors smaller pilot runs and scaling after real sell-through.
DTC brands: usually benefit from short, personalization-friendly runs. For seasonal drops, digital printing wins when claims and offers update weekly because the speed gain offsets a higher unit rate.
Seasonal promotions: forecast based on volume bands. If every quarter adds a new campaign, avoid methods that punish frequent retooling.
Established retailers: prefer offset or flexo where stability pays off and planning runs longer. In that setting, strict quality gates and repeatability deliver the clearest return.
Across all of these, packaging printing best practices mean not over-optimizing one variable while ignoring the rest. A premium branded packaging statement means little if production fails quality checks.
Color accuracy, speed, or scalability?
Ask three practical questions:
- If the category is color-sensitive, like skin-care, wine, or pharmaceuticals, prioritize color accuracy.
- If the campaign calendar is tight, prioritize speed and proof turnaround.
- If annual volume is stable, prioritize scalability and consistency.
A food brand with strict shelf identity may choose offset even at moderate volume because color and detail matter more than setup cost. A promo-first startup may accept a slight tone shift if digital gets the package to market faster.
Over-specification is a hidden landmine. Heavy gloss, foil, and embossing rarely improve pack performance unless the shopper can register the difference in roughly a second of shelf glance. Tight budgets feel that complexity quickly because it complicates process control.
Good packaging printing best practices stay brutally practical: print what the shopper sees and the warehouse can handle.
Put another way, packaging performance is the equation of clarity plus control. You can have one without the other, but not both for long.
Our Recommendation: Packaging Printing Best Practices in Action
Use-case matrix: method fit, not method loyalty
| Use case | Recommended method | Primary reason | Watch for |
|---|---|---|---|
| Frequent short launches, changing promos | Digital | Fast revisions, low setup | Build stronger color approval process |
| High-volume shelf cartons, consistent design | Offset | Color repeatability and low per-unit | Plate cost and change frequency |
| Corrugated mailers and large batches | Flexographic | Throughput and repeatability | Dieline and material calibration |
| Premium short-edition launches | Digital + controlled finishing / screen accents | Fast ramp with premium cues | Registering effects with artwork |
| Text-heavy utility labels | Digital or offset depending on volume | Legibility and consistency | Small-font contrast and contrast on fold lines |
Direct action steps before production
The recommendation is simple. Do not treat this as a purely visual or cost exercise. Move through this sequence:
- Audit your current packaging program and group jobs by stability and color sensitivity.
- Prepare a press-ready art pack: dieline, bleed, fonts, linked images, ink notes.
- Request at least one hard proof and one full-coverage color sample.
- Compare at least three vendor quotes with total-cost breakdown, not unit-only quotes.
- Run a small pilot before scaling to full volume.
One useful way to keep teams aligned is to score this sequence against a print quality control rubric at each gate. If a supplier can pass, they stay on shortlist; if they cannot, they risk elimination before the board is even ordered.
Final checklist to use with your next supplier
If your print partner cannot answer every item in this list clearly, pause.
- Which standard does your proof workflow follow, and how is color drift capped?
- What is the exact minimum order per method after setup?
- How will coating or varnish impact barcode/scan function?
- Do you provide sign-off proof with finish simulation?
- Which standards and compliance documents are included for food-contact or recycled claims?
- What preflight checks do you run before press to avoid late file rejections?
“In my experience, the teams that win on packaging printing best practices are the ones that prove assumptions early and stop making them at final proof.”
Review your structural options against Custom Packaging Products and confirm machine capability via Manufacturing Capabilities before you approve press. If two quotes look similar, total risk is usually the real divider.
Before you approve print, verify substrate, color standard, finish spec, and proof sign-off against the launch timeline in one pass. Once those pieces are locked, you are practicing packaging printing best practices instead of hoping a supplier promise covers every variable. That is the path to keeping branded packaging consistent and cost-efficient from sample to shelf.
FAQ
What are the most important packaging printing best practices for small brands?
Start with press-ready artwork, accurate dielines, and a proofing step before you approve full production. Choose the method by substrate and order size, not just the cheapest quote, and keep one change-control round in the launch plan.
Which printing method is best for packaging when color accuracy matters?
Offset printing usually gives the strongest consistency at scale for fine color matching. Digital printing can work well for shorter runs, but it needs calibrated hard proofing to avoid tone drift.
How much should packaging printing cost per unit?
That depends on volume, structure, finish complexity, and setup fees. Compare setup, finishing, freight, proofing, and revisions, not unit price alone. In many cases, a slightly higher unit cost saves money if it avoids reprints and rework.
How long does packaging printing usually take from proof to delivery?
Simple digital jobs can move quickly, often within a few business days after proof approval. Offset, flexo, and multi-step finishes usually need more setup and inspection time. Fixed launch dates should leave room for at least one proof revision and possible material lead time.
What files do I need before sending packaging art to print?
Usually you need final dielines, outlined or embedded fonts, linked high-resolution images, approved color values, and a clear finish and trimming map. Check bleed, safe areas, and color profiles before submission to avoid delays.
The practical takeaway is simple: lock the substrate, finish stack, color target, and proof owner before quotes go out. If even one of those stays vague, the cheapest price is probably a mirage, and the press will expose it faster than anyone on the brand side can fix it.


