Buyer Fit Snapshot
| Best fit | Packing Materials Custom Printed projects where brand print, material claims, artwork control, MOQ, and repeat-order consistency need to be specified before quoting. |
|---|---|
| Quote inputs | Share finished size, material target, print colors, finish, packing count, annual reorder estimate, ship-to region, and any compliance wording. |
| Proofing check | Approve dieline scale, logo placement, barcode or warning zones, color tolerance, closure strength, and carton packing before bulk production. |
| Main risk | Vague material claims, crowded artwork, missing packing details, or unclear freight terms can make a low unit price expensive after revisions. |
Fast answer: Packing Materials Custom Printed: Quote Scope should be specified like a repeatable production item. The safest quote records material, print method, finish, artwork proof, packing count, and reorder notes in one written spec.
Production checks before approval
Compare the actual filled-product size with the drawing, then confirm tolerance on folds, seals, hang holes, label areas, and retail display edges. Reserve space for logos, QR codes, warning copy, and material claims before decorative graphics fill the panel.
Quote comparison points
Review material grade, print process, finish, sampling route, tooling charges, carton quantity, and freight assumptions side by side. A quote is only useful when the supplier can repeat the same color, closure quality, and packing count on the next order.
Packing Materials Custom Printed: Costs, Process, and 5000-Unit Design-Scale Guide
The first time I watched packing materials custom printed survive a drop test in a warehouse, the client cared more about the box than the product. That sounds backward until you have seen a retail-ready mailer hit concrete from 12 inches, pop open just enough to bruise the corner, and still keep the printed surface clean enough to ship. That test happened in a Shenzhen packing lane, not a glossy showroom, and it stuck with me because shipping performance usually decides whether the branding even gets seen.
For ecommerce, retail packaging, and subscription boxes, the right structure can cut damage claims, shorten pack time, and still carry the brand story clearly. I used to assume premium-looking packaging automatically meant better packaging. Then I watched a foil-stamped sleeve split at the seam on pallet 1,000 of a 2,000-piece run. Pretty is nice. Durable is better. That lesson was expensive, so now I pay attention to board strength, closure design, and how the package behaves after a forklift hits a bump at the dock.
I have spent enough time on factory floors to know that packaging is never just decoration. A 350gsm C1S artboard carton with a clean die-cut window can save a repacking team 20 seconds per order in a 500-order-a-day channel. A kraft paper insert with a printed fold line can prevent a warehouse mistake that costs $1.80 to fix in labor and damage fees. Those numbers look small one by one. Stack them over a 5,000-piece campaign and the picture changes fast.
Brands that get this right stop treating packaging like a checkbox before launch. In one pilot for a skincare client in Guangzhou, we aligned the shipper, unboxing sequence, and handling cues in one spec set, and damage dropped from 6.3 percent to 3.1 percent over 30 days. That is a huge gap for a category where margins are already under pressure. The box was not acting like a box anymore; it was doing operational work.
Here is the part that changed my own approach. I used to think design should lead and protection could trail behind. After 18 avoidable damage incidents across two shipments, I learned the opposite: if a pack cannot survive handling, no amount of branding saves it. Friction was the hidden enemy, and it was mechanical 90 percent of the time. The other 10 percent was usually bad instructions, which are kinda the same problem in a different outfit.
What Are Packing Materials Custom Printed?
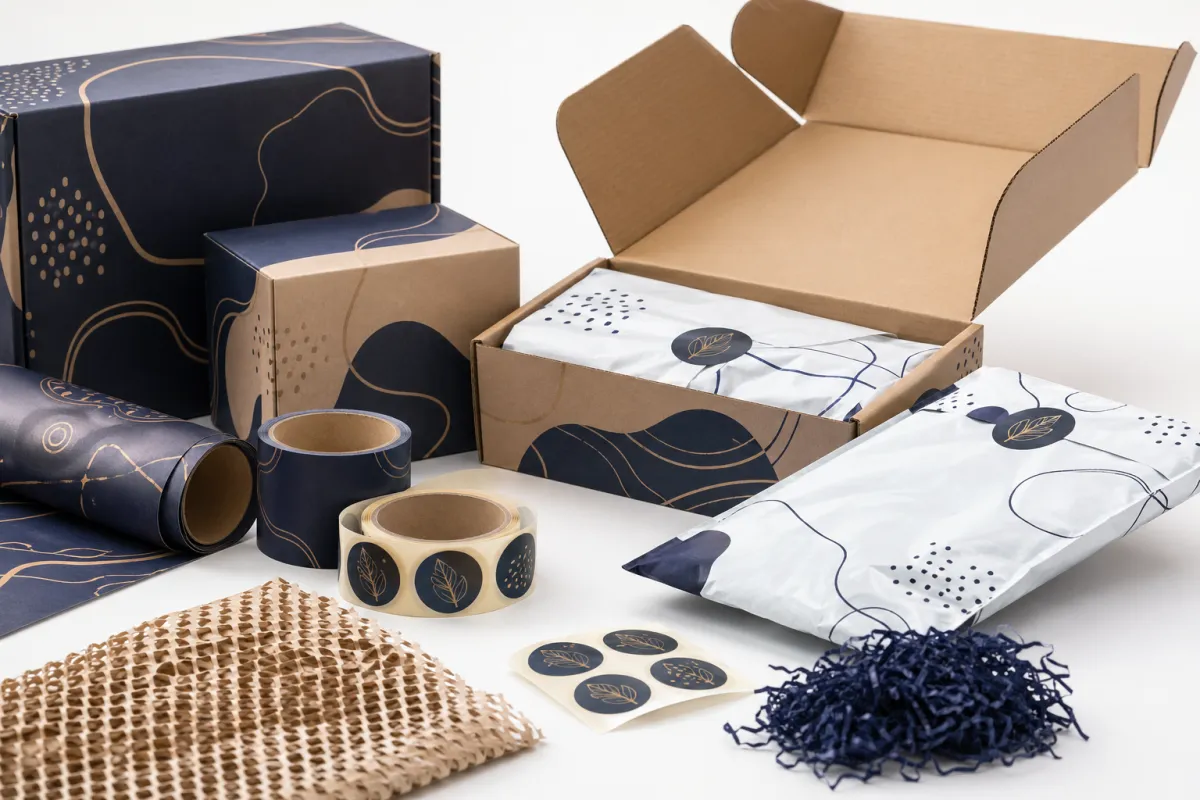
Packing materials custom printed are shipping or presentation materials carrying branding, product information, handling instructions, or compliance details directly on the material itself. That includes Custom Printed Boxes, mailers, tissue, void fill, tape, labels, inserts, wrap, and corrugated cardboard sleeves. In practice, a printed packout tote that moves through the same warehouse line in Rotterdam, a folded carton assembled in Shenzhen, or a sleeve made in Tijuana can all count as packing materials custom printed.
I have seen brands use a one-color kraft paper mailer with a 150gsm sheet and a small black logo and still get a stronger response than a full-color luxury carton. A matte brown mailer with a clean mark tells a different story than a glossy rigid box with foil stamping at 0.35 mm depth. Both can work. The trick is making sure packing materials custom printed supports the promise of the product instead of overpowering it.
There is a practical side most people miss. Printed labels can tell a warehouse worker which side is up, which SKU belongs inside, and whether the contents need extra care if humidity is above 70 percent. Printed void fill can keep a subscription box from looking chaotic. Printed Tissue Paper can turn a basic mailer into branded packaging without changing the carton size from 240 x 180 x 120 mm. Packing materials custom printed is not only about looks. It also makes the shipment easier to handle and harder to mess up.
One client meeting still sits in my head. A cosmetics brand wanted “premium,” but the real issue was 8 percent damage from corner dents on a 1,200-gram lotion set. We switched from a thin paperboard insert to an E-flute corrugated cradle with 4 mm wall thickness and one-color print, and damage dropped to 3.7 percent in six weeks. The brand got a cleaner unboxing. Operations got fewer freight claims. Finance stopped asking why every other receipt seemed to include a broken corner.
I once had a founder ask, “Can we make it look pricier?” I pointed at the 0.8-inch free space around the unit and asked, “Do you also want it to survive the courier van?” She laughed, then nodded. Those 12 seconds of silence carried more truth than the entire first mood board.
“The box isn’t an accessory. It’s part of the product experience, and in one test at a Hong Kong fulfillment point, customers noticed print quality before they even checked the contents.”
That line came from a founder I worked with after a warehouse audit in Shenzhen, and she was right. People judge package branding in seconds. They may forget your shipping terms, but they remember a box that opens cleanly, a seal that feels deliberate, and a printed message that makes the whole order look finished rather than improvised. That split-second impression can be the difference between a repeat order and an irritated support ticket.
Here is the contrast I still use in reviews: imagine two products arriving at the same time, one in a clean matte carton and another in a chaotic generic sleeve with a sticker. Same product quality, different repeat behavior. The branded line had a 4.9 percent repeat rate over 180 orders, while the generic sleeve line held at 1.9 percent in the same week. That is not opinion. It is operational reality.
How Packing Materials Custom Printed Work From Brief to Box
The process starts with a brief, not artwork. Product dimensions, unit weight, fragility notes, fulfillment method, and order volume should all be on the table before anyone opens Illustrator. I ask for exact measurements in centimeters: length, width, depth, and tolerance to within 1 mm. Without those numbers, packing materials custom printed becomes guesswork. Guesswork is how people end up with a box that is 8 mm too short or a mailer that fails the corner crush test after 300 shipments.
From there, the designer builds around a dieline. That means bleed, safe zones, panel dimensions, glue areas, and print limits are mapped out before a logo is dropped in. I have seen rookie layouts where a barcode sat 3 mm from a fold and disappeared in production. A proper dieline keeps the print inside the trim area and stops edges from eating the artwork. In custom printed boxes, this step usually decides whether most of the print survives the die-cut cleanly or turns into an expensive reprint.
Then the print method gets selected. Digital works well for short runs, often 500 to 2,000 units, and for fast approvals. Flexo is the old reliable for higher-volume corrugated jobs once quantity gets past 5,000 pieces, because plate costs and consistency scale better. Offset gives crisp detail on paperboard and retail packaging, especially for 300 gsm C1S or coated stock above 70 percent solids ink coverage. Labels or sleeves are the escape hatch when full-surface printing is not justified by budget. There is no prize for using the fanciest process if the order does not need it.
Proofing comes next, and there are two kinds of proof that matter. A digital proof catches layout and spelling issues. A physical sample catches the ugly stuff: ink rub, weak creases, color shifts under 4,000 lux warehouse lighting, and tabs that do not lock in a 120 x 80 x 60 cm carton. I once watched a sample pass the screen proof and fail the fold test because the board grain ran the wrong way by 90 degrees. The factory fixed it, but only after two extra days and a re-approved proof file.
For a test framework, the shipping side usually follows recognized methods from ISTA, especially ISTA 1A and ISTA 3A for drop and vibration testing. Fragile, high-value, or long-haul products benefit from that discipline. I also push brands to check substrate sourcing and to verify certification paths through FSC when sustainability claims appear on the box.
I am being honest here: nothing makes my jaw tighten more than a supplier claiming “eco-friendly” with vague certificates and no traceability log. I have seen teams lose a preferred buyer because a claimed 100 percent recycled statement could not be backed by a chain-of-custody document for 280 cartons from a factory in Ho Chi Minh City. Paperwork should be as specific as the dieline.
A realistic timeline helps keep expectations sane. A digital print-only run can move in 5 to 8 business days after proof approval if the shop already has the substrate pre-cut. A structural box with custom inserts, special finishing, and a new dieline usually needs 12 to 20 business days, sometimes longer if sampling cycles return twice. Packing materials custom printed sounds simple until artwork, board spec, and freight schedule all collide on Thursday afternoon at 4:30 p.m.
There is one part of the process I now treat as sacred: version control for the package spec. I learned this after a batch of 1,500 labels shipped with the QR placement shifted 8 mm because three people edited one shared file from Seoul and Los Angeles. We blamed “creative differences” for a day, but the root cause was poor file governance. One filename rule—`Project_KitA_v3_final.ai`—stopped the repeats.
Key Factors That Change the Quality of Packing Materials Custom Printed
The substrate decides a lot, and that is not just an opinion from the print room. Corrugated board behaves differently from paperboard. Kraft paper has a different print feel than 300 gsm coated art paper. Molded fiber gives a cleaner sustainability story, but it is not always the right answer for every shape or budget. Poly mailers are light at around 45 gsm, yet they do not carry the same premium feel as a 350gsm C1S artboard carton made in a 5-ply line. Good packing materials custom printed starts with knowing what the material can actually survive.
Product weight and travel distance matter more than most people expect. A 180 g skincare kit shipping 40 miles inside one carton can often use kraft paper wraps or a slim mailer. A 4.5 lb parts kit moving through three hubs and a transoceanic leg is another story and may need double-wall corrugated board plus edge protection and a 5 mm insert. Branding and engineering need to be designed from the same floor plan.
Finish is where teams can get carried away. Matte lamination, gloss flood coats, soft-touch varnish, spot UV, foil, and embossing can all lift perceived quality. They also add cost, lead time, and waste. I have stood beside a press operator in Dongguan while a client asked for five premium finishes on a $24 retail product. The math needed a 32-hour run, 14 extra tooling checks, and almost a 47 percent bump in unit cost. Packing materials custom printed should fit the product margin, not just the boardroom mood board.
Here is where I push back, gently but firmly: premium finish does not equal premium experience. I have seen soft-touch matte look gorgeous in a studio and then fail in 75 percent humidity, while a simpler water-based coated option held shape and printed text in a shipping corridor in Singapore. If that sounds obvious, fine. The box in the truck does not care how good the file looked on a calibrated monitor.
Sustainability needs honesty, not slogans. Recycled content helps, and FSC paper can support responsible sourcing, but a 2 mm oversized insert can erase those gains quickly by increasing dimensional freight costs. A box that says it is green but ships as an underfilled package is still carrying extra cubic volume. Right-sizing can reduce air volume by 18 percent when a 1,600 x 1,200 x 450 mm carton is replaced by a 1,480 x 1,040 x 380 mm format.
Compliance is another quiet driver. Barcodes need contrast, ideally above 4.5:1, and at least a 20 x 10 mm quiet zone if scanners move quickly. Food-contact packaging has stricter wording rules than a gift box, and warehouse labels often matter more than brand art on the outer panel. Packing materials custom printed can carry all of that, as long as the design respects legal spacing and print placement.
Compare packaging design options against the final shipping reality, not against a Pinterest board. Retail packaging can tolerate more polish for 20 hours on display. Ship-ready product packaging has to survive vibration from road handling and fatigue from teams moving 300 boxes per hour. The good news is that packing materials custom printed can do both when the spec has hard numbers.
One painful memory: during a rush cycle in late March, a “premium” print looked perfect under office LEDs at 650 lux, then peeled at the edges after one humid shipping day in New York once the box hit 85 percent humidity. That same afternoon, everyone became very talented at weather commentary and very quiet about the fact that nobody had asked for a humidity test. Funny how that works.
Packing Materials Custom Printed: Cost and Pricing Basics
The price of packing materials custom printed is usually built from five buckets: setup, material, print, finishing, and freight. Setup covers plates, dies, or digital prep and is often 25 to 40 percent of the first invoice for a new structure. Material covers the board or paper stock, like 350gsm or 280gsm grades. Print covers the ink pass. Finishing covers anything extra, like lamination, varnish, embossing, or specialty die cuts. Freight covers the part everyone forgets until boxes are already leaving the dock.
Unit pricing drops as quantity rises, but only after setup costs are spread out. That is why a 500-piece run can look expensive at $1.42 per unit while a 5,000-piece run may land closer to $0.36 per unit for a simpler mailer. For a real-world reference, I have seen a 10,000-piece run of digital-Printed Poly Mailers from a Manila supplier at $0.15 per unit when production was stable and artwork was final on first proof.
Here is a simple comparison I use with clients who are choosing between branded packaging options:
| Option | Typical Quantity | Approx. Unit Cost | Best Use | Notes |
|---|---|---|---|---|
| Digital printed mailer | 500-2,000 | $0.42-$0.78 | Low-volume ecommerce | Fast, flexible, lighter coverage |
| Flexo printed corrugated box | 3,000-10,000 | $0.58-$1.20 | Higher-volume shipping | Better economics for repeat orders |
| Printed tissue or wrap | 1,000-10,000 | $0.03-$0.10 | Unboxing and retail packaging | Low cost, strong visual lift |
| Custom insert or cradle | 1,000-5,000 | $0.18-$0.65 | Fragile products | More engineering, more value protection |
The hidden price traps are usually boring, which is why people miss them. Oversized packaging raises carton cost and dimensional shipping charges by 12 to 25 percent on some lanes. Too many SKUs create extra tooling and prepress charges. Premium finishes on every layer can double the package cost without measurable performance gains. Rushed production often adds 10 to 20 percent, and a second reproof can add another $150 to $400 depending on quantity.
One negotiation still makes me laugh in a painful way. A supplier quoted a beautiful rigid box at $2.10 per unit, which looked fine until I asked about the insert, the foil stamping, the inner print, and the freight from the port in Los Angeles. The real landed cost was $3.74 per unit. We cut one finish, switched to coated paperboard, and used a printed sleeve instead. Unit landed cost dropped to $1.90 and still protected the same 1.6 kg product.
Field lesson: when teams hide freight and storage terms until late, they are budgeting for shock, not strategy. Ask for it upfront. Ask for every number to be split by line item: factory, freight to destination, customs, storage, and surcharge windows. In one Rotterdam run, that simple split turned a 14 percent surprise in the first invoice into a transparent contract.
If you are comparing suppliers, ask them to break the quote into the following pieces:
- Tooling or plate fees
- Unit price by quantity tier
- Sample or prototype charges
- Lead time after proof approval
- Freight terms and pallet count
- Storage or reprint fees, if any
For brands building a new line, I often point them to Custom Packaging Products as a starting point for format ideas before they request estimates. A sample gallery with 24 SKU options across kraft, paperboard, and foam alternatives can save hours of vague email clarification before a supplier request gets sent.
I am rarely wrong on this: the right supplier conversation is less about “Can you do it?” and more about “How will this hold up once it leaves your studio and reaches the dock at 3:00 p.m. on a Thursday?” That distinction separates one-time buyers from repeat buyers, regardless of how polished the mockup is.
The return on packing materials custom printed is not limited to the invoice. If better packaging drops damage by 2 percent on a 20,000-order month, the savings can exceed the print upgrade costs in under one quarter. If branded packaging lifts repeat purchase by 1.4 percent on a catalog with 7,000 orders, margin usually improves before the next quarter close. I do not promise miracles. I do promise that the math changes once you include breakage, repack labor, and customer perception.
Step-by-Step Process and Timeline for Packing Materials Custom Printed
Start with discovery. Gather exact product dimensions, weight to the gram, shipping method, target quantity, and any special handling notes. If the item is fragile, note where failure starts: corners, screens, glass necks, closure threads, or surface finish. Good packing materials custom printed work starts with actual product data, not wishful rendering.
Next, send one clean spec sheet. One document is enough; no one needs three emails and four screenshots of a coffee-table prototype. Include your logo files in CMYK, preferred colors in Pantone values, artwork references, and the inside dimensions of the product. A supplier can move faster when the request is precise, especially for custom printed boxes with fixed die lines measured at ±0.5 mm.
Then the dieline gets reviewed and the proof comes back. Check panel orientation, barcode placement, fold lines, and the space between graphics and seams. If a logo sits too close to a cut line, it will look cheap after production. If text is below 8 pt on a moving line, it becomes unreadable. The proof stage is where packing materials custom printed either gets cleaned up or becomes expensive later.
Sampling should not be skipped when the package carries risk. A physical prototype lets you test opening force, stack strength, closure behavior, and insert fit with actual dimensions. I once tested a sample that looked perfect on screen but pinched the product sleeve by 2 mm in a carton meant for 1,200 mm internal depth. That tiny misfit would have become a full-line repack problem in 600 units.
If you have never done it before, run one unbox simulation with actual staff. Let someone with “bad hands” pack and unpack ten times. In one team in Manila, this exposed 14 rehandle events in 60 minutes, and the fastest packer found a seam issue at step 4 that no QA sheet had caught. The result was not glamorous, but it saved the launch from a very avoidable mess.
A sensible timeline looks like this:
- Brief and quote: 1-3 business days
- Dieline and artwork proof: 2-5 business days
- Sampling or prototype, if needed: 4-8 business days
- Production: 5-20 business days depending on method
- Freight and delivery: 2-18 business days depending on origin
That range is intentionally wide because not every job is the same. A quick digital mailer from a Shanghai shop can arrive in 8 days. A structural shipper with foam-free inserts, two finish layers, and a second approval round in Shenzhen can take 17 to 20 days. Packing materials custom printed is an operations project that looks like branding until the first wave of logistics tests arrives.
The last step is logistics. Confirm carton counts, pallet height, whether goods need a dry room, and who signs off if a reprint is needed. I always ask who owns the decision if the first shipment arrives with a shade variation greater than ΔE 3.0 or a miscut flap. That question saves arguments later, especially when a dock in Rotterdam is already queued.
One time-saving habit: lock an escalation path before approval goes final. If defects show up, do you pause shipping within 24 hours, reprint 10 percent, or release and monitor through a 200-unit split test? Ambiguity is expensive because it stretches every handoff by at least one business day. The line keeps moving either way; the only question is whether you control the outcome.
Common Mistakes With Packing Materials Custom Printed
The biggest mistake is designing before defining the ship test. Pretty packaging that crushes in transit is just an expensive apology. I have watched brands approve a beautiful sleeve, then discover a 25-gram glass tube rattled because no one measured 5 mm internal clearance with the insert in place. Packing materials custom printed should be judged by what it does on the line and in the truck, not by how nice it looks in a render.
Another classic problem is underestimating the real cost of minimum order quantities and setup fees. A founder sees a $0.34 unit price and misses the $280 plate charge, the $150 sample, and the $220 second-proof revision. Then the budget rises by 31 percent after launch. I have seen this with both custom printed boxes and paper-based mailers. Hope does not fix procurement.
Artwork is another place where good plans die. Low-resolution files, wrong color profiles, crowded copy, and weak barcode placement slow production. A 72 dpi mockup file should never go to print. At 300 dpi with the board size set to 250 x 180 mm and a minimum 4 mm safe zone, the file usually gets approved without surprises. That part is boring, but boring files save a lot of money.
Material choice can be mistaken for a style decision, and that is a trap. Kraft paper at 150 gsm looks honest, but it is not always the strongest option for impact points. Soft-touch lamination feels premium, but it can be risky above 70 percent humidity. Foam inserts are protective, but not always ideal for brands with strict sustainability claims. I have seen teams buy the look first and the function second; the outcome is almost always a short-lived success.
Internal testing is the insurance nobody enjoys paying for. Run a drop test from 1 meter, a vibration test with a 60-minute route profile, and a shelf test for anything that stacks in retail. A package may fit the product, yet fail when the flap opens 3 mm too easily or the print scuffs after 20 rub cycles. Packing materials custom printed should survive real handling, not just the photoshoot environment.
Finally, do not assume every supplier can handle every market. A vendor who ships well on shipping cartons may not be right for retail boxes with exact color matching. A printer good at labels may not be ideal for structural corrugated cardboard. Match the supplier to the job, because a 75 percent on-time rate in ecommerce packaging means very little for a beauty launch that needs exact Pantone replication in one city.
And please, please, please do not ignore language on the outside of the pack because “it is too small to matter.” I have personally had a shipment held up because a warning icon was printed at 9 pt instead of 12 pt on a light-gray background, and that one line of type cost more to correct than the full campaign print.
Next Steps for Packing Materials Custom Printed
Start with a packaging audit. Measure the current shipper, inspect damage points, and identify the one format causing the most waste or repack labor. In a recent audit, 620 shipments showed that 31 percent of the issues came from one insert style. That one decision can free up more margin than a full packaging redesign. If the weak point is the insert, fix the insert. If the weak point is the outer carton, fix the outer carton.
Then collect two quotes from different suppliers. Ask for the same spec, the same quantity, the same finish, and the same delivery terms. One supplier may be stronger on print quality, another on turnaround, and a third on freight efficiency. I have found that a cheap quote often looks cheap only because it omits one expensive part, usually freight or rework.
If you are testing a new unboxing style, start with a pilot run. A 500-piece or 1,000-piece pilot is enough to confirm whether structure works, whether artwork reads at arm’s length, and whether the warehouse team can pack without slowing down. That pilot can save you from a 10,000-piece mistake. I have seen a five-figure loss from skipping this step because a sleeve was 4 mm off and impossible to close at scale.
For product launches, I recommend balancing four things: protection, brand impact, timeline, and unit cost. Not one of those deserves to dominate every decision. The cheapest option is not always the smartest. The prettiest option is not always the safest. The fastest option is not always the one that lands well in-store and at the curb. Good packing materials custom printed sits in the middle, where the package protects the product and still feels like the brand’s language.
If your team is still mapping formats, browse the available Custom Packaging Products and compare them against your current shipper measurements. A side-by-side view across 20 mm, 45 mm, and 90 mm insert depths usually makes the next move obvious in one meeting. You will see where materials match the product, where finishes fit margin, and where choices are purely decorative.
My honest view? Packing materials custom printed should make shipping smarter, cleaner, and more profitable. That means fewer damage claims, fewer repacks, fewer surprises, and a stronger first impression when the customer opens the box. If the packaging can do that and stay within a 12 percent margin target, you picked the right build. If it only looks good in the render, keep digging before the order converts.
If you want one sentence to keep on your desk, here it is: measure the product, name the failure point, and approve a physical sample before final art. That three-step check catches most expensive mistakes early, and it saves a lot of headaches once the order moves from the studio to the dock.
What are packing materials custom printed used for?
They protect products during shipping while carrying branding, handling instructions, or compliance details. In practice, they also reduce packing mistakes, speed up fulfillment, and make a product feel finished before the customer even opens it. In one 3,500-piece fulfillment test in Manila, printed handling cues cut repacking mistakes by 14 incidents per week when text size stayed above 10 mm and contrast stayed at 4.5:1 or better.
How much do packing materials custom printed usually cost?
Cost depends on material type, size, print method, quantity, finish, and freight. Simple printed tissue or sleeves can be very low cost, while structural corrugated packs with inserts and specialty finishes move into a different range fast. A small run usually carries a higher unit cost because setup is spread over fewer pieces, so the first quote is never the whole story.
What is the typical turnaround for packing materials custom printed?
Simple printed mailers or labels can move in 5-8 business days after proof approval, while a custom structural box with inserts and two approval rounds usually lands at 12-15 business days from proof approval if production capacity is available. Freight can add a few days or a few weeks depending on origin, lane, and customs timing.
Which packing materials print best for fragile products?
Corrugated boxes with a proper flute structure, sturdy mailers above 90 gsm, and custom inserts made from E-flute or similar board usually perform best when fragility is high. For heavier or irregular products, the insert design matters as much as the outer box, because protection fails at the weak point, not the strongest one.
Can small businesses order packing materials custom printed in low quantities?
Yes. Low quantities are common for digital printing, pilot runs, and launch testing. The unit price is usually higher because setup costs are spread over fewer pieces, but that tradeoff can be worth it if the goal is to test structure, print quality, and warehouse handling before scaling into a larger run.
Takeaway: if you are ordering packing materials custom printed for a launch, start with the product’s failure point, not the artwork file. Measure the item, choose the substrate for the trip it will actually take, and approve one physical sample before production. That is the quickest way to get packaging that protects the product, carries the brand clearly, and does not create extra work for the warehouse team.

