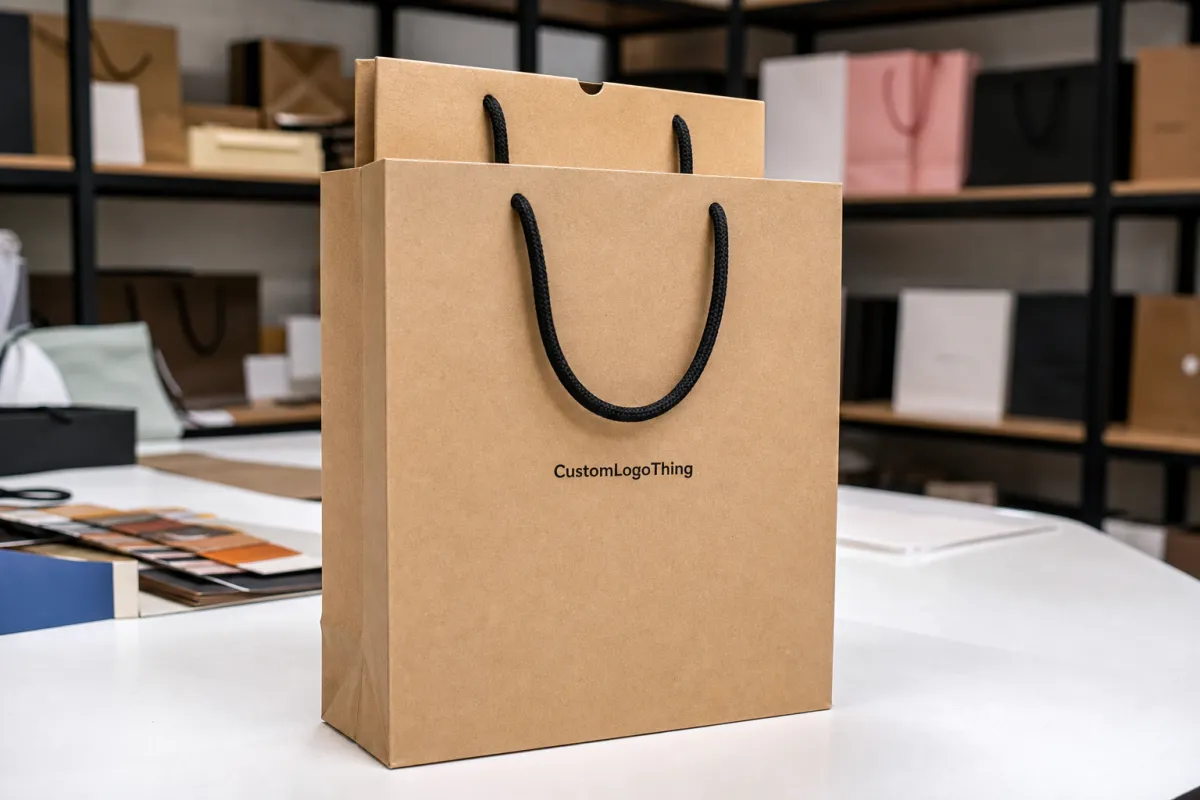
A bag that lets the product flop around is just paper with handles. Paper Shopping Bags with custom insert solve that by keeping the item upright, protecting edges and labels, and making the pack look intentional when it leaves the counter. That matters for retail packaging, gift sets, and any presentation where first impression affects value.
The insert is a structural part, not decoration. Think of it like a divider in Custom Printed Boxes or a tray in a rigid set: it controls movement and improves the reveal. If you already browse Custom Packaging Products, the difference is straightforward. One carries the item; the other presents it.
What paper shopping bags with custom insert actually solve
The main problem is movement. A bottle rattles, a candle leans, a skincare kit slides into the gusset, and the bag starts to feel cheap even if the print is strong. An internal insert creates a cradle so the product sits where it should instead of drifting into a corner.
Most inserts are designed to support the base, brace the sides, or lock around a neck, cap, or box edge. That makes them useful for bottles, jars, candles, cosmetics, and gift kits with awkward proportions. If the item is tall, top-heavy, or has extra headspace, the insert does more than the bag can by itself.
The catch is fit. A nice bag with the wrong insert is still wrong. Bag width, gusset depth, handle placement, seam strength, and the finished product size all affect performance. Labels, shrink bands, closures, and protective wraps can change the real dimensions enough to break an otherwise clean design.
For brands that care about presentation, the insert also changes the customer experience. A tidy reveal feels controlled and premium. A crooked reveal feels rushed. Same bag, different outcome.
How the internal insert keeps bags stable
Most inserts fall into a few practical formats. Folded board inserts are simple and fast, which makes them useful for lighter bottles or candles. Die-cut cradles hug the product more closely and usually look cleaner at point of sale. Corrugated supports handle heavier loads or wider gift kits. Divider layouts work when the bag carries multiple items that need separate slots.
The insert controls movement by touching the product where it matters. Base support stops sinking. Side walls stop tilt. Neck supports keep tall items upright. That is why one insert can work for a jar and fail for a bottle with a long neck. The center of gravity changes, so the support has to change too.
Bag geometry matters just as much. A wider gusset gives the insert more room, but too much room can let the item drift if the cradle is loose. Handle placement changes where the insert can sit. Bottom seam strength matters if the packed item is dense, because the bag may look fine and still fail under load.
If the product moves, the insert is wrong. If packing slows to a crawl, the insert is too tight. That is the whole job.
For transit-sensitive packs, ask whether the design has been checked against real drop and vibration expectations, not just a tabletop fit. ISTA publishes useful packaging testing references at ISTA. It will not design the bag for you, but it helps define what tested should mean.
Sizing, board weight, and material choices
Start with the product, not the bag. Measure height, width, depth, and the widest point after labels or closures are on. Then add only enough clearance for loading and paper tolerances. Too much extra room makes the insert sloppy. Too little turns packing into a fight.
Material choice changes both performance and appearance. Kraft gives a natural look and works well for brands with an earthy feel. Coated board and SBS print sharper and feel more refined. Recycled board can support sustainability goals, although the surface may be less crisp under heavy ink coverage. Corrugated inserts add structure when the load is dense or the bag needs more resistance to sagging.
Thickness is not automatically better. Too stiff, and the insert can split or fight the fold. Too light, and it flexes. For this kind of bag, the right choice is usually the lightest board that still prevents movement under the packed weight. Many programs land around 250-350 gsm for the bag body, with a heavier board or corrugated build for the insert, but the product mass and finish should decide the final spec.
If sustainability matters, ask for FSC-certified paper and documentation rather than relying on a vague eco claim. The FSC system is one of the clearer ways to verify sourcing and is easier to defend in procurement review.
Short version: match board weight to the product, not to a wish list. A heavy bottle needs more support than a silk scarf does.
Cost, MOQ, and what changes unit price
The quote usually breaks into two parts: the bag and the insert. That split helps buyers see what is actually driving cost. A simple printed kraft bag might land around $0.18-$0.40 per unit at 5,000 pieces, depending on size and print coverage. Add a straightforward insert, and the total often moves into the $0.28-$0.75 range. More complex builds can move higher quickly.
MOQ matters because setup is real. Tooling, proofing, and sample labor do not disappear on a small order. On lower quantities, fixed costs get spread across fewer units, so unit price climbs. That is especially true when the insert needs a die, a special fold, or extra hand assembly. If you want a better landed cost, ask whether the supplier can standardize the insert shape while keeping the outside print custom.
| Insert style | Best for | Typical unit impact at 5,000 pcs | Tradeoff |
|---|---|---|---|
| Folded board | Light bottles, candles | $0.08-$0.18 | Fast to make, less precise fit |
| Die-cut cradle | Jars, skincare, premium sets | $0.14-$0.32 | Cleaner presentation, more tooling |
| Corrugated support | Heavier items, dense kits | $0.18-$0.40 | Stronger structure, bulkier flat pack |
| Divider layout | Multi-item gift packs | $0.22-$0.50 | Best control, slower packing |
Hidden costs are where quotes get slippery. Die cutting, proof rounds, extra inserts for approval, custom packing configurations, and freight on bulky flat-packed components all move the landed price. If the supplier bundles everything into one line item, ask for a split quote so you can compare the same build instead of three different versions of it.
Production steps and turnaround from proof to ship
The workflow is standard: brief, measurements, dieline, sample, approval, production, quality check, packing, shipment. Trouble usually starts when one step is vague. If artwork is still changing while the insert is being tooled, the schedule slips. If product measurements are estimated instead of checked against a real sample, the first prototype is likely to miss in some annoying way.
For simple printed bags, turnaround is often 10-15 business days after proof approval. Custom structural inserts usually need more time, especially if tooling is required or if the fit needs a second sampling round. A more realistic window is 15-25 business days, sometimes longer during peak production periods. That is not especially slow; it is the cost of making something that has to hold shape and protect a product.
Ask whether the bag and insert can be produced in parallel. In many cases they can, which saves calendar time and helps with launch planning. It also helps if the supplier shares pre-production photos before packing, because spotting a collar issue or fold error on screen is cheaper than catching it in a warehouse.
Quality control should include a few simple checks: board flatness, glue seam strength, die-cut burrs, handle pull performance, insert alignment, and a load test with the actual packed item. If the product is fragile or top-heavy, add a basic shake test and a short stacking test. That is usually enough to catch obvious mistakes before they become expensive.
For broader packaging language and sustainability claims, the Sustainable Packaging Coalition at packaging.org is a useful place to sanity-check terminology.
Common mistakes that cause bad fit or wasted spend
The most common mistake is measuring the product as if it lives naked in the bag. It does not. Caps, labels, pumps, shrink wrap, and gift wrap all add thickness. Ignore them and the insert becomes a squeeze test instead of a support piece. That is how you end up with crushed corners or a pack that takes too long to assemble.
The second mistake is making the insert too tight. Buyers often think tighter means more secure, but in production it usually means slower packing, more rejects, and occasional damage to premium finishes. A tight insert can also scuff coated surfaces or dent soft boxes. For cosmetic kits and candle packaging, that is an expensive way to lose margin.
The opposite mistake is the insert that looks good in a drawing and wobbles in real life. On paper, it seems fine. In the bag, the item leans, rattles, and makes the whole pack feel rushed. Testing with real samples matters more than a clean dieline.
Do not approve the outer bag before checking the insert in context. Seam position, gusset width, and handle drop can change whether the product sits centered or crooked. That is especially true for retail packaging that has to look neat on a shelf, because small alignment errors become very visible once the bag is upright.
Expert tips for cleaner presentation and easier packing
Use the insert for presentation, not just stabilization. A slight reveal height can make a bottle look taller and more deliberate. A cutout can frame the label. A shoulder support can make the pack feel more premium without adding much material. Good branded packaging is often about restraint, not louder graphics.
Make the build easier on the packing line. Finger notches help workers lift the insert without damaging it. Lock tabs reduce loose parts. A printed load order can shave seconds off each unit, and seconds matter when the order is in the thousands. For launch kits or event sets, those seconds become labor cost fast.
Design for the person packing it, not just the person buying it. If the line hates the structure, production will too.
Keep the outer print and internal structure aligned. If the bag says premium, the insert should not look like an afterthought. Before sign-off, test three conditions: empty, fully loaded, and stacked or lightly compressed. Empty shows the structure. Loaded shows the fit. Stacked shows whether the bag still looks good in a cart, tote, or delivery box.
If your line also includes custom printed boxes, the same logic applies: control movement, protect surfaces, and make the reveal look intentional.
What to send for pricing
The fastest way to get useful pricing is to send a one-page spec sheet instead of a vague email. Include product dimensions, packed weight, bag size, insert style, print coverage, finish, and target quantity. If you have a photo or a physical sample, send that too. It saves everyone from guessing at the same bad numbers.
Ask for a prototype or pre-production sample, then compare at least two insert options. One may cost less. The other may pack faster or feel better in the hand. A quote that looks cheap but adds labor on the packing line is not actually cheap; it is just hiding the bill somewhere else.
Use the same checklist across suppliers so you are pricing the same build, not three different interpretations of it. That is the cleanest way to compare Custom Packaging Products and decide what fits your product, your timeline, and your margin.
If the project is for a retail launch, a gift program, or a packaging refresh, the best starting point is still the same: dimensions, sample, quantity target. Get those right first, and everything else gets easier.
Frequently Asked Questions
What products work best in paper shopping bags with custom insert?
They work best for items that tip, slide, or need an upright display, like bottles, jars, candles, skincare kits, and gift sets. They also help with light but awkward shapes, because the insert controls movement better than a thicker bag alone.
How do I size a custom insert for paper shopping bags?
Measure the product at its widest point, then add only enough clearance for loading and paper tolerances. Check bag width, gusset depth, and handle placement too, because the insert has to fit the full structure, not just the item.
What affects the price of paper shopping bags with custom insert?
Bag size, board thickness, print complexity, insert design, and order quantity all move unit cost. Tooling, sampling, and freight can also change the landed price, especially when the insert is more than a simple fold.
How long does production usually take for a custom insert bag order?
Simple builds move faster; custom structures usually need extra time for samples, approval, and setup. The cleanest way to shorten turnaround is to lock dimensions, artwork, and insert style before you ask for final pricing.
Can the insert be printed or branded inside the bag?
Yes, if the insert material and print method support it without weakening the structure. Interior branding works best when it stays simple, because the insert still has to do the practical job of holding the product in place.

