Personalized Water Bottle Labels: Buyer’s Ordering Guide
Personalized Water Bottle Labels do more than cover a blank bottle. They change the way the bottle is perceived before anyone opens it, which matters in settings where presentation, branding, and speed all compete for attention. A plain bottle can do its job. A well-built label makes the bottle look deliberate, and that difference is visible on a banquet table, in a cooler, or on a retail shelf.
For buyers, the real question is not whether the label looks good on screen. It is whether the label construction matches the actual use. That includes the bottle surface, the temperature it will face, the amount of handling it will take, and how long the label needs to stay intact. A label that works for a wedding reception can fail quickly in a chilled display case. The artwork may be identical, but the substrate, adhesive, and finish should not be.
These labels are usually pressure-sensitive and sized to wrap a bottle rather than sit flat on a carton or jar. They can be printed on paper or film, supplied in sheets or rolls, and finished for temporary or longer-term use. The best orders start with practical questions: how is the bottle stored, who applies the label, and what kind of abuse should it survive?
When personalized water bottle labels make sense
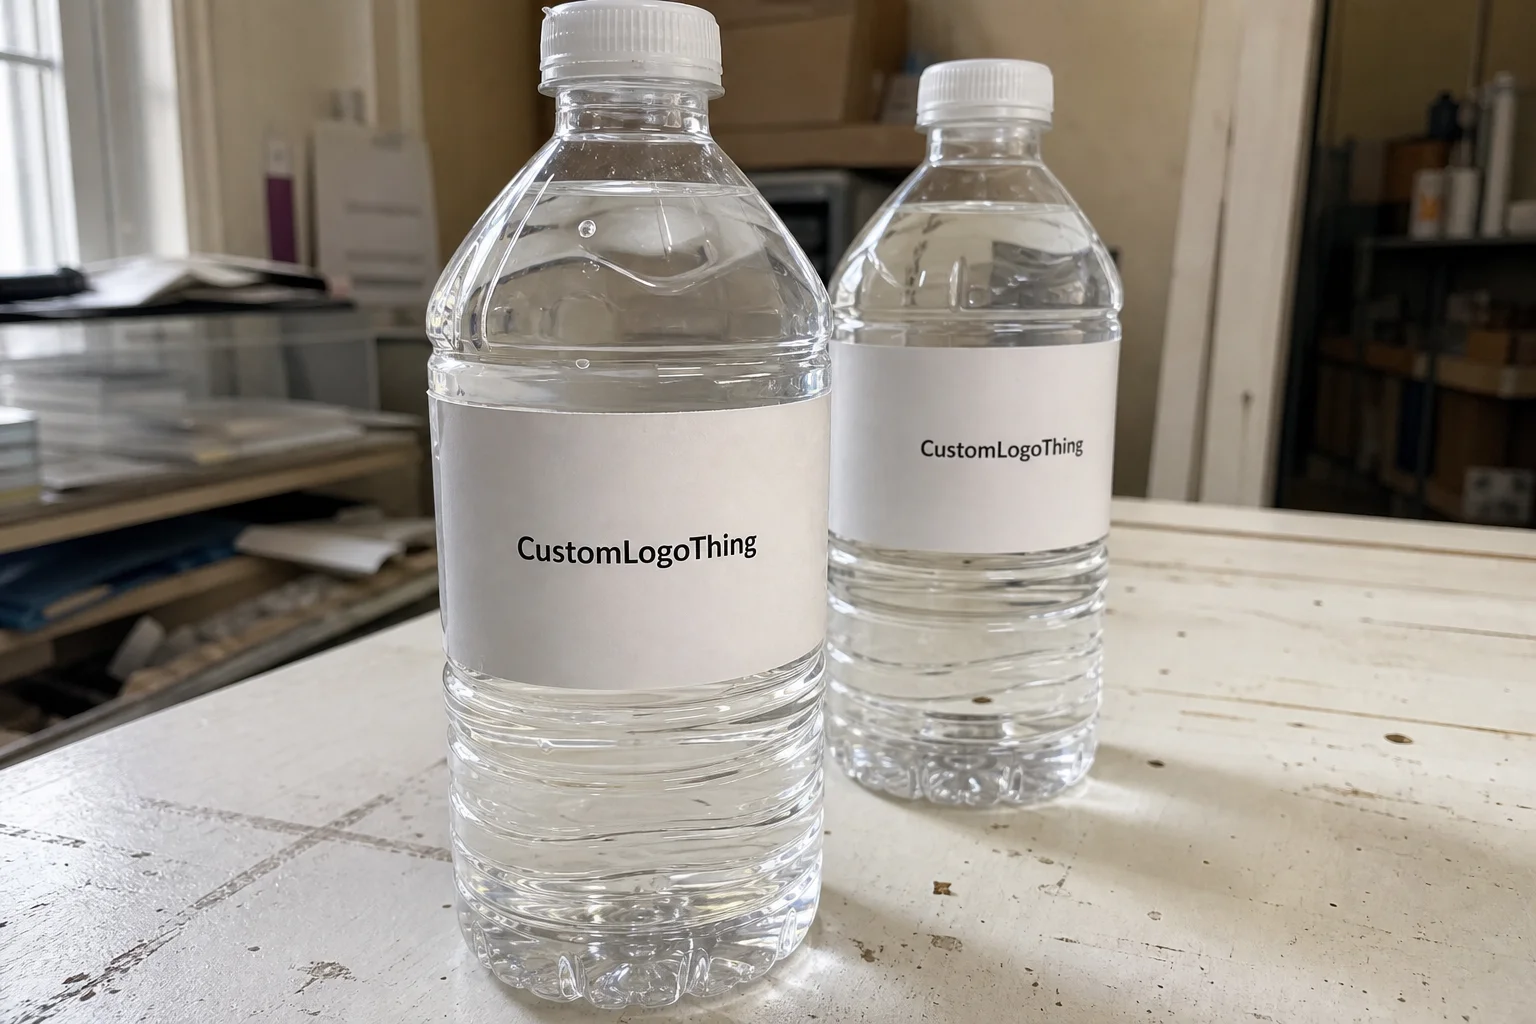
Personalized Water Bottle Labels make sense any time the bottle is part of the presentation. That includes weddings, corporate events, hotel welcome kits, product sampling, sports promotions, conferences, and private-label beverage packaging. The label can carry a logo, event name, flavor cue, ingredient panel, QR code, or simple message without forcing the buyer to change the bottle itself.
That flexibility is one reason these labels show up in short-run work so often. A buyer may need 150 bottles for a rehearsal dinner or 8,000 for a launch event. Ordering branded bottles in those quantities is expensive and inflexible. A custom label gives the same visual result with far less inventory risk.
The other advantage is control over the moment of first contact. Guests see the bottle before they drink from it. Retail buyers see it before they compare flavors. Staff see it before they sort it into a cooler or tray. A clear, well-placed label turns a generic container into a recognizable item at a glance.
There is also a practical merchandising benefit that gets overlooked. In a crowded cooler or display, a label can help differentiate variants, reinforce brand consistency, and keep the product from looking like a commodity. For small beverage brands, that matters. For event planners, it matters too, because the bottle often sits in the same visual field as flowers, signage, menus, or place cards. A weak label can make the whole setup feel unfinished.
“If the bottle is going into a cooler, a service tray, or a guest handoff, the label has to be chosen for the surface and the abuse, not just the artwork.”
For buyers comparing formats, Custom Labels & Tags are often a better fit than stock labels when the bottle has to do real branding work. The more specific the environment, the more specific the construction should be.
How the process works from proof to application
The production path for personalized water bottle labels is usually simple on paper and less simple in practice. It starts with artwork intake. The printer checks file format, bleed, font handling, image resolution, and color mode. If the label includes variable data, a barcode, a batch code, or a sponsor line, those elements are reviewed early because they can affect the layout and the production method.
Once the file is checked, a proof is created. This is where many problems are caught, but only if the buyer reviews it carefully. A proof should show text, placement, cut line, and color intent clearly enough that the final bottle can be imagined in real use. If the label will wrap around a curved bottle, a flat proof alone is not enough. The artwork may look balanced on screen and still land badly on the actual container.
Lead time depends on what the order asks the shop to do. A simple rectangle on a common film stock can move faster than a contour-cut label with a laminate and special adhesive. Large runs behave differently from short runs. Multiple versions, custom dies, or sensitive color matching add time because they add setup and inspection steps. For many standard jobs, 12 to 15 business days after proof approval is a realistic window, but the actual schedule should always be tied to the spec sheet rather than a generic promise.
Application method matters earlier than people expect. If the labels are going on by hand, sheet labels may be efficient and easy to manage. If the bottle count is higher, or if staff need a repeatable workflow, roll labels are usually easier to place consistently. A roll format also tends to reduce handling time, which can matter during a tight event setup or a packing run.
The most common delay is not printing. It is incomplete information. A buyer sends a logo and quantity, but no bottle dimensions. Or the artwork is approved before the label height is checked against the shoulder curve. Or the file uses RGB colors and nobody notices until the proof is already in motion. The faster the order needs to move, the more important it is to confirm the container size, label panel, and application conditions before release.
Materials, adhesives, and finishes that change durability
Material choice is the difference between a label that holds and a label that curls, scuffs, or slides off. Paper stocks are usually the lowest-cost option and can work well for dry, short-duration applications. They are less suited to refrigerated storage, condensation, or repeated hand contact. Film stocks such as polypropylene generally perform better under moisture and handling because they resist tearing and soften less in wet conditions.
Adhesive selection is just as important. A permanent adhesive is useful when the label is meant to stay put on a smooth bottle through chilling and service. A removable adhesive makes more sense when the label must come off cleanly afterward. The wrong adhesive creates problems that show up late: edge lift, residue, or labels that slide after condensation forms. That risk rises on cold bottles, curved bottles, and textured surfaces.
Finish affects both appearance and wear. Gloss gives color more punch and makes the label read from a distance. Matte reduces glare, which can help under bright event lighting or on shelves with overhead reflections. A soft-touch finish has a premium feel, but that feel does not automatically equal better performance in wet or high-contact settings. If the bottle will be stacked, carried, or packed with ice, a laminate often earns its place because it adds scuff resistance and protects the printed surface from rubbing.
For buyers, the easiest way to think about construction is as a system. The face stock, adhesive, and finish all need to match the job. A beautiful print on the wrong material is still the wrong label. That sounds obvious, but it is where many short-run orders go sideways.
Water, chill, and handling are not abstract risks. They are the conditions that define whether the label survives. A bottle that sits on a dry table for an hour has a very different requirement from one that lives in a cooler for half a day. If you are unsure which material fits, ask the supplier to describe the expected performance in real conditions rather than in generic terms.
Technical decisions for label construction are often cross-checked against industry guidance from sources like packaging.org and transit-oriented testing frameworks such as those discussed by ISTA. Those references do not replace testing on the actual bottle, but they do keep the conversation grounded in stress, adhesion, and handling rather than mockup aesthetics.
Cost and pricing: what drives a clean quote
Pricing for personalized water bottle labels usually comes down to a narrow set of variables: quantity, size, shape, material, finish, and whether the order needs a custom die cut. A small rectangle on paper can be inexpensive. A short run on film with laminate, special adhesive, and contour cutting costs more because the setup work is spread across fewer pieces.
Low quantities can look expensive on a per-label basis because the fixed work is still there. Proofing, cutting, setup, and press adjustment do not shrink much just because the order is small. That is why a quote for 250 labels can look disproportionately high compared with 5,000. The cost structure is real, not arbitrary.
For larger quantities, the unit price drops because the setup is diluted over more labels. That is also why quote comparisons should be made on the same assumptions. Two suppliers may quote the same artwork, but one may include proof revisions, die cutting, and standard packing while another excludes those items or adds them later.
| Option | Typical use | Typical price range at 5,000 units | Notes |
|---|---|---|---|
| Paper label, simple rectangle | Dry event bottles, short display life | $0.08-$0.16 per label | Lowest material cost, limited moisture resistance |
| Polypropylene film, standard adhesive | Chilled service, sampling, general branding | $0.14-$0.24 per label | Better tear resistance and cleaner handling |
| Film with laminate and custom die cut | Premium presentation or heavy handling | $0.18-$0.32 per label | Higher setup, stronger scuff resistance |
| Variable data or specialty adhesive | Batch coding, special conditions, difficult surfaces | $0.22-$0.40 per label | Depends heavily on application and workflow |
Secondary costs deserve attention because they can change the real budget. Rush production may be worth it if the event date is fixed. Sample proofs may save money if the label needs to be tested on the actual bottle. A slightly higher unit price can still be the better deal if it avoids rework, residue cleanup, or labels that fail after chilling.
Buyers should ask what is included before comparing suppliers. The quote should make clear whether it covers prepress review, proofing, cutting method, finishing, pack format, and shipping. If those details are vague, the price comparison is not trustworthy.
Step-by-step ordering checklist for accurate production
Accurate orders start with the bottle itself. Measure the usable label panel, not just the bottle height. Note the diameter, any taper, the shoulder curve, and the space available before a seam or molded ridge gets in the way. If the bottle shape is unusual, send a sample or clear dimensioned photos. A label spec built on guesswork usually costs more later.
Next, lock the functional requirements. Decide whether the label needs to be removable or permanent. Confirm whether it will be chilled. Decide whether it needs a matte or gloss finish. If the bottle will be handled in bulk, choose a construction that can survive repeated contact rather than one that only looks good in an untouched mockup.
Art files should be ready before the order moves forward. That means final logo files, text copy, color references, barcode data if needed, and any legal or ingredient text that must appear on the label. Fonts should be outlined or embedded, and the file should be built at the correct size with bleed. Small corrections can still be made after proofing, but changes at that stage tend to delay the job.
- Measure the bottle and note the usable label area.
- Confirm whether the label must be removable or permanent.
- Send print-ready artwork or source files with fonts outlined.
- Choose the finish based on the service environment.
- Approve the proof only after checking copy, color, and placement.
- Order extra labels for spoilage, test application, and transit damage.
Use case should drive the final approval. A bottle for indoor service does not need the same durability as one packed in ice or shipped with other goods. A bottle that sits on a table for a toast has different requirements from one that must read clearly in a retail cooler. The label spec should reflect those differences instead of forcing one standard across every project.
It is also worth thinking through how the labels will be stored and applied. Labels that arrive cold or damp should acclimate before use. Bottles should be dry at the time of application. Staff should have a placement guide if the label needs to land consistently across a large count. None of this is glamorous. It is the difference between a clean batch and a box of wrinkled rejects.
For related formats, browse Custom Labels & Tags and compare the bottle application conditions before choosing a generic spec. A label should be built for the container and the handling pattern, not just the artwork.
Common mistakes that cause peeling, wrinkling, or color drift
The most common failure is a size mismatch. A label that is too wide, too tall, or too close to the bottle seam will wrinkle on a curved surface. Even a strong adhesive cannot correct a bad layout. The label needs enough room to wrap cleanly across the panel and settle without forcing the edge to bunch.
Surface condition comes next. Moisture, oils from handling, dust, and condensation all weaken adhesion if the bottle is not prepared properly. In event work, this gets overlooked because the schedule is tight and the labels are moving fast. The result is usually blamed on the label stock when the real issue is the application surface.
Color drift often starts with the file, not the press. A design built in RGB can shift during conversion to print. Bright reds, deep blues, and subtle neutrals are especially sensitive. Buyers who care about brand color should expect to review a proof under normal lighting, not just judge it from a phone screen. Fine type can also change slightly depending on the stock and finish, so thin fonts deserve extra attention.
Handling is another source of failure. Bottles in coolers, ice buckets, shipping cartons, or service trays see more friction than buyers expect. Repeated contact can dull a finish, lift an edge, or scratch the print. Personalized water bottle labels need to be chosen with those conditions in mind, not just the first five minutes after application.
Another mistake is checking the front view only. A label may look balanced head-on and still hide a logo under the seam or push important text onto the shoulder curve. That kind of mistake is easy to miss in a flat proof. It is easier to catch on a test bottle, which is why a physical sample is worth more than a polished mockup.
Expert tips for labels that stay sharp in real use
Test one finished label on the actual bottle before signing off the run. That single step reveals the things a digital proof cannot show: how the label follows the curve, how the adhesive behaves on the surface, and whether the finish looks right under the lighting that matters. In production terms, that is one of the cheapest ways to prevent waste.
Match the finish to the environment. Gloss tends to read louder and brighter. Matte lowers glare and can make typography easier to read in a bright room. Laminate is often worth the added cost if the bottle will be rubbed, packed, chilled, or handled by more than one person. For a short event, the label may only need to look good. For service work, it has to endure contact.
Keep the workflow as controlled as the artwork. Store labels in a dry place. Let cold stock acclimate. Dry bottles before application. Use a placement guide if staff are applying labels by hand. Those are basic controls, but they prevent the most common problems: lifting edges, crooked placement, and wrinkled wrap points.
If the order is exposed to shipping or rough handling, use the same discipline a packaging engineer would use for transport concerns. ISTA-style thinking is useful because it shifts the focus from appearance to stress. A label can look fine in a box and still fail in transit if the material or adhesive is too light for the job.
There is a simple hierarchy that works well: confirm the bottle, choose the use case, select the construction, and then approve the art. Buyers who reverse that order usually pay for it in reprints, delays, or labels that never quite fit the bottle they were meant for.
Personalized water bottle labels are strongest when they are treated as part of the packaging system. That means matching stock, adhesive, finish, and quantity to the actual bottle and the actual handling conditions. The Labels That Hold Up are rarely the fanciest ones. They are the ones that were specified with enough care to survive the real environment.
How do personalized water bottle labels stay on during chilling and handling?
They hold best when the bottle surface is clean, dry, and free of condensation at the time of application. A film face stock with the right adhesive performs better than standard paper in coolers, buckets, or refrigerated storage. A test application on the actual bottle is the most reliable way to confirm performance before a full run.
What size should custom water bottle labels be for a standard bottle?
Measure the usable label panel on the bottle itself rather than using a generic size chart. Leave room for the seam, taper, and shoulder curve so the label can wrap without buckling. A proof on the actual container is the fastest way to confirm the dimensions are correct.
Are personalized water bottle labels waterproof or just water-resistant?
Performance depends on the face stock, adhesive, and whether the label includes a laminate or protective finish. Some constructions handle condensation and brief contact well, but that does not mean they are meant for prolonged ice-water exposure. The safest approach is to match the label build to the real use, not the appearance.
What details should I have ready before requesting a quote?
Have the bottle dimensions, target quantity, artwork files, desired finish, and expected timeline ready before asking for pricing. Also confirm whether the labels need to be removable, moisture-resistant, or suitable for retail display. The more specific the inputs, the more useful the quote will be.
How many extra labels should I order for an event or launch?
Order extra labels for test application, spoilage, and any bottles that get damaged during handling or transport. For a time-sensitive event, a modest buffer is usually cheaper than a rushed second production run. Build that overage into the order before approval so the final count is not too tight.
Personalized water bottle labels work best when the buyer treats them as a packaging decision, not a decoration decision. Measure the bottle, confirm the use case, Choose the Right face stock and adhesive, and compare quotes on the same spec. That approach gives the label a fair chance to do what it is supposed to do: look polished, stay in place, and hold up through actual use.