Buyer Fit Snapshot
| Best fit | Printed Carton Inserts with Logo projects where brand print, material claims, artwork control, MOQ, and repeat-order consistency need to be specified before quoting. |
|---|---|
| Quote inputs | Share finished size, material target, print colors, finish, packing count, annual reorder estimate, ship-to region, and any compliance wording. |
| Proofing check | Approve dieline scale, logo placement, barcode or warning zones, color tolerance, closure strength, and carton packing before bulk production. |
| Main risk | Vague material claims, crowded artwork, missing packing details, or unclear freight terms can make a low unit price expensive after revisions. |
Fast answer: Printed Carton Inserts with Logo: Board, Finish, Dieline, and Unit Cost should be specified like a repeatable production item. The safest quote records material, print method, finish, artwork proof, packing count, and reorder notes in one written spec.
Production checks before approval
Compare the actual filled-product size with the drawing, then confirm tolerance on folds, seals, hang holes, label areas, and retail display edges. Reserve space for logos, QR codes, warning copy, and material claims before decorative graphics fill the panel.
Quote comparison points
Review material grade, print process, finish, sampling route, tooling charges, carton quantity, and freight assumptions side by side. A quote is only useful when the supplier can repeat the same color, closure quality, and packing count on the next order.
Printed Carton Inserts with logo do more than stop a product from rattling around in a box. They set the tone the moment the carton opens. A product sitting loose in a plain carton can look underwhelming even before the customer touches it. Add a fitted insert with clean branding, and the package feels deliberate, protected, and worth the price tag.
That is why brands keep using printed carton Inserts With Logo for kits, fragile items, retail-ready sets, and e-commerce shipments that need a stronger first impression. The objective sounds simple: protect the product and present the brand. The execution is where things get interesting, because both goals have to work without turning the insert into expensive packaging theater.
For packaging buyers, inserts sit in a useful middle zone. They can replace plastic trays, reduce loose filler, support right-sizing, and improve unboxing without creating a complicated build. Get the structure right and the insert earns its place twice: once in transit and again when the customer opens the box.
Why Printed Carton Inserts with Logo Punch Above Their Weight
A good insert is not trying to win awards. It is trying to survive shipping and make the product look organized. That is the job. It handles movement, scuffing, awkward gaps, and inconsistent presentation, then turns them into something controlled inside the box. The product stays where it belongs. The brand stays visible. Everyone moves on with their day.
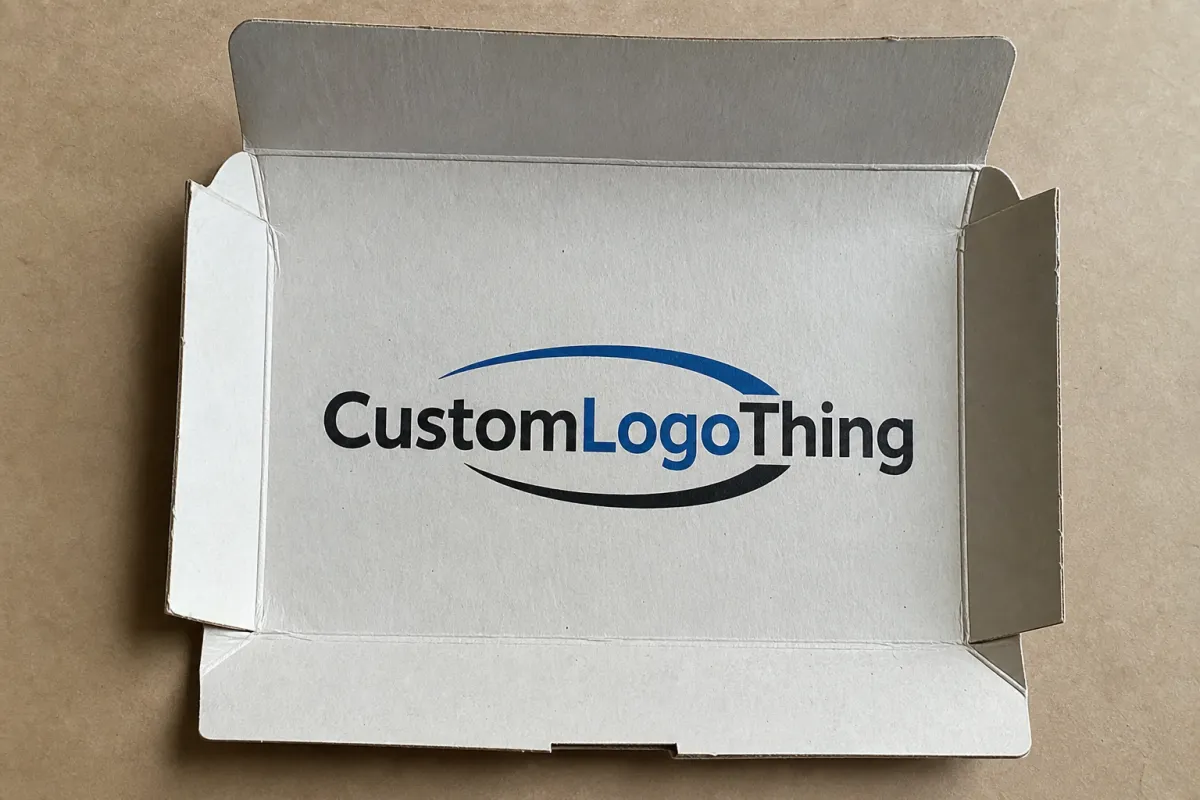
Printed carton inserts with logo are structural paperboard components that hold, separate, and present products while carrying brand graphics on visible surfaces. Depending on the design, they can also carry product names, instructions, orientation marks, barcodes, or pack-out cues for the fulfillment team. The logo does not need to dominate every surface. A crisp mark on the top panel or inside flap often works better than a loud graphic nobody sees after assembly.
They also fit well into sustainability conversations, but only if the details are honest. Paper-based inserts can replace combinations of plastic trays, foam blocks, and extra filler, which can reduce material count and simplify disposal. That is not automatic. The board grade, inks, coatings, and local recycling rules still matter. A printed paperboard insert is not a miracle. It is just often a smarter default than a pile of mixed materials.
They matter most in packages that have multiple jobs to do:
- Fragile items such as glass bottles, cosmetics, electronics accessories, and small appliances.
- Multi-pack kits where several components need to stay separated and easy to identify.
- Premium retail sets where presentation affects perceived value before the product is even handled.
- E-commerce orders where damage rates and repeat purchase behavior both depend on the first shipment going right.
Customers rarely congratulate an insert for doing its job. They notice it when it fails. That is why the best printed carton inserts with logo tend to feel almost invisible in use. They hold the product steady, protect the edges, and make the unboxing feel intentional without begging for attention.
"The insert should not compete with the product. It should make the product look settled, then get out of the way."
How Printed Carton Inserts with Logo Work Inside the Box
The structure matters more than the print. A carton insert earns its place by preventing movement under normal shipping abuse, not by looking polished in a mockup. The folds, tabs, slots, locking points, and glue areas all work together to distribute pressure away from fragile parts of the item.
Most designs begin with a dieline that maps where the board will cut, crease, and fold. That flat pattern becomes a three-dimensional shell, tray, divider, or cradle. Clean geometry keeps assembly simple. Overcomplicated geometry does the opposite, and then labor costs show up like an uninvited guest.
Common structural elements
A typical insert may include a base tray, side walls, divider panels, locking tabs, or die-cut windows that cradle the product. For bottle packs and glass items, the insert often uses corner retention and edge clearance to reduce point pressure. For electronics or cosmetics, the insert may rely on snug pockets and nested layers so the item cannot tilt or rub against the carton wall.
Assembly matters as much as the cut pattern. A design that takes 20 seconds to form instead of 8 seconds may not sound dramatic, but across 20,000 units, that difference can turn a tidy line into a bottleneck. The best insert is one a worker can build without thinking too hard and a customer can remove without a fight. That is not a high bar. It is a practical one.
Where the logo goes
Brand graphics can live on the top panel, the interior face, the side walls, or a small visible tab that remains readable after folding. Placement should follow what the customer actually sees when the box opens. If the logo ends up buried under the product, it is wasted ink. If it sits on the most visible panel, it can reinforce the opening sequence without adding much cost.
Subtlety usually wins. A one-color logo, a short message, or a small product ID can be enough. If the insert is visible for two seconds, it does not need a magazine layout. It needs to look clean, aligned, and consistent with the outer box.
Material choice shapes performance too. Recycled paperboard is common for lighter products and presentation-focused kits. Corrugated board gives more crush resistance and better stacking strength for heavier loads or rougher transit. Specialty grades can help, but only if the product actually needs them. Fancy board with the wrong thickness is just expensive cardboard.
For testing and sourcing, it helps to use real-world language rather than guesswork. Many teams borrow ideas from ISTA transit testing to evaluate vibration, drop, and compression risk. For material sourcing and certification questions, the ISTA and FSC sites are useful references. If the insert is going into a retail or fulfillment chain, it has to survive more than a polished prototype photo.
Cost, Pricing, and MOQ: What Actually Drives the Quote
Pricing for printed carton inserts with logo is not random, even if some supplier quotes make it feel that way. The number usually comes down to a handful of variables: board grade, thickness, dimensions, print coverage, structural complexity, finishing, tooling, and order quantity. Change one of those, and the price moves.
A small, simple insert for a light cosmetic item may land in a very different range from a heavy-duty divider set for glass or electronics. As a rough planning guide, a straightforward recycled paperboard insert at 5,000 units might fall around $0.18-$0.35 per unit, while a more complex corrugated insert with multiple folds and higher ink coverage could sit closer to $0.35-$0.80 per unit or more, depending on size and finishing. Lower quantities almost always cost more per piece. That is not supplier greed. That is setup math.
MOQs, or minimum order quantities, are often the part buyers underestimate. A smaller run may be possible, but the tooling, sampling, and press setup get spread across fewer units. A 1,000-piece order can work for a launch, but the unit price may be meaningfully higher than a 10,000-piece run. If you are comparing suppliers, ask where the break point sits instead of only asking for the lowest number they can fit into an email.
| Insert Type | Best For | Typical Unit Range | Strength | Notes |
|---|---|---|---|---|
| Recycled paperboard insert | Light retail goods, cosmetics, small kits | $0.18-$0.35 | Good for light-to-moderate protection | Often the best balance of cost, print quality, and sustainability |
| Corrugated carton insert | Heavier items, shipping protection, stacked cartons | $0.35-$0.80+ | Better crush and vibration resistance | Can cost more but reduce damage and returns |
| Premium printed board insert | Gift sets, premium retail packaging, presentation packs | $0.30-$0.70+ | Strong presentation value | Often chosen for visual impact rather than raw strength |
The cheapest unit price is not always the cheapest program. If a lower-cost insert takes longer to assemble, arrives damaged, or lets products shift in transit, the hidden cost shows up in labor, returns, and replacement shipments. That is why smart buyers compare protection cost, not just piece price.
Budget for the less obvious items too:
- Prototyping and physical samples before full production.
- Dieline revisions if the first layout does not fit the product correctly.
- Freight, especially if the board is bulky or the shipment is split.
- Packaging for shipping if the inserts themselves need careful carton packing.
- Approval cycles that add time and sometimes reprint costs.
Ask for at least two quote scenarios. One should reflect the minimum viable insert that meets the core protection need. The other should show the premium version with the same footprint, maybe thicker board or better print coverage. That comparison makes tradeoffs obvious fast. Otherwise you end up comparing apples to an expensive cloud of cardboard dust.
Production Process and Timeline: From Dieline to Delivery
The production process is usually predictable if the inputs are clean. The problem is that the inputs are often messy. Someone measures the product wrong, another person approves artwork before the structure is finalized, and suddenly the schedule turns into a blame buffet.
A normal workflow looks like this:
- Brief - define the product, shipping method, target feel, and protection level.
- Measurements - record the real product dimensions, including tolerance ranges and any protrusions.
- Dieline creation - map the flat cut and fold pattern around the actual product.
- Artwork setup - place logo, product text, handling marks, and any regulatory copy.
- Prototype - make a sample or pre-production version.
- Corrections - adjust fit, fold behavior, print placement, or material thickness.
- Final approval - sign off on the structure and visuals.
- Production - print, cut, crease, glue if needed, and convert.
- Packing - bundle the inserts in a way that prevents crush or warp.
- Shipping - move the finished goods to the assembly site or fulfillment center.
Lead times vary by complexity. Simple prototypes can sometimes be turned around in about 5-10 business days, while a custom structural insert with print, revisions, and production often lands closer to 12-20 business days after proof approval. Heavier board, specialty finishing, or a busy production window can extend that further. Shipping time is separate, which sounds obvious until a launch date is breathing down your neck.
What slows things down?
- Missing product samples or inconsistent measurements.
- Too many revision rounds on the dieline.
- Artwork sent before the structure is locked.
- Late changes to board grade, insert depth, or print coverage.
- Testing that happens after approval instead of before it.
If the launch date matters, build buffer time into the schedule. Leave room for prototype review, one correction cycle, and transit delay. I would rather see a brand hold a launch by a week than rush an insert that looks fine on screen and fails in real handling. Screen previews are cheap. Damage claims are not.
For buyers who want a more formal sourcing lens, the EPA packaging and container guidance is a useful place to think about material efficiency and waste reduction. Not because every insert needs a government memo attached to it, but because packaging decisions land in the real world of disposal, recycling, and logistics.
Key Design Factors for Sustainable, Protective Inserts
The best insert starts with the product, not the logo. Weight, fragility, finish, and movement all shape the geometry. A matte-coated bottle behaves differently from a glass jar, and a heavy device with sharp corners needs a very different cradle than a soft-sided item. If you design the insert first and the product second, you are already in trouble.
Fit is the first design factor. The insert should account for the actual product tolerance, not just the ideal measurement from the spec sheet. A part that varies by 1.5 mm across a batch can suddenly rattle, compress, or refuse to slot in cleanly. That is why a prototype built around one sample can mislead you. Real production is never as tidy as the sample on your desk.
Sustainability choices matter, but only if they do not wreck performance. Recycled content, FSC-certified stock, and minimal ink coverage are good starting points. Heavy lamination, unnecessary foil, and overbuilt coatings can make recycling harder. The cleanest sustainability story usually comes from right-sizing, material choice, and avoiding extra layers, not from piling on decorative treatments because someone wants the package to feel fancy.
Design choices that actually help
Logo placement should support the opening moment. A visible top panel can make the box feel organized. A small inside logo can create a nice reveal. Bold graphics may work for retail displays, but quiet branding often suits premium shipping packs better. The choice depends on whether the insert is meant to sell, reassure, or simply protect.
Ink coverage also affects cost and recyclability. A single-color logo on natural board is usually simpler and cheaper than a full-surface print with heavy solids. That does not mean color is off the table. It means the design should earn its ink. If the graphics will not be seen after opening, they probably do not need to cover every visible edge.
Assembly efficiency is another major factor. The best insert is easy for a packer to build, easy for a customer to open, and not a puzzle with too many locking points. Every extra fold adds labor. Every confusing tab adds the chance of mistakes. If a worker needs a training video to fold the insert, the design likely needs simplification.
On the protection side, think about shock absorption, edge clearance, and product restraint. A well-designed carton insert should stop the item from moving enough to rub against printed surfaces or collapse in transit. For shipping-heavy programs, it is smart to test against common handling abuse, including drop, vibration, and compression. That does not require a full lab every time, but it does require more than shaking the box and hoping for the best.
Practical rule: if the insert protects the product but slows packing too much, it is too clever. If it looks great but leaves movement inside the box, it is too shallow. The sweet spot is boring in the best possible way.
Common Mistakes That Waste Money and Create Returns
The fastest way to burn money on printed carton inserts with logo is to design for the render instead of the shipment. A pretty structural mockup can hide a lot of problems. The box closes. The logo looks crisp. Everyone nods. Then the first real order ships, and the product arrives scuffed, loose, or crushed in the corners. Very elegant failure.
One common mistake is overdesigning hidden surfaces. If a panel will never be seen after assembly, expensive finishing there is usually wasted. That includes heavy coverage, specialty coatings, and decorative work on parts that sit flush against another panel. Put the money where the customer sees it.
Another classic error is ignoring product tolerance. A batch may vary slightly in height, width, or shoulder shape. If the insert is tuned only to the sample unit, the full production run may fit too tightly or too loosely. Too tight means pressure marks and assembly frustration. Too loose means movement, noise, and damage risk. Neither is a win.
There is also the false economy of chasing the lowest unit price without checking total program cost. A cheaper insert that adds 6 seconds to assembly time can cost more over a year than a slightly pricier design that folds cleanly. Add higher damage rates, replacements, and customer service time, and the cheap option stops looking clever.
Testing mistakes are just as expensive. Some teams skip transit simulation, approve artwork before the structural prototype is proven, or drop the box without the real product inside. That last one is especially useful in the way a weather forecast is useful if you live underground. The load matters. The product matters. The real package in motion matters.
Better testing looks like this:
- Assemble the insert with the actual product, not a dummy block.
- Pack several units, not just one perfect sample.
- Shake, tilt, and drop the box under realistic handling conditions.
- Check for rub marks, pressure points, and edge crush after transit.
- Review how long assembly takes on a normal line, not in a controlled demo.
If a supplier says the insert is "fine" but cannot show fit and protection with the real product, treat that as a warning sign. Packaging is full of people who are very confident right up until the goods start moving. Movement is the whole problem, so test for it.
Expert Tips and Next Steps for a Smarter Launch
Start with a supplier dieline, not a guess. That is the cleanest way to get printed carton inserts with logo built around real dimensions instead of hopeful math. If you already have your carton spec, product drawing, and shipment method, the dieline can be tuned to those numbers instead of forcing the box to adapt later. Guessing saves time for about ten minutes. Then it costs you a week.
Standardize where possible. If two or three SKUs can share the same insert footprint with minor internal adjustments, you will usually reduce tooling, simplify inventory, and make reorders easier. Common sizes also help with forecasting. Fewer custom variants means fewer surprises in production and storage.
Request a physical prototype and test it with the real product. Check both protection and presentation. Does the item sit centered? Does the logo show as intended? Can a customer remove the product without tearing the board or scuffing the finish? Those questions are simple. The answers are where the value lives.
When you compare suppliers, ask for these details in writing:
- Board grade and thickness.
- Print method and color count.
- MOQ at two or more quantities.
- Lead time for sample and production.
- Assembly method and whether glue is required.
- Testing approach if the product is fragile or heavy.
That list prevents vague quotes. Vague quotes are how projects drift.
There is a reason printed carton inserts with logo keep showing up in serious packaging programs. They are efficient, visible, and practical. They can reduce loose filler, improve the unboxing experience, and support a sustainability story without forcing the brand into a clumsy compromise. The key is to match the structure to the product, keep the print purposeful, and respect the realities of assembly, transit, and cost. Do that, and printed carton inserts with logo stop being a small accessory and start doing real work.
If you are moving a project forward now, the next step is simple: lock the actual product dimensions, choose the board based on transit risk instead of guesswork, and get a physical prototype in hand before artwork approval. That order matters. Everything else gets easier after that.
What is the best material for printed carton inserts with logo?
Recycled paperboard works well for lighter products and brands that want a clean sustainability story. Corrugated board is a better fit when the product needs more shock protection or stacking strength. FSC-certified stock is a smart option if sourcing credentials matter. The right choice depends on product weight, fragility, and how hard the package gets treated in transit, not on which board sounds most premium in a sales deck.
How much do printed carton inserts with logo cost per unit?
Unit price depends on board type, size, print coverage, structural complexity, and quantity. Short runs usually cost more because setup and tooling are spread across fewer pieces. Higher volumes tend to bring the price down quickly, especially when the design is standardized. A useful move is to ask for two quote levels so you can see the real break-even point instead of guessing at it.
What is the usual lead time for printed carton inserts with logo?
Simple prototypes can move quickly, but custom structural work needs time for sampling and revisions. Production time grows when the artwork is complex, the board is specialty, or approval is slow. Shipping time is separate, so build in buffer if the inserts are tied to a launch date. If speed matters, approve the dieline early and keep revision rounds tight.
Can printed carton inserts with logo actually reduce shipping damage?
Yes, if the insert is engineered around the product instead of being sized by eye. The main job is to stop movement, absorb minor shock, and prevent rubbing or crushing. Testing with the real product matters more than a pretty sample sitting on a desk. A good insert can also reduce returns, which is the boring but very real payoff for getting the structure right.
Do printed carton inserts with logo need special finishes to stay sustainable?
No, not usually. Many brands get better results with simple print and a clean structural design. Heavy laminates and unnecessary coatings can make recycling harder, so they should be used only when they truly add value. Sustainable packaging is mostly about material choice, fit, and right-sizing. Fancy finishes do not save a bad structure.


