Buyer Fit Snapshot
| Best fit | Printed Hang Tags with Foil projects where brand print, material claims, artwork control, MOQ, and repeat-order consistency need to be specified before quoting. |
|---|---|
| Quote inputs | Share finished size, material target, print colors, finish, packing count, annual reorder estimate, ship-to region, and any compliance wording. |
| Proofing check | Approve dieline scale, logo placement, barcode or warning zones, color tolerance, closure strength, and carton packing before bulk production. |
| Main risk | Vague material claims, crowded artwork, missing packing details, or unclear freight terms can make a low unit price expensive after revisions. |
Fast answer: Printed Hang Tags with Foil: Material, Adhesive, Artwork, and MOQ should be specified like a repeatable production item. The safest quote records material, print method, finish, artwork proof, packing count, and reorder notes in one written spec.
Production checks before approval
Compare the actual filled-product size with the drawing, then confirm tolerance on folds, seals, hang holes, label areas, and retail display edges. Reserve space for logos, QR codes, warning copy, and material claims before decorative graphics fill the panel.
Quote comparison points
Review material grade, print process, finish, sampling route, tooling charges, carton quantity, and freight assumptions side by side. A quote is only useful when the supplier can repeat the same color, closure quality, and packing count on the next order.
Printed Hang Tags with foil can change the way a product is seen before anyone touches it. Light hits the metallic detail, the brand catches the eye, and the tag starts doing work that a plain card stock label cannot. The effect does not have to be loud. In fact, the strongest results are often the most disciplined: a clean logo, enough open space, and finishing that feels deliberate rather than decorative for its own sake.
For buyers, the challenge is practical. How will the tag look under retail lighting? What stock will hold the foil cleanly? How much will a small design decision affect the quote? Those questions matter because foil is not only a visual choice; it affects setup, production method, registration, and lead time. If a packaging program includes matching pieces, Custom Labels & Tags can help keep the visual system aligned across related items without forcing every component to look identical.
Foil seems straightforward until a job enters production. Paper weight, surface texture, die setup, artwork spacing, and finishing order all influence the final result. Printed Hang Tags with foil work best when they are planned as a complete build, not treated as an add-on once the design is already locked.
Printed Hang Tags with Foil: What They Are and Why They Stand Out
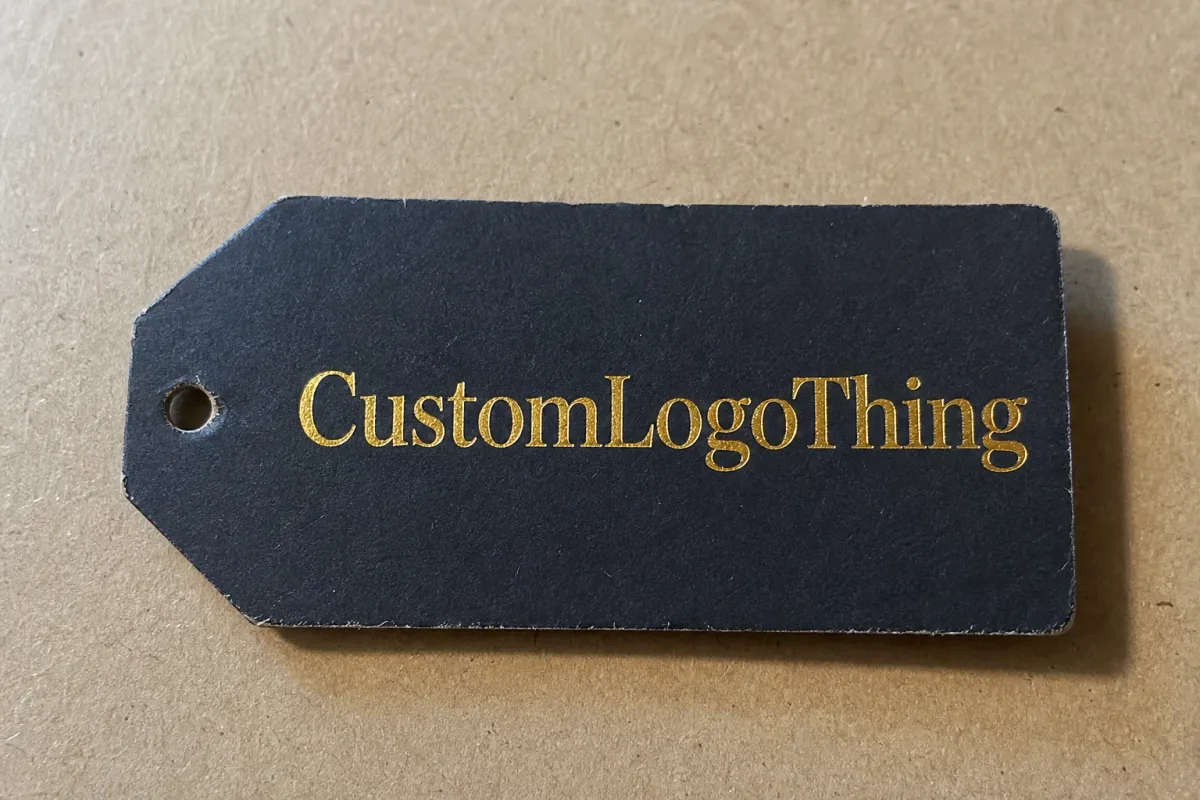
At the most basic level, printed hang tags with foil are paperboard or card stock tags that combine printed branding with one or more metallic or pigmented foil elements. The foil might be a logo, a border, a monogram, an emblem, or a small accent used to guide the eye. The effect can be restrained or highly reflective, but the quality of the result depends on the stock beneath it, the precision of the file, and the way the foil is applied.
Foil creates a reflective surface that gives the viewer an immediate focal point. That matters on a retail rack, in a box, or in a quick handling moment at checkout. A tag has only a second or two to communicate quality. Foil can help a modest design feel more finished without changing the product itself. In apparel, beauty, gift packaging, and specialty retail, that first impression carries real weight.
It also helps to separate the terms people often use interchangeably. Foil stamping usually refers to a process where heat and pressure transfer foil from a carrier film onto the paper. Digital foil uses a different adhesion method and can be useful for short runs or variable artwork, depending on the equipment. Metallic ink is not foil at all; it is ink with metallic particles or visual effects, which can look attractive but usually lacks the mirror-like reflection of foil. A laminate finish is a surface film, often matte or gloss, that changes the feel and protects the tag, but it does not create the same metallic shine.
A foil logo should read clearly in a glance. If the effect needs too much explanation, the tag is doing less work than it should.
That distinction becomes important the moment a quote is requested. A supplier cannot price a simple one-color hang tag with a single foil mark the same way it prices a premium card with multiple foil zones, embossing, rounded corners, and stringing. Foil changes the file setup, the press method, the stock choice, and often the schedule. Even the direction of the paper fibers can affect how cleanly the impression lands.
For teams that want a common language for packaging and finishing, the Institute of Packaging Professionals is a useful reference point. Clear terminology shortens the quoting cycle and prevents a surprising amount of back-and-forth.
How the Foil Process Works on Hang Tags
The production path for printed hang tags with foil usually begins with the artwork and the dieline. The dieline defines the final cut shape, the hang-hole placement, any folds, and the exact printable area. Once that is approved, the printer or converter confirms the stock, foil color, and finishing order before the job moves into plates, dies, or a digital setup. The fewer assumptions made here, the fewer corrections show up later.
In a typical hot foil stamping workflow, a heated die presses foil against the tag stock under controlled pressure. The heat activates the carrier layer, and the foil releases only where the die contacts the paper. The result is a crisp, high-contrast metallic mark that many brands want for logos or borders. On smooth coated stock, linework tends to stay sharp. On textured or fibrous paper, the finish can feel softer and more tactile, though very fine detail may not survive as cleanly.
Digital foil follows a different path. Instead of the traditional metal die and heat transfer setup, the foil is applied through a digital or toner-based adhesion system. That can help when the run is short, when artwork changes from tag to tag, or when the setup needs to stay lighter than conventional stamping. It is useful, but not universal. Some shops rely on it for attractive accent work, while others still prefer hot stamping for heavier coverage, cleaner edges, or particular stock behavior.
The surface itself matters more than many buyers expect. A smooth, stable stock usually gives foil the best chance to sit flat and reflect evenly. Heavy texture, a soft recycled sheet, or a rough cotton paper can create tiny breaks in the image. That does not mean the order is wrong. It means the desired look should match the paper instead of fighting it.
Small text and thin rules are common trouble spots. If the line weight is too delicate, foil can fill in or break apart, especially on darker or more textured tags. Open counters inside letters also need enough room to stay visible after heat and pressure are applied. Production teams often build in more breathing room around foil details than they would on plain ink work, and that extra space is not just aesthetic. It reduces risk.
Registration is the quiet detail that shapes the final impression. The foil area has to line up with the printed artwork, and even a slight shift can become obvious if the foil sits near a border or edge of a letter. That is why proofing matters. It is also why realistic tolerance should be expected, especially when the order includes several finishing steps.
Optional effects like embossing, debossing, spot UV, rounded corners, drilled holes, and stringing can improve the presentation, but each one adds a step and often a separate setup charge. A raised foil logo can look excellent on a premium apparel tag. A spot UV gloss over a matte card can frame the metallic area nicely. But if the tag already has a tight imprint area and too many design elements, more effects can create noise instead of polish.
- Hot foil stamping is usually strongest for a crisp, classic metallic look.
- Digital foil can suit shorter runs or artwork that changes from piece to piece.
- Embossing adds a raised tactile feel that pairs well with foil.
- Spot UV works best as contrast, not as a substitute for foil.
- Stringing and drilling should be planned early so the foil does not interfere with the hang hole.
Printed Hang Tags with Foil Pricing: What Drives the Quote
Pricing for printed hang tags with foil usually comes down to a handful of repeatable variables: quantity, tag size, paper stock, foil coverage, color count, finishing steps, and packaging requirements. Those variables interact. A heavier board may look better, but it can also raise material cost. A larger foil area can create stronger brand presence, but it generally asks for more setup and closer production control.
Quantity is one of the biggest levers. At lower volumes, setup costs are spread across fewer pieces, so the unit price can look high even if the materials are modest. As quantities rise, the unit cost usually improves because setup gets diluted across the run. That is why a 500-piece order and a 5,000-piece order can have very different economics, even if the design barely changes.
Foil coverage makes a real difference. A small logo accent is usually easier and less expensive than a full-border metallic frame or a large foil background. Multiple foil colors also add complexity because each color may need its own setup and registration pass. If the art uses intricate linework, tiny text, or several metallic zones, the quote should reflect that labor and risk.
Paper choice can push the price in either direction. Standard cover stock is usually easier to source and process. Cotton paper, thick specialty board, soft-touch laminated stock, or heavily textured paper can increase cost because the material itself is more expensive and the production tolerance becomes tighter. A premium stock may be worth it if the tag belongs in a luxury presentation, but it should be chosen with intent, not just because the name sounds upscale.
Finishing details often hide in the margins of a quote. Custom shapes, drilled holes, stringing, rounded corners, special packaging, individual bagging, or insertion into kits all add labor. Freight can move the total too, especially if the tags are heavy, the pack count is awkward, or the delivery window is tight. A low headline price can become a much higher landed cost once those items appear.
| Common Build | Typical Setup Cost | Ballpark Unit Cost at 5,000 Pieces | Best For | Cost Pressure Points |
|---|---|---|---|---|
| 16 pt coated stock, one-color print, single foil logo | $180-$350 | $0.18-$0.35 | Apparel, accessories, retail basics | Foil size, die cutting, hole drilling |
| 18 pt premium cover, print on both sides, single foil accent | $250-$500 | $0.28-$0.55 | Mid-tier brand programs | Paper grade, back-side print coverage, finish complexity |
| Textured stock, foil, embossing, rounded corners | $400-$800 | $0.45-$0.90 | Gift, boutique, luxury packaging | Registration, die wear, slower production speed |
| Heavy specialty board, full foil area, multiple finishing steps | $600-$1,000+ | $0.75-$1.50+ | Premium launches, statement tags | Material scarcity, multiple setups, manual handling |
The numbers above are ballpark ranges, not promises. They still help because they show where the money usually goes. A buyer who asks for tiered quotes at 1,000, 3,000, and 5,000 units can see the volume break clearly and decide whether the larger run creates enough savings to justify carrying extra inventory. That one step often prevents overbuying or, just as often, under-ordering and paying a rush premium later.
It also helps to compare like with like. If one supplier quotes 16 pt coated stock, single-side print, and a simple foil logo, while another quotes thick textured stock, double-sided print, and foil on both sides, the numbers are not directly comparable. Ask each supplier to spell out the stock weight, foil method, trim style, hole size, and finishing sequence. That is the only fair way to measure the quote.
Production Process and Turnaround: From Art File to Finished Tags
The timeline for printed hang tags with foil usually begins with inquiry, spec confirmation, and artwork review. From there, the supplier prepares a dieline or checks the one you provide, then sends a proof showing the tag shape, print placement, foil callout, and any finishing notes. Nothing should move into production until that proof is approved. A rushed approval is one of the fastest ways to create a costly rework.
Some parts of the process are quick. Digital proofing can happen in a short window once the files are clean. Other parts take longer. If the job needs a custom die, a foil die, embossing tooling, or a specialty stock that is not already in inventory, lead time extends. The more finishing steps you add, the more likely the order becomes a sequence rather than a single pass.
A simple foil hang tag order may ship in roughly 7-12 business days after proof approval if materials are in stock and the art is ready. A more complex job, especially one with multiple foil colors, embossing, or specialty paper, may need 12-18 business days or more. Shipping time sits on top of that. If the tags need to support a launch, a trade show, or a seasonal reset, it is smart to build in extra time for the unexpected.
Artwork issues are a common source of delay. Sometimes the file is missing the die line. Sometimes the foil layer is not separated cleanly. Sometimes the text is too small once the design is scaled to the actual tag size. Each correction adds another loop. The fastest jobs are usually the ones where the buyer has already thought through size, orientation, hole placement, and what the tag must say on the front and back.
Rush production can be possible, but it usually narrows the options. You may lose flexibility on paper selection, foil choice, or finishing sequence, and the cost often rises because the shop has to re-slot work or accelerate outside steps. Rush is a tool, not a strategy. It works best when the basic specs are already settled and only the calendar is tight.
For teams that need to keep a whole packaging program on schedule, it can help to think the way shipping auditors think about carton movement and handling. The ISTA framework focuses on transit performance, and while hang tags are not shipping containers, the mindset still applies: if a finished item has to survive real handling, plan for the rough edges before production starts.
How to Specify the Right Materials, Foil, and Finish
Paper choice changes both appearance and durability. A smooth coated stock usually gives the sharpest foil detail because the surface is more even and the metallic layer can sit cleanly. Uncoated papers can feel warmer and more natural, but they may soften the shine slightly. Textured papers bring character and a more tactile feel, though the foil may appear less uniform across the surface. Heavy card stock often feels more substantial in hand and resists curling better once the tag is cut and drilled.
From a packaging buyer's point of view, the real question is how the tag will be used. An apparel hang tag that swings on a garment rail needs enough stiffness to stay neat, but it also has to survive handling, clipping, folding, and shipping. A gift tag may focus more on visual presentation than abrasion resistance. A product label insert may need to be compact, legible, and easy to attach without adding clutter. The right stock is the one that serves the use case, not just the one that sounds premium on a spec sheet.
Foil color selection is another place where practical judgment matters. Gold usually signals warmth, classic luxury, and traditional premium cues. Silver feels cooler and more modern. Copper or rose-gold tones can read fashion-forward or artisanal. Black foil can create a subtle, tone-on-tone effect on lighter paper, while holographic or color-shift foils create much louder visual impact and are best used carefully. Tinted metallic foils can be effective, but they need enough contrast with the base stock to avoid looking flat.
Legibility should stay ahead of decoration. A foil logo with generous open space usually looks better than a crowded layout packed with tiny foil details. If the tag must carry sizing, barcodes, care instructions, or legal copy, those elements should usually stay in printed ink rather than foil. Foil is strongest when it highlights the part of the design you want people to remember first.
Here is a simple way to think about the material and finish choices:
- Best crisp detail: smooth coated cover stock with a single foil accent.
- Best tactile feel: cotton or textured stock with restrained foil coverage.
- Best premium presentation: heavy board, foil, and embossing used together with restraint.
- Best sustainability story: FSC-certified paper when the brand needs documented fiber sourcing.
If sustainability claims matter to your program, ask for FSC-certified stock and confirm whether the supplier can support chain-of-custody documentation. The FSC explains what that certification means and why it differs from a vague recycled-content claim. That difference matters in retail, especially when brands have to answer buyer questions or package labeling requirements.
Finishing choices deserve the same careful thought. Rounded corners can make a tag feel more polished and reduce edge wear. Drilled holes should leave enough room above the top edge so the stock does not tear under a string or fastener. Soft-touch lamination can feel elegant, but it may change how the foil reads under light and can complicate some adhesive or stamping steps. None of these choices is inherently better. They just need to match the design goal.
Sampling is worth the time when you are using an unusual stock, a deep background color, or a foil tone that depends on light to do its job. Even a one-sheet proof can reveal whether the contrast is strong enough and whether the foil placement feels balanced once trimmed. The cost of a sample is usually small compared with the cost of approving a full run that misses the mark.
Common Mistakes When Ordering Foil Hang Tags
The first mistake is sending artwork without a proper dieline. A hang tag is not a flat rectangle in the abstract; it has cut edges, a hole, and maybe a fold or rounded corners. If those elements are not defined early, the print and foil can end up too close to the trim or too near the hole, which raises the chance of breakage or visual imbalance.
A second mistake is using too much foil on a small tag. Metallic coverage is attractive, but it can become busy very quickly if the tag is only a few inches across. The effect can flatten the hierarchy of the design, make the brand name harder to read, and raise the cost without adding much value. In many cases, one strong foil accent does more than a full sheet of shine.
Third, buyers sometimes choose the cheapest stock and assume it will behave like a premium one. It often does not. Thin stock can curl, scuff, or dent more easily. A weak sheet may also reduce the sharpness of the foil impression because it compresses unevenly under pressure. Saving a little on paper can cost more if the final tags look flimsy or arrive with edge damage.
Another common oversight is forgetting to ask about minimum order quantities, proof charges, or the number of revision rounds included. A quote that looks excellent at first glance may not include the full cost of setup. That is why a buyer should always ask for the complete production assumptions. If the supplier expects a separate charge for a second proof, a new die, or a color change, that should be visible before approval.
There is also a technical mistake that shows up in procurement reviews: comparing only the headline price. If one supplier includes drill holes, stringing, and packed counts, while another lists print only and adds the rest later, the total landed cost may be very different. Freight can change the final number too, especially when the tags are heavy or when the delivery window is tight.
Finally, do not approve a proof too quickly if the foil touches the edge, the text is extremely small, or the contrast feels borderline. Small design decisions become bigger once they move through heat, pressure, and trimming. A careful proof review is not delay for its own sake. It is the cheapest place to catch a problem.
Some mistakes are easier to avoid if the team treats the project like a packaging system rather than a decoration order. If the hang tags need to match labels, cartons, or inserts, line them up early with related pieces such as Custom Labels & Tags so the artwork language, finish, and stock choices stay aligned.
Expert Tips for Better Results and Smarter Ordering
The strongest foil tags usually feel restrained, not overloaded. A clean logo, one strong accent, and enough open space around it will often read more premium than a tag covered with multiple effects. If the goal is a high-end feel at a controlled price, treat foil as the accent that carries visual weight rather than asking it to do everything.
Typography deserves extra care. Clear typefaces with moderate weight survive trimming and foil transfer more reliably than ultra-thin letters with tight spacing. If the tag must include product information, keep the foiled text large enough to remain readable from a normal retail viewing distance. A beautiful tag that cannot be read quickly will not perform well on the shelf.
Buy a sample or short run before committing to a new material. That is especially true with textured stocks, unusual foil colors, or a new supplier process. A sample can show whether the stock curls, whether the foil sits evenly, and whether the color balance feels right under store lighting. It is far easier to adjust a 250-piece test than to repair a 5,000-piece production order.
Ask for a quote that separates stock, printing, foil, finishing, and freight. That line-by-line view shows where cost lives and where savings may be possible. Sometimes switching from a specialty board to a smoother premium cover reduces the price without changing the perceived quality much. Other times, reducing foil coverage by 30 percent has a bigger cost impact than changing the paper. You only know that when the quote is broken out clearly.
Standardizing tag sizes across product lines can save money over time. If several SKUs use the same tag dimensions and hole placement, reorders become simpler and more predictable. It also helps the brand maintain consistency across collections. Production teams appreciate it because they can keep tooling and layout decisions stable from one run to the next.
Plan the artwork around the process, not the other way around. That means leaving enough margin from the trim, allowing room for a hole, and keeping foil areas broad enough to reproduce cleanly. If a design only works by pushing every element to the edge of what the process can do, the order becomes harder to manage and more expensive to rescue.
Finally, ask how the supplier handles registration tolerances, file checks, and reorders. A reliable partner should be able to explain what they consider acceptable shift, how they flag art issues, and whether they can keep repeat runs consistent. Those answers tell you a lot about how the job will go before a single sheet is printed.
A smart foil tag order starts with the file, not the finish. If the design is clear on screen, it is much easier to keep it clean on paper.
Next Steps for Ordering Printed Hang Tags with Foil
If you are ready to request quotes, gather the basics first: artwork, size, stock ideas, foil color, hole style, expected quantity, and delivery window. That small amount of preparation makes supplier conversations far more productive. A complete spec sheet saves time because it reduces the back-and-forth that usually happens when the details are still open.
It helps to list your project in a simple format:
- Tag size and shape.
- Front and back print requirements.
- Foil color and foil coverage area.
- Paper stock or thickness preference.
- Hole size, corner style, and any stringing.
- Target quantity and acceptable delivery date.
Review one proof carefully before approving a larger production run. Check the foil placement, the readability of every small word, the alignment of the hole, and the relationship between the metallic area and the printed background. If anything feels crowded or unclear, fix it before the press run starts. That is the lowest-risk time to make changes.
Compare at least two quantity levels so you can see the real unit-cost break. In many programs, the jump from a small run to a mid-sized run changes the economics enough to justify carrying a little more inventory. In others, a larger run is not worth the warehouse space. The only way to know is to look at the numbers side by side.
Confirm freight and delivery timing early if the tags support a launch, seasonal rollout, or retail reset. A beautiful tag that arrives after the product hits the floor does not help the sell-through story. Build the calendar backward from the real need date, not from the date the quote came in.
Printed hang tags with foil work best when design, material, pricing, and timeline are planned together from the start. Treat those decisions as one system, and the order becomes easier to quote, easier to produce, and much more likely to land with the polished look you intended.
Frequently Asked Questions
What are printed hang tags with foil used for?
They are used to make apparel, gift, and retail packaging feel more premium and more memorable at the point of sale. The foil helps logos, borders, and key details catch light and stand out quickly, which is useful when a customer is scanning a rack, opening a box, or handling a product for the first time. They can also reinforce branding when a simple paper tag needs a more finished, upscale look.
Are printed hang tags with foil expensive to produce?
They usually cost more than basic printed tags because foil adds setup and another finishing step. The actual unit cost depends on quantity, foil coverage, paper stock, and whether the design needs extra finishing such as embossing, drilling, or stringing. A small foil accent is usually far more budget-friendly than a full-coverage metallic design.
How long does it take to make printed hang tags with foil?
The timeline depends on proof approval, die creation, foil setup, printing, finishing, and shipping. Simple jobs can move quickly if the stock is in hand and the art is ready, while custom shapes or specialty papers usually add lead time. The safest approach is to build in buffer time for artwork corrections and final approval.
What file setup do I need for foil hang tag production?
You usually need a clean dieline, vector artwork, and a separate foil layer or spot-color callout for the foil area. Small text and thin lines may need adjustment so they reproduce cleanly in foil, especially if the stock is textured or the foil sits near the trim. A production-ready file helps reduce proof changes and keeps turnaround smoother.
What is the best material for printed hang tags with foil?
The best stock depends on the look you want and how the tag will be used. Smooth cover stocks usually give the sharpest foil detail, while textured or specialty papers create a softer, more tactile feel. Heavier paperboards tend to feel more substantial and hold up better during handling and shipping.


