Buyer Fit Snapshot
| Best fit | printed poly mailers practices for brands ship for packaging buyers comparing material specs, print proof, MOQ, unit cost, freight, and repeat-order risk where brand print, material, artwork control, and repeat-order consistency matter. |
|---|---|
| Quote inputs | Share finished size, material target, print colors, finish, packing count, annual reorder estimate, and delivery region. |
| Proofing check | Approve dieline scale, logo placement, barcode or warning zones, color tolerance, and any recyclable or compostable wording before bulk production. |
| Main risk | Vague material claims, crowded artwork, or missing packing details can create delays even when the unit price looks attractive. |
Fast answer: Printed Poly Mailers Practices for Brands Ship: Film, Closure, Print, and Fulfillment should be specified like a repeatable production item. The safest quote includes material, print method, finish, artwork proof, carton packing, and reorder notes in one written spec.
What to confirm before approving the packaging proof
Check the product dimensions against the actual filled item, not only the sales mockup. Ask for tolerance on folds, seals, hang holes, label areas, and retail display edges. If the package carries a logo, QR code, warning copy, or legal claim, reserve that space before decorative graphics fill the panel.
How to compare quotes without losing quality
Compare board or film grade, print process, finish, sampling route, tooling charges, carton quantity, and freight assumptions side by side. A lower quote is only useful if the supplier can repeat the same color, closure quality, and packing count on the next order.
After twenty years around converting lines in Dongguan, packing benches in Los Angeles, and warehouse docks outside Dallas, I can tell you one thing with confidence: Printed Poly Mailers best practices are usually won or lost in tiny details, not in the logo artwork everyone obsesses over. I’ve watched perfectly good branded bags fail because the seal width was too narrow at 8 mm instead of 12 mm, the film gauge was a touch too light at 1.8 mil, or the artwork sat too close to the edge and got scuffed in transit. If you want shipping bags that protect the product and still look sharp, printed Poly Mailers Best practices start with structure, then print, then cost, then timing. That order has saved me from more headaches than I can count.
I still remember a cosmetics client in Irvine, California who wanted a beautiful soft-white mailer with a full-bleed print. The mockup looked clean, but the first packed samples split at the corner because they were sending boxed skincare sets with sharp edges, and the bag spec was sized like it was for T-shirts. We changed the gauge from 2.0 mil to 2.5 mil, widened the seal to 12 mm, pulled the graphics back 10 mm from the trim, and the issue disappeared on the second proof cycle. That’s the kind of mistake Printed Poly Mailers best practices help you avoid before you burn through a first run of 8,000 units and a month of patience.
Another time, during a supplier review in Shenzhen’s Bao’an District, I held three mailers from the same size class and two of them felt identical in the hand, but one had a noticeably stronger peel strip and tighter gusset memory. The difference showed up only after we packed and drop-tested them on a concrete aisle from 36 inches. That is why printed poly mailers best practices are never just about printing; they are about how the mailer behaves with a real load, in a real warehouse, under real handling. And yes, I did have to explain to a very earnest sales rep why “it feels fine” is not a test method (I wish that were a joke).
What are the printed poly mailers best practices that actually matter?
If you need the short version, printed poly mailers best practices are simple to say and easy to get wrong. Choose the Right film thickness for the product weight, confirm seal strength, keep artwork inside safe zones, and test the bag under real packing conditions before you approve a production run. A mailer that works well for lightweight apparel may fail fast with boxed accessories, cosmetics, or bundled items with corners that press against the film. That is the first truth I learned on a high-output fulfillment floor in Dallas, where a 2 mil bag survived T-shirts all day and then started splitting as soon as the team packed rigid promo kits. The line supervisor looked at me like the bags had betrayed us personally.
Here is the practical framework I use with buyers who need a fast decision: first, prioritize durability; second, choose print quality that matches the brand; third, compare cost per unit; and fourth, check the production timeline. That order matters because a pretty mailer that tears on the conveyor is not doing the brand any favors. If the package arrives damaged, customers do not praise the ink density. They remember the failure. So, when people ask me for printed poly mailers best practices, I always say: protect the product first, then make it look good, then optimize the budget. A bad return costs more than a nicer bag ever will.
There is also a common misunderstanding that one mailer spec fits everything. Honestly, I think that is one of the biggest mistakes in e-commerce packaging. Apparel, cosmetics, books, and hardware do not stress a bag in the same way. A soft hoodie compresses differently than a boxed candle, and a set of metal accessories can punch through a corner if the film is too thin. Good printed poly mailers best practices start by matching the mailer to the product, not to a catalog photo or a pretty product page shot from a studio in Brooklyn.
“The best-looking mailer in the room is useless if it fails at the sealing station,” a fulfillment manager told me after we fixed a run that kept popping open in humid conditions.
For brands that want to move quickly, my recommendation is straightforward: evaluate three things in this order—film strength, seal integrity, and print finish. If those check out, then compare pricing and lead time. That simple filter has saved clients from expensive mistakes more times than I can count, and it sits right at the center of printed poly mailers best practices. If you skip the basics, you usually end up paying for it in reprints, returns, or one very cranky warehouse manager.
Top printed poly mailer options compared
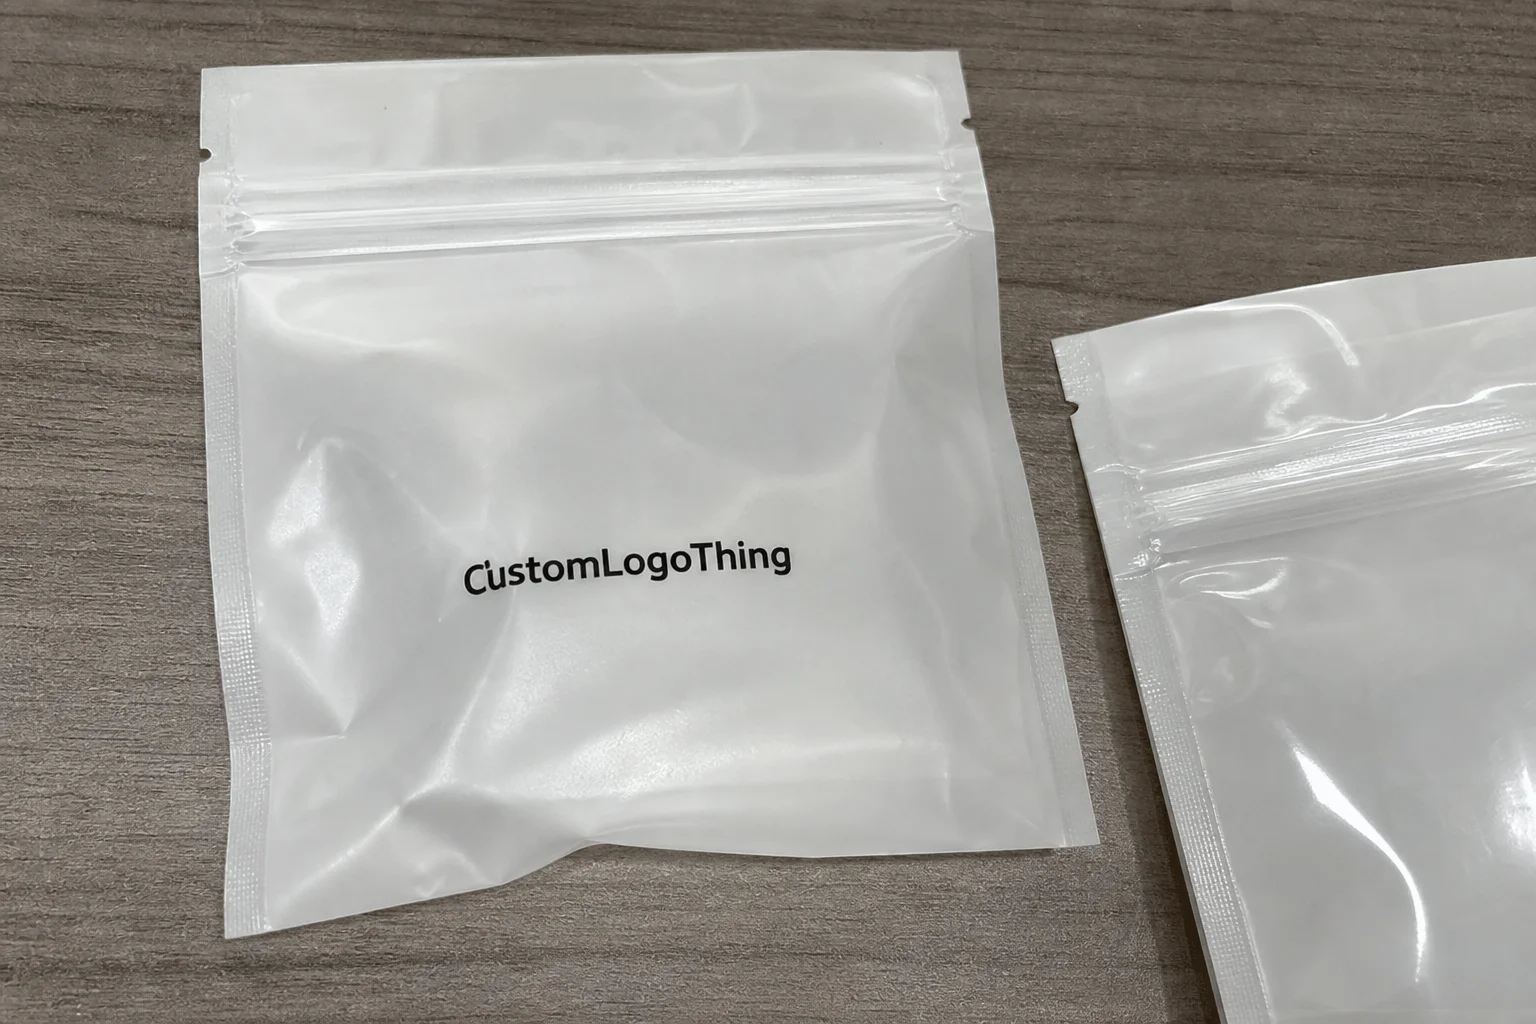
Not all mailers look or perform alike, and that matters more than people expect. In printed poly mailers best practices, the main decision is usually between standard gray-back mailers, white exterior mailers, clear or see-through options, and fully custom printed mailers with branded artwork. Each one has a different balance of opacity, surface appearance, scuff resistance, puncture resistance, and cost. For a brand ordering 5,000 to 10,000 units, those differences can swing the budget by several hundred dollars.
Gray-back mailers are the workhorses. The black or white outer face looks clean enough for most retail shipping, and the opaque gray backing helps hide contents well. White exterior mailers give a brighter, more premium presentation, especially if you are shipping apparel, beauty products, or influencer kits, but they can show dirt and scuffs more readily. Clear or semi-clear mailers are useful for visibility or retail presentation, yet I rarely recommend them for standard shipping unless the brand is intentionally showing the item. Fully custom printed mailers deliver the strongest brand presence, and for many teams, that is where printed poly mailers best practices and marketing goals finally line up.
Matte finishes deserve a special mention. I have seen premium brands choose matte film because it photographs better, hides fingerprints, and reduces glare in unboxing content shot in studios in Los Angeles or Atlanta. Glossy film can look bold on a warehouse shelf, but under softbox lighting it often reflects too much and makes the print feel cheaper than it really is. For brands investing in social content, the finish is part of the buying decision, and it belongs inside printed poly mailers best practices. A $0.02 unit difference can be worth it if the mailer lives on camera for six seconds and in a customer’s memory for six months.
There is also a practical question: what happens to the bag in the hands of the packing team? If it is hard to insert products, if the peel-and-seal strip fights the operator, or if the adhesive grabs too early, your packing speed drops. I’ve seen fulfillment staff lose 20 to 30 seconds per order just because the bag opening collapsed too tightly. Over 4,000 orders a day, that is a real labor cost. Strong printed poly mailers best practices always consider operator ergonomics, especially in facilities paying $18 to $24 per hour for packers in Southern California.
| Option | Opacity | Brand Look | Typical Use | General Cost Tier |
|---|---|---|---|---|
| Gray-back poly mailer | High | Clean, utilitarian | Apparel, basic e-commerce | Low |
| White exterior mailer | High | Brighter, premium | Beauty, fashion, gifts | Medium |
| Clear / see-through mailer | Low to medium | Functional, visible | Retail display, controlled shipping | Low to medium |
| Custom full-color printed mailer | High, depending on backing | Strong branding | Direct-to-consumer, premium brands | Medium to high |
If your products have corners, hardware, jars, chargers, or uneven shapes, I usually push clients away from the lightest bag available. A soft garment inside a 2 mil bag is one thing; a boxed accessory with metal edges is another. Printed poly mailers best practices should always include a quick failure review: does the item compress, shift, or press against one seam harder than the others during transit? If yes, increase the gauge or consider a different pack-out. I’ve had buyers insist a lighter bag would “probably be fine,” which is a charming theory right up until the replacement order lands on my desk in week two.
Detailed reviews: materials, print methods, and build quality
Material construction is where a lot of the real performance lives. In factory language, you are typically looking at LDPE or co-extruded poly films, and the difference matters. A simple single-layer film can work for lighter loads, but multi-layer co-extruded structures often improve toughness, print consistency, and puncture resistance because each layer can be tuned for a different job. That means one layer can carry the print nicely while another layer contributes tear resistance and seal reliability. For printed poly mailers best practices, this is where spec sheets matter more than marketing claims. Marketing claims, by the way, are very good at sounding polished and very bad at stopping a box corner.
Film gauge is another piece people underestimate. A small change, even from a lightweight bag to a slightly thicker one, can reduce split seams and corner punctures dramatically. I have seen 2.0 mil mailers perform well with folded tees, then fail once a client started shipping boxed skincare sets with a rigid insert card. The product had not changed much in weight, but the stress points did. That is why printed poly mailers best practices should always be tied to product geometry, not just ounces. If the product is 11.5 inches wide and the bag is 12 inches wide, you are asking for trouble.
Print method is the next major fork in the road. Flexographic printing is often the practical choice for larger repeat orders, especially when the artwork is stable and you want strong cost control across volume. Rotogravure can deliver excellent detail and color consistency, but the tooling and setup economics usually make more sense for longer runs or brands with steady demand. Digital print works well for shorter runs, multiple SKUs, or designs that change often, and it can be the easiest path when you need speed and flexibility. The right choice depends on quantity, color count, and how often your packaging changes, which is exactly why printed poly mailers best practices are really about process selection, not just aesthetics.
Now let’s talk about adhesive strip quality and seal design, because that is where a lot of bag failures show up after the customer has already received the package. A good peel-and-seal strip should close with consistent pressure, hold in warm or humid environments, and resist early lift during transport. If the adhesive is too aggressive, it slows packing and frustrates operators. If it is too weak, the bag can open in sorting or during final-mile handling. I once reviewed a run for a subscription apparel company in Miami where the adhesive performance dropped in hot summer receiving rooms at 78% humidity, and the fix was not the print—it was the closure chemistry. That is the kind of detail printed poly mailers best practices cannot ignore.
How I evaluate build quality on the floor
When I test mailers, I do not stop at the spec sheet. I want to see them packed, stacked, dragged, and dropped. A bag that looks perfect on a table may scuff badly after 100 feet on a conveyor or 15 minutes in a tote with metal corners. My test list usually includes a drop test from waist height, an abrasion pass against corrugated edges, a load check with actual packed product, and a quick visual review after the bags have been sealed and stacked. That approach lines up with the logic behind ISTA testing methods and ASTM-based packaging evaluation, and if your business ships enough volume, those standards are worth a serious look at ISTA and The Packaging School and industry resources.
One factory in Vietnam I visited outside Ho Chi Minh City had a habit of running a simple abrasion pass using a rough corrugated panel and a weighted cart. It was not fancy, but it exposed weak ink adhesion and soft films in minutes. The bags that passed that kind of rough handling usually held up much better in parcel networks. Printed poly mailers best practices benefit from that same practical mindset: test like the shipper, not like the designer. A sample that survives a pretty tabletop demo is not the same as a sample that survives a 12-hour outbound shift.
For moisture-sensitive brands, I also pay attention to how the mailer behaves in humid conditions. Some films feel fine on a dry sample bench and then curl slightly or lose closure consistency when the warehouse hits 75% humidity. If your operation sits in a coastal climate like Savannah, Norfolk, or Long Beach, or ships through warm distribution centers in Texas and Florida, ask about closure performance under heat and moisture. That single question can prevent a lot of service issues later, and it is one of the quieter but essential printed poly mailers best practices.
Printed poly mailers best practices for artwork, branding, and process
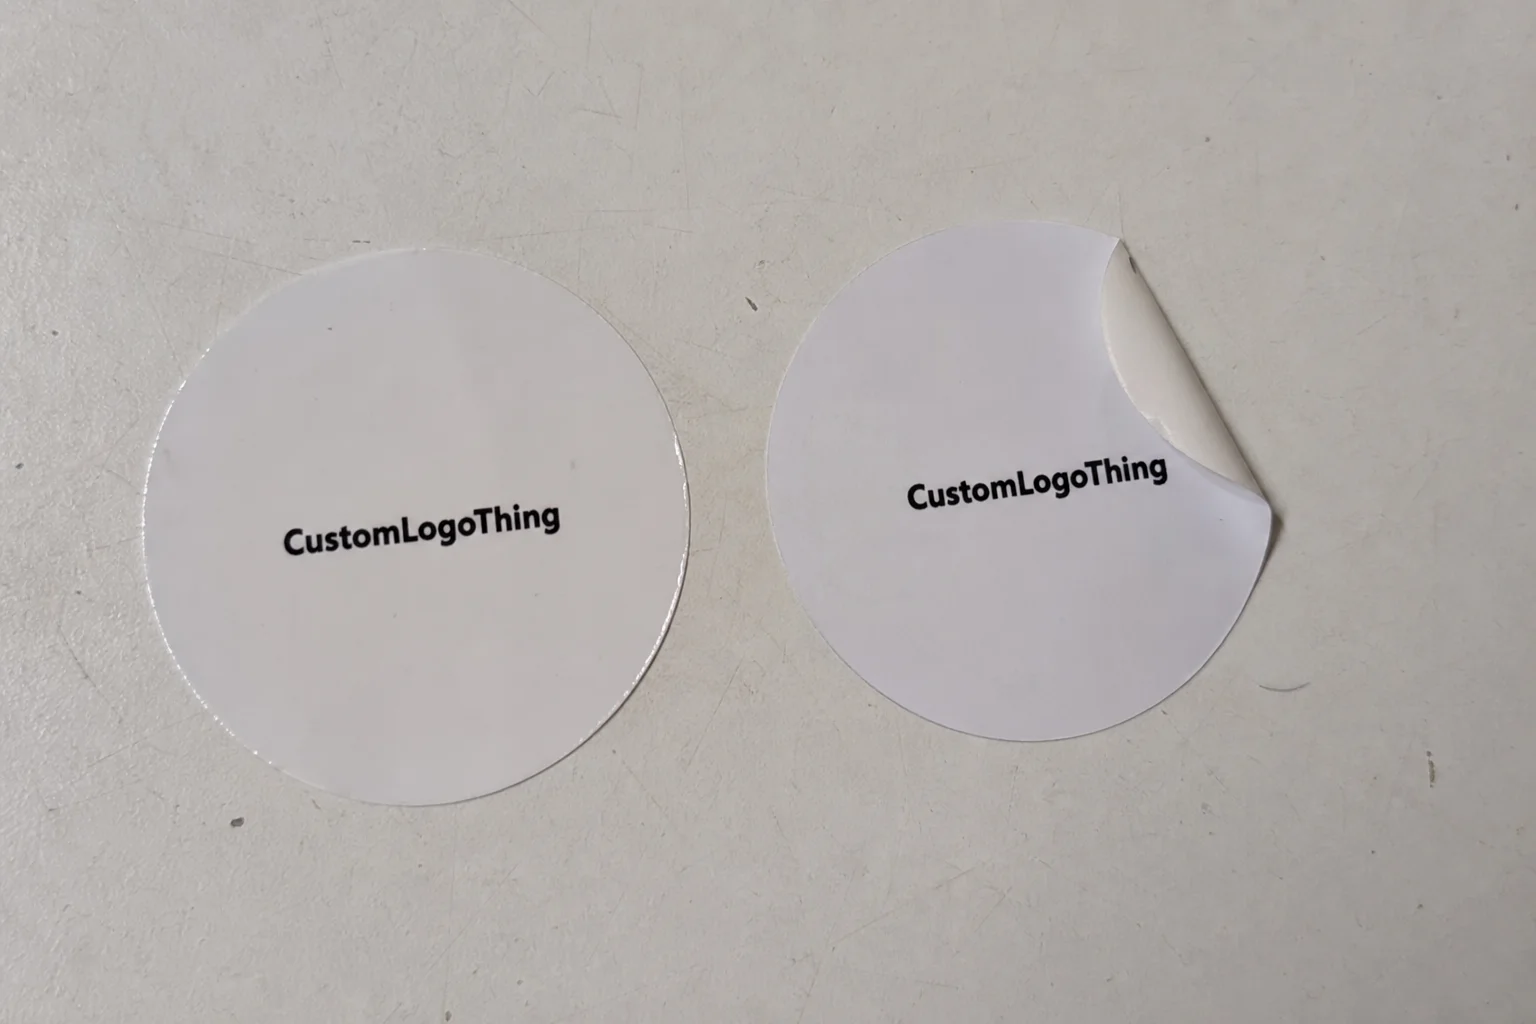
Artwork is where many buyers spend the most time, even though the biggest performance issues usually come from structure. Still, printed poly mailers best practices for branding are critical because the bag is often the first physical touchpoint a customer sees. Keep critical text away from edges, avoid ultra-thin line work, and use enough contrast that the logo remains readable after handling, stacking, and a few scrapes in transit. A mailer is not a poster; it moves through dirty, uneven environments, and the design has to survive that reality. I learned that the hard way when a silver logo looked gorgeous on screen and nearly vanished on a batch of glossy film after a week in warehouse fluorescent lights.
Simple, bold artwork usually prints better on poly than complicated gradients or fine tonal changes. That is not a matter of taste; it is a matter of how film accepts ink and how press registration behaves on a flexible substrate. I’ve sat in prepress meetings in Shanghai where a beautiful gradient looked excellent on a monitor, only to band slightly once transferred to film. The customer blamed the press, but the real issue was the artwork choice. Good printed poly mailers best practices call for clean vector logos, strong spot colors, and generous safe zones. If you are paying for a 4-color print, use it where it counts.
File preparation deserves more respect than it gets. You want the right bleed, proper dieline alignment, and a clear understanding of how your artwork wraps around the bag. If the design must align to a seam or a flap, build that into the file early. If barcode readability matters, keep the code in a high-contrast area and avoid placing it where scuffing is likely. In one client meeting for a DTC apparel brand in Chicago, we moved the return label placement by 12 mm because the original position fell too close to the gusset fold and kept wrinkling during pack-out. That small adjustment saved hours of rework, and it is exactly the kind of detail that belongs in printed poly mailers best practices.
Proofing should always include more than a screen mockup. Screens lie about color. A computer monitor can make a rich navy look almost black, while the actual film prints a shade lighter under warehouse lighting. That is why I prefer physical samples or press proofs whenever color accuracy matters. If your brand color has to match a box, a tissue sheet, or an existing retail display, ask for a sample before you commit. Skipping that step is one of the fastest ways to drift away from printed poly mailers best practices. I have seen a brand approve a Pantone 2965 C online and then complain when the film landed closer to a dark slate under 5000K lighting. Color science is rude like that.
Here is the process I recommend:
- Confirm final bag size against the packed product dimensions, not the product alone.
- Review artwork with bleed, safe zones, and seam placement marked clearly.
- Approve a physical sample or press proof under real lighting.
- Validate seal performance with actual packers and actual product.
- Move into production only after color, size, and closure are signed off.
That sequence may sound conservative, but it prevents the expensive surprises that show up after thousands of pieces are already printed. It also keeps the brand team and the warehouse team aligned, which is often half the battle. Good printed poly mailers best practices are as much about communication as they are about print technology. I have watched a 15-minute approval call save a 15,000-unit mistake. That is a fair trade.
For brands that want to source broader packaging support alongside mailers, I often point them to Custom Packaging Products when they need coordinated inserts, cartons, or branded shipping extras that match the mailer look. And if your direct need is the bag itself, Custom Poly Mailers is the place to start reviewing the Options That Fit different shipping profiles.
Price comparison: what printed poly mailers really cost
Price is where a lot of conversations get sticky, and I understand why. Buyers want a clean number, but printed poly mailers best practices require looking beyond unit cost. The real price depends on size, thickness, print coverage, number of colors, order quantity, material type, and whether you need custom sizing or special finishes. A 14 x 19 inch mailer with a one-color logo is a very different project from a fully printed 19 x 24 inch bag with matte film and a custom return panel. If someone quotes both like they are the same, they are either guessing or selling very hard.
Higher quantities usually lower the per-unit cost, but low-volume runs can carry setup fees that make premium-looking mailers feel unexpectedly expensive. That is particularly true with flexographic or gravure jobs where tooling and plate costs need to be spread across the run. A typical flexo plate set might add $180 to $450 depending on the number of colors, while a custom print cylinder can push a gravure project much higher. Digital may reduce upfront setup in smaller orders, but the per-unit print cost can rise. That tradeoff is normal, and it should be part of printed poly mailers best practices from day one.
Here is the pricing logic I use when I review quotes with clients. I first compare the actual spec, not just the size label. Then I check print coverage, because full-bleed branding costs more than a small logo panel. After that, I look at freight, inner packing, carton counts, and storage. Too many buyers focus only on the bag line item and miss the rest. I’ve seen a “cheap” quote turn into a costly one after freight, split shipments, and a second proof cycle. That is one reason printed poly mailers best practices must include landed cost, not just factory price. If the unit is $0.15 each for 5,000 pieces FOB Xiamen, but freight adds $0.04 and a second proof adds a week, that “cheap” bag is no longer cheap.
| Cost Factor | What It Changes | Typical Impact |
|---|---|---|
| Size | Material usage and print area | Larger bags cost more per unit |
| Thickness | Durability and material consumption | Thicker films raise cost, often worth it for heavier items |
| Print coverage | Ink and press time | Full coverage costs more than a small logo |
| Quantity | Setup amortization | More units usually lower the per-piece price |
| Finish | Visual quality and processing | Matte or specialty finishes can add cost |
| Freight | Landed budget | Can materially change total spend |
For real-world budgeting, a basic stock-style printed option can sit in the lower cost tier, while a fully custom branded mailer with richer coverage and stricter control usually sits higher. I am careful about giving blanket numbers because customs, region, freight mode, and spec variation all change the outcome, but a buyer should still ask for a quote at multiple quantities, such as 5,000, 10,000, and 25,000 units. That shows the breakpoint where the unit cost drops enough to matter. Printed poly mailers best practices always encourage quote comparison at more than one volume level. In many factory quotes I’ve reviewed in Guangdong, the jump from 5,000 to 10,000 pieces can cut the unit price by 10% to 18%.
There are hidden costs too. Overspecifying gauge can add unnecessary expense. Repeated proof rounds slow launch timing. Overordering before the artwork is final can leave you with obsolete inventory if the logo changes. Storage and pallet handling can also sneak up on you if you are bringing in a six-month supply. The smartest buyers I know track cost per impression, not just cost per mailer. If a slightly better bag reduces returns, protects a high-value item, or improves repeat purchase perception, the math can make sense quickly. That is a core part of printed poly mailers best practices. A 3,000-unit reorder saved at $0.03 per bag is nice; a 4% drop in damage claims is better.
How to choose the right printed poly mailer for your brand
The right mailer depends on product weight, fragility, brand position, shipping environment, and whether your orders are packed in-house or by a third-party fulfillment center. A boutique fashion label shipping light tees has different needs than a subscription kit brand shipping mixed SKUs with accessories. In my experience, printed poly mailers best practices become much easier once you classify the item into one of three buckets: soft and light, mixed and moderately rigid, or sharp and stress-prone. That three-part sorting system is boring, which is exactly why it works.
For soft and light items, standard gauge mailers can work well if the seal is strong and the artwork is kept simple. For heavier garments, bundled sets, or anything with hardware, I lean toward a thicker film and a wider seal margin. If the item has corners or rigid pieces, I also check whether inner packaging is needed to reduce point pressure. That kind of decision may sound small, but it can change damage rates noticeably. It is the practical side of printed poly mailers best practices that many marketing teams never see. A hoodie does not care about packaging. A glass candle absolutely does.
Brand position matters too. A premium fashion label may care deeply about matte finish, print clarity, and the feel of the unboxing moment. A promo kit or seasonal campaign may care more about speed and budget. Neither is wrong. What matters is matching the mailer spec to the commercial goal. If your packaging is part of the conversion story, invest more in the appearance. If it is purely a shipping vehicle, then cost and durability may take priority. That balance is central to printed poly mailers best practices. A $0.12 bag can be fine for basics; a $0.19 bag can be justified for premium launches in New York, Austin, or Seattle.
Workflow compatibility is another point I test early. Will the mailer accept a shipping label without curling? Can the barcode be read by the fulfillment line? Does the package fit automated bagging equipment or manual insertion stations? I once helped a client whose new mailers looked excellent but slowed the line because the opening was too narrow for their packing team’s gloved hands. They lost about 8 seconds per pack, which sounds trivial until you multiply it by thousands of orders. Good printed poly mailers best practices respect the warehouse as much as the brand desk. If your building in Phoenix is running 6,000 units a day, those seconds become overtime.
- Light apparel: prioritize print quality, moderate gauge, and clean closure.
- Premium fashion: prioritize matte finish, strong visual identity, and scuff resistance.
- Mixed SKU shipping: prioritize durability, interior space, and seal strength.
- Promotional kits: prioritize presentation, size consistency, and label compatibility.
One more practical note: if your lead time is tight, you may need to sacrifice some customization to stay on schedule. That is not a failure; it is a supply chain decision. A slightly simpler printed design that ships on time is usually better than a perfect concept that misses launch week. If timing and brand impact are both critical, build the project around sample approval first. In that scenario, printed poly mailers best practices are about protecting both calendar and customer experience. I would rather approve a clean two-color print in 12 business days than wait 28 days for a fancy idea that misses the drop date.
Our recommendation and next steps for buying smart
If I had to recommend a path for most brands, I would start with a sample, validate the packed performance, then move to production only after confirming color, size, and closure. That sequence sounds cautious, but it is the fastest way to avoid a bad run. My recommendation hierarchy is simple: test one sample, verify size and seal performance, review printed colors under real lighting, and then place the order after packing validation. That mirrors printed poly mailers best practices as I have seen them work on real floors, not just in presentations.
For lightweight apparel, a standard or medium gauge custom mailer is often enough, provided the print is bold and the closure is reliable. For premium fashion, I would spend more attention on finish and presentation, because the package becomes part of the brand story. For mixed SKU shipping, especially with boxes or accessories, I would choose stronger film and a more forgiving size. For products that face moisture, rough handling, or longer transit, stronger tear resistance and better moisture protection should move up the priority list. That is where printed poly mailers best practices save money by preventing avoidable damage. A 2.5 mil bag with a 12 mm seal can be a better spend than a 2.0 mil bag that triggers 30 replacements.
Here are the next steps I give buyers who want to move efficiently:
- Create a one-page spec sheet with product dimensions, packed weight, and target branding details.
- Gather 2 to 3 competitor samples that represent the look and feel you want.
- Measure the actual packed item, including corners, inserts, and label placement.
- Compare lead time, unit price, setup fees, and freight on the same basis.
- Document your sample testing results so reorders are faster and more accurate.
That documentation step matters more than people think. The best operations teams I have worked with keep a simple notes file on film gauge, seal performance, artwork issues, and warehouse feedback. The next time they reorder, they already know whether a 14 x 17 bag was too snug or whether the matte finish scuffed during fulfillment. That is how printed poly mailers best practices become a repeatable system instead of a one-time purchase. It also saves time when you reorder from a supplier in Ningbo or Ho Chi Minh City and need to avoid re-explaining your spec from scratch.
If you are building out your full packaging lineup, pair the mailers with the right cartons, inserts, and branded touches through Custom Packaging Products, and keep your mailer selection anchored to the actual shipping load rather than the artwork concept alone. For many brands, the smartest move is a slightly stronger bag with a cleaner print and a shorter approval cycle. In my experience, that combination protects the product, keeps the warehouse moving, and still gives the customer a polished first impression. That is the real promise behind printed poly mailers best practices: protection, print quality, and cost efficiency working together, not competing with each other.
So here’s the takeaway: pick the bag based on the packed product, not the design mockup; approve a physical sample before you green-light volume; and insist on testing seal strength, scuff resistance, and real-world fit with the actual pack-out. Do those three things, and you’ll avoid most of the expensive nonsense that turns a simple mailer order into a mess.
What are the most important printed poly mailers best practices for first-time buyers?
Start with the right size and thickness for the packed product, not the empty product dimension. Then request a physical sample or proof so you can confirm color, seal strength, and artwork placement before ordering in volume. Those two steps prevent a large share of the problems I see on factory and warehouse floors. If you can, test 20 packed units, not just one, because the fifth and twentieth bag tell you more than the first sample ever will.
How thick should a printed poly mailer be for clothing orders?
Light apparel often works well in standard mailer gauges, while heavier garments, bundled sets, or items with hardware usually benefit from a thicker film. The better rule is to choose thickness based on puncture risk and handling conditions, not only on appearance. A 2 mil bag may be fine for tees, but not always for rigid folded items. In many cases, 2.5 mil or 3.0 mil is the safer choice for packed bundles shipping through hubs in Memphis or Louisville.
Are digital printed poly mailers better than flexographic print?
Digital is often better for shorter runs and design flexibility, while flexographic can be more efficient for larger repeat orders. The best choice depends on quantity, color complexity, and how often the design will change. I have seen both perform well when matched to the right order profile. A 1,000-piece test run in digital can be smart; a 25,000-piece repeat in flexo often makes more financial sense.
How long does production usually take for custom printed poly mailers?
Timeline depends on proof approval, setup method, print complexity, and order size. Build in time for sampling and revision, because skipping proofing often causes delays later. In many real projects, the sample stage is what keeps the final schedule honest. Once proof approval is final, production typically takes 12 to 15 business days for standard flexo jobs, while digital short runs can sometimes finish in 7 to 10 business days depending on the factory in Guangdong or Jiangsu.
What should I compare when checking printed poly mailer prices?
Compare unit price, setup fees, shipping, material thickness, print coverage, and quantity breakpoints. Also compare the value of fewer damages and better branding, since the cheapest mailer is not always the most economical. A low quote that leads to returns or reprints usually costs more in the end. Ask for pricing at 5,000, 10,000, and 25,000 pieces so you can see where the scale break actually lands.