A Private Label Caps sample checklist is the difference between a cap that looks right in a photo and one that survives real use, real freight, and real retail scrutiny. A front panel can look crisp on a table, then sit too high on the head, pinch at the temples, or collapse once the crown is worn in and packed out. Sample approval is where those problems surface before they become expensive in bulk.
For buyers, the point is not to chase a perfect object. It is to confirm repeatability: the cap should match the brand promise, fit the target wearer, and hold up through production. That matters whether the program is a clean snapback, a softer dad cap, or a more premium build with tighter trim control and custom finishing.
Cap sourcing also has a habit of hiding cost in small places. A logo that is slightly too large, a closure that feels stiff, or a label that sits in the wrong spot can look minor in isolation. Put those errors into a 1,000-piece order and they become returns, rework, and strained margins.
“A sample that only looks right under studio lighting is incomplete. It has to behave on a head, under handling, and after packing.”
Why a Cap Sample Can Save the Whole Program
Caps are deceptively simple. Beneath the basic silhouette sits a long list of variables: crown height, panel structure, brim curve, seam density, sweatband comfort, embroidery pull, and how the fabric responds after heat and handling. A style that reads clean in a flat lay can behave very differently once it is formed into shape and worn for more than ten seconds.
That is why a structured sample review matters. It turns a subjective approval into a controlled one. Instead of saying a cap “looks fine,” the buyer can compare the sample against a spec sheet and answer a tighter set of questions: does the fit match the target customer, does the logo sit where it should, and will the chosen decoration preserve the front panel shape after wear?
The sample stage also protects the rest of the launch. Packaging, barcode placement, carton count, folding method, and insert design all become harder to change once production starts. If those details are not aligned early, the quote can drift and the order can stall in revision cycles. A good sample review keeps the commercial side and the product side moving together.
For teams building private label headwear, the sample is also where brand language becomes physical. A minimal athletic cap, for example, asks for different handling than a lifestyle cap with a washed finish. A structured promotional cap tolerates different tradeoffs than a premium retail piece. The sample should make those choices visible instead of leaving them buried in email threads.
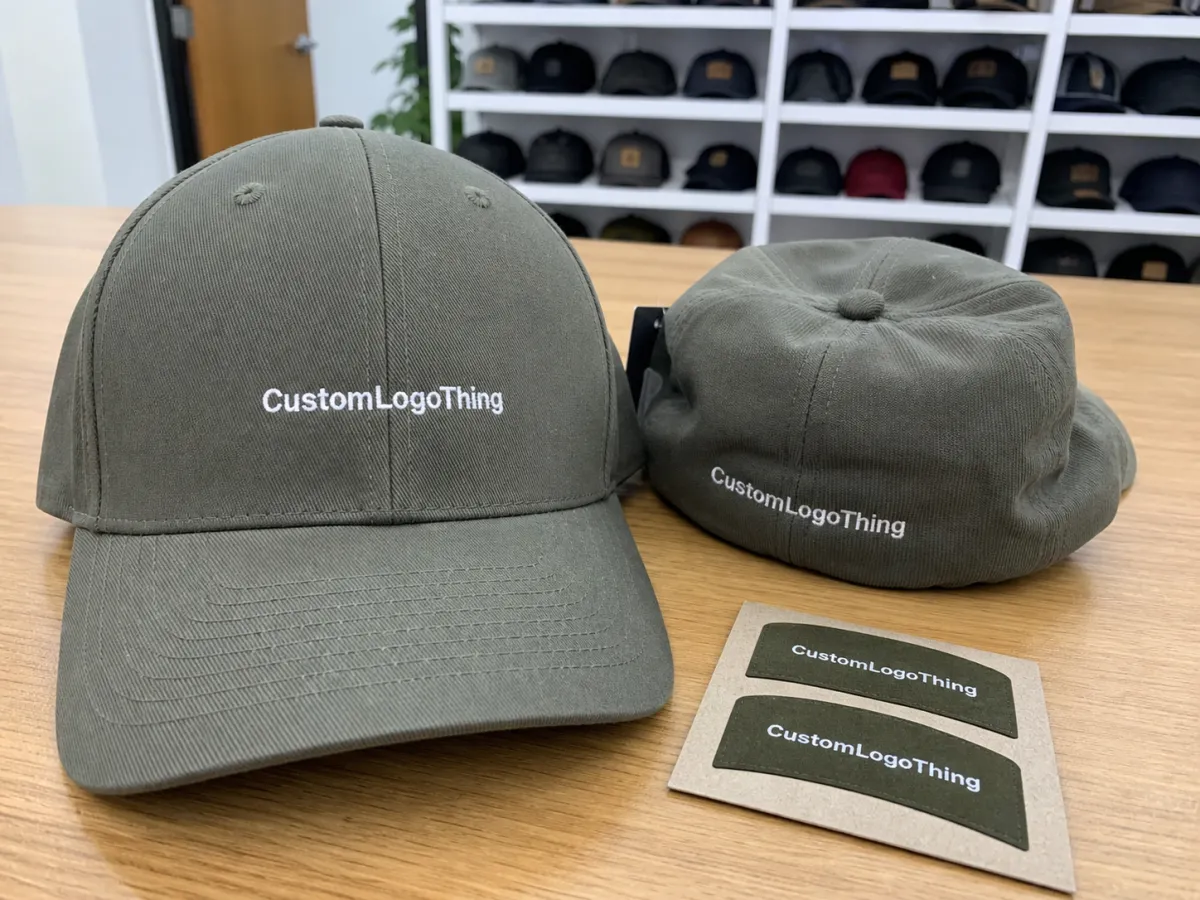
If your program includes branded inside details, lining up Custom Labels & Tags early can prevent a common mismatch: the exterior decoration feels polished, but the inside trim still looks like a generic blank. Consistency matters because buyers notice it, and so do retail partners.
Private Label Caps Sample Checklist Basics
The simplest useful checklist does one thing well: it makes approval repeatable. A cap should be checked against the same standards every time, whether the sample is the first prototype, a revised sample, or the pre-production version. Without that discipline, the team ends up comparing opinions instead of product.
A strong checklist usually covers these areas:
- Silhouette - six-panel, five-panel, low-profile, structured, unstructured, or foam-front.
- Construction - panel count, seam finish, brim insert, sweatband style, and interior taping.
- Decoration - embroidery, woven patch, silicone patch, printed logo, or mixed decoration.
- Brand details - woven labels, back closure marks, interior prints, and custom hardware.
- Pack-out - folding method, polybag, carton count, retailer labels, and shipping setup.
That structure matters because the same cap can pass one review and fail another if the standard is fuzzy. A logo might be centered relative to the crown seam but still look off on the head. A closure might function, yet feel too stiff for a comfort-led retail line. A checklist lets the buyer document those calls before production locks them in.
It also helps to keep the sample review connected to the sales spec. If the brief says the cap should have a soft, worn-in look, then a heavily structured front panel is not a near miss; it is the wrong direction. If the brief calls for a premium retail feel, loose stitching or cheap-feeling hardware is not acceptable simply because the cap “basically matches the art.”
Industry groups such as the International Safe Transit Association and the Institute of Packaging Professionals both reinforce a simple principle that applies here as well: product details hold up better when they are tested and documented. Caps are a soft goods category, but the same logic applies.
A practical sample checklist should also name the order of review. Start with fit and shape, then move to decoration and brand details, then finish with packaging and shipping requirements. That sequence avoids a common mistake: approving the print before noticing the cap itself is built on the wrong silhouette.
Fit, Shape, and Decoration Checks That Matter Most
Fit is the first filter, because a cap that feels wrong will usually be rejected even if the decoration is excellent. Check circumference, crown depth, panel balance, and visor curve. Then wear it forward and backward. Some styles feel acceptable in a normal position but start to pull when the back of the crown sits under pressure or when the wearer tilts the brim.
Shape deserves equal attention. Structured caps can buckle if the front panel is too heavily loaded with embroidery. Unstructured caps can sag if the fabric is too soft or if the seam balance is uneven. Foam-front truckers need a close look at the front surface because patch size, print heat, and stitch density can distort the clean flat look that buyers expect.
Decoration is where many approvals go sideways. Thread density can harden the panel. A patch can shift the visual center line. A print can look sharp on artwork and still land slightly off once it is applied to textured fabric. The sample is where those interactions become visible, and that is why artwork alone is never enough for approval.
Material choice matters just as much. Cotton twill generally holds structure differently than polyester. Nylon can feel lighter but may show stitch shadowing more easily. Mesh-backed trucker styles add another layer of judgment, because the front panel and the mesh do not age or drape the same way. The cap may look crisp on arrival and still sit differently after a few wears.
Closure hardware should not be treated as a minor detail. Snapback, strapback, buckle, Velcro, and fitted sizing each create a different user experience. A closure that feels overly stiff can read as cheap. One that is too loose can invite returns. A sample checklist should make closure comfort a pass-or-fail item, not a casual note.
Simple Wear Checks Worth Doing Every Time
- Measure front panel height and compare it to the spec sheet.
- Check whether the brim holds a clean curve without wobbling.
- Confirm that the logo sits centered when the cap is worn, not only when it is laid flat.
- Run a hand along the inside seams to catch rough stitching or loose thread ends.
- Test closure tension on at least two head sizes if sample stock is available.
It also helps to look at the cap under different light. A navy cap can hide stitch issues that a light gray cap will expose immediately. Matte fabric and lightly sheened fabric can also change how embroidery reads. A buyer who reviews only one colorway is usually seeing the easiest version of the style, not the hardest.
For sustainability-minded programs, this is the point where packaging and trim choices need to enter the conversation. FSC-related paper components, recycled inserts, and carton labeling should be reviewed alongside the sample, not after the product is already approved. Small details in the box often determine whether the full program feels coherent.
| Cap Style | Typical Sample Risk | Best Check | Common Fix Cost |
|---|---|---|---|
| Structured snapback | Front panel buckling under dense embroidery | Logo density, crown shape, brim curve | Low to moderate |
| Unstructured dad cap | Loose fit or uneven panel lay | Crown depth, seam balance, closure tension | Low |
| Foam-front trucker | Patch or print causes surface distortion | Decoration size, heat reaction, front flatness | Moderate |
| Performance cap | Fabric sheen shifts color under light | Color match, handfeel, sweatband comfort | Moderate |
Cost, Pricing, MOQ, and Quote Variables to Confirm
Sample pricing rarely matches bulk pricing, and that is normal. One-off sampling carries setup, labor, and handling overhead, especially if the cap requires embroidery digitizing, custom patch development, or specialty trim sourcing. A buyer who focuses only on the sample price can miss the real economics of the order.
As a rough range, simple blank samples may land around $25 to $60 per piece, while decorated samples often run $60 to $150 or more depending on patch complexity, digitizing, and trim work. Revision samples can cost less if the base remains unchanged, but they can also climb quickly when materials need to be re-sourced. Those numbers vary by region, construction, and supplier setup, so they are useful only as a planning frame, not as a quote.
The quote should be broken down in plain language. Ask what is included for the blank cap cost, decoration method, thread or patch charges, packaging, freight, sample fees, and revision charges. If a supplier gives only one headline number, it becomes difficult to compare offers on the same basis.
MOQ deserves close attention too. Minimums often shift when a program includes custom colors, special hardware, multiple sizes, or branded interior details. For straightforward styles, 300 to 500 pieces may be workable. For more custom builds, 1,000 pieces or more can be the cleaner production threshold. That does not mean one supplier is better than another; it means the spec itself changed the math.
Lead time is another place where expectations can drift. A simple sample might be turned in 7 to 14 days, but embroidered or highly customized versions can take 2 to 4 weeks before shipping. Bulk production commonly lands in the 30 to 60 day range, though specialty fabrics, busy seasons, and repeat sample corrections can push that out. Buyers should ask for stage-by-stage timing instead of one vague promised date.
If you are coordinating multiple branded components, a related item like Custom Stickers & Product Seals can affect pack-out, carton configuration, and sticker application work, so it helps to review those items together. The same applies to inserts, tags, and display packaging.
Here is a practical cost comparison many teams use during approval:
| Cost Item | Sample Stage | Bulk Order | Buyer Question |
|---|---|---|---|
| Blank cap | Often higher per unit | Lower at volume | What is the unit price at 500, 1,000, and 5,000 pieces? |
| Decoration | Setup-heavy | Spread across run quantity | Is embroidery, patch, or print the best cost-to-look ratio? |
| Packaging | May include prototypes | Depends on carton and retail needs | Are polybags, inserts, and labels priced separately? |
| Revisions | Often charged | Usually avoided if spec is fixed | How many revision rounds are included? |
That breakdown keeps the commercial side honest. A sample can look cheap and still lead to an expensive bulk program if the assumptions behind the quote were never spelled out. The checklist should protect against that by forcing the buyer to check both product quality and pricing structure at the same time.
Process and Timeline From Sample Request to Approval
A good sample process starts with a complete brief. Send artwork files, target fit, fabric preferences, decoration method, packaging notes, and any MOQ concerns before the factory starts work. If the brief is thin, the first sample often becomes a conversation starter rather than an approval tool.
Then the process usually moves through a few steps: the supplier reviews the brief, confirms material options, prepares the sample, ships it, and waits for feedback. If changes are needed, the supplier revises and resends. The more custom the cap, the more likely the timing will stretch around specialty fabric sourcing, embroidery setup, or trim color matching.
Delays often happen in the middle of the process, not at the beginning or the end. A stitch test can run too dense and need re-digitizing. A foam front can show print distortion and require a layout adjustment. A closure can arrive in a shade that is close but not quite right. Those issues are normal if they are planned for early and reviewed honestly.
The most useful timeline conversations are stage-based. Ask for estimated timing at each step: brief confirmation, sample build, shipping, internal review, revision, and final approval. That gives merchandising, sourcing, and brand teams a clearer picture of where the schedule can flex and where it cannot.
Buffer time matters. A cap should be reviewed under proper lighting, not only through a phone camera. There should also be enough time for wear testing, comparison against the spec, and one clear feedback cycle. If the factory has not been given enough time to react, the approval becomes rushed and the risk moves into production.
If the launch includes packaging, align cap approval with Custom Packaging Solutions so the product, insert, and carton plan stay on the same schedule. That keeps the order from splitting into disconnected workstreams that each need separate fixes.
One more practical detail: ask whether the final production run will be measured against the approved sample or against a written spec sheet. If both exist, they should match exactly. If they do not, the buyer can end up approving one standard and receiving another.
Common Mistakes That Make a Sample Look Better Than It Is
The first mistake is approving too quickly because the sample photographs well. Camera lighting can hide a crown that sits too high, a brim that waves slightly, or a front panel that feels stiff after embroidery. A cap needs to be worn and handled before anyone trusts the visual impression.
The second mistake is giving vague feedback. Comments like “make it nicer” or “fix the front” do not help the factory. A better note would be: lower the logo by 4 mm, reduce thread density, and soften the brim curve by one step. Specific feedback speeds revision and prevents backtracking.
Another common miss is ignoring the inside of the cap. Sweatband stitching, seam finish, label placement, and thread tails all affect comfort and perceived value. Buyers sometimes focus so hard on the front logo that they forget the interior is what the wearer feels every time the cap goes on.
Colorway testing can be misleading too. One sample in black or navy does not tell you how the same construction will look in light gray, khaki, or a high-contrast two-tone version. Dark fabrics can hide stitch issues while lighter fabrics expose them. A sample checklist should call for reviewing the most risky colorway first, not the easiest one.
Then there is the commercial mistake: approving the sample before confirming the quote, MOQ, and production lead time. That can leave the buyer with a nice-looking sample and a difficult bulk order. The product looks ready, but the terms are not. Those are separate approvals, and they should stay separate until both are clean.
If your team works with shipment testing or transit standards, it can be useful to keep a reference to ASTM or ISTA handling expectations in the approval file. Soft goods are not fragile in the same way as electronics, but they still suffer when packaging, compression, and carton fill are ignored.
Expert Tips and Next Steps for a Clean Approval
A simple comparison sheet goes a long way. Keep the spec, sample photos, pass/fail notes, and a short revision list in one place so the team can see what changed from one round to the next. If merchandising, sourcing, and brand all need to weigh in, that sheet becomes the shared memory of the project.
Check the sample in more than one lighting condition. Natural light shows color more honestly, while warehouse or retail light can expose sheen, embroidery texture, and fabric contrast differently. A small extra review step often catches issues that would otherwise show up after delivery.
Keep the decision chain tight. One decision-maker and one backup reviewer are usually enough. Too many voices create drift, especially when people give conflicting opinions on crown height, logo scale, or closure style. The best approvals feel deliberate, not noisy.
There is also value in looking at failure modes instead of only the ideal version. Ask what happens if the embroidery is denser than planned, or if the fabric source changes slightly, or if the cap is packed tighter than expected. That kind of question sounds unglamorous, but it is exactly how program risk gets reduced before bulk production.
From there, the path is straightforward: confirm the final spec, document any approved changes, request a revised sample if needed, and release production only after the key items pass. If packaging, labels, or tags are part of the program, lock those too so the order does not fracture into late-stage fixes. A clean approval is rarely dramatic. It is usually just disciplined.
The Private Label Caps sample checklist is the tool that turns a promising cap into a reliable bulk program. It saves time because it forces the hard decisions before production starts, when changes are still manageable.
What should I check first on a private label caps sample checklist?
Start with fit, front panel shape, and crown height, because those issues are the hardest to fix after approval. Then verify logo placement, closure style, and fabric color against the spec sheet. Finish by checking the inside finish, label position, and overall comfort on an actual head.
How many sample rounds are normal for private label caps?
One round is possible for straightforward blanks or simple decoration. Two rounds are common when color matching, embroidery density, or closure details need adjustment. More than two rounds usually means the spec is unclear or the first brief was incomplete.
What costs should be included when I review a cap sample quote?
Look for sample fees, setup charges, decoration costs, packaging, and shipping. Ask whether revision samples will create extra charges if changes are needed. Compare the sample quote with expected bulk unit cost so the pricing story stays consistent.
How can I tell if the process and timeline are realistic?
Ask for stage-by-stage timing instead of one overall date, including material sourcing and sample shipping. Check whether the factory has allowed time for feedback, revisions, and final approval. Add buffer if the cap uses specialty fabric, custom hardware, or complex decoration.
What information should I send before requesting a private label cap sample?
Send artwork files, color references, target fit, decoration method, and packaging notes. Include the quantity target and any MOQ concerns so the supplier can quote accurately. Share your approval criteria up front so the sample is judged against the right standard.


