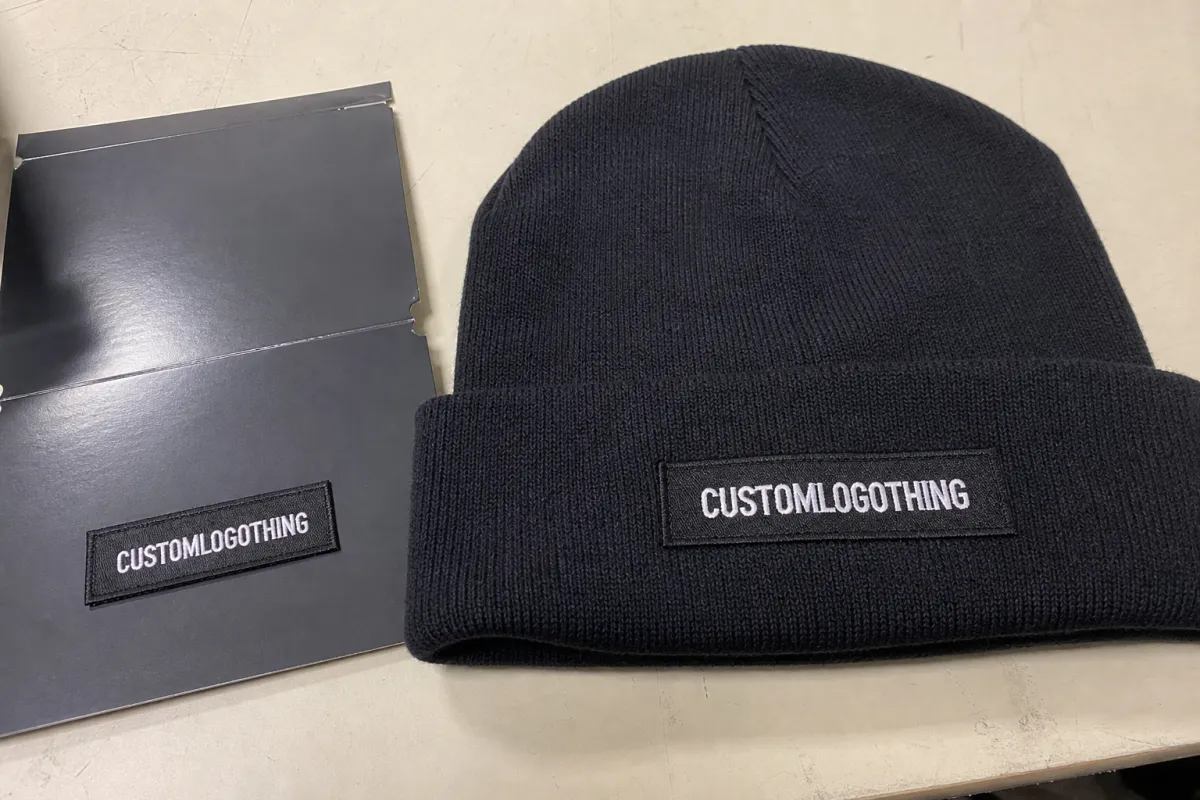
A Retail Merch Beanies artwork file setup is one of those behind-the-scenes steps that decides whether a bulk order moves cleanly into production or spends days in proof revisions. Beanies offer a small, curved decoration area, so artwork that looks perfectly balanced on a screen can shrink into something muddy once it is adapted for embroidery, a woven patch, a printed label, or a folded cuff.
For buyers, the job is not just to send a logo. The file has to tell the supplier what the logo is, how large it should be, what decoration method will carry it best, and where it belongs on the finished beanie. That is especially true in retail merch programs, where the hat may need to match a display set, a seasonal drop, a hangtag system, or a pack-out spec that leaves little room for improvisation.
Good setup protects the look of the product and the schedule. Unclear files usually trigger redraws, digitizing work, placement questions, and extra proof cycles. Those delays do not always show up in the first quote, but they almost always show up somewhere before the order is released.
What Beanie Artwork File Setup Really Means for Merch Buyers
In practical terms, retail merch beanies Artwork File Setup means getting the art ready for the production team to evaluate size, line weight, color count, and decoration method before anything is made. It is less about making the artwork look polished and more about making it usable.
That distinction matters. A logo that reads beautifully at 14 inches wide may need to be compressed to 2.5, 3, or 3.5 inches across the cuff of a beanie. At that scale, thin outlines close up, small type loses breathing room, and gradients can become patchy or disappear entirely. The knit itself adds another variable because ribbing, stretch, and yarn texture can alter how a logo appears once it is stitched or applied.
- Source art should be the cleanest version available, not a screenshot or a compressed image pulled from a deck.
- Color references should be called out early, ideally with Pantone numbers or clearly approved equivalents.
- Placement should be defined before proofing, including front cuff, center fold, side seam, or patch position.
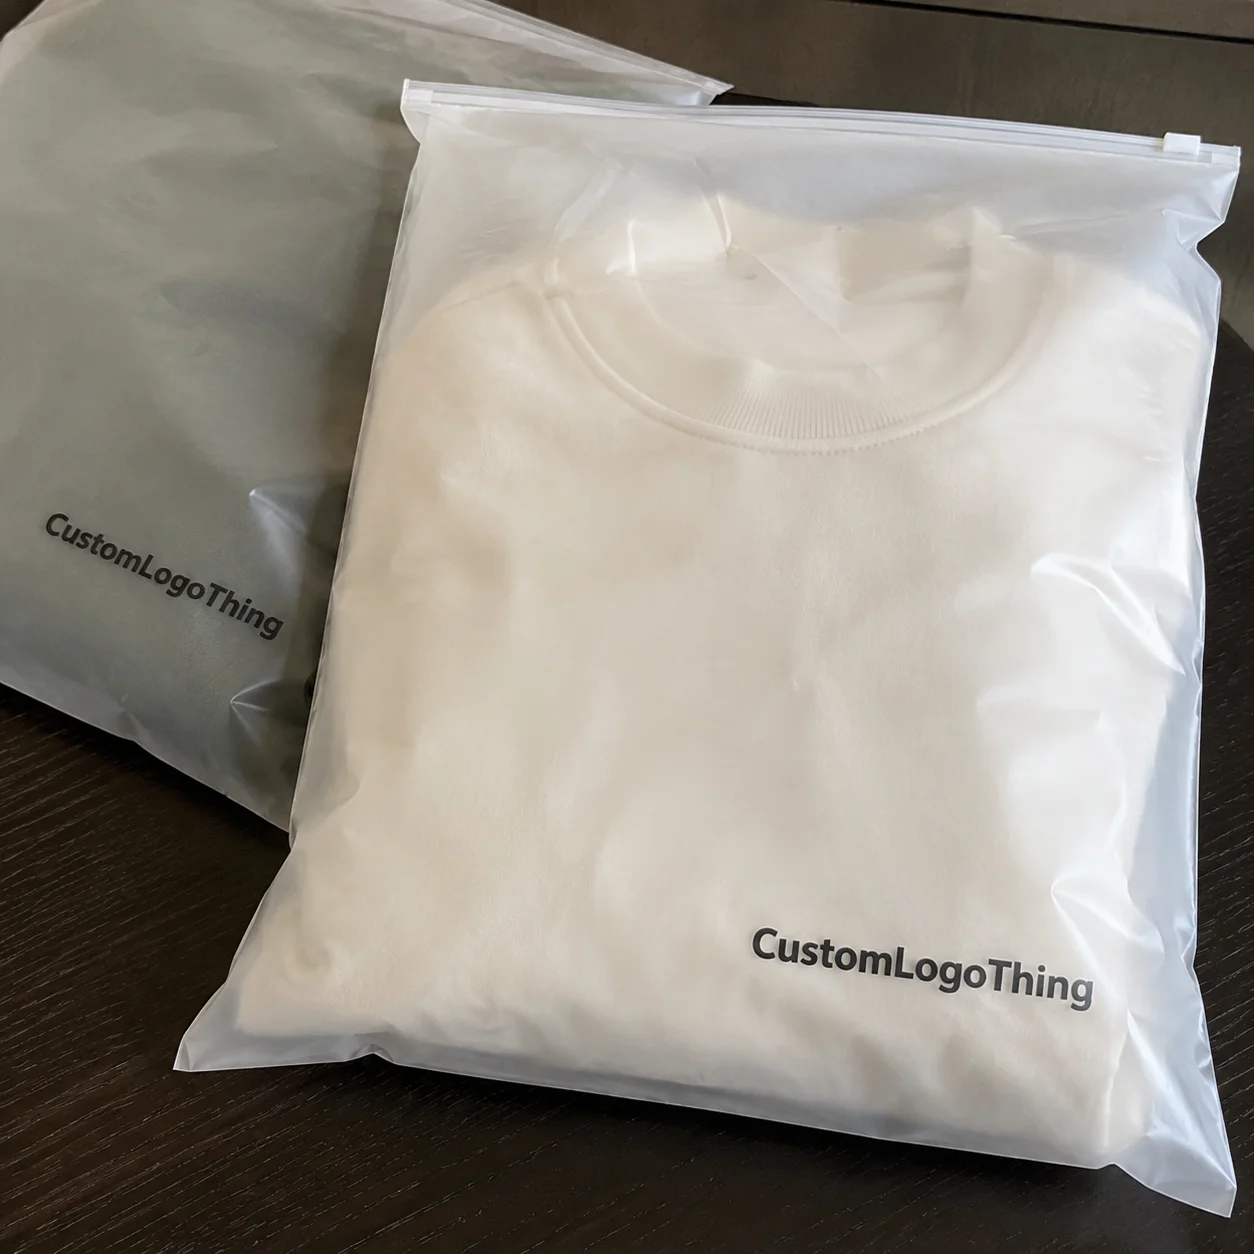
- Packaging notes should be included if the order needs hangtags, polybags, barcode stickers, or carton labels.
That last point is easy to miss. A beanie can be decorated well and still miss the brief if the merch program depends on retail-ready pack-out. If transit packaging is part of the order, standards from organizations such as ISTA can matter. If the job includes paper components such as insert cards or hangtags, it may also be worth asking whether FSC-certified stock is required through fsc.org.
Practical rule: if the logo does not read clearly at the actual decoration size on paper, the same problem will usually appear once it is stitched, woven, or heat-applied.
Buyers also get better results when they think in terms of the finished object rather than the artwork alone. A cuff with a deep fold gives a different visible area than a shallow one. A slouch beanie has different placement limits than a tight rib knit. Even the yarn finish matters, because a soft matte yarn and a slicker acrylic blend do not reflect light the same way.
How Artwork Moves From Screen to Finished Beanies
The handoff from screen art to finished beanies is usually more structured than buyers expect. First comes intake, where the art team checks whether the file is vector, raster, or a presentation export with missing pieces. Then comes a technical review: resolution, outline quality, font integrity, spot color structure, and whether the logo can survive at decoration size without becoming fuzzy or overcrowded.
After that, the decoration method sets the limits. Embroidery usually needs digitizing because stitch paths are not the same thing as artwork paths. Woven patches can hold more detail than embroidery, but they still work best with simplified art, sensible line weights, and text that is large enough to remain readable once the threads interlace. Printed labels, heat transfers, and appliques preserve more of the original graphic, though they introduce their own constraints around fabric compatibility, wash durability, and edge detail.
Proofing is the bridge between design intent and production reality. A useful proof should show the actual beanie style, the placement, the scale, and the decoration method in a way that lets the buyer judge what a customer will really see. If the proof shows a floating logo on a plain background with no sense of the cuff or knit texture, it may look attractive while still missing the practical details that determine success.
Good files do more than look tidy. They help the supplier answer the questions that matter most: how much detail can the method carry, what can be matched in thread or print, where the mark should sit, and whether the artwork needs a simplified version for the smaller decoration area.
Artwork Specs That Keep Logos Sharp on Beanies
For most retail merch beanies artwork file setup projects, vector art is the safest starting point. AI, EPS, and editable PDF files preserve clean paths, which makes them easier to resize, separate, and prepare for production. High-resolution PNG or PSD files can still be useful in some cases, but they often need cleanup before a factory can use them without risk.
Beanies are less forgiving than many apparel placements. Fine serif type, hairline rules, and delicate negative spaces can look elegant in a brand deck and then fall apart on a 3-inch decoration field. A useful rule is to avoid details that would not survive if the artwork were reduced by half and viewed from arm’s length. If a stroke is thinner than about 0.75 pt on screen, or if text would be smaller than roughly 5 pt at the final size, it deserves a second look. For very dense logos, the real test is not whether the art is technically editable, but whether the smallest shapes still hold after translation into thread, yarn, or film.
Color is another area where expectations need to stay grounded. Even with Pantone references, embroidery thread is not an ink system. Thread sheen, knit texture, fiber color, and lighting all change the appearance of the mark. A navy thread on a heather gray cuff may read differently than the same navy on a black or forest green beanie. That is normal, and a good supplier should point it out rather than pretend there is a perfect match every time.
Placement is just as important as the file itself. A logo that works on a hoodie chest may need simplification for a beanie cuff. Many buyers get better results by preparing two versions of the art: a primary version for larger placements and a simplified version for small-format decoration. That approach is especially useful if the original graphic includes a tagline, nested shapes, or a fine icon that loses clarity once the width drops.
One detail worth confirming early is the visible field after folding. A beanie with a tall cuff can hide more artwork than a low-cuff style, and a blank area that looks generous in a flat mockup may shrink once the knit is worn. The production team can usually adjust placement, but only within the physical limits of the product.
If the artwork includes small knockouts, reverse text, or layered linework, ask for a production check before approval. Those areas are often where the first readability problems show up. A good proof process should make those problems visible while there is still time to fix them.
Retail Merch Beanies Artwork File Setup Process and Timeline
The retail merch beanies artwork file setup process usually follows the same basic path, but the speed depends heavily on how complete the original file is. A clean job can move from intake to proof quickly. A messy one can slow down before the first mockup is finished.
- File intake: the supplier checks file type, resolution, fonts, and color structure.
- Art prep: the logo may be cleaned up, redrawn, or simplified for production use.
- Method setup: embroidery is digitized, patches are built, print files are separated, or labels are adjusted.
- Proof creation: a mockup is assembled with placement, size, and finish details.
- Buyer approval: changes are confirmed before anything is released to production.
- Production release: the order moves to manufacturing once the proof is signed off.
Most delays happen in the middle of that chain. Low-resolution source art slows down cleanup. Missing fonts create redraw work. Unclear placement instructions force extra mockups. And if the buyer has not confirmed whether the decoration should sit centered on the cuff, slightly offset, or directly over the fold, the proof can bounce back and forth more than once before approval.
Timing should be separated into two pieces: proof time and production lead time. A vendor may return a proof in one or two business days if the file is strong and the decoration method is straightforward. That does not mean the final order will ship immediately. For bulk beanies, especially those with custom patches or detailed embroidery, post-approval lead time often lands in the 10 to 20 business day range. More involved jobs, larger quantities, or custom packaging can stretch longer.
Sampling adds another layer. If a program requires a pre-production sample, expect extra time for art adjustments, method confirmation, and physical review. That step can be worth it when the design is complex or the retail spec is strict, but it should be built into the schedule instead of treated as a last-minute add-on.
The fastest orders are usually not the simplest ones; they are the ones where the buyer has already made the hard choices. Once the decoration method, size, color references, and placement are locked, the production team can spend its time building the product instead of decoding the brief.
Cost, Pricing, MOQ, and Quote Factors for Beanie Artwork
Pricing for beanie artwork setup usually comes down to a few predictable variables: decoration method, color count, cleanup time, and whether the order needs digitizing or custom patch development. A clean vector logo is cheaper to prepare than an emblem with tiny type, layered gradients, or hand-drawn marks that need substantial cleanup.
MOQ matters too. Setup costs are easier to absorb when the order volume is healthy because the prep work gets spread across more units. On smaller runs, the same art and method setup has to be recovered over fewer pieces, so the per-unit cost rises. That is common, not a warning sign. It is also why buyers should compare setup cost, unit cost, and the total landed cost together.
In many programs, beanie quantities start around 48 or 100 units, though the exact minimum depends on the decoration method and the supplier’s workflow. Embroidery and woven patch jobs often have different thresholds than printed labels or heat-applied graphics. Larger runs may also reduce the setup burden per piece, while highly customized retail packaging can add separate costs that have nothing to do with the decoration itself.
Here is a practical pricing reference. Exact numbers vary by supplier, design complexity, and order size, but these ranges are useful for setting expectations before a quote comes back.
| Decoration option | Typical setup work | Typical cost impact | Best fit |
|---|---|---|---|
| Direct embroidery | Digitizing, stitch simulation, thread matching | $35-$85 setup, plus about $0.60-$1.40 per piece on many bulk runs | Clean logos, simple text, classic retail beanies |
| Woven patch | Art cleanup, patch border planning, edge definition | $50-$120 setup, plus about $0.40-$1.10 per piece | Smaller logos with sharper detail than embroidery can hold |
| Printed label or heat transfer | Color separation, artwork flattening, adhesion review | $20-$60 setup, plus about $0.25-$0.80 per piece | Graphic-driven designs, lighter branding, short-run merch |
A cleaner file can save real money. It reduces revision cycles, lowers the chance of a redraw, and cuts down on proof churn that often shows up as hidden labor in the final quote. Buyers sometimes focus on unit cost alone, but the quote is usually more accurate when the source artwork is solid from the start.
If the order includes hangtags, folded inserts, or custom cartons, ask whether the paper stock needs a specific finish or certification. Retail presentation materials can change the quote more than expected, especially when the design has to carry across multiple touchpoints and still look consistent under store lighting.
Common File Mistakes That Slow Down Approval
Most approval delays are preventable. The usual problems start with a file that looks acceptable on a monitor but is missing the structure a production team needs. Screenshots, low-resolution logos, and flattened artwork with no editable layers are frequent offenders.
Wrong color mode creates another layer of trouble. A file prepared for web use may be in RGB, while production often wants CMYK, spot colors, or clear Pantone references. That mismatch can lead to surprises when the proof is built, because screen color rarely matches thread, ink, or woven yarn with perfect accuracy.
Overcomplicated artwork is risky on beanies. Designs that depend on micro type, thin negative spaces, or tiny interior symbols often look rich in a brand presentation but collapse at small size. Buyers sometimes ask production to make the logo fit without any changes, but the better move is to simplify the art before the proof stage starts.
Missing placement instructions slow things down as well. A strong logo can still be approved in the wrong location if nobody says whether the design should sit centered on the cuff, low on the fold, or slightly offset for a more fashion-forward look. Ambiguity creates avoidable revisions, and revisions push a clean order into the slow lane.
Internal disagreement is another hidden delay. Retail, marketing, and operations can all have a slightly different idea of the right beanie. If those teams are not aligned before the art is sent, the proof becomes a debate instead of a production tool. A single final approver solves more problems than a long chain of opinions.
One more issue is beanie construction itself. A logo created for a flat knit mockup may not behave the same way on a thicker rib, a slouch style, or a cuff with more stretch. The art can still work, but only if the supplier understands the product before they build the proof.
Expert Tips for Cleaner Proofs and Fewer Revisions
The simplest way to improve retail merch beanies artwork file setup is to send the best source file and the smallest set of instructions that still captures the brand intent. In most cases, that means an editable vector file, a short spec sheet, and one person who can approve quickly.
These habits save the most time in production:
- Send the native art file instead of a compressed export if you have access to it.
- State the decoration method up front, because embroidery and patch work follow different setup paths.
- Give a size target in inches, not just “small” or “medium.”
- Include brand color references so the proof does not rely on guesswork.
- Ask for an actual-size mockup so you can judge readability before approval.
A second logo version can be useful. If the main mark has a fine tagline or a dense icon, prepare a simplified version with fewer interior details. That gives the production team a better option for small placements without stripping away the identity of the design.
Review the proof the way a customer will experience the product: at arm’s length, on a real beanie shape, under ordinary light. A design that works on a white monitor may need contrast or size adjustments once it sits on rib knit. That is not a flaw in the artwork; it is simply the reality of decorating a curved textile surface.
It also helps to look for the practical signs of a good proof. The placement should feel centered in relation to the fold. The mark should have enough breathing room around it. Tiny text should be legible without effort. If the proof looks busy before production even starts, it will not become clearer after stitching or printing.
Finally, keep the approval chain short. The fewer people who have to comment on a proof, the faster the order moves. A tight approval process is one of the most reliable ways to protect quality and schedule at the same time.
Actionable Next Steps Before You Send Your Artwork
Before you request pricing, gather the source logo files, confirm the beanie style, and decide whether the decoration should be embroidery, a woven patch, a printed label, or another finish. That single decision shapes the rest of the quote.
Then write down the practical details a factory needs to build the first proof correctly: placement, approximate size, color expectations, quantity, and any retail packaging notes. If the order has a deadline, include it early so the supplier can tell you whether the schedule is realistic.
It helps to test the art at reduced size before you send it. Print the logo at the actual decoration width, look at it from a normal distance, and check whether the smallest words still read cleanly. If they do not, simplify the design now rather than after the proof comes back.
For a smoother retail merch beanies artwork file setup, treat the artwork handoff like part of the production job. A careful file setup makes the proof easier to approve, the quote easier to read, and the final run more predictable from the first sample through the bulk shipment.
FAQ
What file type is best for retail merch beanies artwork file setup?
Vector files such as AI, EPS, or editable PDF are usually the best starting point because they scale cleanly and are easier to prepare for production. High-resolution PNG or PSD files can work for some decoration methods, but they often need more cleanup. If the logo has fine detail, ask the supplier which format they prefer before you send the file.
Do I need vector art for beanie logo production?
Vector art is strongly preferred for most beanie decoration because it preserves shape and makes size adjustments much easier. If you only have a raster file, the factory may still be able to use it, but parts of the logo may need to be redrawn. The smaller the design, the more valuable vector cleanup becomes.
How long does the proof stage usually take for beanie artwork?
Proof timing depends on file quality, decoration method, and whether the logo needs digitizing or redraw work first. Clean files often move faster because the art team can build the mockup without extra back-and-forth. Unclear placement instructions and complex changes are the usual reasons the proof stage stretches out.
What affects beanie artwork pricing the most?
The biggest price drivers are decoration method, color count, artwork cleanup time, and whether the project needs custom digitizing or patch development. Order quantity also matters because setup costs are spread across the run. Simple, clean art usually costs less to prepare than a logo with tiny type or multiple revision rounds.
What should I send with my artwork file to get a faster quote?
Include the beanie style, artwork placement, approximate size, color references, and total quantity. Add any retail requirements such as hangtags, packaging, or brand-matching notes so the quote reflects the full scope. If you have a deadline, mention it right away so the supplier can judge schedule fit.