Buyer Fit Snapshot
| Best fit | retail packaging practices for better shelf sales for packaging buyers comparing material specs, print proof, MOQ, unit cost, freight, and repeat-order risk where brand print, material, artwork control, and repeat-order consistency matter. |
|---|---|
| Quote inputs | Share finished size, material target, print colors, finish, packing count, annual reorder estimate, and delivery region. |
| Proofing check | Approve dieline scale, logo placement, barcode or warning zones, color tolerance, and any recyclable or compostable wording before bulk production. |
| Main risk | Vague material claims, crowded artwork, or missing packing details can create delays even when the unit price looks attractive. |
Fast answer: Retail Packaging Practices for Better Shelf Sales: Material, Print, MOQ, and Cost should be specified like a repeatable production item. The safest quote includes material, print method, finish, artwork proof, carton packing, and reorder notes in one written spec.
What to confirm before approving the packaging proof
Check the product dimensions against the actual filled item, not only the sales mockup. Ask for tolerance on folds, seals, hang holes, label areas, and retail display edges. If the package carries a logo, QR code, warning copy, or legal claim, reserve that space before decorative graphics fill the panel.
How to compare quotes without losing quality
Compare board or film grade, print process, finish, sampling route, tooling charges, carton quantity, and freight assumptions side by side. A lower quote is only useful if the supplier can repeat the same color, closure quality, and packing count on the next order.
Retail Packaging Best Practices for Better Shelf Sales starts with a blunt truth: shoppers decide fast. Sometimes embarrassingly fast. A package gets a glance, a hand reaches for it, or it gets passed over. That is the whole game. Good retail packaging best practices protect the product, move cleanly through packing and freight, and still look worth a spot on shelf. If a package only photographs well, that is not strategy. That is decoration with a budget.
From a buyer's point of view, the safest starting points are simple: folding cartons for light goods, rigid boxes for premium presentation, and corrugated retail packs for heavier or more fragile products. Those three structures cover most retail jobs. Each one can be tuned with board grade, finish, and insert style so the product fits the package instead of getting bullied by it. That is the practical side of retail packaging best practices. It is not glamorous. It works.
If you're comparing options for Custom Packaging Products, keep one thing in your head: the package has two jobs. It has to survive the warehouse and sell on the shelf. A carton that looks sharp in a mockup but scuffs during pack-out fails half the assignment. A mailer that ships well but looks cheap under store lights fails the other half. Real retail packaging best practices sit in the middle, not at the extremes.
Retail Packaging Best Practices: Quick Answer
Here is the short answer I give buyers. The best retail packaging best practices balance shelf impact, product protection, pack-out speed, and freight efficiency. Not just looks. Too many teams start with finish, then scramble to make the structure behave. That is backwards. Light board caves in. Overbuilt boxes eat margin. Fussy inserts slow the line and turn a tidy launch into a labor problem.
Most shoppers do not inspect packaging the way a brand team does. They glance, compare, grab, or move on. That is why retail packaging best practices have to connect to business outcomes: better sell-through, fewer transit losses, cleaner shelf presentation, and lower return rates. A package that cuts damage by even 2% on a high-volume SKU can justify a serious upgrade in print or structure. On a smaller item, that same reduction can be the difference between a launch that sticks and one that quietly fades out.
A package that wins in the render and loses on the line is not premium. It is expensive.
The safest starter choices are still easy to defend. A folding carton works well for cosmetics, supplements, candles, accessories, and lightweight consumer goods. A rigid box makes sense when the product is high-value, gift-oriented, or expected to create a stronger opening moment. A corrugated retail pack is the better answer for electronics, glass, tools, food-adjacent items, and anything that needs more structure for shipping or display. That logic sits right at the center of retail packaging best practices because it follows the product, not the trend.
I see buyers get into trouble when they ask, “What looks most premium?” That question flatters the design review and ignores the warehouse. A better question is, “What package protects the product, supports the brand, and still runs cleanly through fulfillment?” That is the kind of question that produces real retail packaging best practices. It also stops the project from drifting when design wants drama and operations wants something that folds fast and ships flat.
- Lightweight products: Folding cartons with SBS, CRB, or kraft paperboard usually give the best mix of price and shelf appeal.
- Premium items: Rigid setups with a wrapped paperboard shell and paper-based or foam-free inserts create a stronger perceived value.
- Fragile or heavy goods: Corrugated retail packs with a purpose-built insert hold up better in transit and on the sales floor.
- Tight budgets: Simplify the structure first, then spend on one finish or one brand cue instead of piling everything on at once.
That is the short version of retail packaging best practices. The longer version lives below, where materials, cost, finishes, and production behavior start showing their teeth.
Retail Packaging Best Practices Compared
When buyers compare formats side by side, the first thing I recommend is ignoring the mockup and looking at how the package behaves in the real chain. Retail packaging best practices get easier once you compare shelf presence, protection, decoration quality, and pack-out speed in one place. The best package is not the prettiest sample. It is the one that still looks good after shipping, handling, and retail stocking.
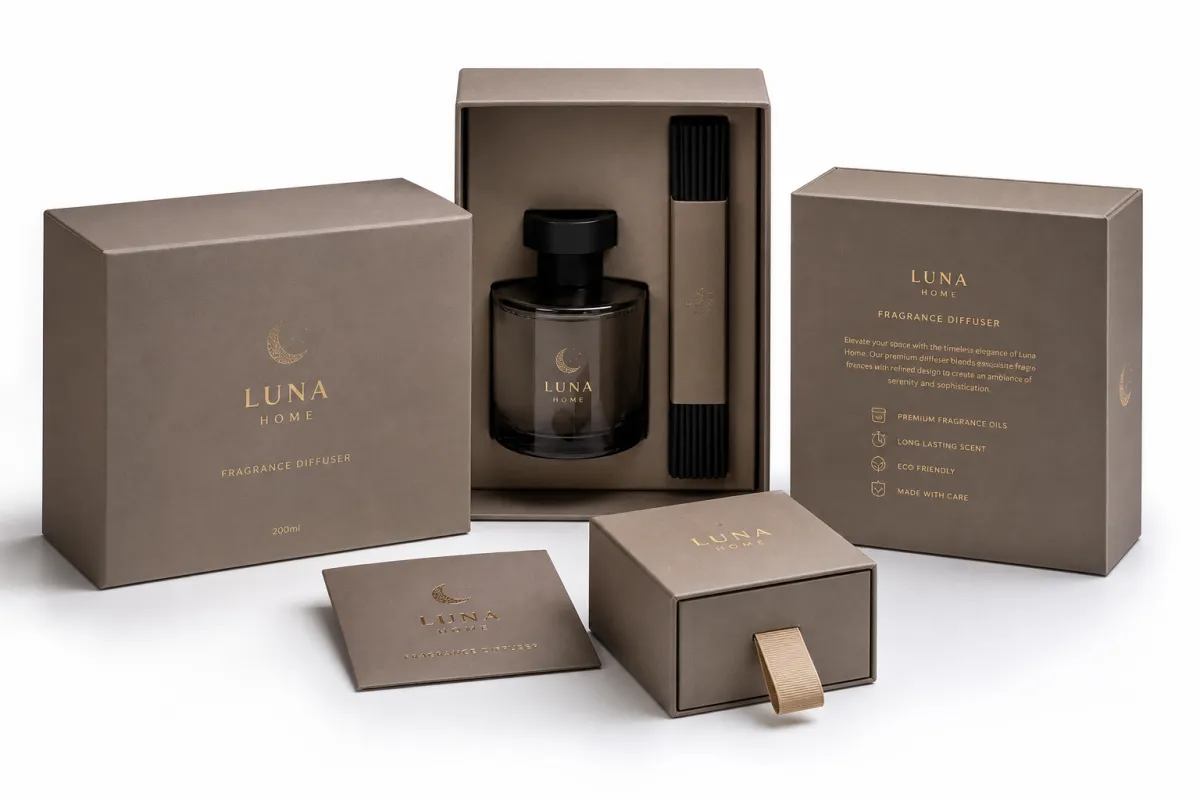
Folding cartons are the workhorse. They ship flat, print cleanly, and stay economical at medium to high quantities. They handle strong branded packaging with crisp typography, spot UV, embossing, or foil, and they work especially well when the product itself is not doing much structural heavy lifting. Rigid boxes lean into perceived value and the opening experience. They use more material, sure, but when the product needs a premium presentation, they are still hard to beat. Corrugated retail mailers and display cartons sit on the practical end of the spectrum; they are the sensible answer for heavier goods, multi-piece kits, or retail packaging that has to survive a rougher trip before it reaches the customer.
Sleeves are useful too, but they are not magic. They can turn a plain tray, jar, or carton into a sharper package without rebuilding the whole structure. That makes them handy for lower-risk launches. It does not make them strong. Sleeves do not create the same crush resistance or stacking strength as a full carton. In retail packaging best practices, sleeves are a finishing move, not the foundation.
Here is the part many brands miss: the package that looks premium in a rendering may not look premium after palletizing, stripping, and shelf loading. Corners bruise. Ink rubs. Glue windows lift. A tight tolerance that felt elegant on a proof can turn into a mess once production speed rises. That is why I always judge retail packaging best practices against production reality, not just creative intent. Pretty is fine. Pretty and durable is better.
| Format | Best Use | Typical Strengths | Typical Weak Points | Relative Cost |
|---|---|---|---|---|
| Folding carton | Cosmetics, accessories, small consumer goods | Flat shipping, strong print quality, efficient line speed | Limited crush protection, can dent if board is too light | Low to moderate |
| Rigid box | Gift items, premium products, high-value kits | Strong shelf presence, premium feel, better opening experience | Higher freight cost, slower assembly, more expensive tooling | Moderate to high |
| Corrugated retail mailer | Fragile, heavier, or e-commerce-to-retail items | Excellent protection, better transit durability, good insert support | Print finish can look more utilitarian if not planned well | Moderate |
| Sleeve | Secondary branding over trays, bottles, or simple cartons | Low added material, quick branding change, flexible graphic area | Weak on protection and structure if used alone | Low |
| Display-ready carton | Multipacks, shelf trays, club or grocery retail | Fast shelf conversion, strong merchandising value | Needs careful tear strip and structural design | Low to moderate |
If you want the most practical filter possible, remove any option that adds cost without solving a real problem. That usually means tossing rigid boxes for low-price items, stripping decorative extras from heavy products, or dropping complex shapes when pack-out labor is already tight. In other words, retail packaging best practices are often about subtraction. Clear the noise, then spend where it changes the result.
For teams still comparing package families, a useful next step is to line up samples and ask three questions: Does it protect the product? Does it present the brand clearly on shelf? Does it run cleanly through fulfillment? If a structure fails two of those three, it rarely belongs in the final shortlist. That keeps retail packaging best practices from sliding into design theater.
Detailed Reviews: Materials, Inserts, and Finishes
Materials make or break retail packaging. Graphics sell the story, but the substrate decides whether the package survives handling and still looks respectable by the time it reaches the shelf. That is why retail packaging best practices have to start with board choice, flute choice, and structural restraint. If the board is wrong, no finish can save it. If the flute is wrong, the box may look right and perform badly anyway.
For folding cartons, common paperboard grades include SBS, C1S, CCNB, and kraft-based boards. SBS is still a strong choice for clean print, sharp graphics, and premium branded packaging. C1S helps when one side needs print quality and the reverse can stay functional. CCNB tends to be more cost-sensitive and can work well for inner layers or price-conscious retail packaging. Kraft-based board gives a more natural look and often fits sustainability messaging or a more organic package branding story.
Corrugated board deserves more attention than it usually gets. E-flute can feel sleek and print well for retail-facing boxes, while B-flute brings more wall strength. Double-wall builds are rarely needed for light retail goods, but they can be justified if the product is dense, has sharp edges, or faces rough logistics. This is where retail packaging best practices stay honest: use the minimum structure that still passes real testing. Anything past that is a cost decision, not a quality decision.
Inserts are where a lot of packaging budgets quietly disappear. Paperboard locks, molded pulp, corrugated dividers, and custom die-cuts can all be useful, but each one should solve a specific stress point. If the item is light and stable, a simple die-cut cradle may be enough. If the product has multiple components or a fragile accessory, a divider system may earn its keep. If the opening experience matters and the buyer expects a premium unboxing, a molded pulp insert can create a cleaner, more responsible impression than foam. Even then, the insert has to earn its space. Excessive complexity slows packing, raises scrap, and makes the package feel overdesigned. I have seen teams add three insert layers to solve a problem that one well-cut cradle could have handled. That is not excellence. That is a meeting that escaped into production.
Finishes should be treated as performance features, not wallpaper. Matte varnish softens glare and keeps typography calmer under retail lighting. Soft-touch coating creates a rich hand-feel, but it can scuff if handled hard. Embossing and debossing add depth to package branding, especially when a logo needs to stand out without flooding the whole box with ink. Foil still carries premium signal, though it needs restraint because too much shine can tip a package into dated or flashy territory. Spot UV adds contrast, but on some substrates it exposes registration issues when the press work is sloppy.
For testing, I start with the unglamorous basics: scuff resistance, corner crush, glue integrity, barcode readability, color consistency, and closure repeatability. If the box opens too loose after three cycles, the fit is suspect. If the barcode is hard to scan under store lighting, the package is already failing a real retail test. If colors drift too far from the approved proof, the branded packaging loses consistency, and consistency matters more than people admit.
Packaging standards matter here too. For transit checks, many teams use ISTA test methods to simulate drops, vibration, and compression. For sourcing board that supports responsible fiber practices, FSC certification can be part of the spec when the supply chain supports it. I also keep an eye on guidance from the Institute of Packaging Professionals, especially when a team is standardizing terminology across product packaging programs.
Honestly, the upgrades worth paying for are usually the ones that protect the print or improve the customer's handling experience. A better coating, a cleaner insert, or a stronger board upgrade can earn its place. The upgrades that mainly flatter the sample are the ones that only change the photo. That distinction sits at the center of retail packaging best practices, and it keeps budgets from drifting into decoration for decoration's sake.
What to sample first
Start with a physical sample, not a PDF. A sample shows how the board creases, how the closure behaves, and whether the product actually sits correctly inside the cavity. When possible, request two versions: one optimized for structure and one optimized for print, then compare them under actual lighting. That is one of the simplest ways to apply retail packaging best practices without making the project weirdly complicated.
What to avoid early
Skip speculative finishes, unusual die-cut windows, and very tight tolerances until the base package passes testing. Those features can be added later if the core structure is stable. Too many teams reverse that order and end up paying for rework. In packaging design, restraint usually produces better retail packaging than novelty.
Retail Packaging Best Practices and Price Comparison
Pricing is where many packaging conversations go sideways, because people compare unit cost without looking at the full landed picture. Retail packaging best practices need a wider view: unit cost, setup cost, tooling, insert cost, freight, storage, labor, and replacement cost from damage. The cheapest box on paper can become the most expensive choice if it slows the pack line or creates a steady stream of returns.
Order quantity changes everything. A run of 1,000 pieces carries a very different cost structure than 10,000 or 25,000 pieces, especially if the project needs custom printed boxes, specialty coating, or a custom insert. Lower volume usually favors simpler structures, fewer finishes, and standardized materials. Once the quantity rises, the economics of better print coverage, more refined die-cuts, and more complete branded packaging improve quickly. That is one of the most practical retail packaging best practices to remember.
| Package Type | Approx. Unit Cost at Low Volume | Approx. Unit Cost at Mid Volume | Common Add-Ons | Best Value When... |
|---|---|---|---|---|
| Folding carton | $0.35-$1.10 | $0.18-$0.55 | Spot UV, foil, emboss, insert | The product is light and the brand needs strong shelf graphics |
| Rigid box | $1.80-$4.50 | $1.10-$3.00 | Wrapped paper, magnetic closure, ribbon, tray insert | The opening experience matters and the item supports a premium price |
| Corrugated retail mailer | $0.75-$2.10 | $0.45-$1.40 | Custom print, mailer lock, molded pulp insert | Protection matters as much as shelf appearance |
| Sleeve only | $0.12-$0.45 | $0.08-$0.22 | Special ink, foil accent, tamper feature | The base package already performs and needs a branding layer |
| Display carton | $0.45-$1.65 | $0.25-$0.90 | Tear strip, shelf-ready perforation, product divider | The package must convert into a display quickly and cleanly |
Those numbers are realistic starting points, but they move with coverage, finish complexity, structural detail, and supplier geography. A 4-color carton with heavy ink coverage and a tight registration spec costs differently than a single-color kraft sleeve. A rigid box with a custom insert and magnetic closure is a very different economic proposition than a basic telescoping setup. That is why retail packaging best practices push you to compare landed cost, not just quoted price.
Hidden costs show up in familiar places. Special inks can increase make-ready waste. Multiple SKUs complicate inventory and raise the odds of stale cartons sitting on the shelf. Versioned artwork can slow approvals. Late-stage design changes get expensive fast because they often trigger new tooling, new proofs, or extra production time. If the product line has many variants, standardize the structure and vary the graphics. Redesigning the box for every flavor or size sounds clever. It is usually a headache in disguise.
Speed also has a price. If a carton takes an extra 8 to 12 seconds to pack because the insert is fiddly or the closure is hard to fold, labor cost will outrun a small materials savings before long. That is one of the quiet truths behind retail packaging best practices: the package has to fit the people using it, not just the CAD file.
If you want a practical rule, think like this: spend where the customer notices and where the product is at risk. Do not spend where the change only flatters the sample in a meeting. That mindset keeps retail packaging decisions sane and keeps Custom Packaging Products aligned with the margin on the shelf.
How to Choose the Right Retail Package
Good package selection is less about taste than fit. The right answer depends on product weight, fragility, retail channel, branding goals, and whether the item ships direct or moves through a store. That is why retail packaging best practices work best when they start with the product, then move outward to operations, then finish with design. Reverse that order and you usually get packaging that looks right but behaves badly.
Performance first
Start by measuring the stress the package will actually face. A light cosmetic item in a warehouse tote needs a different structure than a glass accessory handled by store associates, stacked in a backroom, and opened by a customer. The closer the package gets to the real handling conditions, the better your decision will be. Ask whether the box needs to survive drop impact, stacking pressure, humidity, abrasion, or repeated opening. Good retail packaging best practices always respect those forces.
Brand fit
Then ask how the package should feel in the hand. Premium positioning often benefits from rigid construction, refined typography, and a controlled color palette. Functional products may do better with a crisp folding carton that communicates clearly and avoids visual clutter. A lot of package branding problems come from trying to make one SKU speak to everyone. Clear packaging design usually works better than crowded packaging design. One strong front-panel message and one clean hierarchy usually beat a package that tries to tell five stories at once. That sounds basic because it is basic. Still, teams mess it up all the time.
Production fit
Finally, check whether the package can be built, filled, and replenished efficiently. A beautiful concept means very little if the line has to slow down for it. Evaluate foldability, insert placement, glue area, carton opening, and how the package behaves in a case pack. If the design makes operators fight the box, the project is not done. In practical terms, retail packaging best practices are a production discipline as much as a branding one.
Use this simple checklist before you approve anything:
- Confirm product dimensions, fill weight, and any fragile points.
- Decide whether the package is shelf-first, ship-first, or both.
- Choose the weakest acceptable structure, then test upward only if needed.
- Review artwork hierarchy with barcode placement, regulatory text, and claims.
- Request a sample and check fit, scuffing, and opening behavior in real light.
- Run a pilot order before full launch if the item is new or the line is changing.
That last point matters more than people think. A pilot order exposes problems that a design review will never catch, including slight board variation, inconsistent folding, and how the package survives the first warehouse cycle. If the pilot comes back clean, you have a much stronger case for scaling. That is one of the most reliable retail packaging best practices available to any buyer, regardless of category.
If the choice still feels uncertain, I usually advise clients to compare two routes: one structure that is slightly more premium and one that is slightly more operationally efficient. Then judge both against actual margin, not perceived style. The better package is the one that helps the product sell while staying easy to run. Simple sentence. Big difference.
Process and Timeline for Custom Packaging
Custom Retail Packaging moves through a predictable sequence, and the teams that understand the sequence usually avoid the biggest delays. Retail packaging best practices are easier to execute when the process is disciplined from the beginning: discovery, dieline selection, structural sampling, artwork proofing, production, and delivery. A clean process is not flashy, but it saves more money than almost any decorative finish.
A normal project often starts with product dimensions, fill weight, shipping method, and retail display needs. Those details determine the structure before art enters the room. From there, a dieline or structure recommendation can be drafted, and a sample can be built to check fit. Depending on complexity, a prototype may take 3 to 7 business days, while a print proof can take 1 to 3 business days once artwork is ready. Full production commonly lands in the 12 to 18 business day range after approval, though that can stretch if the project needs unusual materials or multiple rounds of correction.
Rush schedules cost more for a reason. They compress supplier windows, reduce material flexibility, and limit the number of approval rounds. That does not mean rush work is impossible. It means the team has to be sharp about decisions. If color targets, copy, barcodes, and regulatory text are not approved early, the risk of rework climbs fast. That is why retail packaging best practices reward early discipline.
Here is the information that speeds the process most:
- Exact product dimensions with tolerances if they exist.
- Fill weight and whether the item shifts inside the package.
- Retail channel, including shelf, peg, display tray, or ship-to-store.
- Forecast quantity by SKU and any expected reorders.
- Finish goals, such as matte, soft-touch, foil, emboss, or spot UV.
- Barcode, compliance, and claim requirements before the artwork lock.
One thing I always tell buyers: do not approve copy too late. Barcode placement, warning text, ingredient statements, and legal claims can all affect layout, and if they are missing until the end, the artwork almost always needs another round. That adds cost and time, and it is completely avoidable. In a well-run program, retail packaging best practices include copy control as much as material control.
It also helps to define the approval path in plain language. Who signs off on structure? Who signs off on color? Who signs off on claims? If the team does not know, the schedule will drift. I have seen good packaging projects lose a week because four people assumed someone else had approved the proof. Clear ownership keeps product packaging moving.
Once the sample is approved, keep one final check on the production plan: case pack count, pallet pattern, storage conditions, and the shelf readiness of the finished unit. Those last details are easy to skip, but they matter. If the package arrives technically correct and operationally awkward, the launch still suffers. The best retail packaging best practices always end at the shelf, not at the printer.
Our Recommendation and Next Steps
If I had to recommend the safest default, I would start with a well-built folding carton for light to medium-weight retail goods, a rigid box only when the product or margin truly supports the premium experience, and corrugated retail packaging when protection or distribution risk is the bigger issue. That recommendation is simple because simple usually works. The deeper point is that retail packaging best practices are not about choosing the fanciest package; they are about choosing the package that earns its place in the chain.
For brands that are early in the process, the smartest move is usually to audit the current package, request samples, compare landed cost, and test the result on a real shelf or in a real shipping lane. A package can look excellent in a design review and still underperform when it meets actual handling. If you want to move with confidence, use a small rollout path: internal review, supplier quotes, sample testing, then a final approval before volume production. That sequence cuts surprises and keeps the budget under control.
A practical 30-day rollout looks like this:
- Week 1: Gather product specs, forecast volume, branding goals, and current pain points.
- Week 2: Review structure options and request prototype samples.
- Week 3: Check shelf presence, pack-out speed, and damage performance with the sample.
- Week 4: Approve the final structure, lock artwork, and confirm the production schedule.
That approach works because it keeps the work concrete. You are not debating packaging in the abstract. You are looking at a box, measuring the fit, checking the finish, and asking whether the package will help the product sell. That is what retail packaging best practices look like when they are done well.
The best package protects the product, speeds packing, and earns its place at retail without forcing the business to carry unnecessary cost. Keep that standard in place, and the next packaging decision gets easier. Better yet, it becomes repeatable. That is the real value of retail packaging best practices: they turn packaging from a one-off design choice into a dependable commercial tool.
Actionable takeaway: before you approve any retail package, test three things in the real chain: shelf appearance, pack-out speed, and transit survival. If a structure fails one of those, fix the structure first. If it only fails the photo, adjust the finish later. That order saves money, protects margin, and keeps the packaging honest.
What are the most important retail packaging best practices for small brands?
Keep the structure simple, product-safe, and easy to pack so the team can run it without slowing down fulfillment. Make the branding hierarchy obvious, with one strong front-panel message and one clear barcode or compliance area. Test the package in shipping and on a shelf before ordering at scale, because small brands feel damage and rework very quickly. A small mistake can turn into a loud one, fast.
Which retail packaging format is best for premium products?
Rigid boxes usually create the strongest premium feel, but a well-built folding carton can deliver excellent presentation at a lower cost. Choose the structure based on product weight, opening experience, and the amount of protection the item really needs. Do not overbuild a light product just to make it look expensive, because the extra material can hurt margin without improving sales. Fancy does not always mean effective.
How do retail packaging best practices affect cost?
Costs rise with thicker board, specialty finishes, custom inserts, lower quantities, and tighter production tolerances. Packaging also affects hidden costs such as pack-out speed, freight weight, and replacement product from shipping damage. The lowest unit price is not always the best value if it causes returns, scuffing, or inefficient assembly. That is usually where teams get tricked.
How long does custom retail packaging usually take?
Timelines vary by structure, sample count, artwork readiness, and finishing complexity, so every project needs its own schedule. The process usually moves through concept, prototype, proofing, production, and delivery, and each step can add time if approvals are late. Rush orders are possible, but they often limit material choices and increase cost. If you want speed, get the copy locked early. That part alone saves a lot of grief.
What should I test before placing a retail packaging order?
Check fit, drop resistance, closure strength, scuffing, barcode readability, and color under the lighting used in stores. Measure how fast the team can pack it and whether the package stays attractive after handling and transit. Review the sample with the product inside, because a package that looks good empty can fail once it is filled. Empty boxes are liars.


