Buyer Fit Snapshot
| Best fit | Rigid Boxes Pricing projects where brand print, material claims, artwork control, MOQ, and repeat-order consistency need to be specified before quoting. |
|---|---|
| Quote inputs | Share finished size, material target, print colors, finish, packing count, annual reorder estimate, ship-to region, and any compliance wording. |
| Proofing check | Approve dieline scale, logo placement, barcode or warning zones, color tolerance, closure strength, and carton packing before bulk production. |
| Main risk | Vague material claims, crowded artwork, missing packing details, or unclear freight terms can make a low unit price expensive after revisions. |
Fast answer: Rigid Boxes Pricing: Spec Review should be specified like a repeatable production item. The safest quote records material, print method, finish, artwork proof, packing count, and reorder notes in one written spec.
Production checks before approval
Compare the actual filled-product size with the drawing, then confirm tolerance on folds, seals, hang holes, label areas, and retail display edges. Reserve space for logos, QR codes, warning copy, and material claims before decorative graphics fill the panel.
Quote comparison points
Review material grade, print process, finish, sampling route, tooling charges, carton quantity, and freight assumptions side by side. A quote is only useful when the supplier can repeat the same color, closure quality, and packing count on the next order.
Rigid Boxes Pricing Guide: What Actually Drives Cost
This rigid boxes pricing guide cuts through the usual packaging nonsense. Two premium boxes can sit side by side, look nearly identical, and still land at very different prices. Labor, board wrap, inserts, and finishing choices pull harder on cost than most people expect. A rigid box is usually a chipboard structure wrapped in printed or specialty paper, and that wrapped build is exactly what gives it the sharp edges and heavy, premium feel buyers want.
The annoying part is that there is almost never a clean number at the start. A supplier has to look at the structure, decoration, quantity, closure style, and how much hand assembly the design needs before a real quote makes sense. That is why a rigid boxes pricing guide helps before you lock artwork or approve the final spec sheet. It keeps you from guessing off a photo and hoping for the best. Packaging can be kind of dramatic that way.
From a packaging buyer's point of view, the best quotes separate fixed costs from costs that scale with volume. One-time setup, structural samples, and tooling behave differently from per-unit material and labor. That difference gets louder as the order grows or the design gets fussy. A good rigid boxes pricing guide makes those lines obvious so you can decide where to spend and where to trim without making the box feel cheap.
If you are comparing custom packaging programs, the whole system matters more than one SKU in a vacuum. The broader Custom Packaging Products catalog helps with that comparison, especially if you are deciding whether a rigid box really needs premium finishes or whether another format can carry the same brand story for less.
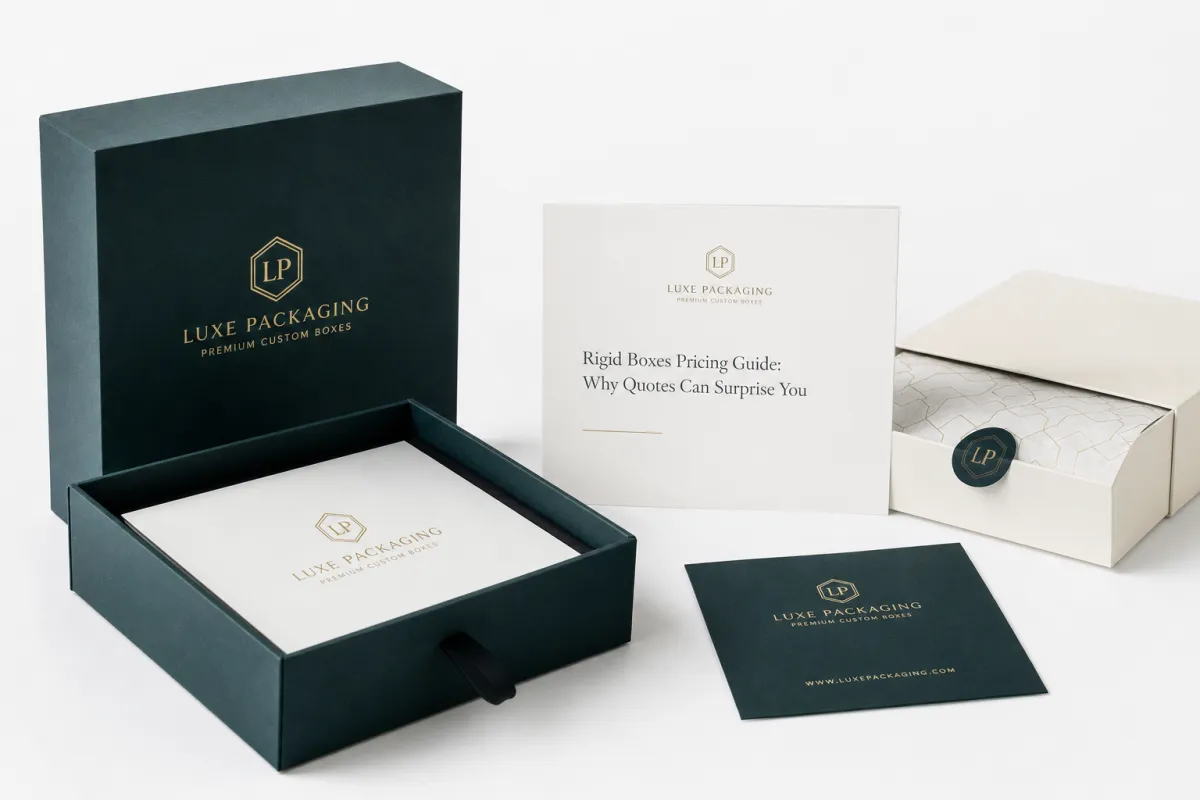
Rigid Boxes Pricing Guide: Why Quotes Can Surprise You
The first surprise is usually simple: two boxes with the same outside dimensions can quote very differently. One may be a basic tray-and-lid build with a plain wrap and no insert. The other may hide magnets, a foam cradle, a foil logo, and a wrap process that eats more labor. A rigid boxes pricing guide matters because the outside shape tells you almost nothing about what is actually happening inside production.
Rigid boxes are not folded and glued from one sheet the way many folding cartons are. They are built from thick board, usually chipboard or greyboard, then wrapped in paper, specialty stock, or printed sheets. That wrapped exterior gives the package its polished look, but it also adds material handling, alignment work, adhesive steps, and finishing time. The upscale feel is real. So is the effort behind it.
Pricing also feels murky because a rigid box quote is not just about dimensions. It is about the structure, decoration, insert, closure, quantity, and pack-out method. A rigid boxes pricing guide should make it clear that a clean-looking box can still be expensive if it needs multiple assembly stages or very tight alignment. Clean design does not equal easy manufacturing. Packaging loves to pretend otherwise.
Two boxes can share the same footprint and still price very differently once you add magnets, foil, specialty paper, or a hand-glued tray.
That matters because many buyers start with a visual reference instead of a production spec. A mood board helps, sure. It is not a quote. If the box needs a custom insert, a two-piece lid, a hidden magnet closure, or a soft-touch laminated wrap, the price moves fast. A disciplined rigid boxes pricing guide keeps the fantasy separate from the factory build.
Premium packaging is judged by touch almost as much as appearance. A soft-touch lamination, a tight paper wrap, or a well-fitted insert changes how the product feels before anyone opens it. That is why buyers accept a higher price for rigid boxes. Fair enough. The smart move is to know exactly what is driving the number before you sign off. That is the whole point of this rigid boxes pricing guide.
Rigid Boxes Pricing Guide: How Quotes Are Built
A real quote starts with a spec sheet, not a price. The supplier needs dimensions, product weight, closure style, insert needs, print coverage, finish level, and target quantity before the estimate means anything. A rigid boxes pricing guide is useful at this stage because it shows how each input Changes the Quote instead of treating the total like some mysterious oracle.
Most packaging teams work through the structure first. Is it a telescope box, a book-style magnetic box, a drawer box, or a lid-and-base? Then they move into the wrap material, since paper stock and print coverage affect both appearance and cost. After that comes decoration: foil stamping, embossing, debossing, spot coating, soft-touch lamination, or a plain printed wrap. Each choice changes setup, labor, and inspection time.
Here is the practical workflow many buyers never see:
- Start with the product - weight, fragility, and fit determine the structure.
- Lock the dimensions - even a small change can alter board usage and wrap consumption.
- Choose the closure - magnetic, ribbon, tuck-in, or lift-off lid all carry different labor profiles.
- Define the insert - EVA foam, paperboard, molded pulp, velvet-lined trays, or no insert at all.
- Set the decoration level - print coverage, foil, embossing, and coatings need their own setup assumptions.
- Confirm the quantity - the same box can quote very differently at 500, 1,000, or 5,000 units.
Dielines and mockups matter because they show the real panel layout, glue flaps, and tolerances around the insert. If the structure changes after artwork is placed, cost can jump quickly. A good rigid boxes pricing guide tells you not to approve visuals before the construction is stable, because late changes usually trigger rework or new tooling. The safest path is structure first, artwork second, finish details last.
Strong quoting also separates one-time setup from recurring cost. Tooling for an emboss die, foil die, or structural cutter should never be buried inside the per-unit price without explanation. Sample builds, prototype revisions, and template revisions may be charged once. Board, wrap, glue, labor, and pack-out scale with the run. That distinction is what lets a buyer compare suppliers fairly. Without it, a quote can look cheap and still end up expensive once the missing pieces show up.
Rigid Boxes Pricing Guide: Key Cost Drivers
The biggest pricing levers are usually size, board thickness, insert complexity, print coverage, finishing, and labor. A larger box uses more chipboard and more wrap paper, which sounds obvious. The bigger jump usually comes from how much handwork the box needs. A rigid boxes pricing guide should make it clear that a simple-looking box can still be expensive if it needs a precise fit, several wrapped panels, or a finish that slows the line.
In common production ranges, most premium rigid boxes use chipboard or greyboard in the 1000-1500gsm neighborhood, wrapped with printed art paper, specialty paper, or coated stock. That range is a practical ballpark, not a promise. Different factories build to different board systems, and regional sourcing changes the math. Add a custom insert, and the cost climbs again. EVA foam, molded pulp, velvet-lined trays, or multi-compartment paperboard inserts all change the bill of materials and the time needed for assembly. Soft-touch lamination, foil stamping, embossing, and spot UV each add their own setup and inspection burden.
| Build option | Typical structure | Planning range at 1,000 units | Main cost pressure points |
|---|---|---|---|
| Basic rigid box | Tray-and-lid, standard chipboard, printed or plain wrap, no insert | $1.10-$2.25 per unit | Board thickness, wrap coverage, basic assembly |
| Mid-tier presentation box | Book-style or lift-off lid, printed wrap, simple paperboard or EVA insert | $2.50-$4.75 per unit | Insert fit, more wrap handling, added labor |
| Premium magnetic box | Magnetic closure, soft-touch or specialty wrap, custom insert, foil or emboss | $4.75-$9.00+ per unit | Magnets, alignment, finish setup, hand assembly |
| Pilot run | Any structure at low quantity, often 250-500 units | $3.50-$12.00 per unit | Setup amortization, revision risk, lower production efficiency |
Quantity changes the math in a big way. At low counts, setup and sample work get spread across very few units, so the price feels stubbornly high. Once the order moves into production volume, the cost per box usually drops because tooling and preparation are spread out over more pieces. A rigid boxes pricing guide should always remind buyers that a 250-piece pilot is not a fair benchmark for a 5,000-piece production run.
Labor is often the deciding factor. Magnetic closures need clean alignment. Ribbon pulls have to be placed with care. Velvet or foam inserts need accurate cutting and consistent adhesive placement. A nested tray can be straightforward, while a multi-component presentation box may require several operators to keep tolerances tight. If the box takes three to seven minutes of hand assembly per unit, that cost shows up fast. That is why a tidy-looking box can still sit near the top of the pricing range.
Shipping and pack-out deserve their own mention. Rigid boxes are bulky, so freight can affect landed cost more than buyers expect. Larger cartons, protective overpacks, palletization, and the amount of empty air in the carton all shift the final invoice. If the boxes ship assembled, the cube is higher. If they ship flat or in components, you may save freight but add local assembly time. Any rigid boxes pricing guide that skips freight is leaving out real money.
Visual complexity is not the same thing as manufacturing complexity. A minimalist black box with a deep deboss, a magnetic flap, and a tight paper wrap can look calm and elegant, yet still cost more than a louder printed box with simpler construction. That is the part buyers miss. The cleanest design is not always the cheapest design. The rigid boxes pricing guide is there to stop that surprise before it shows up in the quote.
For teams comparing premium packaging against other structures, reviewing the range of forms in the Custom Packaging Products selection can help before you settle on a final build. Sometimes rigid construction is still the right answer. Sometimes a lighter structure with one smart finish gets you the same brand story for less money.
How to Quote Rigid Boxes Without Guesswork
The fastest route to meaningful pricing is to standardize the inputs. A rigid boxes pricing guide works best when every supplier gets the same dimensions, the same product weight, the same closure style, and the same finish expectations. If one quote assumes a foam insert and another assumes an empty cavity, the comparison is useless. Apples-to-apples pricing starts with one shared brief.
Send one clean spec sheet that includes the box style, internal dimensions, product size, target quantity, decoration method, insert type, and shipping destination. If you have reference photos, include them, but do not lean on photos alone. Add callouts for what matters most: hidden magnets, soft-touch lamination, a printed interior, or a specific paper texture. The more explicit the brief, the fewer assumptions the quote maker has to invent.
Ask for line-item pricing whenever possible instead of one blended number. You want to see structure, wrap, decoration, insert, assembly, sample work, and freight broken out where practical. That breakdown shows what scales with volume and what does not. It also makes it easier to spot a quote that looks low only because some costs are missing. A strong rigid boxes pricing guide should push for transparency, not mystery.
- Define the product - fragility, shape, and weight control the build.
- Confirm dimensions - length, width, height, and internal fit must be locked.
- Choose the closure - lid style, magnet, ribbon, or drawer pull all change labor.
- Choose the wrap - printed paper, specialty stock, soft-touch, matte, or gloss.
- List the insert - foam, paperboard, molded pulp, or no insert.
- Set the quantity range - 500, 1,000, 3,000, and 5,000 each tell a different price story.
- State the shipment plan - assembled cartons, bulk-packed components, or palletized freight.
One useful budgeting trick is to sort must-haves from nice-to-haves before you ask for the quote. Maybe the magnet closure is non-negotiable, but the embossed logo can wait. Maybe the box needs a custom insert, but the interior print can go. That ranking gives the supplier room to build a baseline option and a premium option, which is far more useful than getting one number that is already over budget.
If the quote lands too high, the answer is not always to kill the concept. Often you can cut cost by simplifying the insert, trimming the box size, or moving from several decoration steps to one strong visual feature. A good rigid boxes pricing guide is practical, not sentimental. It should help you keep the premium impression while adjusting the build where it matters least.
For products that need a tighter fit or a more engineered insert, browsing the broader Custom Packaging Products range can help you compare alternative structures before you approve a tooling path. That extra comparison step often pays for itself.
Rigid Boxes Pricing Guide: Process, Timeline, and Approvals
Price and timeline move together more often than buyers expect. A rigid boxes pricing guide should show that once the structure is approved, proofing and sampling become the schedule anchor. A straightforward rigid box order often needs 10-15 business days after proof approval. Specialty finishes, complex inserts, or multiple assembly steps can push that to 15-25 business days or more. Rush sampling and compressed approvals usually add cost because the line has to be reshuffled and the work has to move faster.
The usual flow is easy enough to name, even if the details shift from supplier to supplier: briefing, quoting, dieline development, structure approval, artwork proofing, sample or prototype review, production, quality check, and shipment. Where things slow down is usually not the actual build, but the back-and-forth around approvals. If artwork changes after the dieline is locked, or if the insert is revised after the proof is signed, the schedule can slip and the budget often slips with it.
Clear approvals save money because they reduce rework. Once the board is cut, wrapped, and assembled, changes are not free. A revised logo placement may need a new print file. A changed insert thickness may need a new fit test. Even a tiny adjustment can ripple through the rest of the order. A rigid boxes pricing guide earns its keep here because it reminds teams to resolve structure first, then visual finish, then shipment details.
For fragile products, transit testing matters too. Some packaging teams align their build with ISTA transit testing standards so the box is judged against real shipping stress, not just shelf appearance. For paper sourcing, buyers often ask for FSC-certified paper options when sustainability claims need traceability. Those choices do not always raise cost much, but they can affect paper availability, lead time, and the documentation needed for approval.
Lead time can stretch when the box includes specialty finishes. Foil stamping, embossing, soft-touch coatings, and multi-piece inserts all add inspection steps. Magnetic closures and tight-fitting trays do the same, because alignment has to be checked carefully. A premium box is not simply printed; it is engineered, proofed, assembled, and checked several times. That is why a realistic rigid boxes pricing guide should always include timeline, not just material.
If your project has a hard launch date, the best protection is to lock the spec early and keep the approval chain short. Fewer revisions mean less waste and fewer schedule surprises. The price may not drop dramatically, but the risk of paying for rush freight, overtime assembly, or rework drops a lot. Boring advice. Also true.
Common Rigid Box Pricing Mistakes to Avoid
The most common mistake is comparing quotes that were never built on the same assumptions. One supplier may include inserts, protective cartons, and freight, while another quotes only the box shell. A rigid boxes pricing guide only works if you compare the same package of work across every supplier. Without that discipline, the lowest number can end up being the least complete number.
Another frequent issue is approving artwork before the structure is finalized. That sounds harmless until the panel layout changes or the box grows to fit the product properly. Then the print file needs revision, and the schedule may slip. The same problem shows up when buyers choose a premium finish too early. A rigid boxes pricing guide should remind you that foil, embossing, and soft-touch can be excellent choices, but they should come after structure and fit are settled.
- Hidden freight - bulky packaging often costs more to move than buyers plan for.
- Assembly labor - magnets, inserts, and ribbon pulls add time one unit at a time.
- Overage for quality control - factories usually build extra units to cover inspection and attrition.
- Storage - finished rigid boxes take space, and that matters if you are not shipping immediately.
- Pilot bias - a small trial run is not a good baseline for a production budget.
Small quantity orders need special attention. A pilot batch of 250 pieces can help with fit checks and branding tests, but it does not tell you what the final production unit price will be. Setup is too heavy relative to the run size. That is one reason a rigid boxes pricing guide should always ask whether the quote is for prototyping, short-run sampling, or true production volume. Those are different pricing worlds.
Another mistake is assuming the most elaborate finish always gives the best return. Sometimes one strong feature is enough. A deep black wrap with a clean foil mark may feel more premium than a box that stacks soft-touch, spot UV, embossing, and a custom insert all at once. More effects can mean more cost, more inspection, and more risk of visible variation. Practical packaging thinking usually wins here. Choose the detail that matters most to the brand, then let the structure do the rest.
Finally, buyers sometimes forget to ask what happens after production. Are the boxes shipped fully assembled or in components? Are they palletized? Is the freight quoted to your dock, or only to a distribution point? Those questions affect landed cost. A disciplined rigid boxes pricing guide does not stop at factory pricing; it follows the package until it reaches your facility.
Expert Tips for a Smarter Rigid Boxes Pricing Guide
If you want cleaner pricing, ask for three quote versions when possible: a baseline build, a mid-tier premium build, and a higher-end option with specialty finishes. That approach helps you see how much each upgrade costs without forcing the supplier to guess your budget. A rigid boxes pricing guide gets a lot more useful once you can compare those versions side by side.
Use the same inputs every time. Keep the dimensions, product weight, insert type, decoration method, and target quantity consistent so each revision is actually comparable. If a supplier changes a number, ask what changed in the assumptions. A small shift in board grade, paper stock, or assembly time can move the price more than expected. The rigid boxes pricing guide only works if the assumptions stay visible.
For fragile or high-value items, request a sample or a prototype before you finalize the run. That helps a lot when the design includes magnets, nested trays, tight-fit inserts, or a box that needs to protect glass, cosmetics, electronics, or premium gifts. A photo is useful. A sample tells you whether the box closes properly, whether the product rattles, and whether the unboxing experience feels intentional instead of accidental.
Think in total cost, not just unit cost. Freight, storage, damage risk, assembly time, and reprint risk all belong in the conversation. A slightly more expensive box that ships more efficiently or assembles faster can outperform a cheaper box that creates headaches later. That is one of the places where a rigid boxes pricing guide pays for itself: it keeps the conversation tied to the full job, not just the manufacturing invoice.
As you compare options, revisit the Custom Packaging Products page and check whether a different packaging family would give you a similar presentation at a lower landed cost. Sometimes the answer is still a rigid box. Sometimes the smarter choice is a simpler structure with one premium finish that carries the brand just as well.
My practical advice stays boring because boring works: gather your dimensions, decide which features are truly non-negotiable, confirm your quantity range, and compare quotes line by line. Do that, and the rigid boxes pricing guide stops being a theory piece and becomes a real buying tool. That is how you keep premium packaging from drifting into avoidable cost while still protecting the look and feel your product deserves.
How much do rigid boxes usually cost per unit?
There is no single reliable number because size, quantity, board weight, wrap paper, and decoration all move the price. A simple rigid box at higher volume behaves very differently from a small premium box with foil, magnets, and a custom insert. The best way to estimate is to use a consistent spec sheet and ask every supplier to quote the same assumptions. That is the only way a rigid boxes pricing guide stays meaningful.
What makes rigid box pricing higher than folding cartons?
Rigid boxes use thicker board, wrapped construction, and more manual assembly than many folding cartons. Premium finishes, inserts, and closures add both material cost and labor cost. The result is a box with a more upscale feel, but it also means more production steps and more quality checks. A rigid boxes pricing guide should make that difference easy to see before you approve the design.
Which rigid box features raise the price the most?
Magnets, custom inserts, foil stamping, embossing, soft-touch finishes, and complex die-cut windows usually move the price fastest. Large formats and heavy products also increase costs because they need stronger board and more protective pack-out. Any feature that adds setup time or hand assembly will show up clearly in the quote, which is why a careful rigid boxes pricing guide is so useful.
How can I lower rigid box costs without hurting quality?
Simplify the structure, reduce the number of specialty finishes, or choose a standard insert style when possible. Often you can keep a premium look by focusing on one strong visual feature instead of layering several expensive effects. Ask for alternate quotes so you can compare a baseline version against a more decorated option, then choose the build that does the job without excess.
What should I send to get an accurate rigid box quote?
Send the product dimensions, product weight, target quantity, closure style, insert needs, artwork files, and preferred finish level. If possible, include photos of the product and any packaging references that show the look and feel you want. A complete spec sheet reduces assumptions, speeds up pricing, and keeps the rigid boxes pricing guide grounded in real production details instead of guesswork.
What is the smartest way to compare suppliers?
Compare line items, not just the total. Make sure each supplier is quoting the same board grade, the same wrap stock, the same insert, the same finish, and the same freight assumptions. If you do that, the numbers become comparable and the rigid boxes pricing guide becomes a practical tool for making a clean buying decision that fits both budget and brand goals.
Bottom line: lock the structure first, quote the same spec everywhere, and separate setup costs from per-unit costs before you compare suppliers. That three-step habit is the fastest way to get a realistic rigid boxes pricing guide and avoid paying extra for a box that only looked simple on the surface.


