Buyer Fit Snapshot
| Best fit | Spot Uv Printed Boxes projects where brand print, material claims, artwork control, MOQ, and repeat-order consistency need to be specified before quoting. |
|---|---|
| Quote inputs | Share finished size, material target, print colors, finish, packing count, annual reorder estimate, ship-to region, and any compliance wording. |
| Proofing check | Approve dieline scale, logo placement, barcode or warning zones, color tolerance, closure strength, and carton packing before bulk production. |
| Main risk | Vague material claims, crowded artwork, missing packing details, or unclear freight terms can make a low unit price expensive after revisions. |
Fast answer: Spot Uv Printed Boxes: Board, Finish, Dieline, and Unit Cost should be specified like a repeatable production item. The safest quote records material, print method, finish, artwork proof, packing count, and reorder notes in one written spec.
Production checks before approval
Compare the actual filled-product size with the drawing, then confirm tolerance on folds, seals, hang holes, label areas, and retail display edges. Reserve space for logos, QR codes, warning copy, and material claims before decorative graphics fill the panel.
Quote comparison points
Review material grade, print process, finish, sampling route, tooling charges, carton quantity, and freight assumptions side by side. A quote is only useful when the supplier can repeat the same color, closure quality, and packing count on the next order.
Spot UV printed boxes tend to look more expensive than they really are, mostly because a controlled band of gloss can do more for shelf presence than extra ink coverage, louder graphics, or a heavier carton ever will. That is the practical reason spot uv printed boxes keep showing up in samples for cosmetics, electronics, gifts, and specialty goods: the finish creates a sharp highlight without making the whole package compete for attention.
For a packaging buyer, the appeal is pretty easy to understand. spot uv printed boxes offer contrast, texture, and a polished finish in one move, but the real value sits in the production details: how the coating is registered, which parts of the artwork receive it, what board is selected, and how the finish behaves under light, touch, folding, and shipping. Once those practical pieces are clear, spot uv printed boxes become much easier to specify, price, and approve with confidence.
That restraint is part of the charm. A box does not need full-surface gloss to feel premium. A logo, a product name, or a repeating motif in spot uv printed boxes can be enough to signal that the brand cares about finish quality, not just ink coverage. Buyers notice that difference quickly, even if they cannot always name it right away.
Spot UV Printed Boxes: Why They Stand Out on Shelf and in Hand
A narrow glossy highlight can change the character of a carton almost immediately. That is the real strength of spot uv printed boxes: the finish is selective, so the eye moves toward the coated area while the matte or uncoated surface gives that highlight room to breathe. The goal is not to cover every inch with shine. The goal is to direct attention where the design needs it.
Put simply, spot UV is a clear coating applied only to chosen parts of the printed artwork. In a well-made run of spot uv printed boxes, the coated sections catch the light and may feel slightly raised compared with the surrounding surface, depending on the coating system and the stock. That is where the premium impression comes from. The effect is visual first and tactile second, and that mix is why the finish feels deliberate rather than loud.
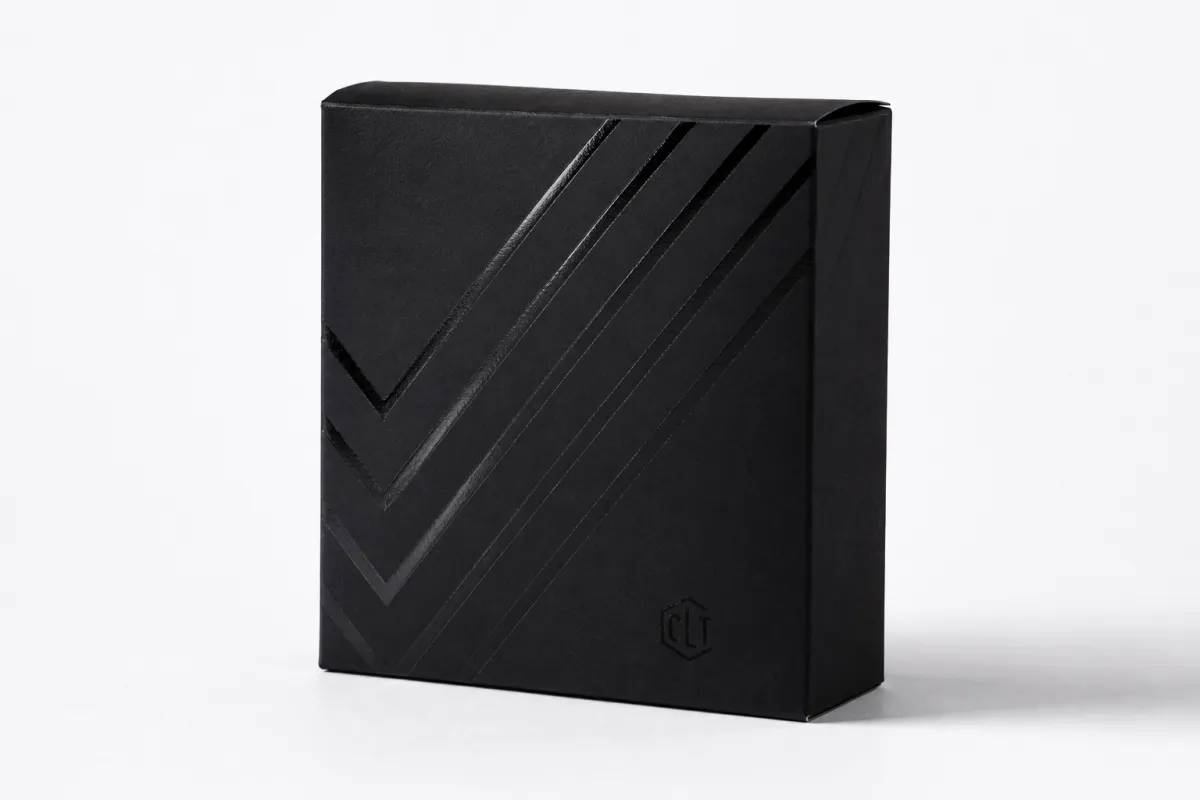
The strongest applications usually focus on the elements people should notice first: logos, product names, icons, borders, geometric patterns, and small detail work that would disappear if everything carried the same visual weight. spot uv printed boxes also work especially well when the design needs a quiet base layer, such as a matte black field with a crisp gloss contrast on top. Under retail lighting and in unboxing photos, that pairing reads very cleanly.
Many brands make the job harder than it needs to be. They reach for foil, embossing, soft-touch lamination, structural changes, and several inks before they ask whether a targeted gloss pass would solve the presentation problem. In plenty of cases, spot uv printed boxes are the more sensible starting point because they deliver a clear finish effect without changing the entire packaging structure.
Practical rule: place the coating where the customer’s eye naturally lands first. That usually means the logo, the product name, or a pattern that frames the front of the box. Used that way, spot uv printed boxes feel sharp instead of busy.
The finish also changes the way a box behaves in different environments. On a bright shelf or in a studio image, spot uv printed boxes can flash just enough to make the design feel precise. In softer light, the gloss still reads, but it does not overpower the rest of the package. That flexibility matters because packaging shows up in warehouses, retail displays, and social media photos, not only in a controlled presentation room.
From an experience standpoint, the strongest quality of spot uv printed boxes is restraint. The package feels polished without asking the buyer to work for that impression. If the board choice is solid, the result can look more expensive than the raw material cost would suggest. I have seen projects where a simple gloss accent did more for perceived value than a much fancier structure would have done.
How Spot UV Printed Boxes Are Made: Process and Timeline
The production flow looks straightforward on paper, though a few steps demand real precision. Most spot uv printed boxes begin with artwork preparation, then printing, then coating, then curing or drying, and finally die cutting, folding, gluing, and packing. Each stage is familiar on its own, yet the spot coating adds registration control that plain printed cartons do not require.
Artwork setup prevents a lot of downstream trouble. The coating layer needs to be separated cleanly from the print layer, usually as a distinct spot file or vector mask. On spot uv printed boxes, that map has to line up with the dieline and with the final printed position, which means safe areas, trims, folds, and glue zones all need checking before production starts. If the file is messy, the finish will look messy too, even when the presswork is strong.
Registration is critical because the clear coating is supposed to land exactly where the designer intended. If the gloss drifts off the logo edge or lands across a line break, the eye catches it right away. That is one reason spot uv printed boxes usually receive more prepress review than simple one-color cartons.
The finish may be applied through screen printing, a digital UV pass, or another method that depends on the press line, and each approach brings its own speed and registration behavior. A standard printed box can move faster because it skips the coating stage. spot uv printed boxes cannot, so turnaround usually stretches a bit even when the rest of the schedule is well managed.
Curing time also matters. UV coating is designed to set quickly under ultraviolet light, but that does not mean every downstream step can begin immediately. Stacking, folding, and packing can depend on the coating method, the ink set, and the board surface. In a typical packaging run, spot uv printed boxes often need tighter handling windows so the finish stays clean and does not pick up scuffs during conversion.
Complex shapes add time as well. A straight tuck carton is easier to manage than a structure with multiple panels, windows, internal folds, or special inserts. Once a box includes detailed die cutting or a multi-panel layout, the coating map becomes more complicated, and spot uv printed boxes can take a few extra days to move from proof approval to finished goods.
For brands that want a practical benchmark, many packaging teams compare the job against transit and logistics standards rather than guessing. References like the ISTA packaging testing standards can be useful, especially when the box will move through channels where abrasion, stacking pressure, and edge wear matter. The finish has to survive the route to the customer, not just the press.
Typical timelines depend on quantity, board availability, and how quickly proofs are approved. A clean file set and a simple structure may move in about 10-15 business days after approval, while more complex spot uv printed boxes can run longer if proof revisions, coating registration checks, or additional finishing combinations are involved. The schedule is usually more sensitive to artwork readiness than people expect.
If the order includes other premium effects, the schedule shifts again. Foil stamping, embossing, or a special lamination may be added before or after the UV pass, and each extra step means more handling. The order of operations matters because the finish has to survive the next process without damage. That is why experienced buyers treat spot uv printed boxes as a coordinated production job rather than a decorative upgrade.
One useful habit is asking how the supplier handles prepress checks. A strong quote for spot uv printed boxes should not just list the coating method; it should also account for proofing, cutting tolerances, and the expected turnaround if the art needs correction. A clear answer there usually says more about process quality than the price alone.
Spot UV Printed Boxes Cost: What Changes the Quote
Pricing for spot uv printed boxes comes down to a handful of practical variables, and most of them are easy to understand once they are separated. Box size, board choice, print coverage, coating coverage, and order quantity are the biggest drivers. If the carton is small and the gloss is limited to one logo panel, the quote stays lower. If the box is large, heavily printed, and coated across several zones, the price rises in a predictable way.
Quantity matters because setup costs get spread across the run. The press and finishing equipment need to be dialed in, and that setup does not disappear when the order is only a few hundred boxes. For that reason, spot uv printed boxes usually look far more affordable at 3,000 or 5,000 units than they do at a smaller quantity. The unit price is carrying setup, labor, board, waste, and finishing passes all at once.
MOQ requirements also affect the quote. Some shops price more favorably at certain thresholds because the job fits efficiently on the press, while others need a minimum run to justify the coating stage. With spot uv printed boxes, the coating itself is only part of the cost. Registration control, masking, and additional handling all take time, so small quantities tend to carry a heavier unit burden.
Design complexity can push the quote up quickly. Multiple coating zones, fine details, mixed effects, and exact alignment with text all add production risk. If you combine spot uv printed boxes with foil stamping or embossing, the run may need more than one finishing pass, and the cost rises accordingly. That is not a penalty; it is the practical reality of more labor and more control points.
Material choice is another quiet cost factor. A 350gsm C1S artboard or a coated folding-carton substrate often behaves differently from a textured stock or an uncoated board. Smooth surfaces usually make spot uv printed boxes cleaner and easier to register, which can reduce headaches later. The same artwork on a rougher material may need more adjustment or deliver a softer effect.
From a sustainability point of view, some buyers also ask whether the packaging comes from responsibly managed sources. If that matters for the brand, it is worth checking for FSC certification guidance and confirming whether the board supplier can provide documentation. That does not change the look of spot uv printed boxes, but it can influence procurement decisions and the story the brand tells on shelf.
A better way to think about price is to ask what the finish is buying you in presentation, not just what it costs in isolation. A modest increase may deliver a much stronger first impression. In a channel where the carton is barely seen, the added spend may not earn its keep. That judgment is what separates a smart purchase from an expensive one.
| Option | Typical Use | Approx. Unit Cost at 5,000 pcs | Notes |
|---|---|---|---|
| Simple spot UV on logo only | Clean retail cartons, gift packaging | $0.20-$0.34 | Usually the most efficient choice for spot uv printed boxes with limited coverage |
| Medium coverage with patterns or multiple panels | Cosmetics, supplements, premium consumer goods | $0.28-$0.48 | More setup time and tighter registration checks |
| Spot UV plus foil stamping or embossing | High-end launch boxes, presentation kits | $0.40-$0.75 | Premium look, but more finishing steps and higher waste risk |
| Full-surface design with multiple coating areas | Brand statements, limited editions, showcase packaging | $0.45-$0.85 | Visually strong, but best only when the concept really needs it |
These ranges are broad, not promises. A small rigid-style carton, a folding carton, and a mailer box will not price the same way, even if they all use spot uv printed boxes. Still, the table is a practical way to see whether a quote sits in the right neighborhood or whether the scope needs simplifying.
If the number feels high, start by looking at coating area and setup count. A design with three separate gloss islands can cost more than one with a single, well-placed coating shape. That is why experienced buyers often ask the designer to reduce the number of UV zones before cutting quality or board strength. With spot uv printed boxes, disciplined artwork usually saves money more effectively than squeezing the material spec.
Design Choices That Shape Spot UV Printed Boxes
Strong contrast is the foundation of a good finish. On spot uv printed boxes, a glossy element placed over a matte or low-sheen base creates immediate separation, which makes the logo or pattern feel intentional. If the whole box is equally shiny, the visual hierarchy disappears. The finish works best when it has something to stand against.
Dark backgrounds are popular for exactly that reason. Black, charcoal, deep blue, and rich neutral tones make the UV highlight read clearly, especially under retail lighting. Still, strong results are not limited to dark packaging. spot uv printed boxes can work on lighter cartons too if the coated area is shaped carefully and the print contrast is strong enough to hold the eye.
Placement strategy matters more than decoration count. Logos, product names, framing lines, and repeating geometric patterns usually perform better than scattered gloss spots with no clear purpose. The reason is simple: the coating should reinforce the design structure. In well-planned spot uv printed boxes, the finish supports the message rather than competing with it.
Surface condition matters as well. Smooth, well-prepped stock gives the coating a cleaner edge, while textured board can break up the gloss and make the highlight less crisp. That is not always a problem, but it does change the outcome. If the goal is a highly polished look, spot uv printed boxes usually perform better on coated surfaces with good ink laydown and stable board quality.
Dielines should guide the finish instead of fighting it. Coating over folds, tuck flaps, or hidden areas can waste money or create awkward visual breaks. Good layout work keeps the gloss on the face of the package where it will actually be seen. That is one reason spot uv printed boxes reward careful prepress attention.
Design details that help the finish read clearly
- Use bold shapes and avoid extremely thin lines where the coating could lose definition.
- Leave enough negative space around the coated area so the gloss can stand apart.
- Keep key text large enough to survive print, coating, and folding without distortion.
- Check whether the coated artwork lands on a flat panel rather than a hinge or glue flap.
Color choice shapes the result too. If the base design already has a lot of visual noise, the coating can get lost. Clean palettes tend to work better because the contrast is easier to read. That is why many high-performing spot uv printed boxes use one strong graphic idea instead of several competing ones.
There is a temptation to coat everything. I would resist that. The more surface area you cover, the less surprising the finish becomes, and the less return you get from the added process. The strongest spot uv printed boxes usually behave like a well-cut suit: tailored, controlled, and never overloaded with details that have nowhere to breathe.
One final design note: if embossing or foil stamping is already part of the plan, map the hierarchy before approving the art. A box can absolutely carry multiple premium effects, but the visual order needs to be clear. On the strongest spot uv printed boxes, each finish has a job, and none of them are there just to fill space.
Step-by-Step Guide to Ordering Spot UV Printed Boxes
Start with the product brief. Before anyone opens design software, define the box dimensions, pack style, quantity, product weight, and presentation goal. That information shapes everything that follows, from board selection to coating coverage. Well-scoped spot uv printed boxes start with a clear target, not a vague request for “something premium.”
Next, prepare the artwork properly. Separate the spot coating layer, name the files clearly, and make sure the finish map matches the dieline exactly. If the box is being built around a folding-carton or mailer structure, remember that some panels will be visible while others will not. Good spot uv printed boxes usually come from disciplined file setup more than clever last-minute changes.
Then request a proof and review it carefully. Check the coated areas, fold locations, typography, barcode placement, and safe areas. If the proof includes a sample of the UV mask, inspect it line by line. Small errors in spot uv printed boxes often show up as shifts, overlaps, or missing highlights that become expensive only after production starts.
Once the proof is accepted, confirm the finish combination. You may choose spot UV alone, or pair it with lamination, foil stamping, or embossing if the product calls for a higher presentation level. The key is keeping the budget tied to the role the box plays. Not every package needs the same treatment, and spot uv printed boxes are often strongest when they stay focused.
After that, get the quote in writing and verify what it includes. Ask about tooling, setup, plate or screen charges if relevant, sample costs, and whether the quoted lead time assumes final art approval. That kind of clarity helps prevent surprises later. A clean quote for spot uv printed boxes should explain the build, the finish, the quantity, and the expected delivery window.
If you are comparing suppliers, it makes sense to look at broader packaging options too. Sometimes the best choice is not just one box style, but a coordinated packaging program. Browsing Custom Packaging Products can help you decide whether the project should stay simple or expand into a fuller brand presentation.
Before production begins, run a short approval checklist:
- Verify dimensions, board, and fold style.
- Confirm the spot UV layer matches the final dieline.
- Check logo placement, type size, and barcode clarity.
- Review the final quoted lead time and shipping plan.
- Approve the finish combination only after the proof looks right.
That checklist may look basic, but it prevents most expensive mistakes. The best spot uv printed boxes are rarely the result of a dramatic design leap; they come from a clean process where the artwork, finish, and production path all line up before the press starts running.
When the boxes are tied to a launch or seasonal drop, build in a little buffer. Packaging schedules can move with paper availability, finishing queues, and shipping conditions. A modest amount of extra planning is usually cheaper than rushing a revised version of spot uv printed boxes through production.
Common Mistakes With Spot UV Printed Boxes
The biggest mistake is trying to coat fine details that cannot hold up cleanly. Tiny text, hairline rules, and very small icons may look clever on screen, but they can blur or lose definition in production. For spot uv printed boxes, boldness usually wins. The finish needs enough shape to register well after printing and cutting.
Weak contrast is another common issue. If the UV layer sits on a background that is too close in tone or gloss level, the premium effect gets lost. The result may still be technically correct, but it does not read strongly. Good spot uv printed boxes need visible separation between coated and uncoated areas, or the whole point of the finish starts to fade.
Misreading the dieline causes a surprising number of problems. A design may look great in a flat mockup, then shift once the box is folded, glued, and trimmed. That is why safe areas, bleed, and fold lines need to be treated seriously. When spot uv printed boxes are built without that discipline, registration issues show up right where the eye lands first.
Overdesigning the front panel is another trap. It is easy to stack too many effects onto one face: full-color art, foil, multiple gloss zones, embossing, and too much text. The package ends up feeling crowded, not premium. The strongest spot uv printed boxes usually keep one or two focal points and let the rest of the surface breathe.
Skipping proof review is the final mistake, and it is the one that costs the most. A coating misalignment that looks minor on screen can be obvious in hand, especially on a glossy highlight. If a whole run is already printed, the correction is expensive. Careful proofing is boring, but spot uv printed boxes reward that boring discipline very well.
There is also a human mistake that shows up often: assuming every finishing supplier interprets the coating map the same way. They do not. Some want the UV layer built one way, some prefer a different naming system, and some need a specific file format. Ask first. That small step prevents delays and protects the quality of spot uv printed boxes.
Expert Tips for Better Spot UV Printed Boxes and Next Steps
Use the finish sparingly. That is the first and most practical tip I would give. A small, deliberate gloss highlight on spot uv printed boxes usually creates more impact than coating every visible area. The eye reads restraint as confidence, especially in premium packaging categories where the customer already expects a refined presentation.
Test the concept before committing to a full run, especially if the finish is part of a new brand launch. A simple sample or digital mockup can reveal whether the contrast is strong enough, whether the gloss area feels too small, and whether the artwork really supports the box shape. For spot uv printed boxes, that early feedback is worth far more than guessing.
Ask for a real sample or prototype whenever the project allows it. A screen image cannot tell you how a gloss patch will look under a store light or how the texture will feel when the box is held. In hand, spot uv printed boxes can read quite differently, and that physical check often improves the design.
Build a production checklist and keep it tight. It should cover artwork separation, coating placement, quantity, board choice, finish order, lead time, shipping, and how the boxes will be stored before use. Moisture, stacking pressure, and rough handling can all affect the final presentation. That is true for most cartons, but spot uv printed boxes deserve extra care because the finish is part of the appeal.
Here are a few habits that usually pay off:
- Keep the coating map simple unless there is a clear reason to add more zones.
- Match the finish to the selling channel, whether that is retail, ecommerce, or gifting.
- Choose a board and print system that support crisp registration.
- Compare the gloss effect against matte, lamination, or foil stamping before final approval.
If you are still deciding whether the upgrade is worth it, think about the role of the box in the customer journey. A mailer used only for transit may not need much visual drama, while a shelf-facing carton or presentation box benefits from more finish control. That is the real question behind spot uv printed boxes: not whether they look good, but whether they earn their place in the brand experience.
As a final purchasing note, a good quote should make the tradeoffs visible. It should tell you what changes if you reduce coverage, switch board, or simplify the finish stack. That kind of transparency makes spot uv printed boxes easier to buy with confidence, because you can see where the money goes and what each choice buys in return.
To close the loop, set the box dimensions, mark the coating areas, confirm the quantity, and request a production quote with clear timing. If the artwork is already in progress, get the spot UV layer reviewed before the print file is locked. Done that way, spot uv printed boxes can deliver sharper shelf presence, a better unboxing feel, and a cleaner premium signal without wasting money on unnecessary effects.
Frequently Asked Questions
What are spot UV printed boxes used for?
They are used when a brand wants packaging that feels more premium without changing the whole box structure. The finish is especially useful for cosmetics, electronics, gifts, specialty foods, and other products where presentation matters. In those categories, spot uv printed boxes help the logo or main artwork stand out quickly.
How do spot UV printed boxes differ from matte or gloss boxes?
Matte and gloss describe the overall surface finish, while spot UV is applied only to selected areas. That targeted coating creates contrast, texture, and visual emphasis instead of covering the whole box. So spot uv printed boxes are really about selective highlight, not blanket shine.
Do spot UV printed boxes cost more than standard printed boxes?
Usually yes, because the job includes an extra finishing pass, more setup, and tighter registration control. The final unit cost depends on quantity, coating coverage, board choice, and how complex the artwork is. For many buyers, spot uv printed boxes are worth the increase because the presentation jump is immediate.
What artwork works best on spot UV printed boxes?
Bold logos, product names, clean icons, and strong pattern elements usually perform best because they create visible contrast. Very thin type and tiny details are riskier because the coating can lose clarity at small sizes. If you want spot uv printed boxes to read cleanly, keep the coated shapes confident and easy to register.
How long does it take to produce spot UV printed boxes?
Timeline depends on proof approval, artwork readiness, box style, coating method, and the current production queue. A clean file set and fast approvals usually shorten the turnaround more than any single manufacturing step. For straightforward spot uv printed boxes, that can make a bigger difference than changing the press itself.
Related packaging resources
Use these related guides to compare specs, costs, quality checks, and buyer decisions before making the final call.


