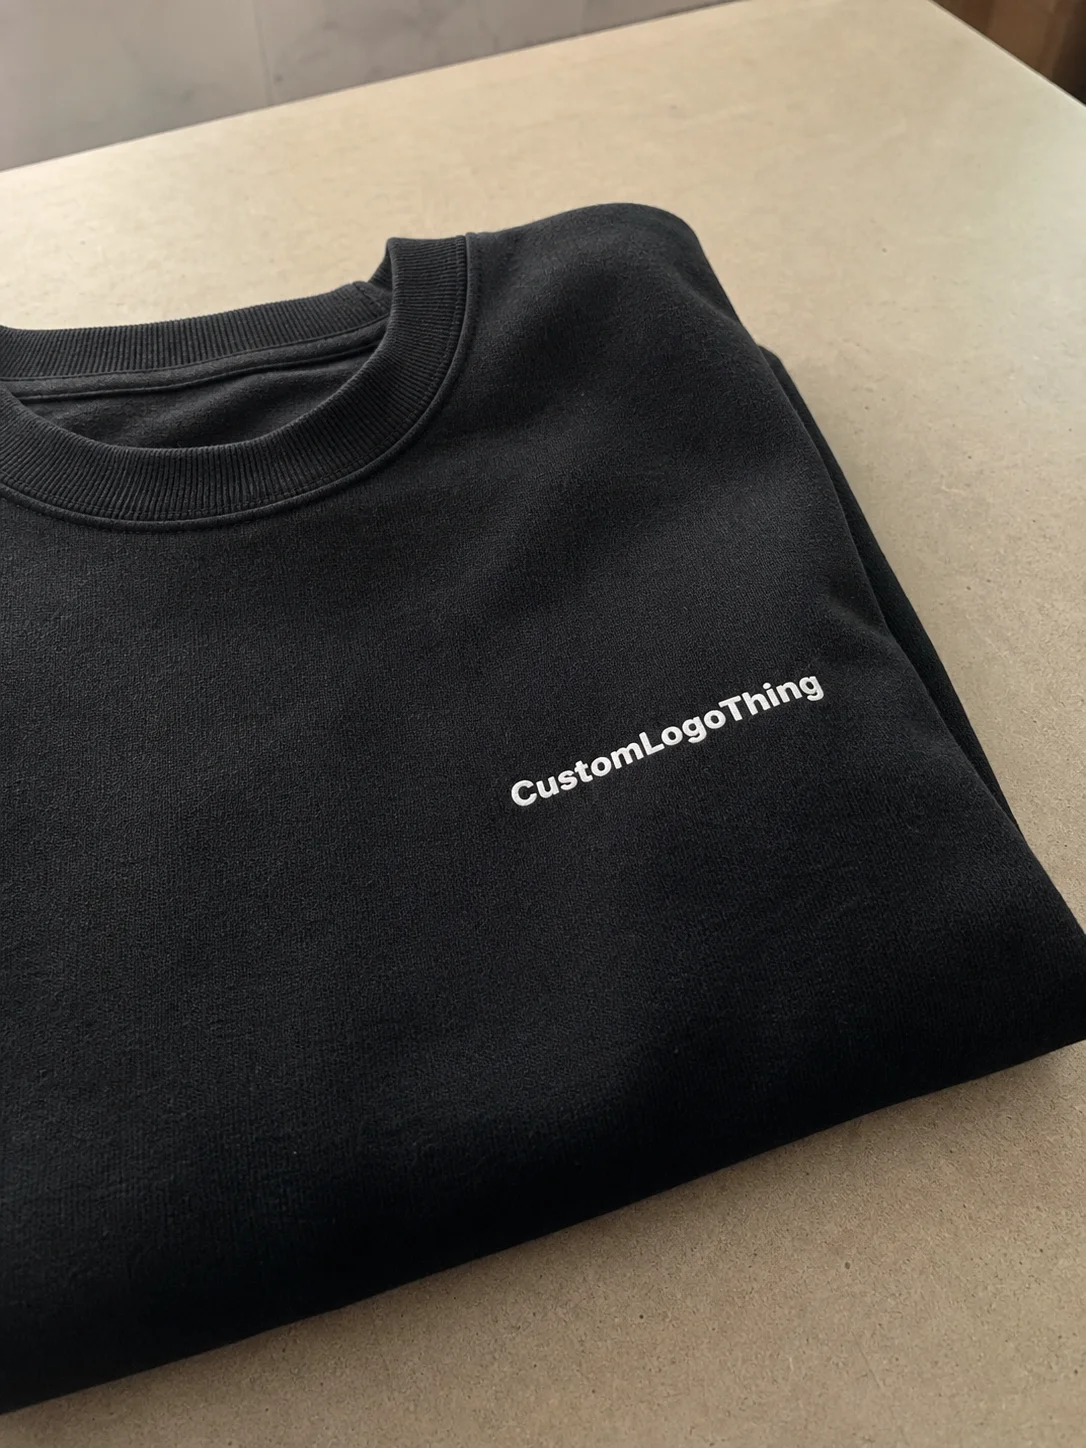
For a clothing brand trying to move quickly without making the package look rushed, staples Custom Label Printing can be a useful shortcut. Not because labels are glamorous. They are not. Because the right label makes a garment feel finished, organized, and ready to ship, whether it lands on a folded tee, a polybag, a shipping carton, or an insert card.
Most buyers do not need theory. They need to know what the process can handle, where it breaks down, and what choices actually affect the final result. Apparel labels are small, but the decision tree is not. Size, stock, adhesive, finish, and artwork setup all change how the label performs once it leaves the proof stage and meets a warehouse floor, a retail shelf, or a customer who handles everything by the corner.
That is why label decisions should sit inside the broader packaging plan. A brand that already coordinates Custom Labels & Tags, Manufacturing Capabilities, and Custom Packaging Products will usually get a more consistent result than a team ordering labels in isolation. The label needs to match the box, the hangtag, the insert, and the rest of the packaging system. Otherwise the package looks like three different people approved it.
Why staples custom label printing Matters for Clothing Brands
In practice, people use staples Custom Label Printing to describe a fast, straightforward ordering path: upload artwork, review the proof, approve it, and get printed labels without a long back-and-forth. That matters in apparel because product timelines are rarely neat. A colorway changes. A promo drops early. A size run gets split. A label has to keep up with the pace.
For clothing brands, labels usually serve a few clear jobs. They can identify size, carry a barcode or SKU, seal tissue wrap, brand a polybag, or sit on a shipping carton as a secondary identifier. Some labels are there to inform. Some are there to reassure. Some are there because the garment feels unfinished without them. All of them have to be legible and durable enough for the actual use case.
The useful distinction is this: quick ordering is not the same thing as good performance. A simple digital print run can be a solid fit for short-run apparel labels, seasonal drops, and low-volume packaging. But if the label needs to survive friction, light moisture, repeated handling, or a longer distribution path, the stock and adhesive matter more than the convenience of the storefront.
That is the part buyers often miss. A label is not just a printed rectangle. It is a small material decision sitting on top of a surface decision. If those two things do not match, the label peels, curls, smudges, or looks cheap after a single touch. None of that is mysterious. It just means the job was specified too loosely.
These are the specs that usually decide whether a standard ordering path is enough or whether the job needs a more specialized print setup:
- Stock, paper for dry indoor use, film for added durability, or specialty materials for premium presentation.
- Adhesive, permanent for cartons and polybags, removable for temporary use, or repositionable for trials and promotions.
- Finish, matte for readability, gloss for color depth, soft-touch for a premium feel, or clear for minimalist branding.
- Durability, especially if the label will be folded, rubbed, stacked, or exposed to light moisture.
- Print method, digital for short runs and versioned SKUs, offset for larger fixed runs where setup costs are spread out.
For apparel packaging, the label should support the product, not compete with it. A clean label on a garment card, polybag, or shipping insert can improve the whole package. A weak one can make the item feel lower-value even if the clothing itself is strong. Customers notice the difference faster than brands usually expect.
How the Printing Process and Timeline Usually Work
The order flow is usually simple on paper. Choose a size and stock, upload the artwork, review the proof, approve it, print, and ship. The part people underestimate is the review stage. That is where delays happen, and that is where a rushed clothing label order can go off the rails.
Artwork cleanup is the first common bottleneck. Low-resolution logos, missing fonts, broken links, and file formats that do not match the printer’s setup all slow the job down. A file can look fine on a laptop and still fall apart when the proof is enlarged to actual size. Tiny text is another issue. If care copy, SKU numbers, or barcode text are too small, weak source art will make that obvious very quickly.
Typical turnaround depends on order size and file quality. For simple digital printing jobs, production often falls in the 5 to 10 business day range after proof approval, with shipping adding its own time. Rush work can move faster, sometimes in 2 to 4 business days for the print step, but transit still matters. The carrier is usually the part nobody controls and everybody complains about.
Here is the practical sequence:
- Day 1: send specs, quantity, and artwork.
- Day 1 to 2: receive a proof or request file cleanup.
- Day 2 to 3: approve the proof or revise the details.
- Day 3 to 8: print, finish, and pack the labels.
- After that: ship, receive, and inspect before the full run goes live.
Reorders get easier if the first job is documented properly. Save the approved artwork, stock, finish, adhesive, quantity, and any notes about how the labels were used. That sounds basic because it is. It also prevents the familiar mess where a brand thinks it is reordering the same label and ends up with a slightly different version because nobody saved the spec sheet.
If the label is part of a larger packaging system, keep it in the same conversation as the carton, insert card, and outer mailer. Consistency matters more than most teams want to admit. A label that clashes with the rest of the package looks like an afterthought, even if the print quality itself is fine.
Cost, Pricing, and MOQ Factors That Change the Quote
Label pricing is not random. It moves for predictable reasons. Quantity is the biggest one. Then come material, adhesive, finish, shape, and whether the job needs custom cutting or multiple versions. Once those variables are clear, most quotes are easy to read.
Small orders feel expensive because setup, proofing, and finishing get spread across fewer pieces. That is true for digital printing, and it becomes more visible if the design needs a Custom Die Cut or multiple SKUs. Larger runs usually bring the unit price down, sometimes sharply, as long as the artwork stays fixed and the production method does not change.
For clothing labels and related retail packaging, these are realistic pricing bands buyers commonly see:
- Short-run digital labels, often $0.18 to $0.45 per unit at 250 to 1,000 pieces, depending on size, coverage, and finish.
- Mid-volume runs, often $0.08 to $0.22 per unit at 2,500 to 5,000 pieces.
- Higher-volume repeat jobs, sometimes $0.05 to $0.15 per unit when the specs stay fixed and the order is easy to produce.
MOQ, or minimum order quantity, is another reality to factor in. Premium materials, specialty inks, clear labels, or unusual dimensions can push a supplier to a higher minimum. That does not automatically mean the quote is bad. It often reflects waste on press, changeover time, or how the supplier batches production. For a stable SKU plan, the MOQ may be completely reasonable. For a one-off launch, it may be too much.
Price comparisons need context. Check whether the number includes proofing, shipping, bleed setup, finishing, and any die or cut charges. A quote can look cheap until the add-ons appear. The lowest headline price is not always the best deal if the label has to survive handling or support a premium package presentation.
| Option | Best Use | Typical Unit Cost | What You Get |
|---|---|---|---|
| Paper label | Dry indoor use, inserts, short-life packaging | $0.04 to $0.10 at higher quantities | Good print quality, lower cost, less resistance to moisture and abrasion |
| BOPP or film label | Polybags, cartons, handled retail packaging | $0.07 to $0.20 | Better durability, stronger moisture resistance, clean finish |
| Soft-touch premium label | Gift sets, premium apparel, elevated package branding | $0.12 to $0.28 | Refined tactile feel, strong shelf presence, usually higher finishing cost |
| Clear label | Minimalist retail packaging, dark substrates, discreet branding | $0.10 to $0.24 | Transparent look, strong visual integration, needs careful artwork contrast |
A label that looks fine on screen can still fail on press if the stock and adhesive do not match the surface. The proof is not the finish line. It is a checkpoint.
If sustainability is part of the brand story, ask about paper sourcing and material options. FSC-certified paper is one common reference point for responsible sourcing. If the label will spend its life inside cartons, through warehouses, and across carrier networks, the same discipline used for transit testing is useful here too. Different standards, same idea: test the real use, not the mockup.
Choosing the Right Material, Adhesive, and Finish
Material choice shapes both the look and the performance of the label. Paper is still common because it prints well and costs less, but it is not the answer for every apparel application. Film stocks, including BOPP, handle moisture and abrasion better. Specialty stocks can create a more polished presentation, which matters when the label sits beside premium garments, Custom Printed Boxes, or other high-touch packaging.
Adhesive matters just as much as the face stock. A permanent adhesive is usually the right call for shipping cartons, folded apparel bundles, and polybags. A removable adhesive makes sense for temporary promotions, test runs, or applications where residue would be a problem. If the label touches fabric directly, the risk changes again. Some adhesives grip too hard. Some barely hold. The surface has to be part of the spec, not a last-minute note.
Finish changes how the label reads under light and how the brand feels in hand. Matte cuts glare and usually improves small-text readability. Gloss pushes color and makes graphics look sharper. Soft-touch adds a more premium tactile cue, though it is not always the best choice for labels that will be scuffed in transit. Clear finish works well when the goal is to let the substrate show through, but the artwork needs enough contrast or the copy disappears fast.
Size and shape should be chosen against real viewing distance. A 1.5-inch round label can work for a tissue seal, but it will be too small for a care note with multiple lines of text. A 3-inch by 4-inch rectangle gives more room for legibility, barcodes, and secondary copy. If the label has legal or care text, leave quiet space around it. Crowding the design is the fastest way to make useful information look like background noise.
Color management is another place where buyers get surprised. A screen preview is not a printed label. Monitors brighten color, and uncalibrated displays drift even further. If brand color matters, ask for a proof that reflects the print method and stock as closely as possible. Digital printing can shift more visibly from one material to another, so the substrate choice and the proof both matter.
For apparel brands trying to keep package branding consistent across multiple touchpoints, define the label system the same way you would define the packaging system: one approved artwork set, one approved stock family, and one finish spec for each use case. That keeps the brand from drifting every time a new run is placed.

Step-by-Step Ordering Guide for Clothing Label Buyers
Start with the job, not the logo. Is the label replacing a hangtag, sealing folded packaging, marking inventory, or supporting a shipping presentation? That answer determines the stock, adhesive, and finish before anyone opens a design file. Too many orders begin with artwork and end with a label that does not fit the surface.
Before placing an order, gather the essentials:
- Dimensions, width, height, and whether the shape is rectangular, square, round, or custom cut.
- Quantity, including any split SKUs or versioned runs.
- Artwork file, ideally in vector format or a high-resolution print-ready PDF.
- Finish, matte, gloss, soft-touch, or clear.
- Application surface, fabric, polybag, carton, tissue wrap, or insert card.
Artwork setup needs a quick but serious check. Confirm bleed where needed, keep text inside the safe area, and make sure the resolution supports small details. If the label has a cut line, verify that the die line matches the intended shape and that no important text sits too close to the edge. Tiny border errors are easy to miss on a screen and obvious on press.
Proofing should be treated like a real approval step, not a checkbox. Inspect crop marks, line thickness, small type, barcode contrast, and color balance. If the label carries legal or care language, read it as if you were the end user. One wrong unit or omitted word can turn a usable run into scrap.
If the label will sit on the front of the garment or on a premium retail package, request a sample or a proof before committing to a larger run. If it will interact with the rest of the packaging system, check the final look against the carton or insert artwork too. A label that clashes with the package creates work nobody needs.
Once the file is right, document it. Save the version name, size, stock, adhesive, finish, and quantity structure. That record matters more than most teams realize, especially when several people touch the project and a reorder happens months later.
Common Mistakes That Raise Cost or Cause Reprints
Low-resolution artwork is still the most common mistake. It is also the easiest one to avoid. Fine text, small logos, and care symbols need clean source files. A 72 dpi logo pulled from a website may look acceptable in a browser, then break apart once it is scaled for print. Badly flattened transparency and unembedded fonts cause the same kind of trouble.
Wrong adhesive selection is another frequent problem. A label meant for fabric contact may peel, slide, or leave residue if it was chosen as if the surface were a carton. The opposite mistake hurts too: a permanent adhesive can be too aggressive for temporary runs. Either way, the result is wasted money and a messy presentation.
Quantity mistakes create a different kind of pain. Buyers sometimes compare unit cost without looking at the total spend or the actual sell-through rate. A small run can look cheap until the brand needs to reorder quickly and pays more for the next batch. The right quantity depends on storage space, reorder frequency, and how stable the artwork is.
Skipping proof review is risky because the problems that matter are usually small. A missing inch mark, a shifted barcode, or an alignment issue is easy to catch before print and annoying to fix after delivery. If multiple people approve artwork, use one final decision path. Otherwise the proof gets approved by one person and rejected by another after production has started. That is a waste of everyone’s time.
Unclear application intent is the bigger structural issue. If the printer assumes the label goes on a carton but the brand planned to apply it to folded fabric, the stock and adhesive can be wrong from the start. A clear use case prevents that expensive mismatch.
Expert Tips for Better Results on the First Run
Test one sample application before you place the full order. Put the label on the actual surface it will touch, then handle it the way a customer or warehouse team will handle it. Fold it. Press it. Pack it. If it fails in a five-minute test, it will not improve in production.
Keep the copy tight. Clothing labels often try to do too much. They need the logo, the size, maybe a barcode or care line, and a clean visual finish. That is enough in most cases. Adding extra copy just because the layout has space usually makes the label harder to read, not more useful.
Standardize dimensions where you can. If a brand uses one label size across multiple seasons, reorders get simpler and production stays cleaner. That is especially helpful when labels sit alongside other packaging items, because spec discipline keeps the whole packaging system from drifting.
Document approved colors, stock, adhesive, and finish. Treat that as a control file, not a casual note. The next time a run is needed, that file prevents accidental changes. It also helps when one team member is out and another person has to place the order.
One more habit worth keeping: create a short internal checklist so marketing, operations, and product teams all review the same final version. It catches small problems before they become reprints. A clean approval path is worth more than a rushed one.
Next Steps for Ordering Labels with Confidence
Start by building a short spec sheet. Put the size, quantity, material, adhesive, finish, and use case in one place. If the label has to work with folded apparel, cartons, tissue wrap, or inserts, say that plainly. Better input gets a better quote and less back-and-forth later.
Then compare at least two production options. Do not compare only the price. Look at proofing process, turnaround, what the quoted price includes, and whether the supplier understands apparel use cases. A printer that handles simple short-run digital work may be perfect for one brand. Another may need larger offset runs or a broader packaging program.
If the label will be visible on the front of the garment or on a premium retail package, ask for a proof or sample before placing a larger run. That is cheap insurance. It is also the quickest way to see whether the finish, contrast, and adhesion fit the real application.
Keep the approved file and reorder notes together so the next production cycle is cleaner. That matters whether the label sits on a garment bag, a shipper, or a display-ready package. With staples Custom Label Printing as the reference point for convenience, the smart move is to decide whether your clothing labels need a faster path, a cheaper path, or a more durable path, then order to that requirement instead of guessing.
FAQ
What should I check before ordering staples custom label printing for clothing labels?
Confirm the final size, quantity, material, adhesive, and finish before you upload artwork. Make sure the label will be applied to fabric, plastic, or packaging so the adhesive choice matches the surface. Review the proof closely for small text, crop marks, and color accuracy before approving print.
How long does the printing process usually take for custom clothing labels?
Turnaround depends on proof approval speed, order size, and whether the artwork needs cleanup. Standard orders move faster when the file is print-ready and the specs are already defined. Rush jobs are possible in many cases, but shipping time still affects when the labels actually arrive.
Why does the quote for custom label printing change so much between orders?
Quantity, material, finish, adhesive, and cutting complexity all affect the final price. Small orders often have higher unit cost because setup and proofing are spread across fewer labels. Special finishes or unusual shapes usually increase cost even when the design is simple.
What is the best material for clothing labels that need to look polished?
Choose a stock that balances appearance with durability based on where the label will be used. Matte options often look refined and reduce glare, while gloss can sharpen color and contrast. If the label will be handled often, ask whether the surface and adhesive will hold up under real use.
How can I avoid reprints when using staples custom label printing?
Use high-resolution files, check spelling, and confirm dimensions before submitting artwork. Always review the proof at full size, not just in a thumbnail. Keep an internal approval process so the final file is the one everyone agrees to print.


