What a Sample Round Really Solves on Beanies
A stationery woven label beanies material sample guide is less about presentation and more about risk control. It answers a practical question that buyers do not always phrase clearly: will this woven label survive real use on a knit beanie, or does it only look good in artwork review? That difference matters because most sample rejections are not about the logo concept. They come from fit, scale, texture, or the way the label behaves once it meets stretch fabric.
On paper, a label can look sharp, balanced, and premium. On a cuffed beanie, the same label may feel too stiff, lose detail, or sit awkwardly against the knit ribs. Stretch changes everything. So does surface texture. Knit is not a neutral background; it is an active part of the product, and the label has to cooperate with it.
A useful sample round should help you judge weave clarity, border quality, thread finish, backing comfort, and placement. If you only check color, you miss half the problem. If you only inspect the label flat, you miss the part buyers actually touch. The value of sampling is simple: it catches the expensive mistakes before the bulk order multiplies them.
A sample is a filter, not a trophy. If it does not answer a production question, it is just a costly way to admire a prototype.
That is also why trim decisions need context. A woven label that works on a beanie may need a different size or finish than a woven tag on a shirt hem or a hangtag attached to packaging. Labels are not interchangeable just because they come from the same supplier.
Stationery Woven Label Beanies Material Sample Guide: How Samples Work
The sample process is straightforward, but each step has consequences. It usually starts with artwork, size, fold style, placement, and quantity. Add Pantone references if color matching matters. Add the beanie style too, because a label built for a low-profile cuff can behave differently on a slouchier knit or a tighter rib.
Next comes the proof. A digital proof checks spelling, layout, and basic proportions. It does not prove that the thread will hold fine detail or that the label will look right after stitching. The woven lab sample is the real test piece. It shows how density, thread sheen, edge finish, and small type behave in actual material. If the label will be sewn onto the finished hat, a sewn pre-production sample is even more useful because it reveals how the trim sits after the fabric is stretched, folded, and worn.
Buyers often treat those stages as the same thing. They are not. A proof tells you whether the concept is correct. A woven sample tells you whether the construction is sane. A sewn sample tells you whether the label works in context. Mixing them up leads to approvals that look tidy on a screen and messy in production.
In practical terms, the sample should confirm four things: can the design be woven cleanly at the chosen size, does the backing feel acceptable against skin, does the label sit flat after stitching, and does it still read well on the actual beanie color. If the answer is yes, the sample has done its job. If the answer is unclear, do not force the approval just to keep the schedule moving.
That same logic applies to broader trim programs. If the beanie is part of a larger launch that includes hangtags, care cards, or protective inserts, compare the woven label sample with the rest of the pack. A product line feels more intentional when the label finish, paper stock, and outer packaging all sit in the same visual register. A rough woven label next to a refined FSC certified paper card can work; a glossy label next to recycled materials and kraft packaging usually looks accidental.
Material Choices That Change Handfeel and Wear
Material choice shapes the sample more than most buyers expect. For woven labels, the main variables are thread type, weave density, backing, and edge finish. The label can look visually similar across options and still feel very different in the hand.
Thread type is the first decision that changes detail quality. A smoother polyester thread usually gives tighter edges, cleaner tiny text, and better durability in wash and wear. A softer or thicker yarn can create a richer, more tactile surface, but it tends to blur micro details. If the design uses small lettering, thin outlines, or a fine border, a heavy weave can work against it fast.
Weave density is the next trade-off. Higher density supports better resolution, which is useful when the logo has fine lines or more than one layer of text. The cost is stiffness. A dense label may feel fine on a structured cuff, but on a soft beanie it can feel like a little plaque stuck to fabric. That is not always a problem, but it should be a deliberate choice, not an accident.
Backing matters for comfort and stability. Sew-on labels are common because they stay put and keep the profile slim. Iron-on backing can help with placement, though it still needs stitching if the garment will be stretched or washed repeatedly. Adhesive backing is usually best treated as temporary positioning aid, not a final construction method. Soft backing reduces scratchiness, which becomes important on beanies because the label often sits close to the forehead or near a seam that already creates pressure.
Edge finish also deserves attention. Heat-cut or laser-cut edges can reduce fraying and keep the label clean at small sizes. Folded edges give a more traditional look and can feel stronger on larger labels, but they add bulk. A folded label on a thin rib knit can look heavy. A flat-cut edge on a tiny cuff label can look too crisp if the design itself is soft or vintage in style. The finish should fit the product, not just the price point.
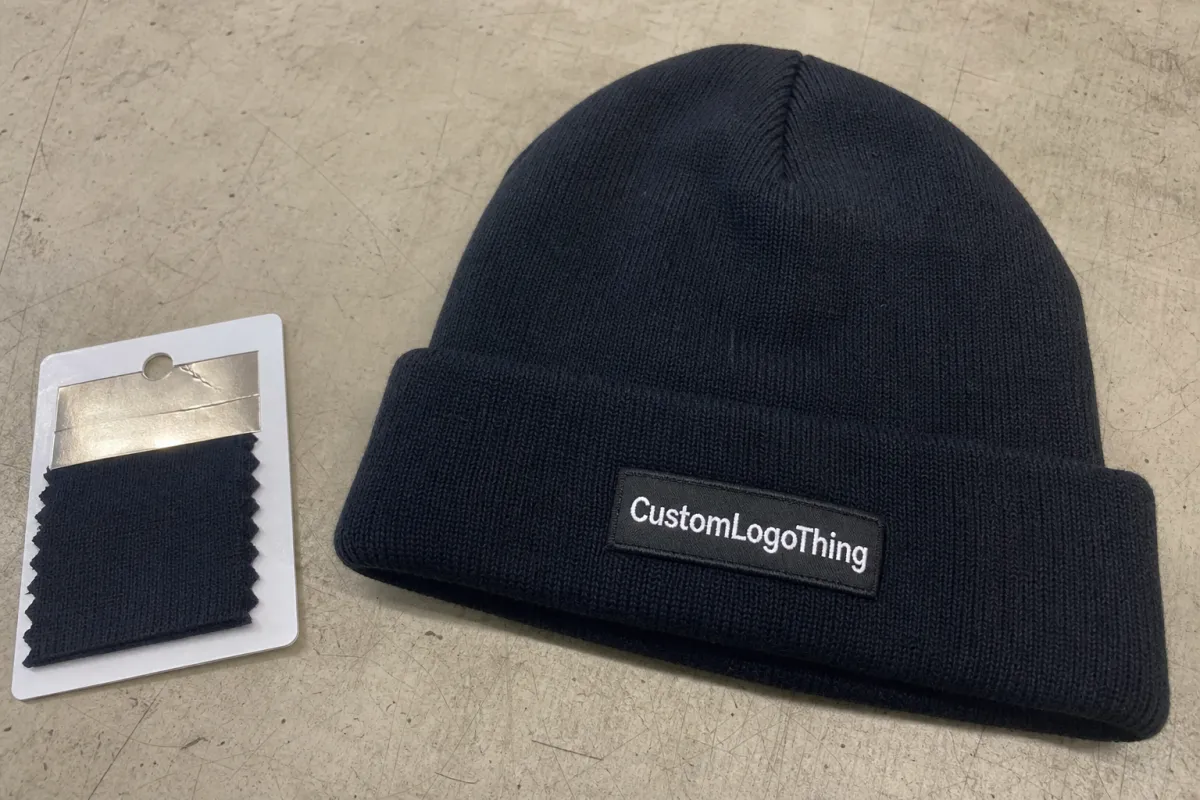
Color behaves differently on knit than on a sample card. A cool gray thread can read sharply on black, flatten on navy, and disappear against heathered yarn. Black-on-black is especially tricky because contrast comes from texture as much as hue. This is why a real sample should be checked on the actual beanie color, not only on a white table or a brand board. If a supplier only shows isolated label swatches, ask for a sewn test on the closest body color before approving production.
There are also fiber caveats. Not every woven label is built the same way. Polyester damask is common because it balances detail and durability. Satin weaves can look smoother and more reflective, but they may not hold micro type as well. Taffeta is more economical and can be fine for simple marks, though it usually lacks the crispness buyers want for premium headwear. The right option depends on the logo, the target price, and how much texture the beanie already brings to the table.
Process and Timeline: From Request to Approval
The clean version of the process has six stages. First, send artwork, dimensions, placement notes, and quantity. Second, confirm thread colors, weave style, and backing. Third, the supplier produces the sample. Fourth, the sample ships. Fifth, you review it against the actual beanie and mark revisions. Sixth, the bulk order starts.
That sounds simple because it is simple. The delay usually comes from missing information, vague feedback, or a buyer changing the design after the first sample arrives. A supplier cannot guess whether you wanted a narrower border or a larger logo if the notes only say “make it better.” Precision matters more than enthusiasm.
Lead times vary, but a basic woven sample often takes about 5-7 business days after artwork confirmation. Shipping adds another 3-7 business days, depending on route and service level. If the artwork needs cleanup, if color matching is strict, or if the first sample triggers revisions, the timeline can stretch to 2-3 weeks pretty easily. Seasonal orders make the clock feel even tighter, which is one reason buyers who wait until the last minute end up making decisions faster than they should.
Packaging for Samples does not need drama. A protective corrugated cardboard mailer, a simple kraft insert, and enough cushioning to prevent bending are usually enough. If you want the sample pack to reflect recycled materials or biodegradable packaging, say so before the shipment goes out. That lets the supplier choose the right box, insert, or filler instead of improvising at dispatch.
If the request is vague, the approval will be vague too. That is how a quick check turns into three rounds of clarification and a missed launch date.
For buyers who care about traceability, a useful request is a written confirmation of label specs, packaging materials, and shipment method. If the outer carton must survive multiple transfers, ask whether the packout follows an ISTA-style transit mindset. You do not need ceremony. You need a package that arrives intact and readable.
Cost, Pricing, MOQ, and Quote Drivers
Pricing for samples is mostly driven by size, weave density, number of thread colors, backing choice, and shipping. Revision count also matters. If a quote looks cheap at first and then grows with every adjustment, that is usually a sign that the original number left out the real work.
For a simple woven label sample, buyers often see a setup or sample fee in the range of $20-$60. A more detailed design, unusual backing, or multiple revisions can push that higher. Production pricing is different. At scale, a basic woven label for beanies may land around $0.08-$0.25 per piece, while denser construction or specialty finishing can increase the unit cost. Small orders almost always cost more per piece because setup is spread across fewer labels. That is not a mark of bad pricing. It is just how short runs work.
MOQ changes the quote quickly. A 500-piece order may be materially more expensive per label than a 5,000-piece repeat run, even if the artwork does not change. The machine still needs tuning, threads still need matching, and the output still needs checking. Low quantity orders are useful for testing or limited editions, but they rarely deliver the cleanest unit economics.
Ask for the full cost structure before approval. A useful quote should show the sample fee, revision cost, MOQ, lead time, shipping method, and whether proof artwork is included. If your trim package also needs woven tags, hangtags, or insert cards, it can help to bundle the request through Custom Labels & Tags so the supplier prices the system as one job instead of three disconnected guesses.
| Sample Type | Typical Cost | What It Confirms | Best For |
|---|---|---|---|
| Digital proof | Often free or low fee | Layout, spelling, basic placement | First-stage approval |
| Woven lab sample | $20-$60+ | Weave clarity, border quality, color behavior | Checking detail before production |
| Pre-production sewn sample | $35-$90+ | Real placement, stitch stability, cuff behavior | Final sign-off before bulk |
How to Review a Sample Before You Sign Off
Start with the label off the beanie, then review it on the beanie. That sequence catches different problems. Flat inspection helps with spelling, border shape, thread density, and overall weave consistency. On-garment inspection shows whether the label actually belongs on the product or merely survives contact with it.
Look at the sample in daylight if possible. Artificial lighting can hide sheen, flatten contrast, or make thread colors look cleaner than they are. Check the piece from arm’s length and from a normal close-up. A good label should read cleanly in both views. If the logo depends on inspection under ideal conditions, it is probably too delicate for bulk production.
Small text is where many samples fail. It may be technically present and still too soft to read once woven. Borders can also cause trouble if the lines are too fine for the weave count. Another common miss is symmetry. If the label sits slightly off-center or the fold is uneven, the eye notices immediately, especially on a simple knit hat with little visual distraction.
Stretch the cuff lightly. Fold it. Unfold it. Wear the beanie if that makes sense for the sample review. Then check whether the label shifts, puckers, or twists after movement. This matters because a label that looks fine while flat can become awkward once the hat is worn. The garment version of honesty is movement.
For designs that mix an icon with small type, judge the two elements separately. Often the symbol is fine while the text is too tiny, or the text is readable while the border gets lost. A useful approval note is specific: increase the text size by 10 percent, lower the label placement by 4 mm, or switch to the softer backing. “Looks off” is not a production instruction.
Common Buyer Mistakes With Beanie Samples
The first mistake is approving from a digital mockup and assuming the woven sample will behave the same way on knit fabric. It will not. A screen can show proportion, but it cannot show stretch, texture, or how much visual weight the label gains once it is stitched onto a cuff.
The second mistake is checking the label by itself and skipping the actual beanie. That leads to scale problems more often than design problems. A label that looks fine on a white sample card can look oversized on a narrow cuff or disappear on a heather knit with a busy surface. The fabric around the label is part of the visual system, not empty space.
Another common error is packing too much into the design. Too many colors, too much text, and borders that are too fine for the weave density all make approval harder. If the label needs a magnifier to read, the design is probably trying to do too much at too small a scale. Simpler usually prints better, wears better, and costs less.
Buyers also skip testing. A sample that only looks good on day one can still fail under abrasion, repeated folding, or ordinary handling. For beanies sold through retail, events, or premium gift programs, basic wear checks are worth the time. If the label lifts, scratches, or distorts after a few cycles, the bulk run will not improve it.
There is a quieter mistake too: not documenting the result clearly. If you do not write down what passed, what failed, and what changed, the next round starts from memory instead of facts. That is how teams waste time arguing over a label that already had an answer.
Expert Tips Before You Place the Bulk Order
For any design with tiny text, dark-on-dark contrast, or a precise placement requirement, ask for one baseline sample and one stress-test version. The second piece gives you a sense of how much margin the design really has. It also reveals whether the artwork is resilient or only barely holding together under ideal conditions.
Use a one-page approval sheet. Include dimensions, thread references, backing choice, placement notes, target quantity, revision status, and the exact approval decision. Approved as is. Approved with changes. Rejected. Those labels save time, and they save suppliers from trying to interpret handwritten arrows in the margin.
Compare the sample to the actual production environment. A beanie is not meant to sit motionless under studio lights. It gets folded, worn, packed, reopened, and worn again. That means the label needs to stay legible and comfortable through ordinary handling, not just on the first inspection.
If the beanie is part of a broader packaging program, keep the visual tone aligned. A refined woven label can sit comfortably beside FSC certified paper, recycled materials, and a restrained mailer design. A rougher label can still work if the rest of the package is equally direct. Problems usually appear when one part of the product feels premium and another part feels unrelated.
Use the stationery Woven Label Beanies Material Sample guide as the final pre-production checkpoint, not as a slogan. Check the weave, test the fit, judge the color on the actual hat, review the price one more time, and confirm that the revision notes are specific enough for production. That is how buyers reduce rework, protect margin, and avoid a batch that looks almost right but not quite finished.
What should I check in a woven label sample for beanies?
Check thread clarity, edge finish, label size, backing feel, and whether the design still reads cleanly on knit fabric. Review the sample on the actual beanie, not only on a flat surface, because stretch and texture change the result. Make sure small text, borders, and color contrast still work once the label is stitched and the cuff is folded.
How many sample rounds do woven label beanies usually need?
If the artwork and specs are clean, one round is often enough. Two rounds are common when buyers want tighter color matching, cleaner small type, or changes to backing and placement. Add schedule buffer if revisions are likely, because each change creates another approval cycle.
What affects quote pricing the most on beanie label samples?
Size, weave density, thread colors, backing type, and special finishing are the main drivers. MOQ matters because small runs carry more setup cost per piece than larger orders. Shipping and revision charges can matter more than buyers expect, so ask for them upfront.
How long does the sample and approval process usually take?
Simple sample requests can move quickly, but realistic timelines include proofing, weaving, shipping, and buyer review. Revisions extend the schedule fast, especially if the team changes size, color, or placement more than once. If the launch date is fixed, request the sample plan before finalizing the production calendar.
What should I send before asking for a final quote?
Send artwork, size specs, color references, placement notes, target quantity, and deadline. Include the exact beanie style if the label must match a cuff, crown, or folded knit area. The cleaner the input, the faster the quote and the fewer expensive misunderstandings later.


