Buyer Fit Snapshot
| Best fit | Subscription Boxes with Inserts projects where brand print, material claims, artwork control, MOQ, and repeat-order consistency need to be specified before quoting. |
|---|---|
| Quote inputs | Share finished size, material target, print colors, finish, packing count, annual reorder estimate, ship-to region, and any compliance wording. |
| Proofing check | Approve dieline scale, logo placement, barcode or warning zones, color tolerance, closure strength, and carton packing before bulk production. |
| Main risk | Vague material claims, crowded artwork, missing packing details, or unclear freight terms can make a low unit price expensive after revisions. |
Fast answer: Subscription Boxes with Inserts: Board, Finish, Dieline, and Unit Cost should be specified like a repeatable production item. The safest quote records material, print method, finish, artwork proof, packing count, and reorder notes in one written spec.
Production checks before approval
Compare the actual filled-product size with the drawing, then confirm tolerance on folds, seals, hang holes, label areas, and retail display edges. Reserve space for logos, QR codes, warning copy, and material claims before decorative graphics fill the panel.
Quote comparison points
Review material grade, print process, finish, sampling route, tooling charges, carton quantity, and freight assumptions side by side. A quote is only useful when the supplier can repeat the same color, closure quality, and packing count on the next order.
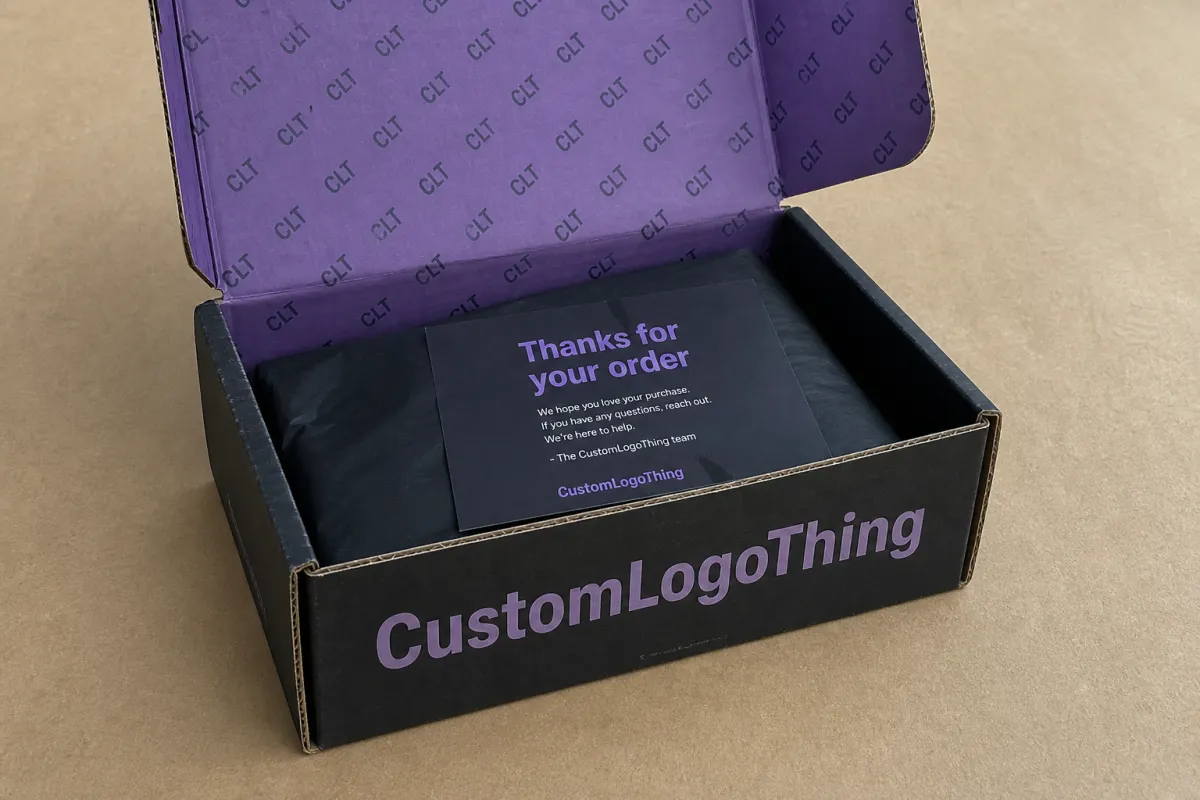
Subscription Boxes with Inserts: Design and Fit Guide
subscription boxes with inserts solve a problem that looks small on a spec sheet and expensive in real life: a carton can arrive polished on the outside and still let products drift, scuff, or flip out of the reveal sequence the brand intended. The insert is the interior architecture that keeps each item where it belongs, so the unboxing feels designed rather than accidental.
That inside structure is doing three jobs at once. It has to protect the contents through sorting and transit, guide the customer’s eye during the reveal, and help the fulfillment team pack quickly enough to support recurring shipments without turning every order into a custom project. Miss the balance and the same issues return cycle after cycle: damaged items, awkward pack-out steps, too much void fill, and a subscription experience that feels cheaper than the brand promised.
Most programs do not need a dramatic insert. They need the right one. A folded paperboard tray, a die-cut liner, a corrugated divider, or a molded pulp form can all perform well if the structure matches the load. That is the real question behind subscription Boxes With Inserts: how to balance fit, protection, and cost without building more box than the shipment actually requires.
Recurring programs also benefit from thinking beyond a single shipment. A stable insert design can become part of the packing rhythm, especially when the same layout repeats month after month. For brands comparing formats or building a new subscription kit, reviewing Custom Packaging Products alongside physical samples makes the tradeoffs easier to see and far less theoretical.
Why Subscription Boxes with Inserts Stand Out
A subscription box without an insert asks the outer carton to do everything by itself. That can work for soft goods or light bundles, but it starts to fail the moment glass jars, candles, cosmetics, supplements, drink mixes, accessories, or mixed kits enter the picture. Inserts create order inside the box, and order is what makes a shipment feel premium instead of improvised.
In packaging terms, the definition is straightforward. An insert is any internal structure that organizes, protects, and presents the contents. It may be a folding paperboard tray with cutouts for each item. It may be a corrugated divider separating heavier components. It may be molded pulp for a more protection-forward, fiber-based design. It can also be a custom liner or cavity system shaped around an irregular product that would otherwise wander through the carton.
That structure does more than stop movement. It sets the pace of the unboxing experience. The customer opens the lid, sees one hero item first, then the secondary pieces, then any printed card or accessory in the intended order. That kind of controlled reveal does not happen by accident. The insert is what tells each product where to sit, how to face, and which item should be visible first.
There is another advantage that gets overlooked more often than it should: inserts reduce decision-making on the packing line. If the cavities are obvious and the orientation is intuitive, staff can pack faster with fewer mistakes. A few seconds saved per box sounds small until it is multiplied across hundreds or thousands of units. In a recurring subscription program, that difference can shape labor cost, throughput, and consistency from one month to the next.
Premium does not have to mean thick or complicated. A simple structure that uses the right amount of board can outperform a decorative one that is too tight, too loose, or too expensive to pack efficiently. The best insert is the one that fits the real product mix and the real fulfillment process, not the one that looks best in a rendering.
A good insert does not just hold items in place. It gives the pack-out a rhythm, so the team knows where each product goes and the customer sees a clean, intentional reveal instead of a carton full of loose pieces.
How Subscription Box Inserts Work in the Pack-Out
The pack-out sequence is where the design either earns its keep or creates friction. In a well-built subscription box, the fulfillment team loads the products into defined cavities or compartments, checks orientation, and closes the carton without fighting the structure. Each item has a place, and that place is stable enough to survive handling, sorting, and vibration in transit.
That stability depends on how the insert controls movement. Side-to-side shifting is usually the first issue. Then comes vertical bounce, corner abrasion, and product-on-product contact. If the shipment includes glass, coated labels, glossy cartons, or decorated finishes, even minor movement can leave visible cosmetic damage. A label crease or a scuffed shoulder on a jar may not look dramatic in the warehouse, but it can be the difference between a repeat customer and a return.
Different insert types solve different problems. Friction-fit paperboard works well for lighter items like cosmetics, accessories, sample packs, and gift sets because it can be scored, folded, and cut into precise cavities. Corrugated inserts bring more strength and cushioning, which makes them a better fit for heavier products or larger subscription formats. Partitions help when a box needs multiple columns or rows of products that should stay separated. Custom forms solve the odd silhouette problem: a tall neck, a pump top, an irregular base, or a shape that never sits right in a square pocket.
The packing team also needs a clear opening sequence. A box that opens with a strong first impression is usually designed so the customer sees the most important item first. The insert can raise one product slightly, hide a utility item, or create a stepped reveal that makes the whole shipment feel thoughtful. That does not require expensive finishing. It requires the layout to be planned around the unboxing path from the beginning.
Practically, a subscription insert should make the line faster, not slower. Staff should be able to tell at a glance which cavity receives which SKU, which side faces up, and whether the item needs a sleeve or a printed card underneath it. When the structure is intuitive, training is easier and pack-out errors drop. That is one reason recurring programs often lock the cavity map early and keep it stable across cycles.
Smaller programs and test launches often benefit from a custom insert and mailer layout that reduces loose fillers and keeps the shipment visually tidy without forcing the outer carton to grow. Higher-volume shipments can use the same logic with a more production-friendly structure that folds quickly and ships flat.
Process and Timeline: From Sample to Production
The path from concept to finished insert starts with measurement, not artwork. That is where many delays begin or disappear. Product dimensions need to be recorded accurately, but height, width, and depth are only part of the picture. Label thickness, cap style, closure type, shoulder shape, sleeves, shrink bands, pumps, droppers, and decorative features can all change how the item sits inside the cavity.
A few millimeters can matter. A bottle that looks perfect on a spec sheet can behave differently once a pump is attached. A jar with a wrap label may need more clearance than a plain container. A boxed item may slide differently depending on its carton wrap, varnish, or laminate. Good insert development starts with real samples on a bench, not just nominal measurements in a spreadsheet.
After the measurements come the dieline and the first structural proof. That checkpoint shows whether cavity geometry, board thickness, folds, and lock features actually work together. The sample stage is where brands should test assembly speed, product retention, and box-closing force. Too much compression can slow the line or scuff the product finish. Too little and the shipment can rattle or tilt.
Sampling also belongs to the unboxing experience, not only the engineering checklist. Does the product lift out cleanly? Does the lid close without bulging? Is the hero item visible too early or too late? Does the insert force the team to pack in a strange order? Those details are not cosmetic. They shape operation speed and the customer’s first touchpoint with the box.
Lead time usually follows the number of moving parts. A straightforward paperboard insert with simple print and a clean die line can often move faster than a more elaborate structure with multiple folds, coatings, or custom tooling. If the insert must match a printed outer carton, artwork approval can matter as much as the structural work. If molded pulp is part of the design, tool development and drying time can extend the schedule. Revision cycles are another common source of delay, especially when the first sample shows that the cavity is a touch too tight or the closure needs adjustment.
For many standard board-based inserts, a rough timeline from proof approval to production can fall in the 10-15 business day range if materials are available and the design is straightforward. More complex or highly finished programs often need 3-5 weeks, and sometimes longer if the supply chain for board, print, or tooling is stretched. Building insert development into the subscription calendar early is usually smarter than trying to squeeze it into the last open slot before launch.
Programs that need a wider packaging system can pair insert development with a matching outer carton from Custom Packaging Products, which helps keep box dimensions, print style, and fulfillment expectations aligned from the start.
Key Factors That Shape Fit, Protection, and Presentation
Material choice comes first, and it should be made by job function rather than style alone. Paperboard is usually the lightest and cleanest-looking option for smaller products, especially when the insert is mostly about organization and presentation. Corrugated board adds more strength and a bit more cushioning, so it tends to suit heavier items or layouts where stacking pressure is a concern. Molded pulp appeals to programs that want a fiber-based, recyclable feel and a more sculpted form. Foam still exists, but it is generally reserved for higher-protection applications and is less common when a fiber-based route can do the job.
Product weight matters more than many teams expect. A tall bottle with a narrow base, a glass jar with most of its mass near the bottom, and a flat accessory packet all behave differently in transit. Center of gravity changes how an item reacts to vibration and impact. A cavity that keeps a lightweight item snug may not be enough for a heavier piece that rocks in place and gradually wears on the insert walls. Good insert design treats the object’s mass and shape as part of the structure, not as an afterthought.
Branding belongs in the fit conversation too. Inserts can disappear quietly, which is often right for utility-driven shipments, or they can become part of the reveal. A printed liner inside a subscription box can reinforce color blocking, support a premium story, and keep the customer inside the visual system of the brand for a few more seconds. Soft-touch lamination, a matte uncoated board, or a clean spot-color approach can all change how the interior feels when the lid opens. The trick is to match the finish to the product and avoid decoration that the customer barely notices.
Sustainability should be treated as a practical requirement, not a slogan. Right-sized inserts reduce wasted material. Fiber-based boards can often be recycled more easily than mixed-material structures. If board sourcing matters, FSC-certified options can support procurement goals, and the fiber chain should be checked early instead of at the end. For shipping performance, many teams use transit testing as a reality check. Procedures from ISTA help evaluate whether the structure can survive vibration, drops, and handling that resemble real distribution. That kind of testing is especially useful before a recurring subscription launch, because a weak insert will fail repeatedly, not just once.
It also helps to ask how much material is actually required. Overbuilding the insert can increase cost, add weight, and make the pack-out harder without improving damage performance in a meaningful way. Underbuilding does the opposite and quickly shows up in returns or cosmetic complaints. The right answer usually sits in the middle: enough structure to stop movement, enough board to hold shape, and enough clearance to let the team pack fast.
| Insert material | Best fit for | Typical strengths | Common tradeoffs | Rough unit cost at 5,000 pcs |
|---|---|---|---|---|
| Paperboard | Cosmetics, samples, light gift sets | Clean presentation, low weight, easy printing | Less cushioning, not ideal for heavy loads | $0.12-$0.28 |
| Corrugated board | Heavier kits, larger items, multi-SKU sets | Better rigidity, better load support, good transit protection | More bulk, may raise freight and carton size | $0.18-$0.40 |
| Molded pulp | Sustainability-focused programs, sculpted protection | Fiber-based, holds shape well, good for nested parts | Tooling and drying can extend lead time | $0.22-$0.55 |
| Foam | High-protection or sensitive components | Excellent restraint, good shock absorption | Less preferred for recyclable fiber programs | $0.30-$0.80 |
The table above is not a quote sheet; it is a planning range. Print coverage, die complexity, special coatings, hand assembly, and freight can push those numbers up or down. Still, it gives a useful starting point for comparing materials before you request samples. A brand looking for polished presentation at moderate cost will usually start with paperboard or corrugated, while a more sustainability-led program may want to test molded pulp early to see if it fits the product profile and the schedule.
Cost, Pricing, and MOQ Considerations for Inserts
Pricing for subscription box inserts is shaped by a few very specific variables. Board grade is one. Thickness is another. The geometry of the cavity matters too, because more intricate cut lines usually mean higher die complexity and more setup time. Print coverage can raise cost if the interior needs full graphics, multiple colors, or a finish such as coating or lamination. Then there is assembly. A flat-folded insert that locks together quickly will usually cost less to run than a structure that needs manual pre-assembly or delicate folding.
MOQ realities should be discussed early. Small subscription programs often want lower quantities while they validate the concept, test response, and smooth out product mix changes. That is reasonable. The challenge is that lower quantities usually carry a higher per-unit cost, especially if custom tooling is involved. Larger recurring programs can usually unlock better pricing because the production run is longer and the setup cost is spread across more units. Even then, a smart buyer still checks full landed cost, not just the piece price.
Ask what is included in the quote. Does it cover tooling, samples, and proofs? Are there setup fees? Is freight included or separate? Is there any secondary assembly? If the insert ships flat, what is the pack efficiency? If it ships pre-formed, how much labor does that save on the line? Two quotes that look similar on paper can behave very differently once packaging, freight, and labor are added.
There are real ways to save money without sacrificing performance. Simplifying a cavity shape can reduce die cost and speed assembly. Reducing print passes can lower decorating expense. Standardizing box sizes across multiple subscription tiers may let one insert design serve several programs with only minor adjustments. Sometimes the best savings come from removing unnecessary structure, not from cutting the most visible part of the packaging.
That is especially true for recurring boxes. If the program changes monthly, it may be smarter to design a base insert system that can handle a predictable product range rather than building a one-off solution for each cycle. A flexible cavity map, a modular partition, or a standardized tray size can prevent repeated development costs and keep the purchasing process calmer over time.
For teams comparing formats, a good internal reference is the full range of Custom Packaging Products, because insert pricing often makes more sense once it is viewed beside the outer carton, the print coverage, and the fulfillment workflow as one system rather than as separate line items.
Step-by-Step Guide to Designing the Right Insert
Start with the product inventory. List every item that will appear in the subscription box, then record the exact dimensions, weight, closure style, and any fragile features. If one SKU has a label seam, a cap, a pump, or a sleeve that changes the profile, include that detail. The goal is not a tidy spec sheet. The goal is understanding how the actual product behaves in the cavity.
Define the pack-out sequence next. Which item should be seen first? Which product should sit highest? Which piece needs the most protection? A lot of subscription boxes feel stronger because the inside follows a visual order, not only a protective order. The opening reveal should be mapped before the insert is finalized, because a structure that protects well but hides the wrong item can weaken the customer experience.
Layout planning comes after that. Decide whether the insert should be a single tray, a multi-compartment divider, a stepped system, or a nested form. Think about whether the team packs from left to right, top to bottom, or by product category. Good structure matches the way people actually work. If a layout forces awkward hand motions or requires items to be dropped into a cavity at an odd angle, the line will slow down and the chance of mistakes will climb.
Test real samples before approval. This step is often skipped, and the cost shows up later. A drawing can look perfect and still fail because the bottle cap is taller than expected, the printed carton sleeve adds friction, or the accessory pouch has a seam that catches on the cavity edge. Real samples show how the material behaves, how much force is needed to insert the product, and whether the item can be removed cleanly by the end customer without tearing the insert or bruising the finish.
Testing should be practical, not theatrical. Put the box through a shake test. Close the lid and check for bulging. Lift the carton to see whether the contents settle unevenly. If the package will ship through a parcel network, look at it with transit in mind rather than display-only expectations. A structure that is beautiful in a studio but weak in distribution is not a finished solution.
Before production, do a readiness check. Confirm the artwork. Approve the dieline. Lock the board specification. Verify that the assembly method fits the fulfillment team’s pace. Leave a small tolerance margin for normal product variation, because no supplier ships every bottle or jar with identical dimensions forever. If the final insert depends on a perfect dimension that never changes, it is probably too fragile a design for recurring use.
- Verify every SKU dimension with an actual sample, not a catalog spec alone.
- Match the cavity depth to the real closure height, including labels and sleeves.
- Test one full pack-out run before approving production quantity.
- Check whether the insert folds flat, ships flat, or arrives pre-formed.
- Confirm that the final structure works with the outer carton and the shipping method together.
If you want a useful production mindset, ask one simple question during the design review: can this be packed the same way 5,000 times in a row without slowing the line down? If the answer is unclear, the insert needs more work. That question pushes the team past renderings and into the actual pace of the subscription operation.
Common Mistakes, Expert Tips, and Next Steps
The most common mistake is designing for the ideal product size instead of the real one. Products vary. Labels add thickness. Caps sit a little high. Sleeves change the footprint. A cavity that looks perfect on paper can become a headache on the line if it leaves no room for normal variation. The second mistake is overcomplicating the structure. Extra folds, hidden tabs, and decorative cutouts may look interesting, but if they slow down pack-out or create snag points, they are not earning their place.
Another problem is forgetting how quickly recurring fulfillment scales. A box that takes an extra 20 seconds to pack may not feel expensive in a sample room, but across a high-volume subscription run it can consume labor capacity and make the program harder to manage. If the team needs to bend the insert, force the product, or realign a cavity by hand, the design is not ready yet.
The best practical advice is usually the plainest. Leave room for supplier variation. Choose the lightest structure that still protects the product. Design the insert so it can be loaded without forcing or snagging. Make sure the unboxing sequence still feels intentional once the package has gone through real transit handling. A clean reveal is nice. A clean reveal that survives distribution is better.
There is value in testing more than one structure. A paperboard tray may be enough for one SKU mix, while a corrugated divider may be a better fit for another. Molded pulp may be the right answer if sustainability is a top requirement and the schedule allows for tooling. The point is not to settle on a format too early. The point is to match the insert to the job it has to do.
If you are starting from zero, the next steps are straightforward:
- Gather finished product samples for every SKU in the box.
- Measure them with packaging in place, not just bare product dimensions.
- Define the opening reveal and the pack-out order.
- Request a structural quote and compare material options side by side.
- Approve a test sample before committing to production volume.
That process keeps the project grounded. It also helps buyers avoid paying for decoration or complexity that does not improve shipping performance. A well-designed insert should protect the product, support the brand story, and help the operation move faster, all at the same time. For recurring kits, subscription boxes with inserts work best when those three goals are developed together rather than treated as separate decisions.
Frequently Asked Questions
What products work best in subscription boxes with inserts?
Products with consistent dimensions usually fit best, because the insert can be built around a stable shape and the packing team can repeat the same motion every cycle. Skincare, candles, supplements, beverages, accessories, and small gift sets are all common candidates. Fragile items benefit most because the insert can limit side-to-side movement and keep heavier pieces from pressing on lighter ones.
If the products vary widely in size, a modular or multi-compartment layout is usually safer than trying to force everything into one fixed cavity. That flexibility can make the difference between a reliable pack-out and a box that needs constant hand adjustments.
How do I know if my insert is too tight or too loose?
A good fit holds the product securely without making the pack-out feel forced. If staff have to bend tabs, compress materials, or fight the cavity to get the product in, the insert is probably too tight. That can slow the line and damage labels, pumps, or printed finishes.
If the items shift, rattle, or tilt during a shake test, the insert is too loose. A little movement can lead to abrasion, corner wear, or a weaker unboxing feel. The right answer sits in the middle: snug enough for retention, open enough for quick assembly and clean removal.
What affects the price of subscription box inserts the most?
Material selection, board thickness, print complexity, tooling, and hand assembly are usually the biggest pricing factors. A simple folded tray will usually cost less than a more intricate custom structure. More board, more finishing, and more manual labor all push the unit cost upward.
Order volume matters too. Higher recurring quantities often lower the per-unit price because setup costs are spread across more pieces. That is why it helps to compare quotes with the full production plan in mind, not just the sample quantity.
How long does the process usually take for custom inserts?
The timeline depends on sample approval, revision cycles, material availability, and how complex the final structure is. Simple paperboard inserts can often move faster than molded pulp or highly finished builds. Lead time also stretches if the insert must match a printed outer carton and the artwork needs several rounds of review.
The quickest path is to provide accurate product measurements at the start and approve samples quickly. That reduces back-and-forth and keeps the project from slipping between production windows.
Can subscription box inserts help with sustainability goals?
Yes, they can. A right-sized insert made from recyclable or responsibly sourced fiber materials can reduce waste while still protecting the contents. That usually means less loose fill, less carton overpacking, and fewer replacement shipments caused by damage.
The best sustainability choice is not the thinnest structure. It is the structure that uses the minimum material needed to protect the products, stays practical for the fulfillment team, and fits the recycling expectations of the end customer.
For brands building recurring kits, the strongest results usually come from treating the insert as part of the whole package system, not as a separate accessory. The practical next step is to gather actual product samples, confirm the pack-out order, and approve one test build under transit conditions before production starts. That is the point where subscription boxes with inserts move from a design idea to a package that can ship repeatedly without surprise.


