Subscription Unstructured Dad Hats digital proof checklist work is about more than approving a nice-looking mockup. Unstructured crowns flex, wrinkle, and settle on the head, so a logo that looks balanced on screen can drift low, crowd the seam, or lose clarity once the hat is worn.
That matters more in subscription programs than in one-off orders. A single proof error can repeat across several monthly drops before anyone notices. If the proof is vague, the mistake becomes a recurring production habit instead of a one-time fix.
A good review process protects margin, trims revision rounds, and keeps the schedule from slipping because someone had to rebuild a mockup at the last minute. It also gives marketing, operations, and approvers one shared reference point, which is important when the same style will be reordered.
Subscription Unstructured Dad Hats Digital Proof Checklist
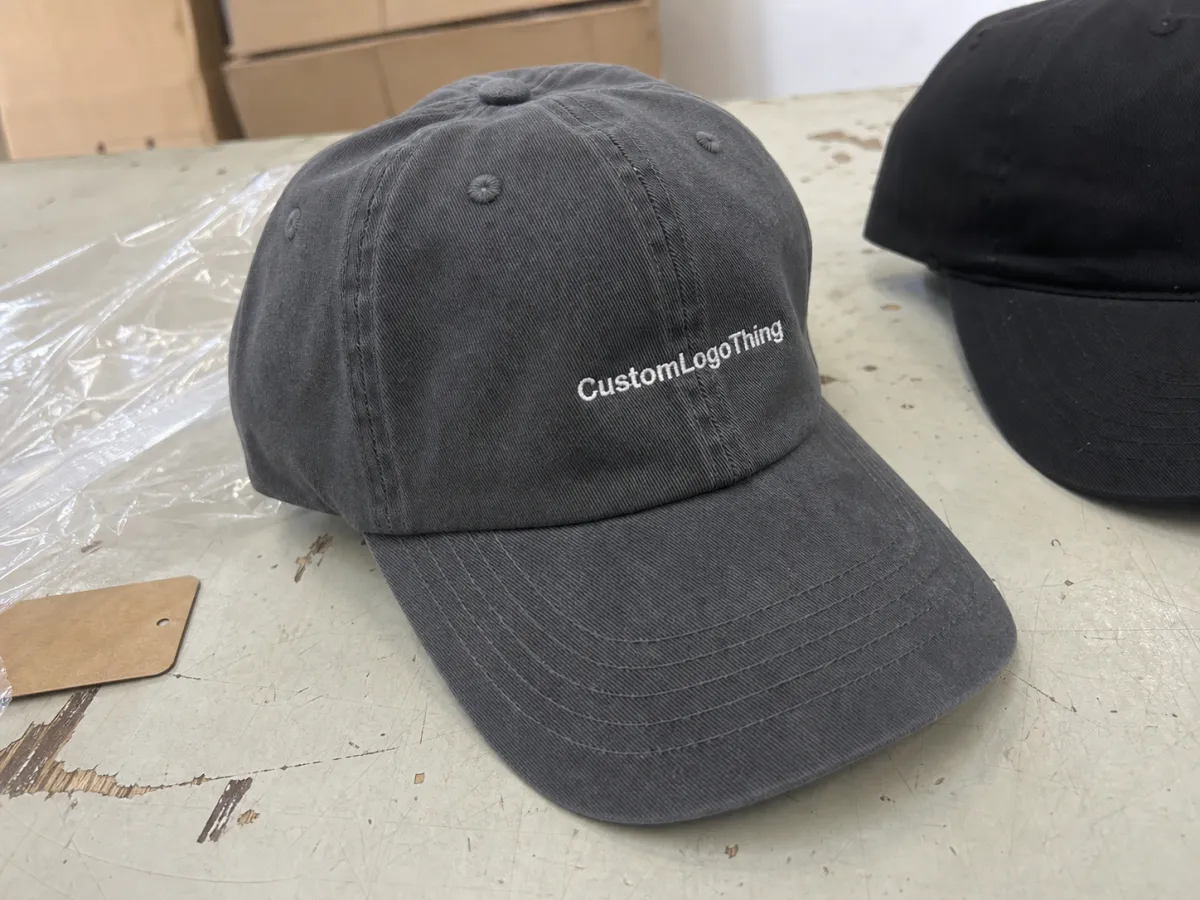
Unstructured Dad Hats are simple in appearance and tricky in practice. They do not have a stiff front panel to hold a logo in place, so decoration has to work with a crown that naturally softens over time. Fabric choice, stitch density, and placement all affect whether the final hat looks clean or merely passable.
The real question is not whether the proof looks good on a flat screen. It is whether the artwork still reads clearly after packing, shipping, folding, and normal wear. On a subscription item, that matters because the same style is often reordered again and again.
In practical terms, the review should focus on four things:
- Wear conditions instead of screen-only appearance.
- Repeatability across every monthly or quarterly drop.
- Documentation that fixes the approved version in writing.
- Production clarity so the proof answers the next shop-floor question.
"If the proof leaves room for interpretation, production will eventually interpret it for you."
A proof is not just a visual; it is a set of instructions. For subscription hats, it should establish the baseline for logo size, thread or patch color, panel placement, closure type, and any label or interior detail that the brand intends to repeat.
If the decoration method includes embroidery, woven patches, or custom labeling, line up the mockup with the right process before signing off. Matching the hat style to the decoration method early reduces rework later, especially when the same format will be used across multiple drops.
There is another reason to be strict here: unstructured hats magnify proportion problems. A logo that is technically centered may still feel too low because the front panel collapses slightly. A patch that is small on paper may disappear once the cap is worn.
How the Proofing Process and Timeline Usually Work
The proofing process usually starts with a clean logo file and a short spec sheet. The production team places the artwork on a digital mockup and sends the rendering back for review. If the brief is specific, the first proof often arrives in 1 to 2 business days. If the brief is loose, the proof may still be fast, but the revisions usually drag out the calendar.
A sensible sequence looks like this:
- Submit artwork in vector format with any brand color references.
- Build the digital proof around the hat style, decoration method, and placement notes.
- Review the mockup for size, centering, color, and construction details.
- Request one clean revision set, if needed, instead of piecemeal comments.
- Approve the final proof only after the record matches the intended spec.
- Move into production and packout with the approved file attached to the order.
What changes fastest on a proof? Usually logo size, placement, thread color, patch outline, and small copy edits. What slows things down? Rebuilding a poor-quality file, changing the patch shape after the art is already placed, or trying to match a color that exists only as a rough screen reference.
Most delays come from process, not from the cap itself. Missing vector files, three people commenting separately, or waiting for brand approval after the proof arrives can stall a drop more than any production issue. For recurring programs, a 24 to 48 hour approval window is usually enough if the artwork is ready and the decision-maker is already in the loop.
Timeline planning should also account for shipping and packout. If the hats are going into cartons or mailers before fulfillment, the carton format and handling plan matter. Transit stress can flatten the crown, scuff a patch, or crease the front panel.
Cost Drivers, Pricing, and MOQ Decisions
Subscription hat pricing usually comes down to five inputs: the blank hat, the decoration method, the complexity of the artwork, the quantity per drop, and any special finishing. At moderate volume, a plain unstructured blank may land around $4.00 to $7.00 per unit before decoration. Better-feel materials, such as brushed cotton or pigment-dyed fabric, can push that higher. Simple front embroidery often adds roughly $1.25 to $3.50 per hat. Patch work usually costs more, especially if the edge treatment or shape is custom.
MOQ decisions affect the final number more than many buyers expect. A smaller recurring run spreads setup across fewer pieces, so the unit cost rises. A larger drop usually lowers the per-hat number because the blank, proof work, and decoration setup are amortized more efficiently.
Here is a practical comparison of common decoration paths:
| Decoration option | Typical cost impact | Proof sensitivity | Best use case |
|---|---|---|---|
| Flat embroidery | Lower to moderate; best for simple logos | High for size and stitch density | Clean front marks with limited detail |
| Woven patch | Moderate; more setup, cleaner detail | Medium; patch shape and edge finish matter | Small details that need a sharper read |
| Leather or PU patch | Moderate to higher | High; color and placement must be exact | Premium drops with stronger perceived value |
| Multi-location decoration | Highest | Very high; more placement points to verify | Programs that want side or back branding too |
Premium details can raise the price, but they also raise perceived value. A soft-touch patch, custom interior label, or upgraded sweatband makes the hat feel intentional rather than generic. If the order includes inserts, wrap materials, or branded cards, sourcing choices can also affect the budget.
What to Inspect on the Digital Mockup Before Signoff
This is where the checklist turns into a working tool. Start with the visible basics, then move into the details that often get overlooked. A soft crown can make a logo feel heavier than expected, especially if the placement is low or the artwork is too close to the seam.
Before approval, inspect the following:
- Logo size relative to the front panel width and crown depth.
- Placement in relation to the center seam, side panels, and brim line.
- Thread or patch color against the hat fabric, including contrast strength.
- Closure style such as self-fabric strap, buckle, slide closure, or tuck-in tab.
- Interior details like labels, sweatband notes, seam finish, or taping if they are part of the order.
Do not assume the screen color is exact. Digital color is useful, but it is still only a digital approximation. If the brand depends on a specific navy, olive, stone, or washed black, ask for the closest production reference or a PMS note where applicable. Dark fabrics are especially deceptive.
Stitch density is another place where good programs save themselves from bad surprises. Heavy embroidery can work well on a structured cap, but on an unstructured dad hat it can pull the fabric and create a stiff patch of crown against a softer rest of the panel. For detailed logos, a woven patch may read cleaner than dense thread because it keeps the graphic crisp without loading the front panel with too much stitch mass.
Also check proportions in the way a customer will experience them. If the logo touches the seam, if the patch is too tall for the crown, or if the artwork seems to fight the curvature of the brim, that will show up the moment the cap is put on. The proof should reveal those issues, not hide them behind a polished mockup.
Step-by-Step Review Workflow for Buyers
A repeatable review workflow prevents a lot of avoidable noise. Start with the spec sheet, compare it to the proof, and then move through artwork, placement, color, and production notes in that order. That sequence keeps the review grounded in facts before subjective reactions start stacking up.
A useful workflow looks like this:
- Verify the file is the correct logo version and not an outdated mark.
- Check the hat style for unstructured construction, closure type, and fabric choice.
- Review placement with a ruler mindset instead of a quick visual guess.
- Confirm colors against the brand palette and any approved reference.
- Group feedback into artwork, color, placement, and production notes.
- Archive the final proof with the order record so future reorders have a fixed reference.
One internal reviewer usually makes the process cleaner. When marketing, e-commerce, and operations all send separate notes, the proof often becomes a negotiation instead of a production document. One person can collect input, resolve conflicts, and send a single set of comments.
For repeated drops, the approved proof becomes a production asset. Store it with the spec sheet, color callouts, and any notes about the decoration method. If the same hat is reordered three months later, the team should not need to guess what was approved the first time.
Teams that combine embroidery, patching, and packaging work should compare the proof to the same manufacturing notes they would use for any repeat item. The goal is stable execution. A well-kept approval record makes that much easier.
Common Mistakes That Create Revisions or Delays
Most proof delays are caused by small gaps, not dramatic failures. The most common one is giving a logo size opinion only after the proof is already built instead of stating the target size in the brief. If the proof comes back too large or too small, the layout has to be rebuilt, and a simple correction can turn into a new round of setup.
Another frequent issue is assuming the digital proof will show the exact final cap color. It will not. The proof is a guide. If the shade matters, flag it early and ask for the closest production match.
The most common revision triggers are these:
- Mixed feedback from multiple reviewers with no final decision-maker.
- Artwork sent in low resolution instead of vector format.
- Unclear placement notes around seams, center lines, or brim height.
- Forgetting to confirm closure style or label treatment before approval.
- Requesting a major design change after the proof is already built.
Another subtle mistake is assuming the first drop sets every later drop automatically. That is not always true if the style code, fabric lot, or decoration setup changes. A repeat order should always point back to the approved proof, but the buyer still needs to confirm that the current run is being built from the same standard.
Packout deserves the same discipline. If the hats will be boxed, reboxed, or redistributed by a fulfillment center, the packaging plan needs to protect the crown and decoration without crushing the front panel.
Expert Tips and Next Steps After Approval
Once the proof is approved, lock it into a repeatable spec sheet. Include the hat style, decoration method, logo size, color references, and any placement notes that were confirmed during review. If the brand plans a second, third, or tenth subscription drop, this document becomes the fastest way to keep the next order aligned with the first.
A few habits pay off quickly:
- Keep one final PDF of the approved proof in the order file.
- Record the exact comments that were resolved before approval.
- Note turnaround assumptions so shipping and warehouse teams are not guessing.
- Track revision count to see whether the brief is getting tighter or looser over time.
- Match future runs to the same approved setup unless the brand intentionally changes it.
That last point matters because repeated programs drift more often than they should. One person trims the logo width, another changes the font weight, and someone else adjusts the patch border to fit a different file format. A fixed proof record stops that slow drift.
It also helps to think in production windows instead of only proof windows. A clean approval should leave enough room for blank receiving, decoration, inspection, and outbound packaging. That rhythm keeps a subscription drop predictable.
The practical takeaway is simple: treat the approval as the start of a controlled build, not the end of an artwork conversation. Once the proof is signed, use it as the source of truth for reorders, inserts, and quality checks.
Frequently Asked Questions
What should a subscription unstructured dad hats digital proof checklist include?
It should cover logo size, front panel placement, centering, hat color, closure style, label or patch details, revision notes, and the final approved production file. If the order will repeat, include the approved reference so later drops can match the same setup.
How many proof rounds are normal for unstructured dad hats?
One round is common when the artwork is clean and the brief is specific. Two rounds are normal if the logo needs a size adjustment or a color refinement. More than two usually means the original notes were too loose or too many people are changing direction midstream.
What affects pricing for subscription-style dad hat orders?
Blank quality, decoration method, artwork complexity, quantity per drop, and any special packaging or label upgrades all affect the number. Smaller recurring runs usually cost more per unit than larger runs because setup is spread across fewer hats.
How long does digital proof approval usually take?
Simple approvals can happen quickly if the buyer already has brand assets and one clear decision-maker. Delays usually come from missing artwork, unclear comments, or waiting on internal signoff from multiple departments. A tighter approval process keeps the timeline more predictable.
What files should I send to avoid proof delays?
Send a vector logo file, brand color references, hat style details, and a short note on decoration location and must-keep details. If you have an earlier approved proof or production sample, include that too. It gives the production team a much cleaner starting point.


