The first surprise for many buyers is that a trade show Logo Patch Beanies sample checklist fails most often because of fit, stretch, and patch placement, not because the artwork is wrong. On screen, a patch can look centered and sharp; on a real head under booth lighting, it can sit too high, pull sideways, or lose contrast faster than anyone expected.
That is why the sample matters. For a trade show order, the sample is supposed to prove logo visibility, patch durability, color accuracy, hand feel, and the way the beanie sits after a long day of wear. If those points are not checked in a disciplined way, a polished giveaway can turn into a box of near-matches.
From a packaging buyer's point of view, the checklist is less about paperwork and more about preventing expensive assumptions. It keeps the conversation focused on measurable specs instead of vague approval language like “looks good to me” or “close enough.”
Trade Show Logo Patch Beanies Sample Checklist Basics
A sample should answer a simple question: does this beanie work in the real world? That means the buyer is not just approving color; they are checking how the cuffed beanie or slouch style looks when worn, whether the embroidered patch or woven patch stays readable at arm's length, and whether the knit still stretches comfortably around the head without distorting the decoration. A flat product photo cannot prove any of that.
In practice, most sample failures come from the relationship between the patch and the knit structure. A tight rib knit can make a patch feel more secure, while a softer or looser knit may let the decoration tilt or bow. The checklist should capture the exact beanie style, yarn weight, cuff height, backing type, and patch placement before anyone calls the sample approved. That way, the sample conversation stays rooted in numbers and placement marks rather than memory.
For buyers juggling brand standards, event deadlines, and multiple approvers, the best checklist is the one that answers five things quickly:
- Fit - Does it stay comfortable after wear?
- Visibility - Is the logo readable from across a booth aisle?
- Placement - Is the patch centered against real seam lines and cuff edges?
- Finish - Do the edges, backing, and stitching look clean?
- Repeatability - Can the supplier make 300 or 3,000 units match this sample?
"If the patch looks right on a table but shifts on a head, the sample is not approved yet."
That is the mindset that saves time later. A sample checklist is not there to make approval harder; it is there to make final approval safer before bulk production starts.
How the Sample Approval Flow Works
The normal flow starts with artwork, then moves into patch size, patch shape, and placement confirmation. After that, the supplier builds the first decorated beanie sample, and the buyer reviews it against the spec sheet. For a trade show order, that review should include crown height, cuff width, patch alignment, thread density, and whether the logo still reads clearly when viewed from several feet away.
There is a real difference between a mockup and a physical sample. A digital rendering is useful for direction, but only the actual beanie shows stretch behavior, texture, thread sheen, and how the patch edge interacts with the knit curve. A buyer may approve a screen image and then change course the moment the sample is handled, because the tactile feel tells a different story than the mockup did.
The cleanest approval loop is simple: review, mark revisions, confirm changes in writing, then route one final signoff through one person. That person may be in marketing, procurement, or events, but there should only be one final approver. Otherwise, the sample can drift between teams while everyone waits for someone else to own the decision. If the order includes transit to a show site or to multiple offices, carton durability matters too; ISTA publishes useful test methods for understanding how packages handle drops, vibration, and handling during shipping.
Here is the practical workflow I recommend:
- Confirm artwork and file format.
- Lock patch size, shape, and placement measurements.
- Approve the first physical sample, not just a rendering.
- Record changes in writing with clear revision limits.
- Issue final signoff only after physical inspection.
That sequence keeps the project calm and predictable, which is exactly what you want before a trade show deadline starts pressing. It also prevents the most common failure mode: a sample that gets approved in theory, then challenged after the production order is already moving.
Patch Materials, Knit Structure, and Fit Factors
Patch selection changes the entire feel of the beanie. A woven patch usually gives the sharpest fine detail with a low-profile look, while an embroidered patch adds texture and a more traditional merchandise feel. Leatherette brings a cleaner, more premium surface, and PVC-style patches can create a bold, dimensional look, though they are not always the best choice if the buyer wants a softer hand feel or a quieter brand presentation.
| Patch style | Visual effect | Typical unit impact | Best fit for |
|---|---|---|---|
| Woven | Fine detail, smooth surface | About $0.18-$0.35 per unit | Small text and crisp logos |
| Embroidered | Raised texture, classic merch look | About $0.22-$0.48 per unit | Simple marks and stronger tactile feel |
| Leatherette | Clean, modern, polished appearance | About $0.30-$0.60 per unit | Premium trade show giveaways |
| PVC-style | Bold, dimensional, highly visible | About $0.35-$0.75 per unit | Strong contrast and harder-edged graphics |
The knit structure matters just as much. A rib knit with good recovery can hold the patch zone better than a softer, looser knit, and a cuffed beanie gives you a more controlled visual field for logo placement. An uncuffed style may look more relaxed, but it gives the decorator less room to work with when the buyer wants the patch centered and balanced. Yarn thickness also matters; a heavier yarn can feel warmer and more durable, but it may create a bulkier patch area that changes the silhouette.
Material detail also affects the sample verdict. Acrylic is common because it is cost-efficient and accepts dye well, but acrylic blends with polyester can change softness, sheen, and wash behavior. Wool content adds warmth and structure, though it can also raise the price and narrow the comfort range for users who are sensitive to itchiness. For indoor trade show wear, that tradeoff is worth considering. The beanie does not need to survive a blizzard; it needs to stay comfortable on a convention floor and still look tidy in photos.
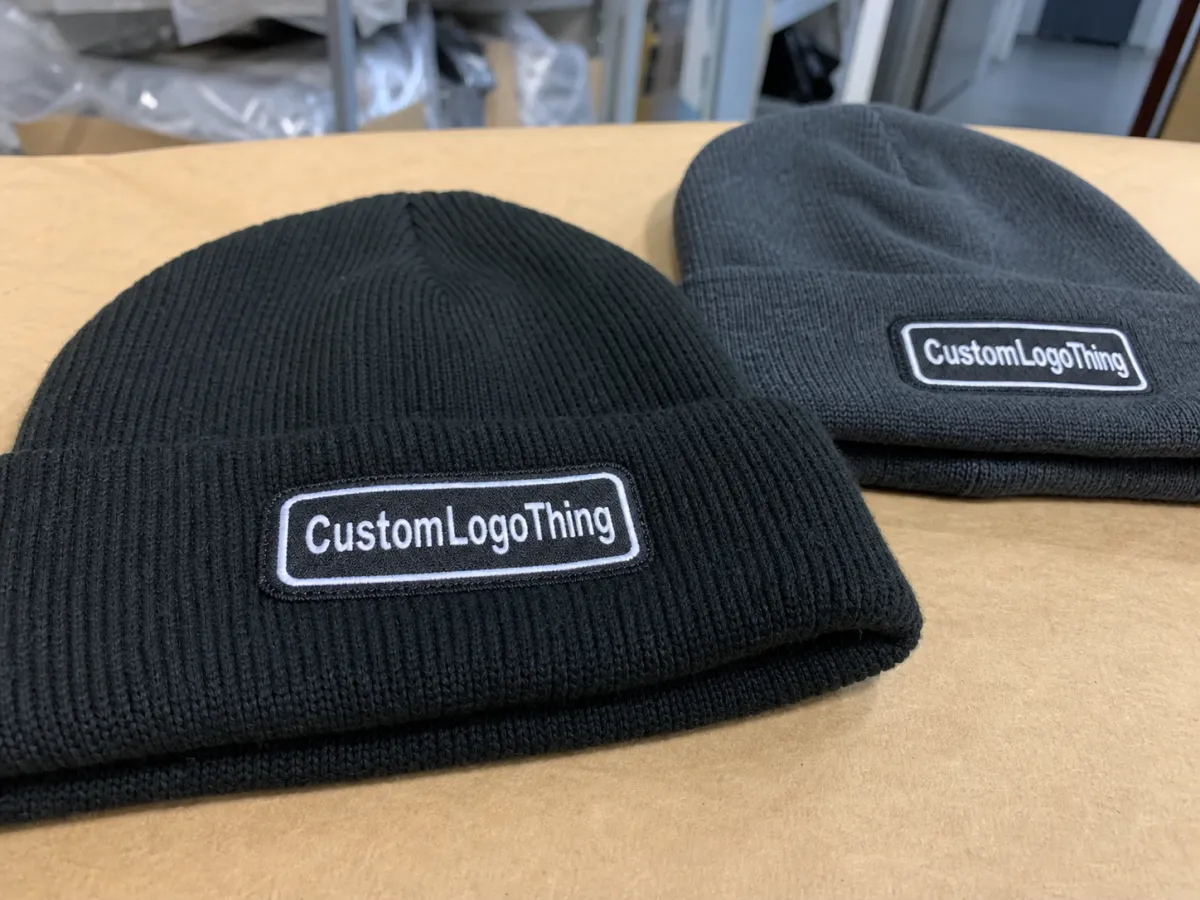
Color contrast is a major trade show issue. Booth lighting is not gentle, and people are usually moving fast, so a low-contrast logo can disappear in a second. High contrast between patch and beanie body usually wins. Dark navy with a pale patch, or charcoal with a white or silver mark, often photographs better than subtle tone-on-tone combinations. That does not mean subtle branding never works, but it should be a deliberate choice, not an accident.
Buyers also underestimate tactile comfort on promotional headwear. A patch that feels stiff or bulky may still look good in a photo, but after hours on the show floor it can bother the wearer enough to get stuffed into a bag instead of worn. That is why fit and feel belong on the checklist right next to logo placement.
If your order includes paper belly bands, insert cards, or hang tags, FSC is a familiar reference point for responsibly sourced paper materials. It is not the only thing that matters, but it is a useful benchmark when the beanies are part of a larger branded kit.
A final practical point: ask whether the patch backing is sewn, heat-applied, or reinforced with both. For a knit beanie, a sewn edge usually ages better, especially if the item will be worn, stuffed into bags, and worn again. Heat-applied layers can work, but only if the supplier has tested adhesion on the specific knit and has accounted for stretch.
Pricing Drivers, MOQ, and Unit Cost Signals
Pricing for custom beanies is driven by a handful of repeatable variables: patch complexity, number of colors, blank beanie fiber content, decoration method, and whether the order needs special packaging or private labeling. If a buyer wants a woven patch with multiple thread colors, sewn onto a higher-end acrylic-blend beanie, the cost profile will look different from a simple one-color embroidered patch on a standard blank.
MOQ matters because setup costs have to be spread somewhere. On smaller runs, especially trade show quantities, the per-unit price often climbs because the supplier is still paying for digitizing, patch creation, machine time, and sample handling across fewer pieces. In many programs, the practical MOQ range lands somewhere around 100-300 pieces per color or style, though some factories can go lower if the buyer accepts a higher setup burden.
A useful quote should show exactly what is included and what is not. I would want to see sample fees, decoration charges, blank cost, freight, rush fees, and any revision or rework assumptions. If that information is missing, the buyer is guessing at the final landed cost, and landed cost is what matters when you are ordering for an event.
Here are the most common price signals buyers should watch:
- Low blank price with high decoration cost - the patch work may be doing all the heavy lifting.
- Small MOQ with a low unit price - confirm whether setup, sample, or freight is being added later.
- Rush timing - compressed schedules can add 10% to 25% depending on the supplier and the season.
- Packaging upgrades - polybagging, inserts, and custom tags can add a few cents to well over a dollar per unit.
The phrase trade show Logo Patch Beanies sample checklist belongs in this conversation because a good checklist protects the budget as much as it protects the artwork. If the sample is approved with clear specs, the production quote stays cleaner, and the buyer has fewer surprises once the line starts moving.
One more practical point: trade show buyers often compare a beanie program to other branded apparel, but headwear behaves differently. The decoration is smaller, the placement is more sensitive, and the sample process leaves less room for vague language. That usually makes the checklist more valuable, not less.
Watch for price gaps that make no physical sense. If one quote is far below the others, it usually means something has been left out: stronger yarn, a sewn patch border, packaging, domestic freight, or the sample itself. Headwear pricing is rarely mysterious; it is just compressed. The short quote can look attractive until the buyer has to add every missing line back in.
Sample Process, Timeline, and Turnaround Windows
A realistic sample timeline starts with spec review, then moves to sample build, ship date, buyer inspection, revision request if needed, and final production authorization. Turnaround is shaped by artwork readiness, material availability, production queue, decoration method, and shipping distance. A simple sample can move quickly, but a patch with multiple colors, a special backing, or a custom knit body will naturally take longer.
The buyer side needs review time too. Internal approvals often take as long as the sample itself, especially when marketing wants to protect brand standards, procurement wants to confirm pricing, and the event team wants to check whether the beanie still looks right in booth photos. That is normal. What creates trouble is waiting until the sample arrives before anyone inside the company has time on the calendar to review it.
The safest way to protect a trade show date is to work backward from the event, then add a buffer for one revision cycle and one contingency shipment. If the event is fixed, the schedule should not be built around the fastest possible sample; it should be built around the slowest likely approval path. That gives the team room for one measurement correction or one color adjustment without turning the whole order into a rush job.
Typical timing often looks like this:
- Spec confirmation - 1-2 business days if the art files are ready.
- Sample build - about 5-10 business days for a straightforward patch beanie.
- Buyer review - 2-5 business days, depending on how many people weigh in.
- Revision cycle - another 3-7 business days if changes are needed.
- Final production - often 12-20 business days after approval, depending on quantity.
Those are planning ranges, not promises. Still, they are useful because they force the buyer to treat sample approval as a calendar milestone, not a casual checkpoint.
Shipping deserves its own margin. A sample can be perfect and still arrive too late if it is sent with the wrong service level or addressed to a person who is out of office. For trade show programs, I prefer to see a named backup receiver, a direct phone number, and a label that includes the project code. Small things, but they save real time when a package lands during a busy week.
Common Mistakes That Create Rework
The easiest mistake is approving from screenshots alone. A rendering will not show thread sheen, knit tension, or how a patch edge behaves on a curved crown. That is why physical review should be part of any serious checklist. Screen images help with direction, but they cannot carry the full approval load.
Vague placement instructions are another repeat offender. If the buyer says the logo should be “centered” without giving seam-to-center measurements, the supplier has to interpret the request. That is where near-misses happen. On a real beanie, the patch should be located against known landmarks: the front seam, cuff edge, or center point measured in millimeters or fractions of an inch. The more exact the placement note, the fewer arguments later.
Skipping wear testing also causes trouble. A beanie that looks balanced flat on a table may shift, sag, or wrinkle once it is worn. Have someone put it on, pull the cuff, and look in a mirror or take a photo. If the logo tilts off axis when the beanie is stretched, that is not a minor issue; it is a sign the patch size or location needs review.
Another frequent problem is leaving revision rules unwritten. Buyers should document:
- Color references with Pantone or acceptable visual match guidance.
- Revision limits so the team knows when the sample has gone too far from the original spec.
- Placement tolerance measured from a seam, cuff, or center line.
- Packaging requirements if the beanies must arrive tagged, bagged, or kit-packed.
If those items are not written down, production has to guess what “close enough” means. Guesswork is expensive.
Another avoidable mistake is treating logo scale as a design choice instead of a production constraint. A patch that is too small may look elegant in a proof and disappear in the real world. One that is too large may overpower the beanie body, catch on seams, or collapse awkwardly when the cuff is folded. The best size is the one that preserves readability and sits comfortably within the knit geometry.
Expert Tips and Next Steps Before Production
Before production begins, I like to see a one-page signoff sheet that captures patch size, placement, color references, blank style, packaging details, and the exact approval date. That single page becomes the shared memory for the job. When someone asks later why the logo was placed a certain way, the answer is already documented.
If the order is for a trade show, ask for one extra sample photo set or a second physical sample if the budget allows. That extra set can be used to test how the beanie reads under booth lighting, in phone photos, and at the distance people actually see it on a show floor. It is a small step, but it helps marketing and events teams agree on what the finished piece should look like before bulk production starts.
Also match the sample to the real use case. An indoor expo, a cold-weather outdoor event, and a standard employee handout are not the same job. A heavier knit may feel ideal for an outdoor winter show, while a lighter cuffed style may be better for a crowded convention center where people will wear the beanie for a short promotional window. Material choice, fit, and patch style should follow use, not habit.
Here is the cleanest sequence before you release the order:
- Confirm the art file and final logo version.
- Lock the spec sheet with exact measurements.
- Review the quote line by line.
- Inspect the physical sample in real light.
- Approve only after the final wear test and signoff.
If you keep the checklist attached to the final order, the production team has a clear target, the buyer has a paper trail, and the first bulk run has a much better chance of matching the sample without last-minute churn. That is the real value here: fewer surprises, fewer relaunches, fewer awkward boxes at the end of a tight event calendar.
One final practical habit helps more than most people expect. Ask for a retained sample or at least a photo record of the approved piece with measurements visible. When the order reaches reorder stage six months later, the old memory will be fuzzy. The retained sample will not be.
Frequently Asked Questions
What should a trade show logo patch beanies sample checklist include?
It should include patch size, exact placement, logo orientation, color references, blank beanie style, and approval criteria written in plain language. It should also note packaging, labeling, and delivery timing so the sample reflects the final trade show plan, not just the decoration work.
How many revisions are normal for a logo patch beanie sample?
One revision is common when the first sample is close but needs placement or color refinement. More than two revisions usually means the spec was too vague at the start, or the decoration plan needs to be simplified before bulk production begins.
What affects the cost of trade show logo patch beanies the most?
The biggest cost drivers are patch complexity, blank beanie quality, order quantity, and any rush or special finishing charges. Freight, revisions, and packaging upgrades can add more than buyers expect if they are not included in the initial quote.
How long does a sample usually take to turn around?
Turnaround depends on artwork readiness, patch method, and the production queue, so a simple sample can move faster than a detailed one. Buyers should also budget time for internal review and one possible revision cycle before giving final approval.
Can I approve the beanie sample from photos only?
Photos help with early review, but they do not replace a physical sample because stretch, texture, and logo feel can look different in person. If photos are the only option, ask for close-ups, measurement photos, and a short wear test video before signing off.
What is the safest way to avoid patch placement errors?
Use a written measurement from a fixed point such as the center seam or cuff edge, then confirm it on the physical sample while the beanie is being worn. Flat-table approval misses the stretch factor, which is where most placement errors show up.


