A cap can look excellent in a flat lay and still fail once it spends six hours under convention-center lights, gets stuffed into a tote, and is worn by someone who is moving between meetings, demos, and a coffee line. That gap between appearance and use is exactly why a trade show running caps sample checklist belongs early in the buying process. The sample is not decoration. It is a test of fit, branding clarity, and whether the piece can survive real event wear without becoming a problem by lunchtime.
Trade show teams treat running caps as moving signage, which sounds simple until the spec sheet starts pulling in different directions. Marketing wants the logo bigger. Events wants the fit more forgiving. Procurement wants the unit price lower. None of those priorities are wrong, but they do need to be measured against the same sample. A disciplined checklist keeps the conversation from drifting into opinion and back again.
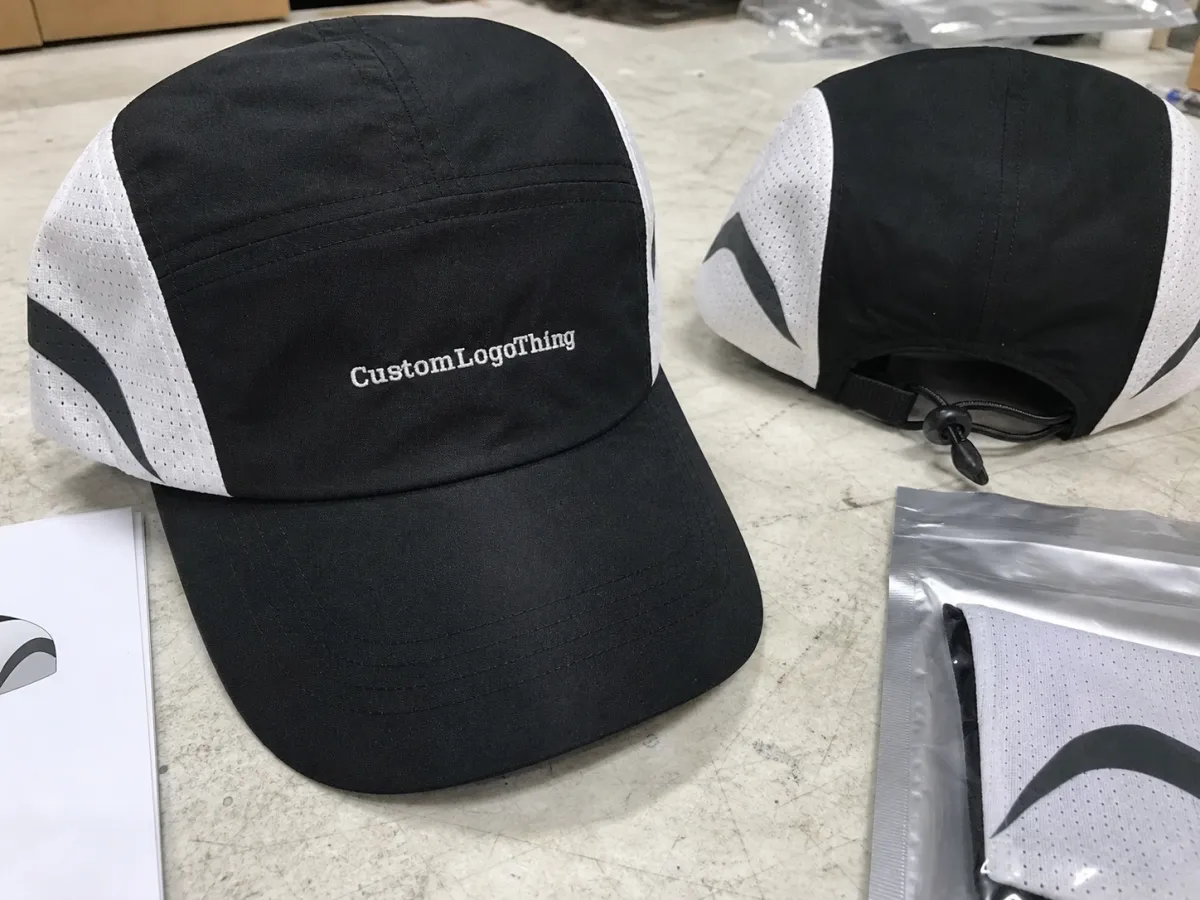
A sample that only works under office lighting is not ready for booth duty.
What a trade show running caps sample checklist covers
A useful checklist does more than say yes or no. It separates the review into stages so people do not confuse a blank sample with a decorated one, or a decorated sample with the final production run. Those are different checkpoints. They answer different questions.
The visual sample shows the body of the cap: the crown height, panel structure, closure, brim shape, and the overall hand feel of the fabric. The decorated pre-production sample shows the logo on the actual cap body, which is where placement, stitch density, patch edge quality, and color matching either hold together or fall apart. The production sample, or first-off sample, confirms that the approved version can be repeated in bulk without quiet changes sneaking in.
| Sample type | What it proves | Typical cost | Best use |
|---|---|---|---|
| Visual sample | Shape, panel structure, closure, fabric hand feel | $20-$45 | Early fit and style review |
| Decorated pre-production sample | Logo placement, stitch density, color match, patch finish | $45-$120 | Final approval before bulk order |
| Production sample or pilot run | Repeatability across the first batch, packing, carton count | Unit price, often $2.10-$6.50 depending on spec | Event quantities and repeat orders |
Those numbers move around for a reason. A one-piece sample carries setup work, digitizing, material waste, and hand finishing that disappear once the order is scaled. If a sample costs more than expected, the quote may still be normal. The real question is what is included: artwork prep, revision photos, sewn labels, packing, or a second round of corrections. That detail matters more than a headline price.
For buyers comparing vendors, the checklist should also capture MOQ, color limitations, packing format, and whether the sample charge is credited back on the bulk order. A cap that looks inexpensive on paper can become costly if the decoration needs rework, the color range is too narrow, or the carton spec changes late in the process.
How the sample review process keeps specs aligned
The clearest sample review starts with one spec sheet and ends with one approved version. That sounds tidy, but in real buying cycles the feedback often arrives in pieces. One person likes the fit. Another comments on the logo. A third notices the closure. Each comment may be valid, yet if the team is looking at different versions of the sample, the project starts to drift.
Drift is subtle. The crown gets a little taller. The brim curve changes. The back closure shifts from a stretch fit to a buckle. No single change looks dramatic, but the cap gradually stops matching the brief. A good checklist forces each change into view before the order is released.
- Pass if the sample matches the brief closely enough to move to production.
- Revise if the issue is specific and fixable, with written notes and photos.
- Reject if the cap misses fit, decoration, or material expectations by too much.
That structure helps buyers write better comments. “Make the logo larger” is less useful than “raise the front logo by 8 mm and widen it by 3 mm.” “Feels cheap” is less helpful than “the sweatband scratches after 15 minutes and the front panel collapses when the brim is bent.” A factory can act on measurements. It cannot do much with a mood.
Conditions during review matter too. Fabric shade changes under warm indoor light, daylight, and warehouse LEDs. Thread sheen changes even more. If the team checks a cap in a conference room, then again near a window, and then again in a photo on a phone, the result can look inconsistent even when the sample has not changed at all. Keep the review environment steady and the judgment gets cleaner.
One habit saves a lot of confusion: photograph the sample next to a ruler and the approved artwork callout. It sounds basic, but it removes guesswork later if a final carton arrives with a logo that is a few millimeters off. The memory of the room will fade. The measurement will not.
Fit, fabric, and decoration details that matter most
The construction details tell you more than the sales sheet does. Start with the crown. A structured crown holds its shape and creates a cleaner front panel for branding. An unstructured crown feels softer and sits lower on the head, which may be better for a casual brand look or for staff who dislike rigid front panels. Five-panel caps usually offer a flatter, more open front for decoration. Six-panel caps tend to look more traditional and can feel sturdier across the seams.
Then check the closure. Hook-and-loop is fast and simple, but not always the most premium-feeling option. Plastic snaps are common and dependable. Metal buckles feel more finished, though they add a little weight and can cost more. Stretch-fit caps are comfortable for long event shifts, but they reduce adjustment range, so they work best when the team has similar head sizes or when comfort matters more than fine-tuned fit control.
Fabric choice matters just as much as shape. Polyester and nylon blends dry faster and handle sweat better than standard cotton twill, which makes them practical for crowded halls and outdoor queue areas. Mesh side or back panels improve airflow. Laser-perforated panels are a useful middle ground when the brand wants a cleaner exterior than mesh can provide. Moisture-wicking sweatbands are worth asking for if the cap will be worn by booth staff for full days rather than short promotional drops.
Decoration is where many approvals succeed or fail. Embroidery can look crisp, but only if stitch density and fabric weight are balanced correctly. Too many stitches on a light fabric can cause puckering. Too few and the mark looks thin. Woven patches give sharper edges and can be easier to read on curved panels. Printed transfers work for smaller runs, but they need close inspection for edge lift, gloss, and how they sit over seams. A logo that looks balanced in an art file can feel cramped once it is wrapped over a curved front panel.
- Measure logo placement from seam to centerline instead of estimating by eye.
- Check stitch tension so the front panel does not pucker around the mark.
- Review color under daylight and indoor light before locking the approval.
- Wear the cap briefly to test sweatband feel, ear clearance, and closure stability.
Color matching deserves a direct review because it causes more avoidable frustration than most buyers expect. Pantone references help, but thread, fabric, and patch materials do not all behave like printed paper. A navy cap can look almost black under warm bulbs. A reflective accent can appear louder in person than on screen. If the brand is sensitive to color, request a decorated sample in the same type of light the booth team will actually work under.
Watch the cap from a distance too. Trade show apparel has to read in motion. A logo that disappears at ten feet is weak branding, even if the cap itself is well made. That is especially true for event teams that move across a floor or stand in a queue where people only catch a glance.
Material specs also affect comfort in ways buyers sometimes underestimate. A slightly heavier fabric can feel more durable, but on a warm show floor it may hold heat. A very thin fabric can ventilate well, yet it may also lose shape after a few wears. The sweet spot is usually somewhere in the middle: enough body to hold the logo cleanly, enough breathability to keep the cap wearable through a full shift.
Cost, pricing, and MOQ checkpoints before approval
Price is rarely just price. It is a stack of choices: panel count, fabric grade, decoration method, label style, packing format, and order size. A basic cap with a small embroidered mark may sit at the low end. A fully custom running cap with perforated panels, woven labels, custom trim, and multiple decoration positions climbs quickly.
Sample pricing often surprises buyers because the sample can cost more per unit than the bulk order. That is normal. Setup time, digitizing, handwork, and wasted material are spread across one piece instead of hundreds. If the sample quote feels high, ask what is included. Sometimes the cost covers art setup and one round of revisions. Sometimes it does not. Sometimes the quote is cheap because the factory is planning to recover the margin later with add-ons.
MOQ shapes the math too. Many custom cap programs land around 100-300 pieces per color or style, though that number moves with material availability, logo complexity, and color count. A single-color program is easier to manage than three colorways with two decoration methods. Ask for a line-item quote if the project has options. That is the fastest way to see how much embroidery, patch work, labels, and special packing actually add.
For a trade show order, transparency matters more than chasing the lowest sticker price. Saving twenty cents per cap is not a win if the sample is weak, the color is off, or the closure fails after a day of use. Replacement costs, rush freight, and internal reapproval cycles can erase the savings quickly.
A buyer-friendly comparison sheet usually includes:
- Base cap price before decoration
- Decoration cost by method and location
- Sample charge and whether it is credited back
- MOQ by color and by logo version
- Packing cost if polybags, inserts, or size labels are required
That level of detail helps procurement and marketing reach the same conclusion without rewriting the quote in their own language. It also keeps the checklist tied to the purchase decision instead of drifting into abstract taste.
Production steps, lead times, and turnaround planning for events
Event deadlines compress every stage. The path from artwork to cartons runs through digitizing, sample construction, decoration, finishing, packing, and shipment. Each handoff can add a day or three if comments come back late or if the artwork file needs cleanup. A schedule that looks generous on paper can become tight very quickly once revisions start moving.
For a decorated cap sample, a realistic timeline is often 7-15 business days after artwork approval. Fully custom production after sample sign-off often takes 15-25 business days, and that does not include freight. If the order needs special fabric sourcing, reflective trim, custom inner labels, or carton changes, add buffer. Those steps do not always fail loudly. They simply take time, and time is what event calendars run out of first.
There is a real split between stock-based decoration and fully custom construction. Stock-based programs move faster because the cap body already exists. Fully custom builds take longer because the factory may need to source fabric, confirm panel dimensions, and create a new decoration setup. When the event date is fixed, that difference can decide the order.
Lead time planning should work backward from the booth handoff, not forward from the purchase order. Mark the freight cutoff, the internal approval window, and a small buffer for final inspection. If the shipment is going to a convention center, add a day for intake uncertainty. That extra day often looks cautious until a carrier delay makes it look normal.
Two outside standards can matter as well. For ship-ready cartons, ISTA testing helps buyers judge how packaging may survive handling in transit; the protocol overview is available at ISTA. For paper inserts or hang tags, FSC certification can matter if sustainability requirements are part of the brief; the framework is outlined at FSC. Small accessories are often overlooked, but once they are in a booth kit, they become part of the brand experience.
Pre-shipment photos are worth asking for. A short image set showing finished caps, carton labels, and packed counts can catch problems that the approved sample could never predict, such as wrong carton markings, missing size stickers, or a packing mix-up across colorways. Solving those problems before shipment is cheaper than solving them after a truck has left.
Common mistakes that waste sample rounds and budget
The most common mistake is approving from photos alone. Screens distort color, contrast, and texture. A stitch that looks tight on a phone may actually be loose. A fabric that looks clean online may appear dull in person. If the cap is meant for repeated wear or front-of-booth use, ask for a physical sample and review it in hand.
A vague brief is almost as expensive. If the logo size is not specified, someone will guess. If the closure preference is missing, the factory will use a default. If the cap needs to fit a mixed team of staff, then one head size is not enough for review. Small omissions create second samples. Second samples create deadline pressure. Deadline pressure creates poor decisions.
Do not judge style and ignore wearability. That mistake shows up constantly with promotional apparel. A cap can look polished and still pinch after thirty minutes. The review should include a short comfort test: front panel pressure, ear clearance, sweatband feel, and whether the closure stays where it was set after movement.
The most expensive sample is the one approved too quickly.
Another trap is comparing a premium sample against a low-cost target without aligning the spec first. Materials, stitch count, and packing need to match before the review makes sense. Otherwise the conversation becomes unfair to both sides. Buyers who want a clean comparison should ask for the same specification across each quote.
Late feedback can quietly drain the budget. Every day lost in comments can push production closer to the freight cutoff. If several stakeholders need input, send the sample to them together and collect comments in one round. That habit cuts rework more reliably than any spreadsheet trick.
One more practical problem: over-correcting on the first revision. When buyers ask for too many unrelated changes at once, they make it harder to see which adjustment fixed the issue. Limit each revision to the few changes that matter most. If the first revision solves the crown height but introduces a logo shift, the next round should only address that shift. Clarity saves time.
Next steps: lock specs, approve samples, and move to production
Before requesting a revision, gather the artwork, cap spec notes, budget target, and event deadline into one approval packet. That small habit reduces back-and-forth because everyone sees the same inputs. If the sample is close but not perfect, a one-page comparison sheet helps the team review fit, branding, price, and turnaround side by side.
Once the sample is approved, confirm the production order in writing. If several people reviewed different versions along the way, attach the approved photo set and note the exact details: crown type, closure type, fabric, logo size, color references, and packing instructions. Production should not have to guess which version won.
The final check before release is straightforward:
- Approve the sample and archive the photo record.
- Confirm quantity by color and logo version.
- Verify ship date against booth deadlines and freight cutoffs.
- Request pre-shipment photos if the order is tight or high value.
Trade show buyers do not need more drama. They need fewer surprises. A disciplined Trade Show Running Caps sample checklist keeps fit, decoration, pricing, and lead times aligned before production starts. That is what turns a decent-looking promo item into something the team can actually wear through the event without complaints, corrections, or emergency replacements.
What should be on a trade show running cap sample checklist?
Include fit, crown shape, closure range, fabric, decoration method, logo placement, color match, and a short comfort test. Add pricing, MOQ, lead time, and approval status so the checklist covers both product quality and buying logistics.
How do I compare running cap samples from different suppliers?
Use the same scorecard for every vendor so you can compare materials, workmanship, branding accuracy, and cost on equal footing. Review each sample under the same lighting and with the same artwork file to reduce noise in the comparison.
Why is a decorated sample more useful than a blank cap sample?
A decorated sample shows how the logo actually sits on the cap, where scale, placement, and stitch density can make or break approval. It also reveals how the chosen decoration method interacts with seams, curves, and fabric texture.
What price factors change the sample cost for running caps?
Panel count, fabric quality, embroidery complexity, custom labels, and special packing are the main drivers. Sample pricing can be higher than bulk pricing because setup and labor are spread across one unit instead of a full run.
How far in advance should I order trade show cap samples?
Start early enough to allow artwork setup, sample production, internal review, and one revision round if needed. Work backward from freight cutoffs and booth dates so approval happens before production is locked.

