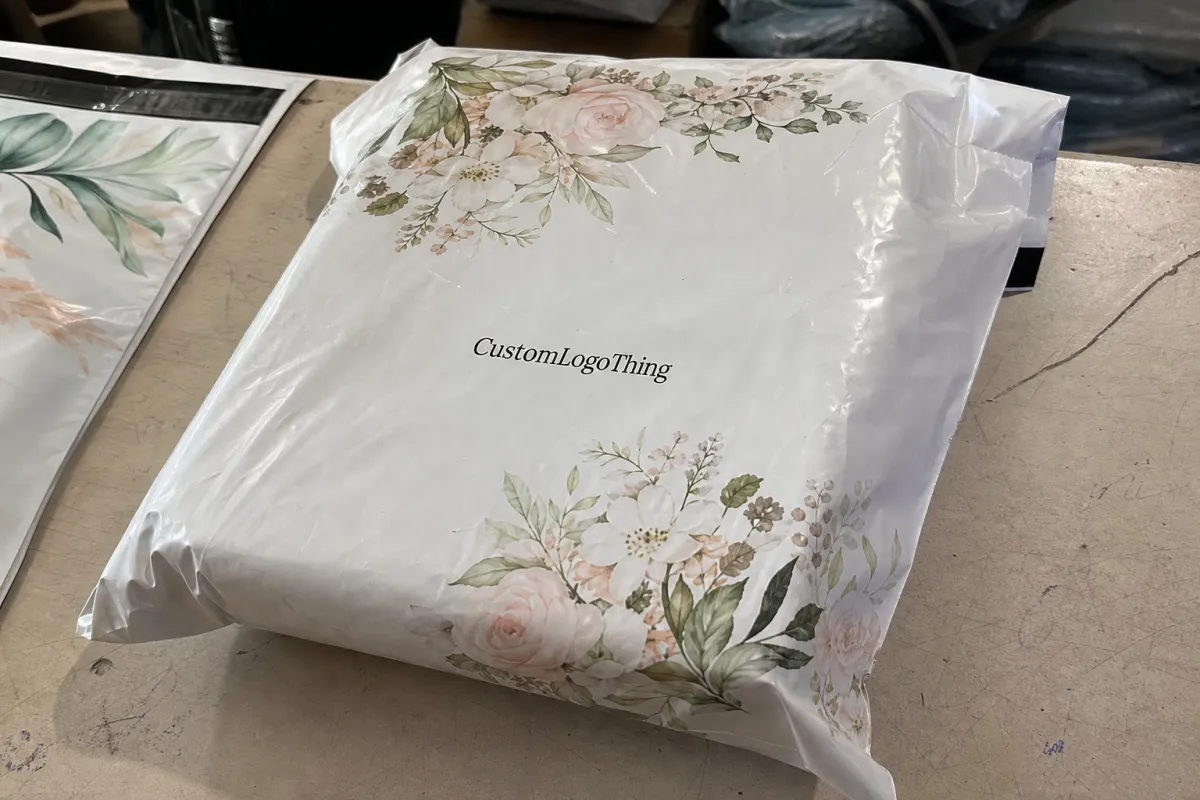
wedding Printed Poly Mailers physical sample checklist is less about paperwork than risk control. A screen proof can confirm layout, but it cannot show how blush ink shifts on white film, whether a monogram sits too close to a seam, or if the adhesive strip still feels secure once the bag is filled. Those are the details that decide whether the mailer feels polished or merely printed.
Wedding packaging is judged visually and in hand. Guests notice sheen, opacity, edge crispness, and how the mailer looks under warm venue lighting, phone flash, or daylight. If the bag holds robes, favors, welcome gifts, or event merchandise, the sample should prove the package works as part of the wedding presentation, not just as shipping material.
For buyers comparing packaging options before approval, the Custom Packaging Products page gives a broader view, and Custom Poly Mailers outlines the size, finish, and print choices that affect the final result.
Why a mailed sample can expose hidden wedding-branding flaws
A digital proof compresses reality. It flattens texture, hides reflective glare, and cannot show how ink sits on flexible film. A mailed sample reveals what happens when color, material, and handling meet in one object. White, ivory, blush, champagne, and black film each shift printed color differently. A pale artwork may look warmer on glossy white stock, while dark film can make light graphics sharper but also expose weak white underprint.
That matters because wedding branding is judged by impression, not by technical notes. Guests rarely comment on ink density. They say the package looked cheaper than the invitation suite or did not match the rest of the event design. If that happens across dozens or hundreds of pieces, the difference shows up in photos and in the overall presentation.
Most problems show up quickly once the sample is handled:
- Artwork distortion near seams when a logo or line art crosses a fold or seal area.
- Closure interference when the adhesive strip is too close to the printed area, especially on smaller sizes such as 10 x 13 in. or 14 x 19 in.
- Scuffing and rub marks that appear after the bag is moved, stacked, or photographed with flash.
- Seal weakness that only becomes obvious once the bag is filled and closed.
If a package looks perfect on a monitor but fails in hand, the monitor was never the approval point.
A physical sample is a production rehearsal, not a courtesy item. It should catch undertone shifts, edge behavior, print registration, and whether the mailer still feels elegant after it is loaded and sealed.
What the wedding printed poly mailers physical sample checklist should verify
Start by defining what the sample must prove. It should match the final order closely enough to evaluate size, material, print, finish, and closure under real conditions. A sample that only looks right on the table is not enough.
A practical checklist begins with the core specifications:
- Dimensions - flat width, overall length, and usable opening.
- Film thickness - commonly 2.5 mil to 3 mil for a sturdier feel and better puncture resistance.
- Print coverage - one-color logo, multi-color artwork, full bleed, or partial coverage.
- Color system - Pantone match, CMYK build, or a supplier-approved closest match.
- Finish - matte, gloss, soft-touch, or another surface treatment.
- Closure style - peel-and-seal, permanent adhesive, or tamper-evident strip.
It also helps to distinguish three sample types, because each answers a different question.
| Sample type | What it proves | What it can miss | Typical cost impact |
|---|---|---|---|
| Digital proof | Layout, copy, and general placement | Sheen, opacity, seam distortion, and feel | Usually low or included |
| Blank stock sample | Size, thickness, closure, and handling | Print sharpness, color drift, and artwork fit | Small fee plus shipping in many cases |
| Fully printed sample | Realistic look, finish, logo placement, and seal behavior | Long-run variation across the full order | Higher, but best for final approval |
Do not approve premium effects from a screenshot alone. Foil, spot gloss, metallic ink, white ink on dark film, and layered typography all behave differently once they are printed on flexible material. Even the font needs a physical check; a script that reads cleanly on screen can become fragile once reduced and printed on a reflective surface.
Transit performance matters too. Standards such as ISTA shipment testing standards are useful for understanding how packaging responds to drops, vibration, and handling. A wedding order may not need lab certification, but the same logic applies: if the sample fails under simple stress, the production run will not improve it.
Material, print, and finish checks that change the final look
Material affects both durability and perceived quality. A thin film can feel light or papery even when the print is correct. A slightly heavier mailer usually lies flatter, resists wrinkles better, and holds ink more consistently. For many wedding uses, that added stiffness is worth the small cost increase because the package feels more intentional in hand.
Opacity matters as much as thickness. If the film is too translucent, the contents can change the apparent color once the bag is filled. That can happen with pale robes, dark accessories, or stacked inserts. A design that looks balanced when empty may read uneven once the contents influence the background tone.
Print quality should be checked closely. Look at edge sharpness, fine text, solid fills, and the spacing between letters. Borders that seem fine on a PDF can break apart if registration is slightly off. Tiny text below 6 pt is risky unless the artwork is exceptionally clean and the print process is stable. Large color blocks also need inspection because banding and patchiness often show up there first.
Finish changes the tone of the package. Matte usually photographs well under mixed lighting and feels softer in hand. Gloss can look richer, especially on dark artwork, but it shows fingerprints and hairline scuffs more easily. If the mailers will be stacked, handled often, or displayed on a welcome table, test the sample under daylight, warm indoor light, and phone flash. Those three conditions catch most finish issues quickly.
Do not judge the design only while the bag is empty. A centered logo can drift visually after the mailer is filled. A layout that feels spacious on a flat sample may become crowded once it is sealed and handed to a guest. The checklist should always include a filled-bag test.
Sustainability claims also need precision. If an order includes paper inserts, ask for FSC documentation instead of assuming certification. If the supplier says the package contains recycled content or recyclable components, request written confirmation of exactly what that claim covers.
Sample review process and turnaround timeline
The most reliable workflow is simple: request a quote, upload artwork, review the proof, produce the sample, inspect it, then approve or revise before the full run starts. Problems usually happen when one of those steps is compressed too much. A buyer approves the layout before checking seam placement, or a team signs off on color from a laptop photo and later sees that the print is warmer than expected.
Timing matters because the sample is not instant. A clear quote and proof review may take 1-3 business days when artwork is complete and specifications are already defined. Sample production commonly takes 5-10 business days, depending on print complexity and queue length. Shipping adds another variable, especially if the destination changes or the sample needs to be rerouted to a planner, stationer, or venue contact.
Rush service can help, but it narrows the margin for error. Faster sampling may mean fewer proof rounds, higher freight charges, or less time to compare the sample with invitation paper, ribbons, and decor. For wedding packaging, a modest buffer is usually the safer choice.
Inspect the sample the same day it arrives. Transit can introduce dents, creases, or surface rub marks, and those should be separated from manufacturing defects before anyone approves the item. Open it, seal it, photograph it, and test it with the intended contents. A sample that sits in a mailroom for several days loses part of its value because the team forgets what it was supposed to answer.
If several packaging pieces are being ordered together, review them as one system. The Custom Packaging Products catalog is useful for comparing the mailer against inserts, tissue, and related branded pieces before the approval window closes.
Cost, pricing, MOQ, and quote factors for sample orders
Sample pricing depends on how much setup work the order requires. A plain stock sample is usually inexpensive, while a custom printed prototype with multiple colors, specialty finish, or a nonstandard size costs more because the supplier has to stage materials, plates, and press time around the order. In some cases, the sample fee is credited back on the bulk purchase. In others, it is separate, and that should be confirmed before approval.
Production unit cost changes sharply with volume and decoration complexity. A small wedding run tends to cost more per piece because setup and proofing are spread across fewer units. A larger run usually lowers the per-unit price. As a planning range, custom Printed Poly Mailers often fall around $0.15-$0.40 per unit at 5,000 pieces, depending on size, color count, print method, and finish. Smaller runs can sit above that range; high-volume repeat orders can come in below it.
MOQ matters more than many buyers expect. Custom sizes, full-coverage artwork, and specialty finishes usually raise minimums compared with a simple one-color stock-size mailer. If the project is for a boutique wedding brand or a one-time event, ask whether a pilot quantity, shared setup, or limited test run is possible before the larger order is released. That can reduce waste if the design still needs refinement.
When comparing quotes, ask for these details in writing:
- Sample fee and whether it is credited back
- Shipping cost and transit method
- Setup charges, plates, or prepress fees
- Revision or reproof fees
- Rush charges for both sample and production
- MOQ by size, color count, and finish
If the quote blurs sample cost into production cost, or if the seller cannot explain what changes the price, the quote is incomplete. A clear supplier can separate sample pricing from bulk pricing and explain which choices create the largest cost jump.
Common mistakes that make sample approval misleading
The most common mistake is approving from a screen photo. The second is reviewing the sample under only one light source. Wedding packaging is sensitive to color shift, and a package that looks right under a desk lamp may look different in daylight or under warm venue lighting. If the sample only works in one environment, it is not fully approved.
Seam placement is another trouble spot. A design can feel centered on a proof, then reveal that the seam cuts through a monogram or icon once the bag is folded. Closure alignment can cause the same issue if the adhesive strip crowds the artwork or interrupts the design.
Fit testing is non-negotiable. Put the actual garment, favor, insert, or gift inside the sample, then close it. Pick it up. Rotate it. Hold it against the finished contents. A mailer that looks generous with air inside may be too tight once the real item is packed. Overfilling can distort the print, strain the adhesive edge, or create a lumpy look that photographs poorly.
Color drift can also be subtle. Artwork may appear accurate on its own, then feel disconnected when placed next to ribbons, tissue, wax seals, or the invitation suite. The sample should be compared with the full wedding palette, not just the logo file.
One more assumption to avoid: a good sample does not guarantee identical results across every unit in a long production run. Flexible film always has some variation. The sample is a benchmark, not a promise of zero drift.
Expert next steps after the sample arrives
Compare the sample with the invitation suite, mood board, and venue decor in the same lighting you expect at the event. That comparison catches mismatches that look tiny in isolation but obvious in context. A soft palette can be thrown off by an overly glossy finish or a print tone that reads too cool.
Then run a practical stress check. Fill the bag with the real item, seal it, and handle it the way it will be handled during packing and delivery. If the mailer will travel, a basic drop-and-rattle test is useful. If a more formal benchmark is needed, the logic behind ISTA shipment testing standards gives a reliable framework for judging how packaging responds to movement and shock. The point is not certification for its own sake. The point is learning how the package behaves before hundreds of units are made.
Document the result in one place. A single approval sheet is easier to manage than an email chain with scattered opinions. Mark the sample as revise, reproof, or approve, then record the specific reasons. If the sample passes, keep one labeled reference copy so the production team has a physical standard to compare against later.
If the order includes paper pieces such as enclosure cards, inserts, or tissue, confirm the specs separately and ask for FSC documentation where relevant. The package should be consistent across materials, not just across the outer mailer.
Once the sample is approved, freeze the version. Avoid casual changes to size, artwork, finish, or color after sign-off. Small edits at that stage often create new proof rounds, new charges, and avoidable delays.
How do I compare a wedding poly mailer sample to the digital proof?
Review both under the same lighting, then compare color, contrast, seam placement, and gloss. If the sample looks softer, darker, or less centered than the proof, treat it as a revision signal before production starts.
What measurements should I confirm on a physical sample before ordering?
Measure flat width, usable opening, overall length, and any depth or gusset. Then test the sample with the actual favor or garment so the fit is based on real contents, not guesswork.
How long does the sample and approval process usually take?
A typical timeline is 1-3 business days for quote and proof review, 5-10 business days for sample production, and additional transit time after that. Add more time if reproofing or a second sample is needed.
What affects the price of custom wedding mailer samples?
Price depends on size, print method, number of colors, finish, and setup work. Smaller orders usually carry a higher per-piece cost because the fixed production steps are spread across fewer bags.
What should I do if the sample is close but not perfect?
Separate cosmetic issues from functional ones. Fix fit and seal problems first, send one clear revision list with marked-up photos, and request a reproof if needed. If the issue is visible, do not assume it will disappear in bulk.
The point of the wedding Printed Poly Mailers Physical Sample checklist is simple: catch the expensive mistake while it is still one bag, not one full order.


