A digital proof can flatter almost anything. A physical bag is less polite. It has seams, drag, memory, and a tendency to expose small mistakes the second someone folds it, packs it, or drops it on a conveyor. That is why the candle Printed Poly Mailers physical sample checklist matters: it turns artwork approval into a real packaging decision, one based on fit, film strength, print behavior, and shipping reality.
Candle packaging is harder than it looks from a spreadsheet. Glass jars add weight, tins dent at the edges, and wax melt sets often include inserts, tissue, or cards that eat into usable space. Even a clean-looking mailer can fail the moment a buyer adds the real product stack. The sample is where those gaps show up before production money is committed.
Used well, the candle Printed Poly Mailers physical sample checklist keeps everyone honest. It replaces vague feedback with measurable observations: how much room is left, where the seam lands, whether the closure feels secure, and whether the print still looks premium after handling.
Candle Printed Poly Mailers Physical Sample Checklist Basics
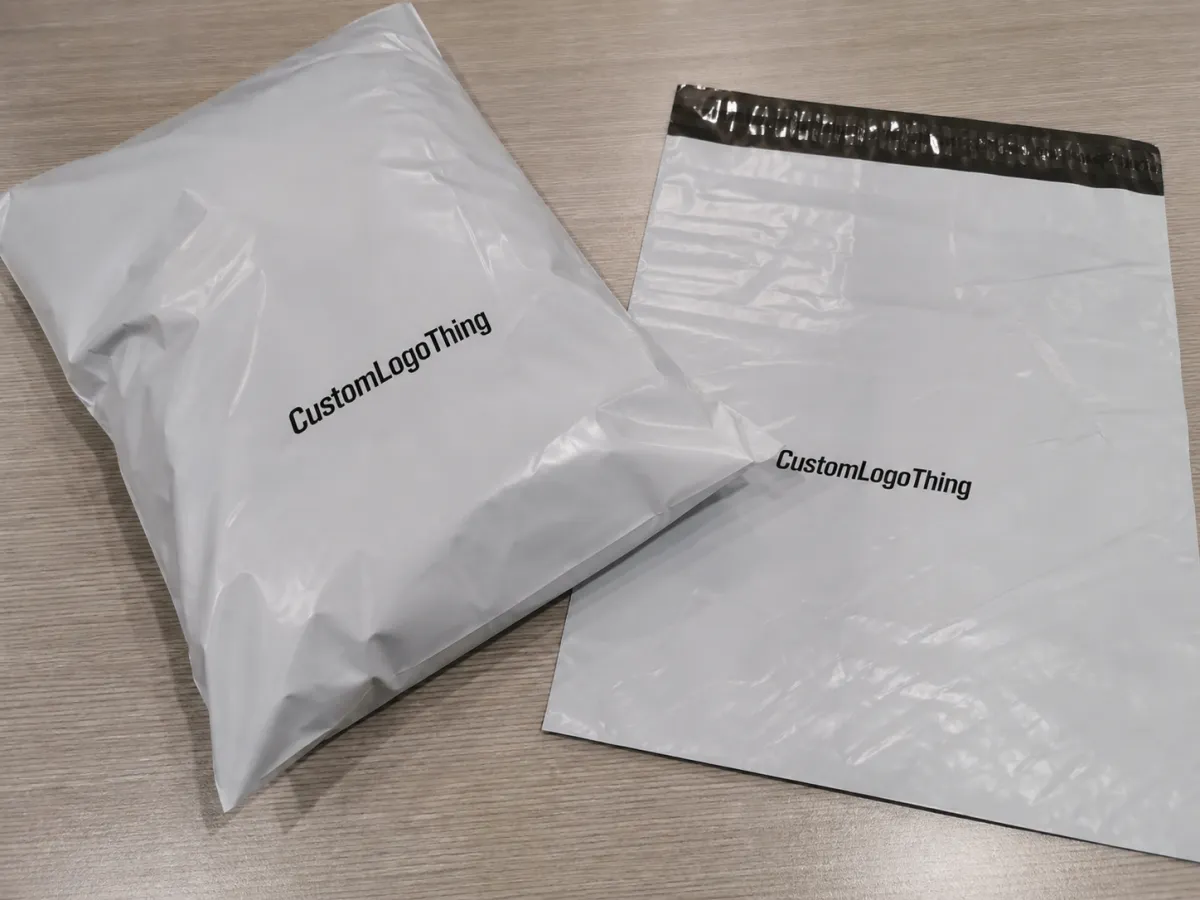
A mailer that looks perfect on-screen can still disappoint in hand. Gloss, matte texture, fold lines, and the position of the seal all affect how the design reads once the bag is opened and loaded. A physical sample is not a mockup. It is the actual structure, in the intended film and print method, ready to be inspected under real light and with real handling.
That matters more for candles than for many products. A one-pound jar does not behave like apparel. A bundled gift set does not behave like a single flat item. If the bag is even slightly too tight, the issue may not appear until packing is already underway, and then the fix becomes expensive.
A flat proof tells you the artwork. A physical sample tells you the package.
At minimum, the sample should answer three questions:
- Does it fit? The actual candle format, not a stand-in.
- Does it hold? Film, seam, and closure should feel dependable.
- Does it still look premium? Branding should survive folding, stacking, and handling.
That is the practical purpose of the candle Printed Poly Mailers physical sample checklist. It is not a keepsake. It is the last low-cost checkpoint before material ordering, setup time, and line labor are all locked in.
What the Sample Should Prove Before Production
The first test is fit. Nominal bag size is only part of the picture because side seals, bottom seals, and any closure feature reduce usable interior space. A mailer that matches the spec sheet may still feel cramped once a candle box, tissue, and a small insert are all inside together.
Next comes print behavior. Candle brands often depend on restrained graphics, neutral fields, and crisp typography. On a sample, inspect color shift, edge sharpness, and any ink weakness around dark solids or full-coverage backgrounds. If white ink is part of the build, check opacity carefully. Thin linework and small text deserve special attention because they are usually the first details to look fuzzy after production scaling.
The best fit test uses the exact product format that will ship. A wrapped jar is not the same as a gift box. A wax melt set with a card or fragrance guide does not behave like a rigid candle in a carton. Load the sample, remove the item, refold it, and load it again. The awkward points tend to appear on the second or third pass, not the first.
Check all sides, not just the front panel. Seams can interrupt artwork. Seal paths can crowd the logo. A closure can alter how the bag lays flat in a shipper carton or on a shelf. These are small problems on paper and large ones at scale.
- Measure the filled bag, not only the flat size.
- Confirm seam placement against the artwork map.
- Handle the bag after closing it to see whether the film whitens or scuffs.
- Test with the same candle, insert, and filler that production will use.
Sizing, Film, and Finish Factors That Change the Fit
Buyers often underestimate the difference between a listed size and a usable size. A 10 x 13 inch mailer is not a clean rectangle once side seals, bottom seals, and a flap are built in. That lost space may be irrelevant for a soft, flat item. For a boxed candle or a rigid jar, it can matter immediately.
Film gauge changes more than strength. A 2.5 mil film can be enough for lightweight wax melt packs or compact candle gifts. A 3.0 mil or heavier build usually gives better puncture resistance for glass jars and multi-item sets. Thicker film also helps the bag keep shape during packing, though some fulfillment teams prefer a slightly softer film because it folds faster and slides into cartons more easily.
Finish affects perception and wear. Gloss can make color appear brighter, but it also shows fingerprints and scuffs sooner. Matte softens the look and hides minor rub marks better, although pale artwork may look flatter if the design is not tuned for it. Opaque coverage helps when branding needs to dominate and product show-through would hurt the presentation.
Paper inserts, thank-you cards, and product cards deserve the same discipline as the mailer itself. For buyers who care about sourcing claims, FSC-certified paper is a useful baseline, and the reference at fsc.org helps clarify what that claim actually covers.
Weight and shape matter just as much as graphics. A glass candle jar travels differently from a wax melt clamshell. A nested gift pack can create corner pressure that a lighter product never would. For heavier sets, ask whether the sample was tested with the package loaded a little above the target weight. That is where failures often show up first.
If the candle mailer is part of a broader packaging system, compare it with other structures before approval. The broader Custom Packaging Products catalog and the Custom Poly Mailers page can help you line up size, structure, and branding before requesting the final proof.
Sampling Process, Timeline, and Approval Steps
The cleanest sampling process starts with complete information. Share the finished dimensions, artwork files, target film, closure style, and expected order quantity. Then specify the sample type, because a blank fit sample and a printed preproduction sample solve different problems. One checks size. The other checks the finished look and build.
A practical sequence usually looks like this:
- Send the spec sheet, artwork, and product dimensions.
- Confirm sample type, film grade, and print method.
- Review the layout proof for seam, fold, and bleed issues.
- Approve after a hands-on fit and finish check.
Timelines vary because the sample may need artwork conversion, plate or digital setup, print curing, trimming, and inspection before it ships. A blank fit sample often takes about 3-7 business days if the size is straightforward. A printed preproduction sample more often lands in the 7-15 business day range after files are final. Freight speed, factory workload, and revision cycles can stretch that window.
If the package needs better shipping validation, ask how the sample aligns with a parcel test profile. ISTA resources at ista.org are useful when you want the review to reflect distribution stresses instead of a simple bench check. Not every supplier will provide a full test report, but a serious supplier should be able to say what was tested, what was not, and why.
The approval step should be written down. Match the sample against the approved spec sheet, mark every change, and sign off only on one final version. That avoids the common situation where one team thinks the bag is approved, another thinks revisions are still open, and the production schedule is already moving.
Cost, Pricing, and MOQ Decisions That Shape the Quote
Sample and production pricing usually come from the same inputs: setup work, print method, film grade, closure style, and the number of colors or special effects in the design. A one-color logo on standard film is simpler than a full-coverage bag with premium finish, so the quote should reflect that difference. The candle Printed Poly Mailers physical sample checklist helps decide whether the upgraded spec is worth it before a larger order is approved.
| Sample Option | What It Proves | Typical Cost Impact | Best Use Case |
|---|---|---|---|
| Blank fit sample | Size, closure feel, and basic load behavior | Often lower, sometimes around $25-$60 before freight | Early sizing checks and package planning |
| Printed preproduction sample | Artwork, color, opacity, and final presentation | Often higher, roughly $80-$250 depending on setup | Final approval before the production run |
| Pilot run or short proof lot | How the bag behaves at near-production conditions | Highest of the three, since it uses more line time | Launches with tight timing or higher-risk artwork |
Minimum order quantity changes the economics quickly. Small runs carry more setup burden per bag. Larger runs spread setup across more units and usually improve the unit price. A quote that looks high at 1,000 units may look very different at 5,000 or 10,000, especially once print coverage and film grade are fixed.
Do not compare a low headline price against a different material, a different size, or a different print count. That comparison is misleading. Ask for one quote using the same film, the same closure, the same artwork coverage, and the same packing assumptions. Then add sample charges, freight, and any plate or artwork setup fees into the total.
For candle brands still building their packaging line, this is where broader product planning helps. If the mailer is only one part of the shipment, price the whole system, not one component in isolation. A cheaper bag that forces more rework or higher damage risk is not cheaper in practice.
Common Mistakes That Create Reprints or Delays
The biggest mistake is approving from a digital mockup alone. Screens are useful, but they can hide weak contrast, washed-out color, or seam interference that only appears once the actual bag is folded and loaded. A logo that looks bold on a monitor can look timid on glossy film. Dark backgrounds can swallow small type faster than expected.
Another frequent mistake is testing with the wrong load. A bag packed with air or a lightweight substitute does not tell you much. It may pass on the table and fail once the real candle set is inserted. Use the actual jar, tin, or melt pack, plus any insert or protective material that will ship with it.
- Missing spec details: Closure location, insert thickness, and label placement can force late revisions.
- Wrong stress test: A bag that looks fine on a desk may fail after stacking, carton loading, or light abrasion.
- Skipping hand checks: The feel of the film, seam edge, and closure path often reveals more than a photo does.
- No scuff review: Ink adhesion and surface rub resistance should be checked after handling, not before.
If you want a more disciplined view of film strength, ask what the supplier can document for impact, tear, or tensile behavior, even if the file is brief. Some teams compare against ASTM-style film tests when they are sorting puncture or tensile claims. That language helps keep the conversation precise without pretending every order needs a lab report.
The reprint risk rises fast when the sample is rushed. A small delay for one more round of checks usually costs less than correcting thousands of bags that are slightly off in size, color, or seal position.
Expert Tips and Next Steps for a Clean Approval
Build a simple pass-fail sheet and keep it with the sample. Include actual measurements, color notes, closure results, rub resistance, and a few photos taken in the same light used in the packing area. That makes approval easy to share internally and much easier to revisit later if the line needs a reference.
Document every revision. If version A had a narrower seal, version B shifted the logo 3 millimeters, and version C changed the finish, write that trail down. When sales, operations, and purchasing all see the same notes, the order moves faster and the risk of approving the wrong version drops sharply.
Keep these checks on the final review sheet:
- Actual filled dimensions after the candle is loaded.
- Print clarity on small type and thin lines.
- Seal strength and whether the closure stays straight.
- Scuff resistance after handling and refolding.
- Photo of the approved sample next to the spec sheet.
If the sample only looks good in a clean office, keep testing. The real proof is whether it still looks right after packing, stacking, and shipping.
Use the sample in conditions that resemble production. Load it with the actual filler, insert the shipping label, close it the way the team will close it, and see whether it still presents well after handling. Then file the approved bag, the spec sheet, and the photo record together so the candle Printed Poly Mailers physical sample checklist becomes a working reference instead of a one-time note.
Frequently Asked Questions
What should be on a candle printed poly mailers physical sample checklist?
Start with fit, print clarity, seam placement, closure strength, and scuff resistance. Then test the sample with the real candle package, including inserts or padding, so the review reflects the actual shipment instead of a stripped-down mockup.
How do I tell if my candle mailer sample matches the final production bag?
Compare the sample to the approved spec sheet for size, film thickness, print coverage, and closure type. Confirm whether it is a true preproduction sample or only a blank fit sample, since those can look and behave differently.
How long does a printed poly mailer sample usually take?
Timing depends on artwork readiness, print method, and whether setup work is needed first. A simple sample can move quickly when dimensions and files are final, but revisions, freight speed, and factory workload can easily add days.
What does a candle printed poly mailers sample cost?
Price depends on material grade, print complexity, closure style, and whether the sample needs custom setup. Ask how sample fees, artwork charges, and freight are handled before comparing quotes, because those details can change the real cost picture.
What should I test if my candles are heavy or in glass jars?
Check puncture resistance, seam strength, and whether the bag keeps its shape when lifted, stacked, or lightly dropped during packing. Use the actual jar and any protective inserts, because glass and rigid packaging create sharp pressure points that lighter substitute loads will not reveal.


