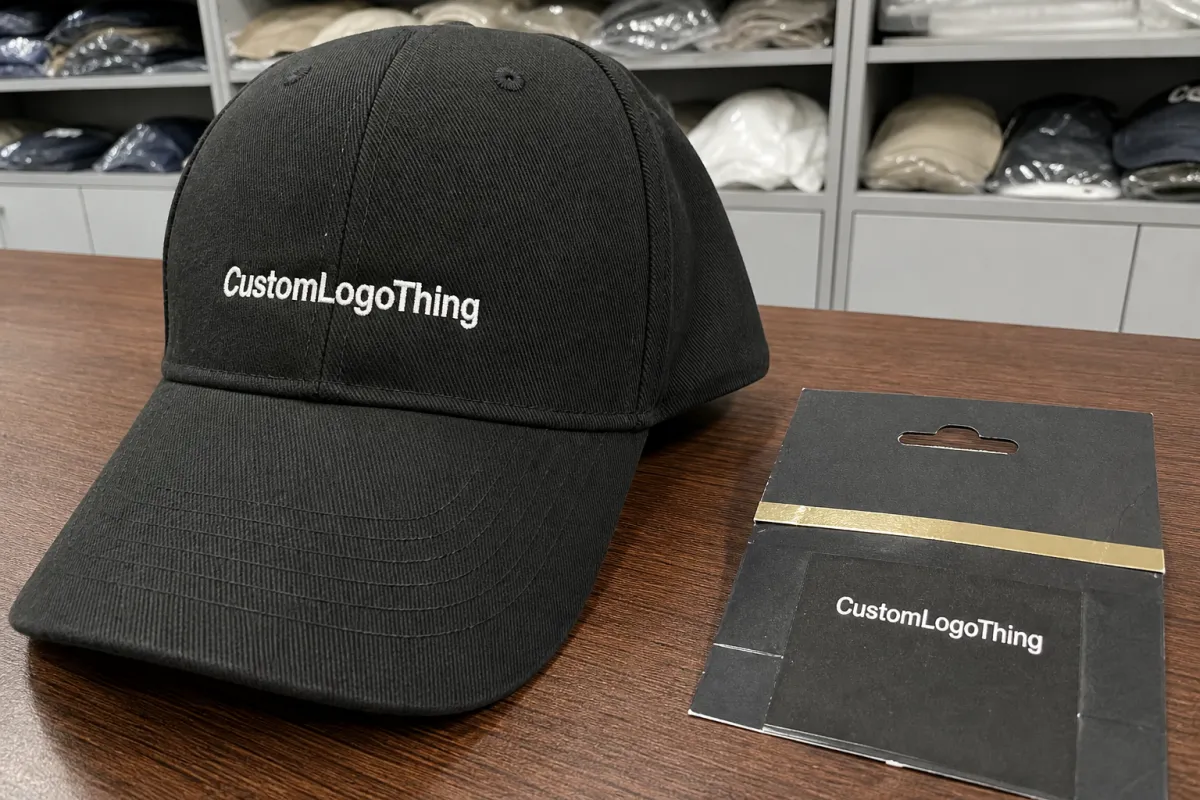
Why a good logo can still look cheap on the wrong cap
If you are comparing samples for an apparel Embroidered Baseball Caps material guide, the first thing to accept is that the logo is only part of the result. A sharp vector file can still look awkward if the crown fabric shifts, the front panels are too soft, or the backing is too light for the stitch count. Buyers often blame the embroidery thread because that is the visible part. The real problem usually starts under the surface.
That matters whether the order is for a brand launch, a sports team, an employee uniform, or resale. A cap has to do three jobs at once: hold its shape, carry the artwork cleanly, and survive handling before it reaches the wearer. If one of those fails, the whole piece reads as lower quality, even when the logo itself is technically well stitched.
The material choice also changes how forgiving the production run will be. Smooth, stable crowns tolerate more detail. Softer or more textured fabrics can look premium in hand, but they are less generous with tiny lettering and dense fills. That is why a visually heavier cap is not automatically a better embroidery surface. In many cases, a tighter weave and stronger front structure deliver the cleaner result.
The useful question is not which cap fabric sounds premium. It is which material lets the logo sit flat, read clearly, and stay consistent across a full production run. That is the practical standard behind every serious buying decision.
How embroidery sits on different crown fabrics
Embroidery works by forcing thread through the crown thousands of times. Each penetration creates tension, and the fabric either holds that tension or gives way to it. The difference between a crisp logo and one with ripples, tunnels, or uneven edges often comes down to three things: weave tightness, fabric stretch, and front-panel reinforcement.
A good rule of thumb is simple: the smoother and more stable the front panel, the cleaner the embroidery tends to look. That does not mean every smooth fabric is the right answer, but it is a useful starting point before you compare prices or colors.
Cotton twill
Cotton twill is still one of the safest starting points because it is predictable and widely available. A structured cotton twill cap with buckram or fused support in the front panels holds satin stitches well and usually gives a neat edge on medium-size logos. It is especially dependable for straightforward lettering and one- to three-color marks.
The tradeoff is that cotton can wrinkle, and lighter constructions can distort if the stitch count is high or the front panel is under-supported. A very soft twill may look pleasant in hand, but if it lacks structure, the embroidery can sink into the crown instead of sitting on top of it. For most buyers, the real question is not whether the fabric is cotton. It is whether the front panel is built to carry the design.
Chino and brushed cotton
Chino cotton usually gives a cleaner surface than brushed cotton because the face is less fuzzy. That makes it more reliable for logos with sharper edges or smaller text. Brushed cotton feels softer and can read as more lifestyle-oriented, but the raised nap can blur fine outlines, especially in darker colors where small thread breaks are easier to see.
These fabrics are good choices when the brand wants a softer, less corporate look. They are less ideal for dense details, stacked text, or thin strokes that need every stitch to stay visible. If a design depends on precision, a smoother weave will usually produce a better result than a textured one that only looks premium before embroidery begins.
Polyester and performance blends
Polyester often performs better than buyers expect. It is usually stable, consistent from lot to lot, and less sensitive to moisture than cotton. That makes it a strong option for orders that need predictable stitch placement and repeatable color matching. A structured polyester cap can look very clean with embroidery, especially when the logo has a bold outline and moderate fill.
Performance blends are a different category. They are designed for comfort, sweat management, and outdoor use, but some versions have enough stretch or surface treatment to complicate the sewing process. That does not make them a poor choice. It means they need testing before bulk production starts. A fabric that feels excellent on the head can still be fussy under the needle.
Structured foam fronts
Foam-front styles create a different visual effect. The raised front gives the logo height and a bold retail look, which is useful for larger marks and simple lettering. The problem is that foam is less forgiving with tiny details. If the design is too small, the foam can compress around the stitching and leave a bulky edge that makes the logo look overworked.
These caps are best used intentionally, not because they look sporty in a catalog. A foam front works when the artwork supports it: larger shapes, clear lines, fewer microscopic features. For complex marks, a structured woven front usually gives a cleaner result and fewer production headaches.
What reinforcement actually changes
Front-panel reinforcement matters more than many buyers realize. Buckram, fused lining, and internal support help the cap resist needle pull and keep the crown from collapsing under stitch tension. That support also helps maintain logo alignment when the design crosses a seam or sits near a curve in the panel. Without it, even a good fabric can look tired after embroidery.
For that reason, a spec sheet that only names the outer fabric is incomplete. The inside construction is part of the material story. If the supplier cannot explain what supports the front panels, the buyer is missing one of the most important variables in the order.
That is why an Apparel Embroidered Baseball Caps material guide cannot stop at fabric names. Structure, backing, and stretch behavior are what determine whether the finished cap looks controlled or compromised.
Step-by-step material selection for embroidered caps
The easiest way to choose the right cap material is to start with the artwork and work backward. Many buyers do the opposite. They fall in love with a fabric first, then try to force the logo onto it, and finally end up redesigning something that never fit the construction in the first place.
Use the logo as the filter. If the design has fine text, narrow letterforms, or dense fill areas, the cap needs a stable surface and strong front support. If the logo is bold and simple, there is more room to choose a softer hand feel or a lighter-weight crown.
- Set the logo size first. Small lettering and thin lines need a cleaner, tighter fabric than a large icon or block mark.
- Estimate stitch density. Dense fills and long satin columns place more stress on the crown and need stronger front structure.
- Match the surface to the design. Smooth woven fabrics support detail better than brushed or highly textured surfaces.
- Check the inside construction. Ask about buckram, fused support, or internal lining before approving the blank.
- Review seam placement. A logo that crosses a seam needs better structure than one placed on a flat, uninterrupted panel.
- Confirm the end use. Retail, sport, event, and uniform orders all place different demands on comfort, durability, and appearance.
A practical shortcut helps here. If the crown flexes easily in your hand, the embroidery machine will feel that movement too. Not every flexible cap fails, but flexibility raises the odds of distortion, especially on dense logos. A sturdier front panel usually reduces risk before the first stitch is sewn.
Another useful habit is to request a sample stitch-out on the exact fabric, not a close substitute. A mockup can hide problems that appear only when the needle, thread, and backing are all working at once. The sample tells you whether the cap can actually carry the design, not just whether the artwork looks good on screen.
That is the point where fabric selection stops being style language and starts becoming production control. A well-chosen blank saves time, reduces revision cycles, and keeps the final run closer to the approved sample.
Cost, pricing, and unit cost by fabric type
Cap pricing is rarely about fabric alone. The final number usually includes the blank, the construction, embroidery stitch count, digitizing, sampling, setup, packing, and order volume. Two caps that look similar in a photo can sit in very different price bands once those factors are added together.
For rough planning, these factory-side ranges are common enough to be useful, though they still move by region, order size, and decoration complexity:
| Cap material | Embroidery behavior | Typical factory-side price impact | Best fit |
|---|---|---|---|
| Cotton twill | Stable, familiar, good for standard logos | Usually the baseline blank; often about $0.80-$1.60 ex-works before decoration at volume | Branded merch, uniforms, retail basics |
| Polyester blend | Often very clean; depends on stretch and finish | Often around $0.90-$1.80 for the blank, sometimes less if the style is common | Sport, outdoor, daily wear |
| Brushed cotton | Soft look, less forgiving on tiny details | Can add cost if extra sampling or stronger backing is needed | Casual lifestyle caps |
| Performance fabric | Can be excellent or annoying; testing is mandatory | Usually about $1.20-$2.50 for the blank because the material spec is tighter | Activewear and heat-friendly use |
| Foam-front styles | Bold look, weaker on small text | Often about $0.85-$2.10 depending on construction and panel support | Larger logos, trucker-style retail runs |
Decoration costs add another layer. A small front logo with a modest stitch count may add only a few tenths of a dollar per unit at scale, while dense embroidery, multiple locations, or unusually fine detail can push that much higher. Digitizing often lands in the $15-$60 range for a single logo, and sew-out samples may carry a separate charge. Those fees matter far more on a 150-piece order than on a 5,000-piece run.
For example, a straightforward structured cap with a simple logo might stay in a relatively low total unit-cost band, while a performance cap with a dense multi-color mark, custom packing, and extra QA can move noticeably higher. The material itself does not always drive the price. Often, it is the combination of fabric behavior and the amount of correction needed to make the embroidery look clean.
MOQ changes the math again. A one-time setup fee spread across a large run is barely visible. The same fee on a small order can be one of the biggest line items. That is why the most useful quote is the one tied to the real quantity, not an arbitrary sample order that no one plans to ship.
Packaging also affects final cost and condition on arrival. Caps packed with kraft paper inserts and loaded into corrugated cardboard cartons usually travel better than loose stacking. If sustainability claims are part of the project, ask whether cartons are FSC certified and whether any void fill uses recycled materials or post-consumer waste. Biodegradable packaging is useful only when it is suitable for the transit path and not just a marketing label.
For broad packaging standards, FSC is a practical reference point, and the ISTA and EPA sites are useful when you want a better read on transport and material expectations.
Process and turnaround: what happens after art approval
After art approval, the order usually moves through a fairly standard chain: artwork review, digitizing, sample stitch-out, material confirmation, bulk embroidery, finishing, inspection, and packing. That sounds orderly. The reality is a little messier, and most delays show up in the same places.
Digitizing is the first real gate. The file has to be converted into stitch commands, and that conversion is where small type can become unreadable or a fill area can become too dense. Once the file is set, a sample stitch-out reveals whether the fabric can handle the design. If the first sew-out puckers, tunnels, or closes up tiny text, the file usually needs adjustment before bulk production starts.
- Artwork fixes. Thin lines, bad vector paths, or poor color separation can force a redesign before embroidery begins.
- Sample revisions. The first test may expose tension issues, letter fill problems, or a logo that sits too close to a seam.
- Fabric sourcing. Special finishes, unusual colors, or custom structures can extend lead time.
- Approval lag. Bulk production cannot start until the sample is signed off, even if the rest of the order is ready.
For simple repeat orders, a bulk turnaround of about 12-15 business days after approval is common. New artwork, denser logos, or specialty fabrics can stretch that to 18-25 business days, especially if the factory has to test a different backing weight or adjust front-panel support. Those ranges are not unusual. They are what production looks like when quality control is doing its job.
QC on embroidered caps should not be vague. A useful check looks at stitch density, thread tension, logo centering, seam alignment, and whether the front panel has any visible collapse around the embroidery. If the cap has a curved brim or a structured crown, the inspection should also check whether the logo still reads cleanly from a normal viewing distance, not just in a close-up photo.
Ask for a sew-out image before bulk starts. If the order is important, ask for a physical sample too. A mockup can hide problems that show up the moment the needle meets the crown. That one extra step is often cheaper than reworking a full run.
Common mistakes buyers make with cap fabrics
The biggest mistake is choosing by appearance alone. A soft cap can look excellent in a product photo and still perform badly under embroidery. Texture, color, and silhouette all matter, but none of them override fabric stability. Once the machine starts stitching, the crown either holds or it does not.
Another common error is asking for oversized logos on unstructured caps. When the front panel does not have enough support, the fabric can ripple, collapse, or show a puckered edge around the design. The result is usually one of three things: warped text, a lumpy front, or thread that sits too high and catches on handling.
Small text causes trouble too. If letter height drops below a practical threshold, the stitches can fill in and the copy becomes hard to read, especially on textured or stretchy surfaces. Buyers often want more information in less space than embroidery can comfortably carry. If the message is important, moving some of it to a woven label, hang tag, or packaging insert is usually smarter than forcing it into the cap.
Skipping the sample is a classic mistake, but it is not the only one. Another is assuming that comfortable fabric automatically makes a better embroidery base. Breathable materials are useful. Moisture-wicking finishes are useful. Neither one guarantees a stable stitch field. Comfort and stitch performance need separate evaluation.
It also helps to watch seam placement. A logo centered over a crown seam needs better support and tighter control than the same logo placed on a flat panel. If the artwork crosses an uneven section, the factory should confirm the expected distortion before the run starts. Ignoring that step is a fast way to get misaligned embroidery that technically matches the file but still looks wrong on the cap.
Best next steps before you request a quote
If you want a useful quote, gather the logo artwork, the target cap style, and the minimum acceptable material level before you send the request. Vague notes like “premium feel” slow the process down because they can mean almost anything. A clearer brief produces a more honest price and a more realistic lead time.
Ask for actual swatches or a sample cap instead of relying on stock photos. Product photography is good at hiding the grain, softness, or stretch that matter in production. The factory may have five similar-looking blanks, but they will not all behave the same under embroidery.
If possible, compare stitch-out photos on at least two fabrics. Cotton twill, polyester, and performance blends can all accept the same logo differently. Seeing those differences before the order is placed is cheaper than discovering them after the shipment lands.
- Decide on structure first.
- Confirm the front panel fabric and any reinforcement.
- Ask what backing or buckram is used.
- Request pricing with MOQ, turnaround, digitizing, and sample timing included.
Then compare the quote against the real goal: logo clarity, budget, and delivery window. If the fabric is right, the embroidery usually follows. If the fabric is wrong, no amount of thread color correction will fix the result. That is the practical lesson in an apparel Embroidered Baseball Caps material guide: the blank is part of the design decision, not just the packaging around it.
What fabric is best for embroidered baseball caps?
Tight-weave cotton twill and structured polyester blends usually give the cleanest results. They hold shape well and allow embroidery to sit flat. If the design is very detailed, choose a fabric with strong front-panel support and minimal stretch.
Does structured or unstructured construction matter for embroidery?
Yes. Structured fronts resist needle pull and help keep the logo crisp, especially on larger or denser designs. Unstructured caps can work, but they are less forgiving when the artwork has small letters or fine outlines.
How much does cap material change the embroidery price?
Material affects price through blank cost, backing, stitch behavior, and the amount of sampling needed to get the logo right. A lower-cost fabric can still raise the total if it needs extra reinforcement or repeat revisions. In many orders, stitch count and MOQ matter more than the fabric label itself.
How long does turnaround usually take for embroidered caps?
Simple repeat orders can move in about 12-15 business days after approval. New logos, dense artwork, or specialty materials can stretch that to 18-25 business days. The sample phase is usually what determines whether the order stays near the short end or moves closer to the long one.
Can performance fabrics be used for embroidered baseball caps?
Yes, but they should be tested first because stretch and moisture-wicking finishes can change stitch stability. They work best with reinforced fronts and artwork that is clean rather than overly intricate. A sample stitch-out is the safest way to confirm the result before bulk production.
What should I ask a supplier before approving a cap blank?
Ask about fabric weight, front-panel reinforcement, seam placement, expected shrinkage, sample timing, and whether the quoted price includes digitizing and one sew-out. Those details reveal far more than a polished product photo. If the supplier answers clearly, the order is usually easier to manage.


