The apparel embroidered baseball caps Digital Proof Checklist matters because a proof is a production map, not a finished cap. On a screen, a logo can look centered and balanced, then shift once it meets a curved front panel, a center seam, or a low-profile crown that leaves less usable space than the artwork suggested.
That gap between what looks right digitally and what sews cleanly is where most preventable problems start. The proof should answer a few blunt questions before anyone loads a needle: does the logo fit, will the stitch build hold, and are all sides approving the same cap spec instead of the same artwork file?
A useful proof removes uncertainty. It tells the buyer what will be sewn, where it will sit, and what tradeoffs were made to get the art onto fabric without distortion.
That is why buyers should check the cap style, crown height, panel count, logo size, placement, thread colors, backing, and decoration notes before sign-off. The apparel embroidered baseball caps Digital Proof Checklist is especially useful for team orders, retail merch, event caps, and repeat programs where consistency matters as much as appearance. It is a control document, not a sales flyer.
Apparel Embroidered Baseball Caps Digital Proof Checklist
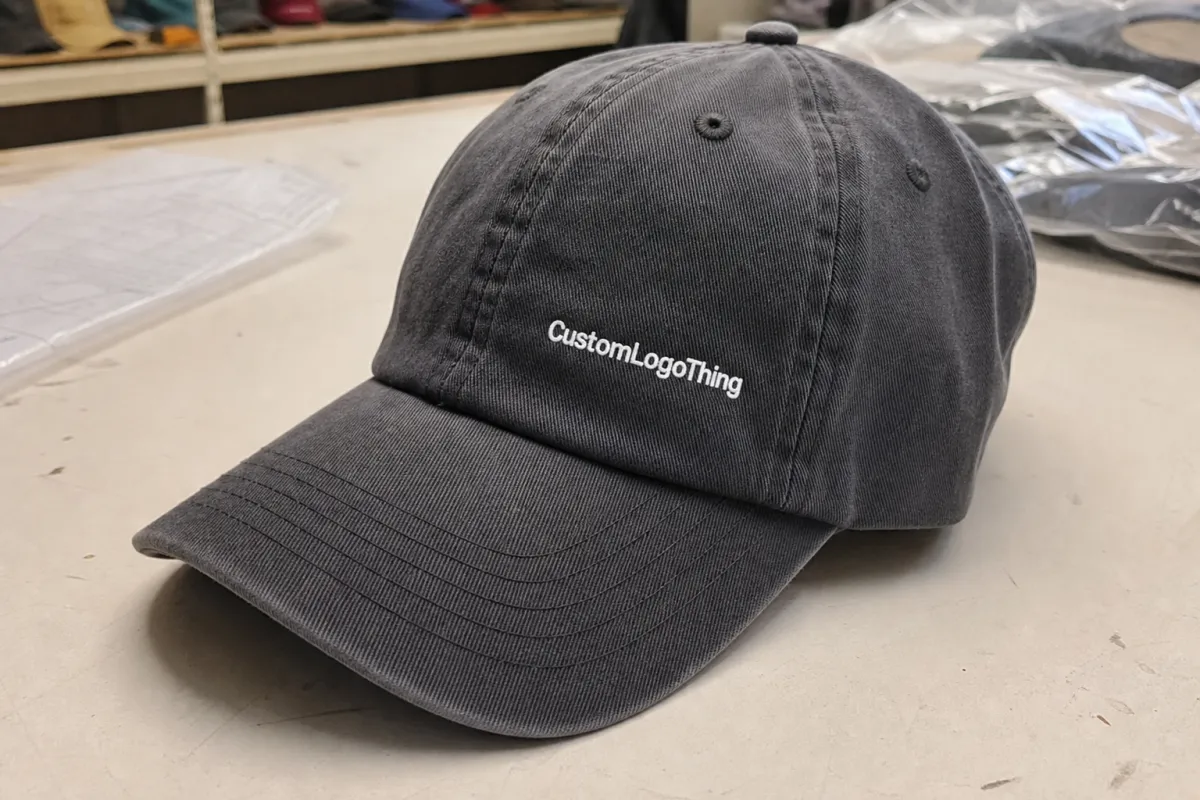
Start with the physical cap, not the artwork. A six-panel structured snapback behaves differently from a five-panel unstructured dad cap, and a mid-profile crown gives more vertical room than a low-profile front that wants a wider, flatter mark. That matters because embroidery is shaped by the hat, not just by the file.
On the first pass, compare the proof against these items:
- Cap style: structured, unstructured, five-panel, six-panel, trucker, performance, or foam-front.
- Crown height: low, mid, or high profile, since the same logo can read differently on each.
- Panel count and seams: especially if the art lands near a center seam or a sharp panel break.
- Logo size: verify actual width and height, not just whether it looks balanced on screen.
- Placement: front center, side, back, or above the closure, with exact distances if possible.
- Thread colors: confirm Pantone references or supplier thread names where color matching matters.
- Backing and stitch method: cutaway, tear-away, fusible support, or no backing, depending on the cap build.
- Special notes: dense fills, small text, 3D puff, contrast outlines, or repeat-program requirements.
A logo can look perfectly centered on a flat mockup and still drift on a real crown. A center seam can split a letter. A curved panel can change the apparent angle of a wordmark. A structured front can make the design sit taller than expected, while an unstructured front may flatten it more than the mockup implies. That is why the checklist has to be read as a translation tool, not a promise of exact visual symmetry.
Good proofs also show what happens when the art is too delicate for embroidery. Fine strokes may thicken. Tiny counters can close up. Narrow serif details may need to be simplified before digitizing. If a logo will sit on the front of a cap, the approval view should make those production choices obvious instead of hiding them behind a polished render.
Fabric choice matters too. Cotton twill usually handles standard embroidery well. Polyester can be stable, but a very dense stitch pattern may still pucker if the backing is weak. Mesh-back truckers and foam-front caps introduce different limits, and performance fabrics can react differently to needle heat and stitch density. A proof that ignores fabric type is incomplete, even if the artwork looks clean.
How the Digital Proof Process Should Read on a Cap
A clean proof process usually starts with artwork intake, vector cleanup, digitizing, proof rendering, and final approval. The sequence sounds straightforward. The real work happens in the handoff between each step. A low-resolution JPEG may need rebuilding before stitch mapping begins. A clean vector file can move faster, but it still needs judgment about scale, fill direction, and edge behavior.
The proof should show more than a flat logo. It should communicate stitch direction, stitch density, underlay, and edge treatment, because thread does not behave like ink. Dense fills can cause puckering if the support is weak. Satin columns that are too narrow can break apart visually. Small type, especially under about 0.20 inch in cap embroidery, often needs to be enlarged or simplified so it survives production.
Useful proofs also identify the cap spec directly. Look for crown height, closure type, fabric type, and intended location. If the order includes a side logo or a back hit, those should be shown separately, not implied. A proof that only shows the artwork floating on white space leaves too much open to interpretation.
Revisions are normal when the artwork has thin fonts, gradients, tiny linework, or multiple color breaks. Those details often work in print but strain the limits of thread and needle. A hairline outline can disappear once it is converted into stitches. A gradient may need to become stepped color blocks or a simplified fill sequence. That is not a shortcut; it is how embroidery stays readable on a curved surface.
The approval path should also cover packaging if the caps are headed into retail or distribution. Carton strength matters more than people expect when the route involves multiple handoffs. The International Safe Transit Association keeps useful test guidance at ISTA. For paper inserts, hangtags, or retail cards, FSC is worth checking if the brand wants certified fiber content. These details are not decoration; they affect how the finished order arrives.
Pricing, MOQ, and What Changes Unit Cost
Pricing for embroidered caps is driven by stitch count, thread colors, logo size, cap style, backing method, decoration location, and any rush or special handling. A simple one-color wordmark on a standard structured cap costs very differently from a dense crest with multiple fills, a side hit, and a back stitch above the strap. The proof should reveal those cost drivers before production starts.
MOQ, or minimum order quantity, matters because setup and digitizing costs are spread across fewer pieces on small runs. Many custom cap programs start around 24 to 72 units, though some suppliers require more if the art is complex or the cap style needs unusual handling. As quantity rises, the unit cost usually falls because setup becomes a smaller share of the order.
These ranges are illustrative, not fixed promises. Fabric choice, stitch count, and decoration complexity move the final quote. A buyer should treat them as planning numbers, not a quote sheet.
| Order profile | Typical proof complexity | Common unit range | What to verify |
|---|---|---|---|
| 48-piece team run | Higher setup share, usually one front logo | $9-$14 each | Digitizing fee, placement, thread colors |
| 100-250 caps | Balanced cost and flexibility | $6-$10 each | Front panel width, backing choice, revision count |
| 500+ program | Lower unit price, stronger consistency needs | $4.50-$7.50 each | Thread availability, carton counts, production schedule |
Ask what is included in the quote. A clean quote should spell out digitizing, proof revisions, samples if any, decoration, packaging, and shipping. Some vendors roll everything into the unit price; others itemize setup separately, often in the $35-$85 range for standard digitizing, depending on logo complexity. Either way, the buyer should know whether the first proof includes one revision or several, because extra rounds can affect both cost and schedule.
One habit pays off across almost every order: compare pricing at a few quantity tiers. A 48-piece quote may look high until the 100-piece tier appears, and the 250-piece tier may unlock a better value if the program is likely to repeat. If the art is expensive to stitch, the better solution is sometimes a simpler logo with bolder outlines and fewer tiny details, not a bigger order.
If you need a broader picture of how the product gets built, review a supplier's Manufacturing Capabilities alongside the proof. That is where material choice, stitch behavior, and finishing options usually become clearer. A good proof conversation should connect the artwork to the actual production path, not just the graphic file.
Timeline From Proof Approval to Finished Caps
A sensible production timeline starts with artwork review, then digital proof creation, buyer approval, digitizing finalization, production, finishing, packing, and shipping. Straightforward orders can move quickly if the art is clean and stock is on hand. Dense logos, multiple colors, or special placements add time. In practice, the schedule is shaped less by the calendar than by how many decisions are still open.
Most delays happen before the needle starts moving. A buyer waits on internal approval, changes a thread color after the first proof, or sends separate comments from three stakeholders, and the order loses a day or two each time. That is why the proof should move through one consolidated approval path whenever possible. Cleaner feedback usually means fewer surprises later.
For rush orders, three things matter most: approve quickly, confirm stock availability, and make sure the shipping method matches the deadline. Two-day air does not help if production is already full. A production slot does not help if the cap color is backordered. If a deadline is fixed, the proof should also confirm carton count and any pack-out instructions so the shipping stage does not become the bottleneck.
On a typical small-to-mid run, proofing can take a day or two, digitizing may take another day if revisions are needed, production often runs about 12-15 business days after approval for standard work, and freight can add several more days depending on destination. That range is not universal, but it is realistic for planning. The tighter the art and the faster the approval, the closer the order stays to the front of that window.
Common Proof Mistakes That Cause Rework
The biggest mistake is approving a mockup without checking actual width, height, and placement against the cap's front panel dimensions. A logo can look balanced at screen size and still be too wide for the front seam or too tall for the crown. Always ask for dimensions in inches or millimeters, not just a polished visual.
Another common miss is ignoring seams and curvature. Center seams, panel breaks, and hard crown bends can distort embroidery even when the artwork looked clean on a flat file. If the logo crosses a seam, it may need to be moved, narrowed, or simplified. A proof should make that risk visible instead of hiding it behind a finished-looking render.
Design detail causes trouble too. Thin serif fonts, hairline strokes, tiny interior counters, and gradient fills often do not translate well to thread. A design that looks elegant in print can become fragile in embroidery, especially on a cap where the surface is curved and the sew area is limited. The safest proof is the one that asks for simplification before production, not after a sample comes back wrong.
Buyers also forget to confirm thread colors, backing, closure style, and final quantity in the notes. That sounds basic, but it is where a surprising number of orders drift. A black cap with a black logo may need a contrast border to stay visible. A low-profile cap may need a different density than a structured cap. A proof that does not lock those details in creates avoidable guessing later.
Here are the mistakes I see most often:
- Approving the mockup instead of the measured proof: the logo size is wrong even though the art looks centered.
- Missing seam conflicts: especially on center-seam fronts and highly curved crowns.
- Keeping artwork too delicate: thin fonts, fine lines, and gradient effects do not sew cleanly.
- Leaving color names vague: "blue" is not enough if the brand needs a specific shade.
- Forgetting final pack details: quantity, closure style, and shipping deadline must match the approval.
Once those issues are caught early, rework drops sharply. That is the whole point of the apparel Embroidered Baseball Caps digital proof checklist: catch the fixable problems while they are still cheap, fast, and invisible to the rest of the order.
Expert Tips for Cleaner Embroidery on Structured and Unstructured Caps
Ask for proof views that show more than the front if the order includes side branding, back stitching, or strap decoration. A front logo is usually the main event, but side and back placements need their own scaling and spacing checks, especially on caps with snaps, fabric straps, or low back panels. If the proof only covers one view, you may miss a placement conflict that affects the final look.
It also helps to compare stitch count with art complexity. A logo with lots of fine detail may need simplification, but not always in the same way. Sometimes the right move is to enlarge the mark by a quarter inch. Sometimes it is to switch a thin font to a bolder weight. Sometimes it is to remove a tiny element that would never be visible from normal viewing distance anyway.
Structured caps usually tolerate more defined shapes because the front panel has internal support, while unstructured caps often need softer placement and slightly lighter density to avoid puckering or shadowing. That is not a hard rule, but it is a dependable starting point. On a structured crown, a satin border and a clean edge often look crisp. On an unstructured crown, the same treatment may need more breathing room so the fabric can sit naturally.
For logo sizing, many front embroidery layouts land around 4 to 4.75 inches wide on a typical structured baseball cap, while lower-profile caps may prefer something a bit narrower. Those numbers move with the shape of the artwork, the cap style, and the stitch method. The proof should show whether the design is being adapted to the cap or just dropped onto it unchanged.
Keep a simple approval log. It does not need to be fancy: version number, requested edits, date sent, date approved, and who signed off. That habit prevents the most frustrating kind of mistake, where an old proof gets mixed up with a current one and everyone thinks they approved the same file. For repeat programs, that log becomes even more valuable because it preserves consistency from one reorder to the next.
If a design will be used across several cap styles, ask for a separate proof for each profile. A logo that looks right on a trucker cap may sit too low on a performance cap or too tall on a low-crown dad hat. The same art file often needs different treatment depending on the crown, seam layout, and backing.
Final Approval Steps Before You Place the Order
Before sending the last revision back, gather the final art file, cap style, quantity, thread colors, and delivery deadline in one place. Then compare the proof against the purchase order line by line. If the proof says six-panel structured snapback and the PO says five-panel unstructured, stop and fix it. If the thread colors or shipping method changed, make that explicit in the approval response so nobody has to guess later.
Use the same pass to confirm quote, MOQ, turnaround, and shipping method. The proof is not only about art; it is the place where the business terms and production details should line up. If one more revision is needed, ask only for the change that removes a real production risk. A preference-based tweak may feel small, but it can create delay without improving the finished cap.
Here is the short version I recommend buyers keep in front of them:
- Check actual logo size and placement, not just the mockup.
- Confirm cap style, crown height, panel count, and closure.
- Review thread colors, backing, and any seam-related notes.
- Match quote, quantity, and lead time to the approved proof.
- Approve only after the final file and the order details agree.
That is the safest way to keep the order moving without surprises. Run the apparel embroidered baseball caps Digital Proof Checklist one more time against the final proof, then approve only when placement, thread colors, cap spec, and timeline all match what the order actually needs.
Frequently Asked Questions
What should I check in an embroidered baseball cap digital proof?
Check logo size, placement, and spacing against the cap's front panel dimensions, not just the screen mockup. Confirm thread colors, backing type, closure style, and any notes about seams or panel alignment. Also make sure tiny text, thin lines, and gradients have been simplified for embroidery so the final sew-out holds up on the curved surface.
How many revisions are normal on a proof?
One revision is common when the artwork is already clean, while more rounds are normal if the logo needs simplification for stitchability. Send all requested changes together so you do not add extra proof cycles and delay production. Every new revision can affect turnaround, especially on larger or more detailed orders.
Does stitch count change the unit cost of embroidered caps?
Yes, more stitches usually mean more machine time and a higher unit cost. Dense fills, outlines, and large logos generally cost more than small, simple marks. Reducing fine detail can lower cost without hurting the look from a normal viewing distance, which is one reason the proof stage matters so much.
How long does the proof and production timeline usually take?
Proof timing depends on how ready the artwork is, and production starts only after approval. Simple orders move faster than caps with complex logos, multiple colors, or special placements. Rush service is easier when stock is available and the buyer approves quickly, because the schedule is rarely delayed by sewing alone.
What are the most common mistakes on digital proofs for embroidered hats?
Approving without checking actual size and placement is the most common one. Missing seam conflicts is another, especially on center-seam front panels or high-curve crowns. Buyers also overlook thread colors, final quantity, and shipping deadlines before sign-off, and those oversights are usually the ones that create the most expensive rework.


