For a wine club, embroidered caps show up in tasting-room photos, member mailers, staff uniforms, and event giveaways. That makes the wine club Embroidered Baseball Caps Digital Proof checklist more than a formality. It is the last practical checkpoint before a logo is stitched into a run that may need to look consistent across 100 caps or 1,000.
A proof is not just a mockup. It is the working agreement for size, placement, thread colors, cap style, and decoration method. A logo that looks balanced on a screen can sit too low on a curved crown, run into a seam, or lose detail once embroidery changes the artwork into stitches. The buyer who reviews those details early usually avoids rework later.
The Wine Club Embroidered Baseball Caps Digital Proof Checklist
The point of the proof is to make sure the factory, buyer, and merch team are looking at the same finished product before production starts. That matters even more for club orders because the approved version often becomes the template for reorders. If the first proof shows a logo at 3.25 inches wide and the second version shifts to 3.5 inches, the difference will be visible on the cap.
Small changes can have a large effect. A burgundy thread that looks refined online may read too red under tasting-room lighting. A script font with narrow counters can close up in embroidery. A logo shifted a quarter inch to avoid a seam may still look off-center once it is stitched. Flat artwork rarely shows those problems clearly.
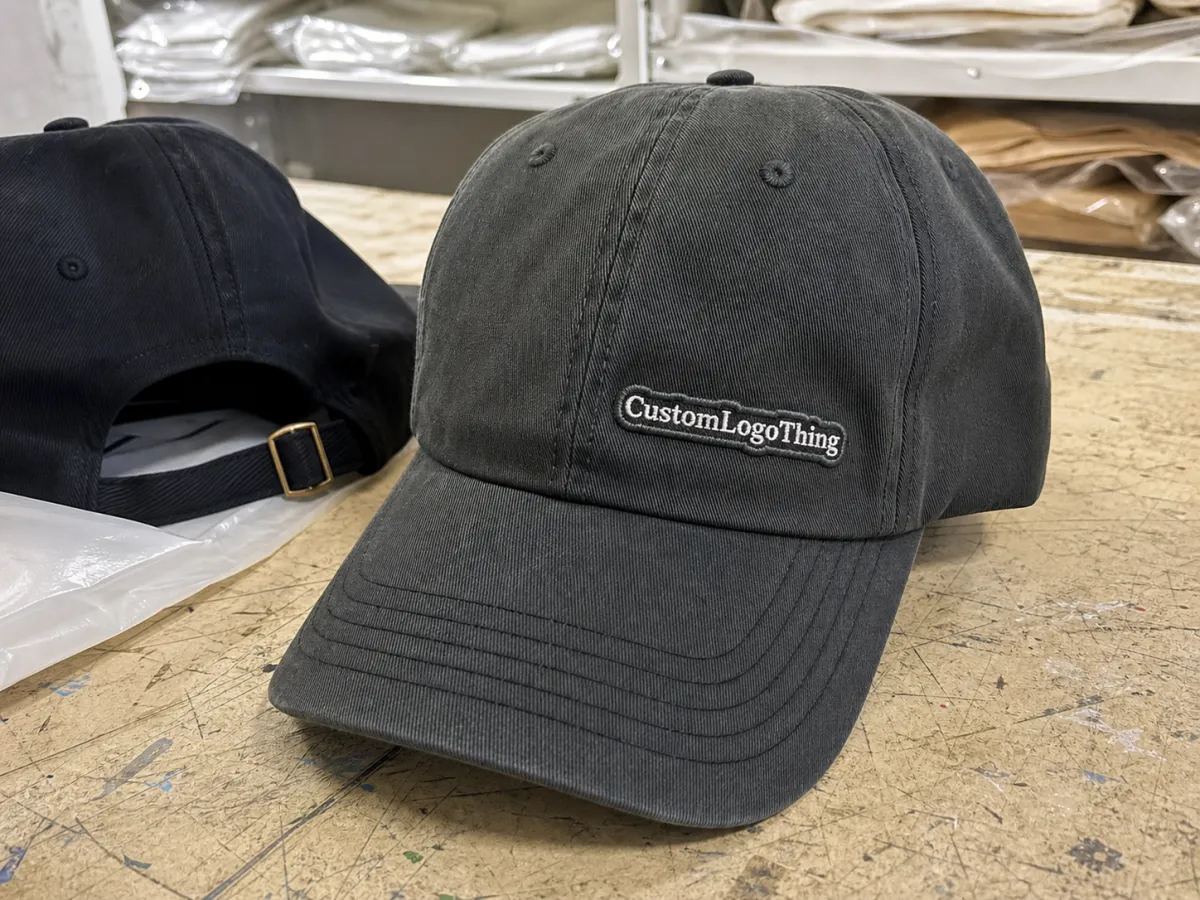
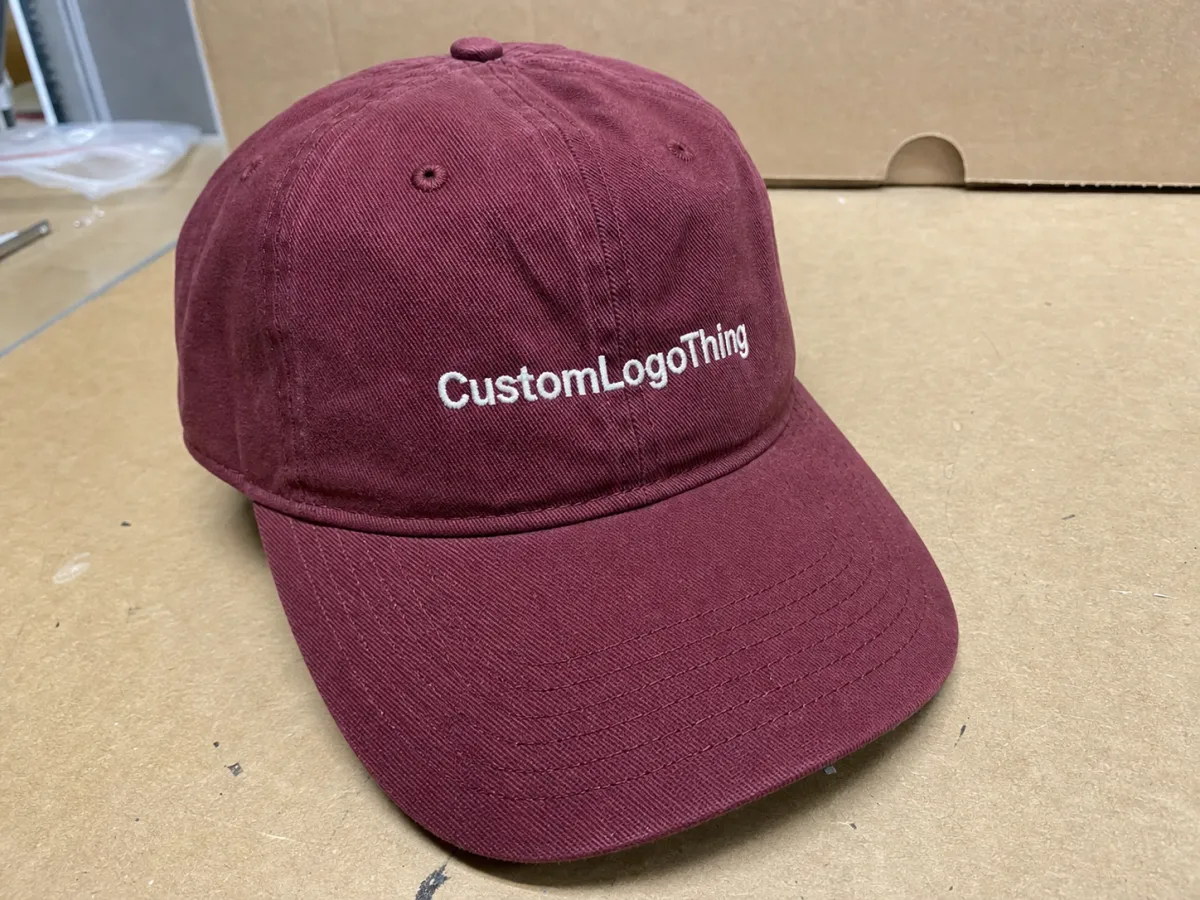
Cap style changes the result too. A structured cap holds the front panel upright and helps centered artwork stay crisp. An unstructured cap collapses more easily, so the same design can look lower or slightly distorted. Crown height matters as well: low-profile caps compress the design vertically, while mid- and high-profile caps give it more space.
A proof only helps if it shows what will actually be stitched, not what looks best in a presentation file.
For most buyers, the main approval questions are simple: Is the logo sized correctly for the cap? Is it centered where the eye expects it? Do the thread colors work in daylight and indoor lighting? Does the cap style support the artwork instead of fighting it? If those answers are clear, the order is usually on track.
How a Digital Proof Turns Artwork Into Stitches
The process starts with vector artwork, then the embroidery team converts it into a stitch file. That translation is where embroidery stops behaving like graphic design. A thin line may need to be widened. A small serif may need to become a sturdier shape. Tiny interior gaps often need simplification so thread does not bunch or fill in on the crown.
The best proof shows what will actually be stitched: front and angled views, thread color callouts, size notes, and any embroidery limits. If the logo needs to move to clear a seam or visor, that should appear on the proof. If a detail is too small to reproduce cleanly, the proof should say so directly.
For premium club orders, a physical sew-out is often worth requesting. It shows thread sheen, stitch density, and how the fabric reacts under the needle. That is especially useful for metallic thread, dense badge-style logos, and artwork with several color transitions. A sew-out can reveal whether the final cap will feel rich, crowded, flat, or stiff.
There is a difference between artwork that is technically correct and artwork that wears well. Caps are curved, handled, folded, packed, and worn in real light. Designs with clean stroke widths, enough open space, and legible shapes usually survive that process better than artwork that depends on hairline details. If the design is already borderline on screen, embroidery will not improve it.
If you need a broader view of how decoration options are handled, the Manufacturing Capabilities page is useful for seeing where digitizing, embroidery, and finishing fit into the production flow.
Cost, MOQ, and Quote Drivers to Check Early
Embroidered cap pricing usually comes down to four things: stitch count, thread color count, cap blank quality, and decoration location. A one-location logo on a standard six-panel cap costs less than a dense crest with multiple thread colors. Closure style also matters. Hook-and-loop is usually cheaper than metal buckles or leather straps, while heavier fabric, washed finishes, pigment dye, and rope details can push the price higher.
MOQ changes unit cost more than many buyers expect. A 100-cap order spreads setup charges across fewer units, so the price stays higher. At 300 or 500 units, the per-cap cost often drops because digitizing and setup are distributed more efficiently. Lower price does not always mean better value, though. A very cheap quote on a complex logo can signal reduced stitch count, a lighter blank, or an unresolved production issue.
Working pricing ranges for club orders often land around $7.50-$11.50 per cap at 100-299 units, $5.75-$8.50 at 300-999 units, and $4.25-$6.75 at 1,000-plus units, depending on blank and decoration complexity. Digitizing often runs $35-$85 per logo, though some programs include it after a certain threshold. These are planning ranges, not promises.
| Order tier | Typical unit range | Common price drivers | What to confirm on the proof |
|---|---|---|---|
| 100-299 caps | $7.50-$11.50 | Setup, blank quality, stitch count, 1-3 thread colors | Exact logo size, placement, and closure style |
| 300-999 caps | $5.75-$8.50 | Better spread of setup costs, fewer per-unit adders | Whether the proof matches the quoted decoration location |
| 1,000+ caps | $4.25-$6.75 | Higher quantity efficiency, freight planning, packaging choices | Final art lock, carton count, and any packout notes |
Ask for setup charges, digitizing, rush fees, freight, and special packaging before approval. That is where hidden cost usually shows up. A proof may look fine, then the invoice changes because a second decoration location was added, a premium blank was swapped in, or the artwork needed extra simplification to sew cleanly. If the order needs gift cartons or retail-style packing, packaging can become its own line item. FSC-certified paperboard from FSC is a reasonable sustainability benchmark, and the International Safe Transit Association offers useful guidance if the caps need to survive multiple handling points on the way to members.
Process and Timeline: From First File to Shipment
The cleanest approval path is simple: submit artwork, review the first proof, consolidate comments into one round, approve the final version, and release the order to production. The hard part is discipline. Separate notes from different people can stretch a two-day review into a week of back-and-forth, especially if digitizing has already started or production has been scheduled around your order.
A first proof can arrive quickly, but the full timeline depends on approval speed, inventory, and workload. A clean order with one revision round often moves to production in 12-15 business days after proof approval. Complex artwork, low stock, seasonal demand, or rush requests can extend that to 18-25 business days or more. The buyer who checks the calendar against the club mailing date avoids most surprises.
Once approved, the order moves through digitizing finalization, embroidery setup, stitching, trimming, finishing, and quality review. A reliable shop should inspect placement, tension, loose ends, and cap-to-cap consistency before packing. Then the caps are cartonized and handed off to freight. For a wine club shipment, it helps to work backward from the mail date rather than forward from the approval date.
Keep one record with the approved proof, the quote, the cap style, and the final art file. That makes reorders easier and reduces version drift when different people handle the next order. In apparel production, confusion usually costs more than complexity.
Design Specs That Change the Final Cap
Cap construction affects the finished result more than most buyers expect. A structured cap gives the front panel enough stiffness for a clean, centered logo. An unstructured cap is softer, but it can wrinkle or fold under embroidery. Crown height matters too. A low-profile cap keeps artwork closer to the brow, while a mid- or high-profile cap gives it more room to stand up visually.
Font size and line thickness can decide whether the cap looks polished or compromised. Lettering under 0.20 inch tall becomes risky quickly, especially with narrow letters or open counters. Thin outlines can blur as thread pulls the fabric, and small interior shapes may fill in more than expected. For wine club branding, simplification is often the better choice. Losing one decorative flourish is usually better than forcing a crowded stitch file.
Thread finish also changes the result. Polyester thread is durable and has a practical sheen that holds up under repeated use. Specialty threads can look more reflective or more muted depending on the light. Backing matters as well. Tear-away or no-show backing can stabilize the front panel, but the wrong backing on a soft cap may make it feel too stiff.
Placement near a seam, visor, or crown transition is another place where a flat mockup can mislead. The machine cannot always stitch exactly where a designer would place a logo on screen. If the art sits too close to a seam, one side may pull differently than the other. The proof should show any shift needed to avoid distortion.
For a wine club, the blank should match the brand mood. A premium tasting-room program often works better with a structured cap, restrained colors, and clean embroidery. A more casual membership club can support an unstructured dad hat, washed cotton, or a softer rope cap. The goal is to make the hat feel like part of the club, not random merch.
Common Proof Mistakes That Create Rework or Delays
The most expensive mistake is approving the wrong artwork version. Spelling, punctuation, spacing, and the exact club name should all be checked against the brand standard, not memory. If the club uses one format for retail materials and another for event signage, the proof needs to match the version intended for caps.
Color is another place where screens create false confidence. Monitors show light, not thread. A burgundy that looks rich on one laptop may appear warmer or darker on another. Thread references should be checked against a physical chart whenever possible, and the buyer should ask whether the factory is matching to a thread library or simply using the closest stock color.
Small lettering, thin outlines, and crowded badge layouts cause most production trouble on cap crowns. A design that feels balanced on a flat art board can become too busy once it wraps over a curved front panel. If the proof includes several tiny elements, ask which ones are essential and which can be widened or removed without hurting the brand.
Before production begins, confirm quantity, size range, packaging, label placement, alternate cap colors, and any insert or hangtag request. Clubs often focus on the logo and overlook the rest. Packaging, carton labels, and shipping details affect fulfillment just as much as embroidery does.
One more issue: the proof should match the actual blank stock. If the style shown is brushed cotton but the quote is based on heavier twill or a pigment-dyed blank, the hand feel and appearance will not line up. Buyers usually notice that mismatch only when the cartons arrive.
Expert Approval Checks and Next Steps
If the goal is a low-drama approval, use one final pass that checks artwork files, placement, thread colors, stitch size, quantity, shipping details, and packout instructions together. That is the practical version of the wine club embroidered baseball caps Digital Proof Checklist: one list, one review, one approval.
- Artwork: confirm the file version, club name, and spelling match the approved brand mark.
- Placement: verify front height, width, and any side or back decoration.
- Color: compare thread references, not just screen color.
- Stitch size: make sure the logo will sew cleanly at the approved dimensions.
- Logistics: confirm quantity, ship-to address, freight method, and timing.
Save the approved proof and the quote together. That pairing becomes the clean record for future reorders and helps prevent the slow drift that happens when different people approve different versions of the same cap. If the program may expand later, a small overage can be useful for replacements, tasting-room giveaways, or late member signups.
Used well, the checklist is less about paperwork and more about protecting the look of the club itself. A clear proof, a realistic quote, the right cap blank, and a disciplined approval process usually produce a finished cap that feels intentional on day one and still holds up on reorder day.
What should a wine club embroidered baseball caps digital proof include?
It should show front and side views with exact logo placement, plus thread color callouts, spelling, size, and any embroidery limits. A useful proof also notes the cap style, closure type, and whether a sew-out is recommended for a detailed mark or a premium club launch.
How long does the proof and production process usually take?
A first proof often returns faster than production, but revision rounds can add days if comments come in piecemeal. Lead time usually depends on approval speed, quantity, cap availability, and current factory workload. Rush orders can be possible, but they usually cost more and leave less room for changes.
What changes the cost of embroidered baseball cap orders?
Stitch count, thread color changes, cap blank quality, and the number of decoration locations are the main drivers. MOQ tiers, setup or digitizing fees, and any rush or freight charges can also move the price. Special packaging, alternate colors, and premium closure styles may add more.
How many proof revisions are normal before approval?
One to two revision rounds are common when artwork is supplied cleanly and the buyer consolidates feedback. Too many changes often mean the logo needs to be simplified or clarified before stitching. One organized revision message usually keeps the timeline on track better than several scattered notes.
When should I request a physical sample instead of a digital proof?
Ask for a sew-out when the logo is highly detailed, very small, or placed close to a seam or visor. A physical sample is also helpful for premium club launches where thread sheen, density, and hand feel matter a lot. That is usually the safest way to confirm the wine club embroidered baseball caps Digital Proof Checklist before a larger run gets released.