Apparel Five Panel Caps sample checklist sounds procedural, but it is really a risk filter. A five-panel cap can look perfect in a mockup and still fail once fabric, stitch tension, and decoration meet the actual pattern. A front panel that sits 3 mm too low, a brim that curves a little too sharply, or an embroidered logo that rides into the seam line can turn a promising style into a costly revision.
The five-panel structure makes those issues easier to see. With fewer panels across the crown, the front face does more visual work, so small defects show faster than they do on some six-panel styles. That is useful for branding, because the front panel gives you a cleaner canvas. It is also unforgiving, because there is nowhere for unevenness to hide.
For merch teams, buyers, and brand owners, a sample review is not a formality. It is the point where materials, construction, decoration, and packing either come together or expose a weak link. The stronger the checklist, the fewer surprises after bulk cutting begins.
Why this apparel five panel caps sample checklist saves money
The sample stage is usually the cheapest place to catch an expensive mistake. Once production starts, even a small error repeats across every unit. A crown that feels too shallow, a closure that sits crooked, or a logo that is placed too high can all become full-order problems. On a run of 300 or 3,000 caps, that is not a design quibble. It is inventory risk.
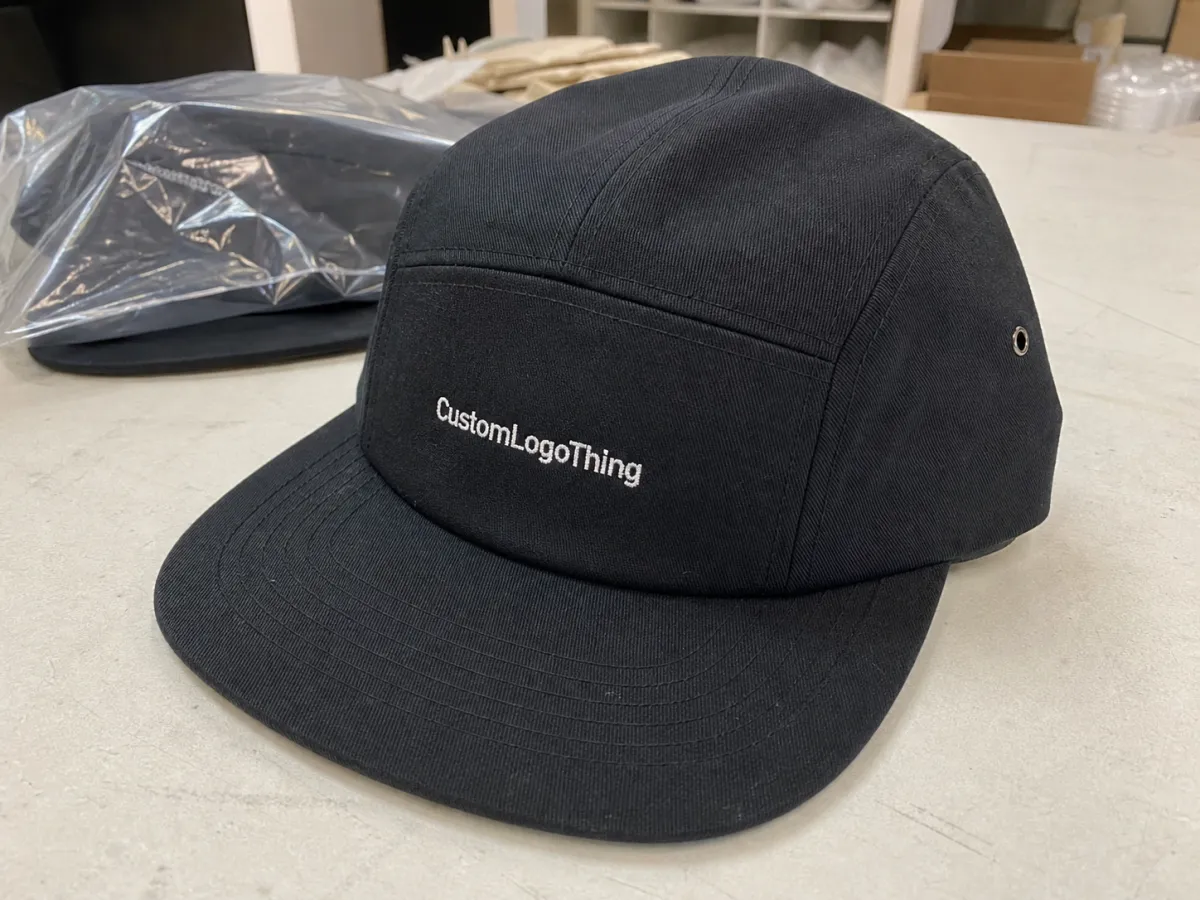
Five-panel caps are especially sensitive because the front panel is broad and highly visible. A six-panel cap can absorb minor irregularity across more seams. A five-panel cap puts the front panel, brim, and logo in one visual field, so the eye catches inconsistency quickly. That is one reason many buyers insist on seeing both a structural sample and a decorated sample before they approve the final specification.
A cap that looks “close enough” during sampling is usually the one that costs the most later.
The checklist also protects the delivery schedule. If the cap is part of a launch bundle, retail drop, or event kit, one delayed sign-off can push the entire order. The production floor cannot cut around uncertainty. It needs fixed artwork, approved fabric, confirmed trims, and a packing instruction that will not change on the last day.
A practical apparel five panel Caps Sample Checklist should cover the pieces that tend to move the most during production:
- Dimensions: crown height, brim width, panel balance, closure range.
- Materials: cotton twill, chino, canvas, nylon, recycled polyester, lining, sweatband.
- Construction: seam alignment, stitch density, interfacing, eyelets, taping, inside trimming.
- Branding: embroidery, woven patches, woven labels, screen print, heat transfer, applique.
- Packing: polybag, size sticker, hangtag, insert card, carton marks.
That list may look basic. In production, basic is usually where the failures hide.
What a five-panel sample should prove before approval
A sample is supposed to prove buildability, not merely appearance. The question is not “Does it resemble the render?” The question is whether the cap can be cut, sewn, decorated, packed, and repeated without drifting away from the approved spec. That distinction matters because cap production is full of small decisions that are easy to ignore in theory and obvious in hand.
Start with the silhouette. Five-panel caps can be structured or unstructured, low profile or mid profile, flat brim or gently curved. Each choice changes how the crown sits and how the front panel supports decoration. A structured front needs enough stiffness to hold a logo cleanly. An unstructured cap may look softer and more casual, but the same patch or embroidery can wrinkle if the fabric has too little body.
Fabric matters just as much. A 100% cotton twill sample will behave differently from brushed chino, washed canvas, or lightweight nylon. Cotton twill often gives a clean, familiar retail look and takes embroidery well, but it can show puckering if the stitch count is too dense. Nylon can feel lighter and more performance-oriented, though it may require different stabilization around the front panel. Recycled polyester introduces another variable: the handfeel can vary a lot depending on the yarn and finish, so a material spec should not stop at the fiber content alone.
Decoration needs its own check. Front embroidery on a five-panel cap should be reviewed for stitch balance, thread density, backing, and placement relative to the seam lines. A woven patch can look crisp on the table and still feel bulky on a softer crown. Screen print may be fine for a flat graphic, but it is less forgiving if the front panel flexes or if the cap is intended for repeated wear. The sample needs to show how the decoration behaves on the actual fabric, not on a generic test swatch.
Measurements should not be guessed. Crown height, brim length, center front width, panel curve, and closure range all need to match the tech pack. If the crown is even a little too tall, the cap can read oversized. If it is too shallow, the fit can feel compressed. A difference of 2 to 3 mm sounds minor on paper; in hand, it is often enough to change the profile.
Packaging is part of approval too. A cap that will ship folded, stuffed, polybagged, or carton-packed should be checked in that state. An item can look fine loose on a table and still crease badly once packed. Buyers who need retail-ready presentation often specify hangtags, barcode placement, and insert cards in the sample stage so the factory does not invent its own packaging logic later.
Experienced buyers treat the sample as a manufacturing test, not a display object. That mindset saves time, freight, and a good deal of embarrassment.
How the sample process and timeline typically works
The process usually begins with a brief, a tech pack, or a reference cap. The buyer provides artwork, color direction, closure type, fabric intent, and any special packing notes. The supplier then confirms whether the first sample will be blank, decorated, or pre-production. That one decision changes the rest of the timeline.
Blank samples are usually faster because they skip artwork setup and decoration prep. If fabric and trims are already in stock, 3 to 7 business days is a common window. Once embroidery, patches, custom labels, washing, or sourcing are involved, 7 to 14 business days is more realistic. If materials need to be bought in, the clock stretches. Shipping sits on top of that, and international transit often adds more time than the factory lead itself.
There are three sample stages worth separating clearly:
- Initial sample: checks shape, fit, and basic construction.
- Revision sample: confirms changes after feedback.
- Pre-production sample: should match final materials, trims, and packing as closely as possible.
Mixing those stages creates avoidable confusion. A first sample can be useful even if the logo is wrong, because it may still prove the crown shape, brim curve, and closure feel. A pre-production sample is different. By then, artwork placement, color match, trim details, and pack method should be locked. If they are still moving, the approval has not actually happened.
The most common delays are ordinary, not dramatic. A supplier waits on vector files. Pantone references arrive late. The buyer changes from embroidery to a woven patch after sample cutting has started. Someone asks for “a cleaner version,” which is not a production instruction. Specific feedback shortens the loop. Vague feedback extends it.
One useful habit is to mark each sample with the date, version number, and exactly what changed. That sounds tedious until three revisions in, when memory starts blurring the details. A simple record keeps the final sign-off defensible.
Cost, MOQ, and quote variables that change sample pricing
Sample pricing is shaped by more than labor. The biggest drivers are decoration method, fabric sourcing, trim complexity, and how many corrections are expected. A blank cap sample may cost little more than materials and shipping. A decorated sample with embroidery, a custom woven patch, interior label, and branded hangtag is a more involved job because setup work sits outside the final unit math.
It helps to separate sample cost from bulk unit cost. A sample often includes one-time work that will not recur in production, such as digitizing embroidery, preparing labels, or cutting a one-off size set. That can make the sample look expensive compared with the eventual per-unit price. The opposite can happen too: a low-cost sample may hide a higher bulk price if the style still has unresolved production complexity.
MOQ matters as well. For many custom five-panel caps, simple styles may begin around 100 to 300 pieces per color, while more customized builds often need higher quantities. The exact number depends on fabric minimums, trim sourcing, and decoration setup. If the style uses multiple colors, several patches, or special closures, the factory may need a higher run to spread the preparation cost. Smaller orders almost always carry more price pressure per piece.
| Sample type | What it proves | Typical sample cost | Typical lead time |
|---|---|---|---|
| Blank cap sample | Fit, crown shape, brim curve, fabric handfeel | $15-$35 plus shipping | 3-7 business days |
| Decorated sample | Logo placement, stitch density, patch size, label layout | $35-$90 plus shipping | 7-14 business days |
| Pre-production sample | Final materials, trims, packing, and bulk readiness | $40-$120, sometimes credited later | 10-20 business days |
Those ranges are practical, not universal. A simple run in one market may come in lower. A decorated sample with imported fabric or special packaging may run higher. Freight can also distort the picture, especially on small orders. A sample fee that looks reasonable on paper can feel steep once express shipping is added.
Ask what is included in the quote. Does the sample fee cover one revision or more? Are new trims extra? Is the shipping separate? Is the sample cost deducted from the bulk order if the project moves forward? Clear answers here matter because sample pricing often reveals how organized the supplier is. If the quote is vague, production will usually be vague too.
A smart buyer may request a small sample set rather than one decorated sample if the team is still deciding between fabric, closure, or logo method. Paying a little more up front can prevent a far more expensive correction after approval.
A step-by-step review workflow for cap samples
A good review process keeps emotion out of the decision. Place the sample on a flat table under bright, neutral light. Keep the spec sheet nearby. Use a ruler or measuring tape, not memory. Cap evaluation gets messy when people rely on the impression from a phone photo or the feel of the first five seconds on the head.
Start with dimensions. Check crown height, brim width, side panel balance, center front alignment, and closure range. Compare those numbers with the approved spec. If the front panel drifts by a few millimeters, the eye often catches it before the tape measure does. That is why measurement and visual review should always be done together.
Then move through construction in the same order every time:
- Seams: look for clean joins, even tension, and no visible puckering.
- Stitching: check density, thread color, and loose ends inside and out.
- Interfacing: confirm that the front panel has enough body for the intended decoration.
- Decoration: verify logo size, placement, backing, and edge finish.
- Closure: test the full adjustment range and check that it sits flat at the back.
- Inside finish: inspect sweatband stitching, seam tape, and trimming.
Wear-testing comes next. Put the cap on, adjust it, and wear it for several minutes. A cap can feel acceptable for 20 seconds and then start to pinch, slide, or tilt once the wearer moves. If possible, test it on more than one head size. A cap intended for broad retail distribution is not being approved for one person. It is being approved for a range of wearers, and that range is where many fit problems surface.
Then review the decoration under the same lighting the customer is likely to see. Embroidery that looks centered in a warehouse may read different under store lighting or on camera. A logo that is too close to the seam can appear slightly distorted once the crown flexes. On five-panel caps, that front panel carries a lot of the visual load, so placement deserves more scrutiny than on a style with more seams to absorb the eye.
Document every issue with a photo and exact note. “Logo 4 mm too high” is useful. “Looks off” is not. If the brim needs adjusting, say whether the issue is curve, stiffness, or length. If the crown feels shallow, explain whether the fit problem comes from height or front panel shape. Clear notes are easier to correct and less likely to come back wrong.
Packaging should be checked at the end of the review, not skipped. Confirm polybag size, fold method, insert card placement, barcode position, hangtag attachment, and carton count if the cap will be shipped retail-ready. Those details affect both presentation and freight efficiency. They also affect whether the factory can repeat the same pack standard on the next order.
Common mistakes that make cap samples mislead you
The easiest mistake is approving from a screen image. Photos compress depth, flatten texture, and can make a color look more accurate than it is. A black cap may read as deep charcoal under one light and true black under another. A slight twist in the brim may disappear in a photo but jump out in hand. A sample should be judged physically, not only visually.
Another common trap is focusing only on the logo. On a five-panel cap, decoration matters, but the structure underneath determines whether the cap feels premium or awkward. An embroidered emblem can look excellent while the front panel collapses under it. If the interfacing is too light or the fabric too soft, the logo does not save the cap. It only makes the flaw easier to see.
Decoration can also distort the fabric in ways that show up late. Dense embroidery pulls differently from sparse embroidery. Patches can sit flat on one build and slightly lift on another if the base panel has changed. Heat transfers may look clean initially but can become fragile if the fabric finish is not suited to the adhesive. The sample needs to be evaluated after decoration, not before.
Skipping fit checks across different head sizes is another costly habit. A cap that works for one internal reviewer may not work for the broader audience. The closure should adjust smoothly and sit flat. If the back gap is too large or the band sits oddly, the product can feel cheaper than it actually is.
Packaging is often left until the end, which is a mistake. Retail labels, barcode placement, insert cards, and carton marks affect both appearance and handling. If they change after the sample is approved, the production team may have to rework materials that were already ordered. That is preventable friction.
Feedback quality matters more than most teams expect. A comment such as “make it cleaner” is hard to act on. A note that says “move logo 5 mm lower and increase front panel stiffness” gives the factory something concrete to fix. Sampling improves when the language is precise.
One final issue: buyers sometimes compare the sample to the product they hoped to have, not the spec they actually approved. Those are different things. The sample should be measured against the documents, the reference cap, and the agreed artwork file. Anything else invites drift.
Expert tips and next steps before you place the order
Any time a major element changes, ask for another approval round. New fabric, a different closure, or a different decoration method can alter the way the cap wears and presents. Treat those changes as new decision points. Small on paper, not small in production.
Keep side-by-side records of each version. A folder with photos, notes, and version numbers is usually enough. Record fabric content, weight if available, trim type, stitch count, logo size, and packing method. That record becomes useful later if the factory needs to repeat the order months after the first run, because memory tends to smooth out the details that matter most.
Use the same Apparel Five Panel Caps sample checklist on the pre-production sample that you used on the first version. The final sample should lock the specification, not inspire fresh debate. By that point, the approved artwork files, fabric references, closure choice, and packing plan should already be fixed:
- Final logo dimensions and placement.
- Approved fabric, trim, and closure references.
- Packing method, carton count, and ship date target.
- Written sign-off on any known exceptions.
The most reliable bulk order usually starts with the least dramatic sample review.
That may sound unglamorous, but it reflects how cap production actually works. The smooth orders are rarely the ones built on optimism. They are built on a disciplined sample process, a clear spec, and enough patience to reject “close enough” before it becomes a shipment problem. If the checklist is honest, the cap has a better chance of being repeatable, wearable, and worth reordering.
Frequently Asked Questions
What should be on an apparel five panel caps sample checklist?
Include fit, crown height, brim shape, seam alignment, stitch quality, closure range, color, logo placement, and inside labeling. Add packaging checks if the cap will be retail-ready, polybagged, tagged, or boxed. The strongest version compares the sample directly against the approved tech pack or reference cap.
How long does a five-panel cap sample usually take to make?
Simple blank samples are often faster than decorated samples because they skip artwork setup and trim sourcing. Custom embroidery, patches, labels, special fabrics, or washing usually extend the lead time. Ask the supplier to separate build time from shipping time so the schedule is realistic.
What changes the cost of a custom five-panel cap sample?
Decoration method, custom materials, revision count, and packaging requirements are the main price drivers. Digitizing, setup, and shipping can make a sample cost more than the final per-unit price in bulk. Request a written quote that separates sample cost from production unit cost.
Should I approve a blank sample or a decorated sample first?
Approve a blank sample first if you still need to confirm fit, structure, or fabric handfeel. Move to a decorated sample once branding placement, stitch density, or patch size needs verification. For complex projects, review both so structural approval is not mistaken for decoration approval.
What is the difference between a sample and a pre-production cap?
A sample is usually for testing design, construction, and decoration ideas. A pre-production cap should match the final bulk order much more closely, including approved materials and trims. Treat the pre-production version as the last checkpoint before mass production starts, because the checklist matters most when the final spec is locked and repeatable.


