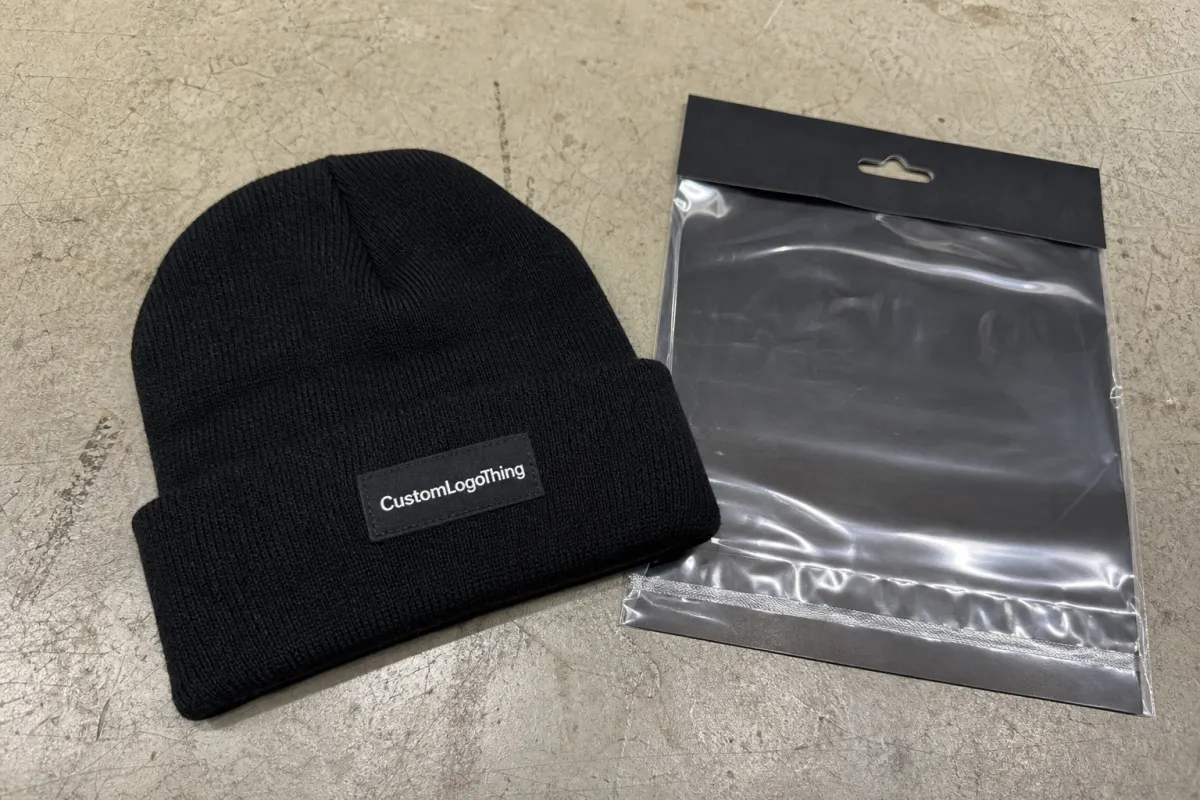
Book Embroidered Beanies Digital Proof Checklist for Buyers
A digital proof can look finished long before a beanie is actually stitched. That is the trap. On-screen artwork hides a lot: a logo that is too small for thread, a curve that will sit awkwardly on a cuff, or a line weight that disappears once the knit starts moving under the needle. The book embroidered beanies Digital Proof Checklist exists for exactly that gap between a polished mockup and a production-ready order.
The proof is not decoration for the buyer. It is the last practical checkpoint before thread, machine time, and schedule are committed. If the art is wrong, the fix may mean a fresh digitizing pass, a new sample, or a delay that forces everyone to reshuffle deadlines. If the art is right, the run usually goes smoother because the factory is not guessing what the brand intended.
That matters even more on embroidered beanies than on flatter products. Knit hats stretch. Cuffs fold differently from style to style. Acrylic yarn reflects light differently than wool blends or polyester knits. A proof has to show the intended placement and the embroidery logic, not pretend the hat behaves like paper.
Book Embroidered Beanies Digital Proof Checklist: What to Inspect First
Start with the basics, because the basics are where most costly misses hide. Read the spelling, confirm the placement, and check the size against the actual beanie style. A proof can look balanced on a screen and still fail once it lands on a shallow cuff or a thick ribbed knit. The eye forgives a lot in a mockup; thread does not.
For embroidered beanies, the first question is not whether the artwork looks stylish. It is whether it can survive production. Thin strokes, crowded letters, tiny registration marks, and decorative flourishes often need adjustment. A design that seems crisp in vector form may need more open spacing so the stitches do not merge.
Thread behaves differently from ink. Most apparel embroidery uses 40-weight thread, and once stitch direction and fabric tension enter the picture, small details shrink fast. A line that appears elegant at 100 percent zoom may become unreadable when it is actually stitched into a 2.25- to 3-inch decoration field.
Good proofing catches mechanical problems early: a letter too close to the edge, a logo that sits under a seam, or a thread choice that makes dark artwork vanish on a dark hat.
If the order includes retail packaging or shipment prep, the proof should sit inside the same approval file as the packaging spec. Transit stress, inserts, and hang tags do not belong in the stitch file, but they do affect the final presentation. Buyers who care about packaging standards sometimes reference ISTA testing standards for shipping performance and FSC-certified paper sources for inserts. That is separate from embroidery approval, but the same order often needs both decisions locked down.
How the digital proof process works from art file to approval
The usual workflow is simple on paper and a little less simple in practice. The buyer sends artwork, often as a vector file such as AI, EPS, or PDF. The digitizer converts that artwork into a stitch path the machine can read. A digital proof is then created to show the proposed size, placement, thread colors, and any changes needed to make the design sew correctly on a knit hat. After approval, the order moves into production.
The digitizing step is where the biggest misunderstandings happen. Embroidery is not a direct copy of the art file. The software has to translate curves, edges, fills, and outlines into stitch sequences, and that translation has physical limits. Tight copy, hairline rules, complex gradients, and overly detailed badges usually need simplification. If they do not, the final embroidery can look heavy or muddy.
That simplification is not automatically a defect. Sometimes it is the correct call. A proof that removes tiny detail may actually be protecting the logo. The buyer’s job is to decide whether the simplified version still reads as the same brand mark from a few feet away. On a beanie, that is usually the right viewing distance.
Timelines vary with the file and the feedback. A one-color wordmark on a standard cuffed beanie may move quickly. A multi-color emblem, a small type lockup, or a design placed on a deep fold usually needs more back-and-forth. Revisions are normal; they are part of making the embroidery fit the hat instead of forcing the hat to fit the art.
One practical detail gets overlooked often: the same logo can need different treatment depending on the blank. A chunky rib knit, a fine-gauge acrylic, and a wool blend will not all accept the same stitch density. If the supplier is asking for a tweak, it is usually because the base fabric is dictating the result. That is a constraint, not a sales tactic.
Sizing, stitch count, and artwork details that change the result
Logo size on a beanie affects more than appearance. It changes readability, stitch density, thread consumption, and how much the knit fabric gets compressed. A mark that feels modest on paper can still produce a dense patch of thread if the design uses fills, borders, and multiple color changes. That extra density can make the decoration stiff.
The most common artwork variables are line thickness, small type, color separations, contrast, and location. Thick shapes generally hold up better. Fine serif type and narrow outlines often need help. If the design sits on the front cuff, the usable area changes every time the cuff height changes. If it sits on the crown or the front panel above the cuff, the curvature of the hat can tilt the visual balance more than buyers expect.
Stitch count climbs quickly. A simple embroidered wordmark may land in the low thousands of stitches. Add an outline, a second fill, and multiple colors, and the count rises fast. That affects machine time, but it also affects hand feel. Too much stitch density can make the embroidery board-like. Too little can let the knit show through and make the logo look unfinished.
Material choice matters here too. Acrylic beanies usually hold crisp embroidery well and stay affordable in bulk. Wool blends can feel richer but may cost more and need closer attention to stitch density. Lower-gauge knits can present a cleaner canvas than loose, chunky ribbing, though the exact result depends on the pattern and the fold. The proof should show the decoration field clearly enough that the buyer can tell whether the art suits the fabric.
A useful rule: if the detail matters at six feet, keep it. If it only looks impressive because the screen is zoomed in, question whether it belongs on a knit cap. That filter usually protects the finished piece better than an overly elaborate brief.
Cost and pricing factors that affect your quote
Beanie pricing is not driven by the blank alone. Digitizing complexity, stitch count, number of thread colors, decoration locations, and order quantity all affect the quote. A one-location mark on a standard cuffed beanie can be very different from a front-and-side decoration package. If the artwork needs cleanup before it can be digitized, that can add setup cost as well.
Quantity changes the math. Lower runs usually cost more per piece because setup time is spread over fewer units. A 48-piece order can look expensive next to a 500-piece order even when the logo is identical, because the digitizing, machine setup, and approval time do not shrink much. That is why MOQ thresholds matter so much in embroidery.
Revision timing affects price too. If the design changes after the stitch file is approved, the file may need to be rebuilt. A small text change can force a new stitch sequence, new density decisions, and fresh proofing. Buyers often think of this as a minor edit; the production side usually sees it as a new version.
| Order profile | Typical decoration | Common unit range | What moves the price |
|---|---|---|---|
| Small run | One logo, one thread color | $9-$15 each | Setup spread over fewer units, digitizing minimums |
| Mid run | Front logo with 2-3 thread colors | $7-$11 each | Stitch count, thread changes, cuff placement |
| Large run | Front mark plus side detail | $6-$9 each | Extra location, revision lock, sample coordination |
Those figures are broad because the real quote depends on details that do not show up in a headline number. Yarn weight, beanie style, decoration area, finishing method, and whether the order needs rush handling all matter. Ask what is included in the base price, whether digitizing is separate, how many revisions are covered, and whether sample development or expedited scheduling adds a fee. Clear answers there usually remove the surprise later.
Quality standards can live alongside cost, but they should not be confused. Fabric testing and embroidery approval are separate checks. A fabric may pass its own spec and still need a revised stitch plan because the knit cannot support dense embroidery in the chosen location. Both matter. They just solve different problems.
Step-by-step proof review before you sign off
The cleanest approvals follow the same order every time. First, read the copy line by line. Then confirm size and placement against the hat style. After that, review thread colors and any notes tied to the blank. Finish by comparing the proof against the actual product spec, including cuff height and decoration area. That sequence sounds plain, but it catches most preventable mistakes.
- Check the text first. Long taglines and short model names both deserve a fresh read.
- Confirm placement on the actual beanie style. A cuff height change can move the visible field enough to matter.
- Review thread references. Ask for thread numbers or a chart if the brand shade is sensitive.
- Inspect crowding and spacing. Letters need room, especially on a stretchy knit surface.
- Save the approval record. Keep the proof PDF, notes, and final sign-off together.
A second-reader check is often worth the time. One person tends to catch the concept. Another catches the mistake. That is especially useful when marketing, operations, and merchandising all want a say, because each group tends to focus on a different problem. A fresh set of eyes usually costs less than a correction.
For larger orders, keep an internal approval packet with the proof, revision notes, quantity, beanie style, and thread references. If the order is revisited weeks later, nobody has to reconstruct the decision from scattered emails. The packet becomes the source of truth, which is far more useful than remembering who said what in a thread that has long since disappeared.
Common mistakes buyers make when approving beanie proofs
The most common mistake is trusting the screen too much. Monitors shift color, brightness, and contrast. File compression can flatten the image. The result is a proof that looks more vivid or cleaner than the real thread will. If the shade matters, ask for thread numbers, a thread card, or a Pantone reference that the supplier agrees to follow. Otherwise, treat the image as directional.
Another frequent miss is approving text that is technically correct but too small for embroidery. Condensed fonts and thin lines can look sharp on screen and still vanish on a ribbed knit. This happens a lot with department names, event slogans, and fine legal lines. If the proof is hard to read at actual size, the hat will be hard to read too.
Buyers also forget to confirm the exact beanie style. A shallow cuff, a deep cuff, a slouch fit, and a classic cuffed knit all present different decoration windows. That shifts placement more than many teams realize. A logo that sits perfectly on one style can sit too low, too high, or too close to the fold on another.
Edge placement causes trouble as well. Artwork that sits near the side seam may peek awkwardly around the head or get lost in the fold. Back-view visibility matters if the hat will be worn in crowds, photographed, or used in retail display. A proof should be reviewed like a real garment, not a computer file. The goal is a wearable result, not a pretty PDF.
The expensive errors are usually plain ones: one misspelled letter, one wrong thread callout, one logo approved a quarter-inch too small. None of those issues are dramatic. They are worse than dramatic, because they are easy to miss and easy to ship.
Expert tips and next steps before production starts
Keep a final approval folder that includes the proof PDF, revision notes, thread references, beanie style, and final quantity. That folder saves time later, especially if the same item is reordered or the proof needs to be checked against a past version. When records are scattered, small errors turn into long email chains.
If anything changes after approval, ask for a fresh confirmation before production starts. Even a small wording edit or placement shift can change the stitch file and the schedule. That extra round is not paperwork for its own sake. It is a safeguard against exactly the kind of change that can turn a clean order into a correction.
For repeat programs, keep a one-page internal checklist and use it every time. Include the item name, thread references, decoration area, proof date, and approver name. That habit speeds up reorders and helps new team members understand what was actually approved. It also gives purchasing and branding the same reference point instead of two different versions of the truth.
Store the approved proof next to the production specs and any notes about decoration method. The more the team reads from the same file, the less likely the order is to drift. That is especially true when a reorder comes back months later and the original context is no longer fresh in anyone’s head.
Frequently Asked Questions
What should I check first on an embroidered beanies digital proof?
Start with spelling, placement, and the overall size of the artwork. Then check the thread colors and make sure any small text is still readable at the size shown in the proof. Those are the checks that catch most avoidable problems before production begins.
How accurate is the color on a beanie digital proof?
Proof color should be treated as directional unless the supplier is using thread numbers, a thread card, or another agreed reference. Screens do not show embroidery color exactly, and knit fabric can shift the look again once the hat is stitched. If brand color is strict, make that clear before approval.
Does approving the proof change my price or lead time?
Approval usually locks the artwork for production, but the price can still change if the specs change later. Lead time is usually most stable after approval because the order is released and the schedule is set. Rush fees, revision fees, and sample costs should be confirmed before sign-off.
How many proof revisions are normal before production?
One or two rounds are common when the artwork is clean and the notes are specific. More complex logos, small text, or major placement changes can take additional rounds. The fastest approvals usually come from one decision-maker and feedback that explains exactly what needs to change.
What should I do if the beanie proof still feels off?
Ask for a revised proof and explain whether the problem is size, spacing, thread tone, or placement. If you are torn between two options, request side-by-side versions so the team can compare them cleanly. Do not approve until the proof matches the real-world result you expect; the book embroidered beanies Digital Proof Checklist only works if the final version is the one you can actually stand behind.


