Use this boutique paper bags Sample Approval Checklist before anyone releases the full order. A bag can look polished in a mockup and still fail once a candle, scarf, skincare set, book, or glass jar goes inside it. That is the point of sample approval: catch the expensive mistakes while they are still one sample, not 3,000 finished bags stacked in cartons.
Most buyers do not need a lecture on packaging theory. They need a clean way to check size, paper stock, print color, handles, finishing, and packing before production starts. That is the job here.
What a Boutique Paper Bags Sample Approval Checklist Actually Checks
A sample approval is not a thumbs-up emoji. It is the last practical checkpoint before bulk production. If the bag looks right in a photo but fails in real use, the end customer will not blame the converting line, the paper mill, or the sales rep. They will blame the brand printed on the bag.
A proper checklist compares the physical bag against four things: the quote, the dieline, the artwork proof, and the actual retail use. That means checking size, paper stock, print color, handle strength, finishing, logo placement, folding, glue lines, bottom structure, and packing method. If one of those is wrong, the sample is not approved. It is just a nicer-looking problem.
Buyers usually deal with two sample types. A plain structural sample confirms dimensions, construction, product fit, and carrying comfort. A printed pre-production sample checks color, artwork, surface finish, handle color, and final presentation. You do not always need both. For a basic kraft shopper, a structural sample may be enough. For a boutique launch, premium gift bag, or brand-critical retail program, skipping the printed sample is a strange place to save money.
Approval also has a legal and commercial side. The approved sample often becomes the reference for production quality. If bulk bags later show a shifted logo, weaker handle, wrong lamination, or different paper feel, the sample helps prove what was agreed. Without it, everyone starts arguing from memory. Memory is not a specification.
“Looks fine in the PDF” is not a quality standard. It is how people end up paying for reprints.
The checklist below is designed to stop that nonsense early.
How the Sample Approval Process and Timeline Usually Works
The process is simple if the brief is clear. First, the buyer confirms the specifications. The artwork is reviewed. A dieline is created or checked. The sample is produced, shipped, inspected, revised if needed, and then released for bulk production.
Simple on paper. Less charming in practice.
Timing depends on the bag structure and finish. A digital mockup may take 1 to 3 business days. A plain structural sample usually takes 3 to 7 business days. A printed pre-production sample often takes 7 to 15 business days, especially if the bag includes foil stamping, embossing, debossing, specialty paper, custom handles, spot UV, or lamination. Tooling, drying time, and material sourcing all add friction.
Sample lead time is not production lead time. That mix-up causes plenty of avoidable tension. A sample is one unit or a small set of test units. Bulk production usually starts only after approval unless the buyer decides to gamble. I would not recommend gambling with packaging. The house usually wins.
Shipping time sits on top of sample time. International courier transit commonly adds 3 to 7 days, and customs can still slow things down even when the paperwork is fine. If the bags are tied to a store opening, launch date, event, or seasonal campaign, build in transit time and at least one revision round. One clean approval is great. Two rounds are common. Three rounds usually means the brief was vague, the artwork was not ready, or too many people were editing the bag by committee.
Special finishes stretch the calendar because they require real setup. Foil stamping needs a die. Embossing and debossing need plates. Ribbon handles may need custom cutting or dyeing. Spot UV needs extra setup and curing. Soft-touch lamination can show scuffing if the substrate and packing are not handled properly. None of this is unusual. It is just manufacturing, which is often less flexible than the email thread suggests.
Key Specs to Verify Before You Approve the Bag
Start with size. Boutique Paper Bags are judged by proportion before anyone reads the fine print. Check width, height, gusset depth, folded top edge, handle drop, and whether the product fits without bulging. A bag that looks elegant while empty can look awkward once a boxed set, tissue paper, insert card, and receipt envelope go inside.
Do not test with imaginary products. Put the real item in the sample. A silk blouse, a candle, a ceramic mug, and a skincare kit behave differently. Real fit testing is the difference between “seems okay” and “works in store.”
Paper stock matters more than many buyers expect. Review GSM, stiffness, texture, coating, recycled content, opacity, and hand feel. A 170gsm kraft bag feels very different from a 250gsm art paper bag with matte lamination. A 300gsm coated board may look luxurious but feel too rigid for a small delicate item. The right choice depends on load weight, brand positioning, and how the customer will carry the bag.
For lightweight fashion accessories, a well-made 157gsm to 210gsm paper may be enough. For candles, boxed cosmetics, books, glassware, or gift sets, buyers often move into heavier stock or add bottom reinforcement. There is no virtue in overbuilding the bag, but flimsy paper on a premium product sends the wrong signal immediately.
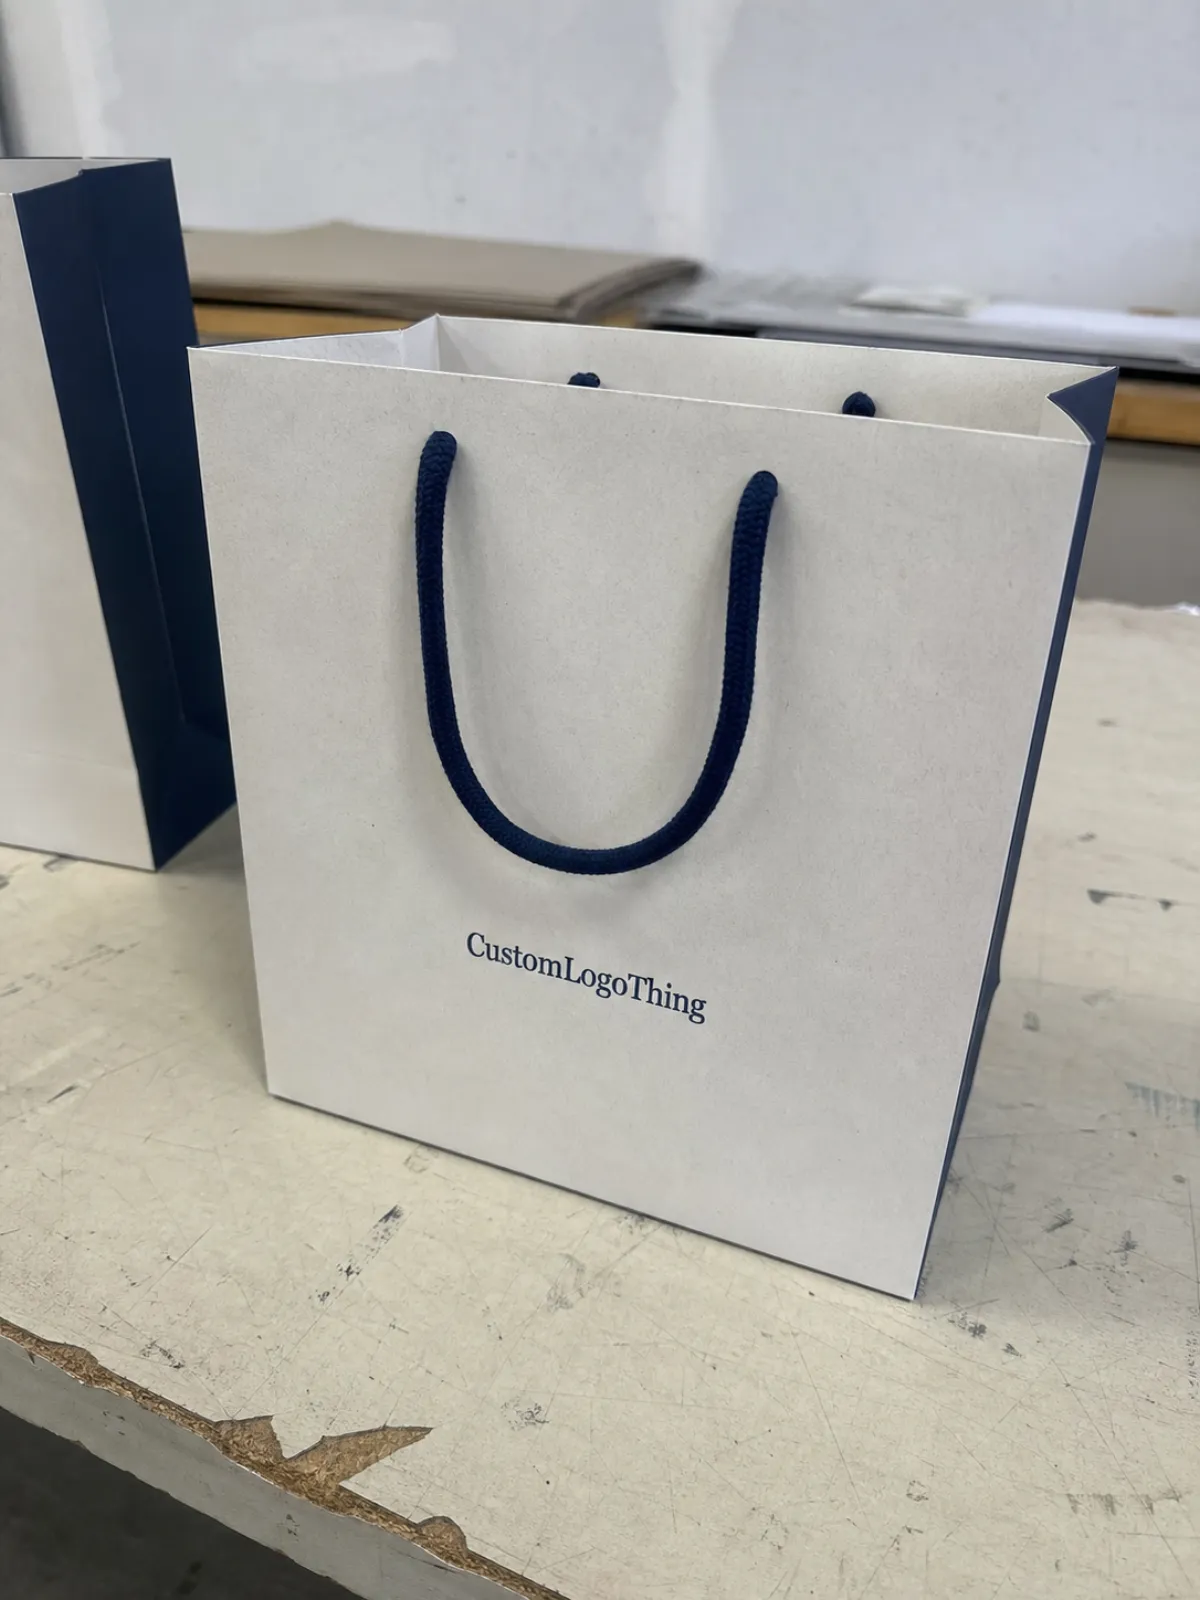
Handle style deserves its own inspection. Rope, ribbon, cotton, twisted paper, flat paper, die-cut, and grosgrain handles all carry weight differently. They also age differently. Ask how the handle is attached, whether reinforcement cards are used, and what carry weight the supplier is comfortable quoting. A beautiful handle that tears after two uses is just decorative regret.
Print inspection should cover logo sharpness, color match, ink coverage, registration, banding, smudging, and small text readability. If the logo has tiny type or thin linework, print it at actual size and view it from arm’s length. That is how a customer sees it. Not zoomed to 300% on a monitor while everyone pretends that helps.
Color needs a physical reference. Pantone numbers, printed drawdowns, previous approved samples, and signed color proofs are more reliable than screen previews. Paper shade also affects color. White art paper, natural kraft, black dyed paper, and recycled greyboard will not produce the same result with the same ink. Metallic foil can shift depending on lighting and surface texture.
Finishing is where boutique bags either look premium or start trying too hard. Check matte lamination, gloss lamination, soft-touch coating, foil stamping, embossing, debossing, spot UV, varnish, edge painting, and any surface that can scratch or show fingerprints. Soft-touch finishes feel expensive, but they can mark easily. Gloss can look sharp but may show scratches. Foil looks polished until it is misregistered by a few millimeters, and then it looks cheap very quickly.
Review the sample in normal daylight and under warmer retail lighting if possible. A deep green, burgundy, cream, or charcoal can shift more than expected. So can metallic foil. What looks rich under a sample room light can look flat under store LEDs.
Compare the sample against the approved dieline and quote, not memory. Memory is how people accidentally approve a 2 cm size change and then act surprised when the bottle no longer fits.
| Sample Type | Best For | Typical Timing | Typical Cost Pressure |
|---|---|---|---|
| Plain structural sample | Size, proportion, carry test, fit test | 3-7 business days | Lower |
| Printed pre-production sample | Color, logo, finish, final presentation | 7-15 business days | Moderate to higher |
| Sample with foil or embossing | Luxury branding and premium retail feel | 10-15 business days | Higher due to tooling and setup |
For transport and package testing references, groups like ISTA publish methods that help identify damage risks before shipment. For paper sourcing claims, FSC certification is worth checking when responsibly sourced material matters to the brand. Claims around recycled content, certification, and compostability should be documented, not waved around because they sound nice.
Cost, Pricing, MOQ, and What Sample Changes Can Add
Sample fees are not random punishment. They cover materials, printing setup, finishing setup, labor, machine time, and sometimes tooling. If foil dies, embossing plates, custom handles, or specialty paper are involved, someone has to pay for the setup. Packaging is physical. Annoying, I know.
A plain unprinted structural sample may be inexpensive, and some suppliers credit the fee back against the bulk order. A printed sample with foil, embossing, spot UV, special paper, or dyed handles will cost more because it uses real production steps. Expecting a luxury sample to cost the same as a kraft mockup means the budget conversation started in fantasy land.
MOQ affects pricing as much as the sample does. Lower MOQs reduce inventory risk but usually raise the unit price. Higher MOQs lower the unit price but create cash flow pressure and storage headaches. The best quantity depends on sales certainty, reorder timing, warehouse space, and how often the brand refreshes packaging. Ordering “just in case” quantities sounds safe until cartons sit in the back room for months.
Sample changes can trigger new costs. A wider gusset may require a new dieline. A different handle may need new reinforcement. A foil position change can affect tooling. A switch from kraft to coated paper can change print behavior and drying time. Even a “small” color correction can require another proof if the brand color is sensitive.
Ask these questions before approval:
- Is the sample fee refundable or credited toward production?
- Are courier charges included or billed separately?
- Does the sample fee include tooling, or is tooling billed later?
- Will a revision sample be free, discounted, or charged again?
- Does the production quote match the approved sample exactly?
- What tolerance applies to size, color, quantity, and packing?
If the approved sample includes features not listed in the quote, get the quote corrected before production starts. Verbal assumptions are not payment terms. They are future disputes waiting for a calendar invite.
Step-by-Step Checklist for Reviewing the Physical Sample
Start with the unboxing. Inspect how the sample arrives. Look for crushed corners, scratched lamination, dented edges, loose handles, rubbed foil, or poor packing protection. If one sample cannot survive courier transit, the bulk shipment needs better packing. Maybe stronger export cartons. Maybe inner poly bags. Maybe corner protection. Pretending transit damage is a one-off is not a plan.
Measure the bag next. Use a ruler or tape measure and compare the sample to the quote and dieline. Check width, height, gusset depth, top fold, bottom fold, handle spacing, and handle drop. If there is an agreed tolerance, write it down. Paper converting is precise, but it is not magic. A few millimeters may be acceptable. A visible proportion problem is not.
Load the bag with the actual product weight. Carry it for several minutes. Swing it gently. Set it down. Pick it back up. If the handle, bottom, or side seam gives you a bad feeling, trust that feeling. Customers do not baby boutique bags. They carry them to a car, through a packed mall, across wet pavement, or into a train station while holding coffee in the other hand.
Check the handle attachment points, knots, punched holes, reinforcement cards, and glue areas. These are common failure zones, especially for candles, boxed products, jars, books, and gift sets. A pretty handle with weak attachment is like expensive shoes with cardboard soles. Fine until someone uses them.
Review the print under daylight and store-like lighting. Color shifts happen. Warm bulbs, cool LEDs, and camera filters all change perception. If the brand color is sensitive, compare the sample against a Pantone reference, printed drawdown, or previous approved sample. Do not approve brand color from a phone photo unless you enjoy avoidable problems.
Inspect folds, creases, gussets, bottom structure, glue seams, lamination edges, and cracking along score lines. Dark ink on coated paper can show cracking more easily. Heavy coverage can reveal scuffs. Matte and soft-touch finishes may show fingerprints or rub marks. That may be acceptable for some brands and unacceptable for others. Decide before production, not after cartons arrive.
Smell the bag, too. Strong solvent or glue odor is easy to miss in a photo and hard to explain to a customer buying skincare, jewelry, or apparel. Some odor may dissipate after airing, but a strong chemical smell should be raised before approval.
Keep one revision list. One. Not six comments scattered across email, chat, screenshots, and someone’s camera roll. Mark every issue clearly with photos and notes. Number the comments. If the supplier has to guess which note matters most, the revision will take longer than it should.
- Approve as-is if the sample matches the brief and performs well.
- Approve with noted corrections if the issues are minor, measurable, and documented.
- Request a revised sample if a core spec misses the mark.
- Reject and revisit the brief if size, print, structure, or material choice is fundamentally wrong.
Common Sample Approval Mistakes That Create Bulk Order Problems
The biggest mistake is approving from photos only. Photos hide paper feel, stiffness, handle strength, odor, scale, surface marks, and most finishing issues buyers actually care about. If the bags are premium, get the sample in hand. Not a JPEG and a hopeful mood.
Another mistake is checking color on a phone screen. Screens are backlit and wildly optimistic. Printed paper is not. If color matters, use a physical standard.
Buyers also approve samples without testing the real load. Handles that survive an empty bag may fail once a glass jar, book, or candle set goes inside. The bag is not being dramatic. It is telling you its limit.
Ignoring tolerance creates trouble from the other direction. Some variation is normal in paper converting and printing. A tiny size difference may be acceptable. A crooked fold, shifted logo, split corner, uneven gusset, weak bottom, or obvious color mismatch is not. The skill is knowing which differences are normal variation and which ones are defects. That depends on the product, price point, order size, and brand expectations.
Artwork errors are another classic. Low-resolution logos, unoutlined fonts, missing bleed, RGB files, incorrect Pantone references, thin foil lines, and web artwork sent for print all create messy results. Printing exposes sloppy files immediately. Screens are forgiving. Paper is not.
Feature creep can wreck the schedule. Adding foil, changing handle color, resizing the bag, switching paper, or moving the logo after sample approval can restart part of the process. A sample is not a loose draft. It is the production reference.
Deadline panic is also a bad advisor. A late correct order is annoying. A fast wrong order is expensive, public, and usually sitting in 30 cartons while everyone tries to sound optimistic.
Expert Tips for Getting Cleaner Samples and Fewer Revisions
Send a clear brief before sampling. Include bag size, product dimensions, product weight, brand colors, finish preferences, handle style, target order quantity, budget range, packing expectations, and delivery date. The more precise the brief, the fewer rounds you need. That is not magic. That is giving the supplier enough information to stop guessing.
Reference images help, but they do not replace specifications. A polished image does not tell a supplier the GSM, coating, handle material, Pantone color, foil shade, or tolerance. Use visuals for direction. Use specs for production.
Choose the sample level based on risk. A simple kraft shopper may only need a structural sample and digital artwork proof. A luxury boutique bag with foil, ribbon handles, deep color, and a premium finish deserves a printed pre-production sample. If the bag is part of the brand experience, spend the extra round. It is cheaper than apologizing later.
Keep the approval team narrow. Too many opinions produce contradictory notes: warmer color, cooler color, more premium, less expensive, bigger logo, smaller logo. That is not a brief. That is a committee designing a compromise nobody likes.
Lock color standards before sampling, especially for signature shades. Pantone references, printed drawdowns, and prior approved samples reduce guesswork. If the brand uses a core color, treat it like a technical specification, not a suggestion.
Ask for production tolerances in writing. Size tolerance, color tolerance, quantity overrun or underrun, carton count, and packing method should not be mysterious. For small boutique orders, even a modest shortage can cause trouble if the bags are tied to a launch. For large orders, a small defect rate can still mean many unusable bags.
Keep one approved master sample once production begins. Label it with the order number, date, version, and final notes. Store it flat or protected so it does not get crushed. This becomes the reference for reorders, disputes, incoming inspections, and quality checks. A clean master sample saves time because nobody has to reconstruct history from old messages.
Be honest about budget early. A capable supplier can suggest smarter substitutions: simpler handles, lighter paper with reinforcement, one-color print instead of full coverage, embossing without foil, or a standard ribbon instead of a custom-dyed one. Those changes are much easier before sampling than after everyone has fallen in love with a version the budget cannot support.
Final Checks Before You Release Boutique Bag Production
Before sign-off, gather the quote, artwork proof, dieline, sample photos, physical sample, product weight, test notes, and revision history in one place. If you cannot find all of that quickly, the approval process is already too loose.
Confirm every final spec in writing: size, paper stock, paper color, print method, color references, finish, handle type, handle color, reinforcement, quantity, carton packing, production lead time, inspection plan, and shipping method. If pricing or MOQ changed during sampling, get the revised version documented before any deposit or balance payment goes out.
Use a clear status label: approved as-is, approved with corrections listed, revised sample required, or rejected. Avoid vague replies like “looks good except a few things.” That is not approval. That is a future argument with bad memory on both sides.
Keep the approved sample in a labeled sleeve or box. Add the order number, date, version notes, and any tolerance agreements. Dull? Absolutely. Useful? Also absolutely. Reorders get easier when someone can open a box instead of guessing what “the one we liked” meant.
The practical rule is simple: do not release production until the boutique paper Bags Sample Approval Checklist is complete, written down, and matched to the quote. That one habit saves more money than most dramatic last-minute fixes. It is less glamorous than rescuing a bad order after cartons land. It is also much cheaper.
What should be included in a boutique paper bag sample approval checklist?
Include size, gusset depth, paper stock, print color, logo placement, handle style, handle strength, finishing, folds, glue seams, bottom reinforcement, packing method, odor check, and tolerance notes. Add a real product fit test and weight test, because visual approval alone does not prove the bag will work in a boutique retail setting.
How long does sample approval take for custom boutique paper bags?
A simple structural sample often takes 3 to 7 business days after specs are confirmed. A printed pre-production sample usually takes 7 to 15 business days, with extra time for foil, embossing, custom paper, ribbon handles, courier shipping, or revision rounds.
Do I need a printed sample before ordering boutique paper bags in bulk?
Request a printed sample when color, logo quality, luxury finish, or exact brand presentation matters. For basic kraft or single-color bags, a structural sample plus digital artwork proof may be enough if the risk is low and the specifications are straightforward.
How much do boutique paper bag samples usually cost?
Costs depend on the sample type, paper stock, printing method, finishing, tooling, and shipping. Plain structural samples are usually cheaper. Printed samples with foil, embossing, spot UV, specialty paper, or custom handles cost more because they require real setup and materials.
Can I change the design after approving a boutique paper bag sample?
Yes, but changes after approval can trigger new sample fees, tooling costs, production delays, or revised unit pricing. Small artwork adjustments may be manageable. Changes to size, paper, handle style, foil, or structure should be treated as a new approval round.

