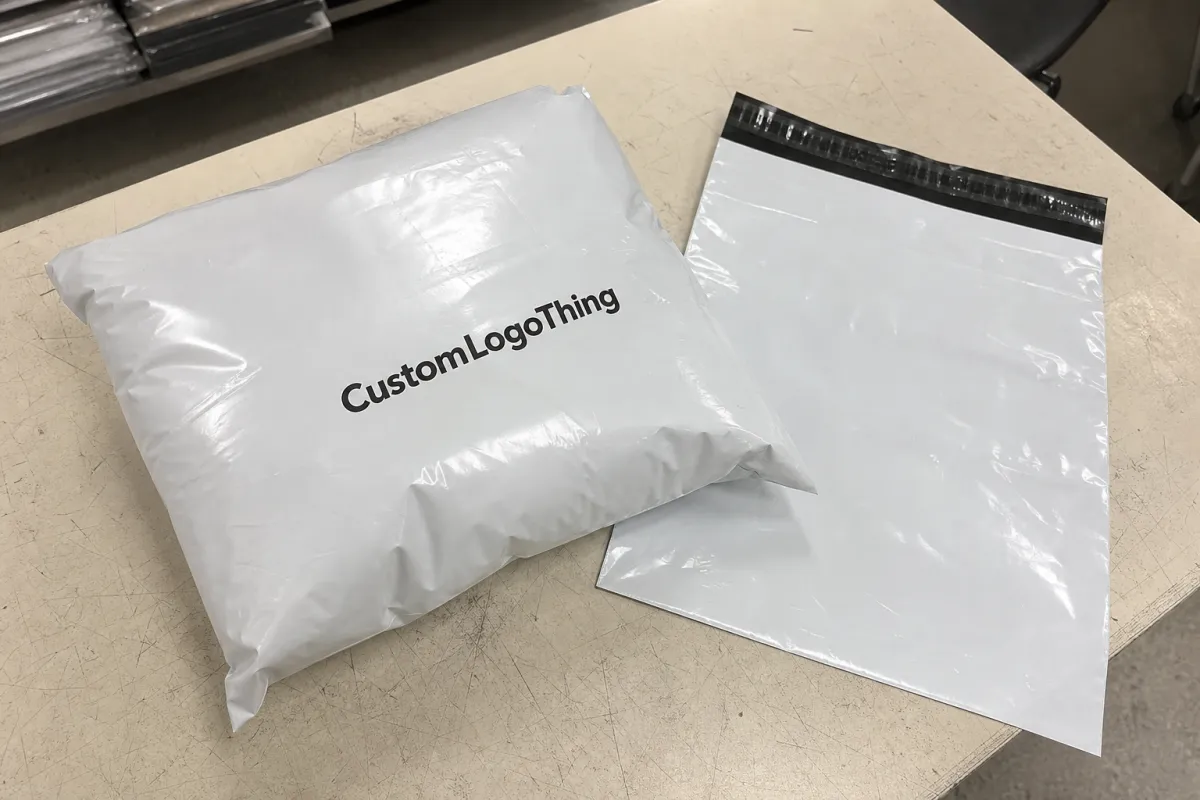
A clear poly retail bags Sample Approval Checklist protects buyers from one of the most annoying packaging failures: a bag that looks fine empty, then falls apart as soon as a folded garment, bakery item, accessory kit, or printed insert goes inside. The logo wrinkles. The seal splits. The barcode scans once, then refuses to cooperate. Very professional. Very avoidable.
Clear packaging has no mercy. Opaque mailers and cartons can hide a lot. Transparent film exposes haze, dust, scratches, crooked seals, uneven gussets, weak ink coverage, and the real shape of the product after filling. That is why sample approval should not be treated as a courtesy step before production. It is the last controlled checkpoint before thousands of identical bags get made.
The goal is not to admire a sample. The goal is to prove that the bag works under the same conditions it will face in packing, shipping, shelving, scanning, and customer handling.
What a Clear Poly Retail Bags Sample Approval Checklist Actually Verifies
A useful checklist verifies more than whether the logo “looks good.” That phrase is useless in production. A proper review confirms dimensions, usable fill space, film clarity, thickness, seal strength, closure function, print placement, barcode readability, venting, hang hole position, suffocation warning copy, and carton packing details.
Most packaging problems are not dramatic factory disasters. They are small mismatches between the buyer’s intended use and the supplier’s interpreted specification.
Example: a buyer requests a 10 inch by 12 inch bag. The supplier makes the outside dimension correctly. Fine. But the usable space is reduced by a flap, a header, a bottom seal, or a side gusset. Now the sweatshirt that should slide in cleanly has to be forced. Packing staff slow down. The product looks squeezed. Nobody enjoys discovering that after a full production run lands.
Digital proofs, pre-production samples, and production samples also serve different jobs. A digital proof checks artwork position, color callouts, warning copy, and layout. A pre-production sample shows whether the actual bag behaves correctly with the product. A production sample, usually pulled from the first manufactured batch, confirms that the approved standard is being followed at scale.
Approve the sample as evidence, not as a feeling. Photograph measurements, record tolerances, mark the version number, and keep the signed sample as the production benchmark.
For buyers comparing options across Custom Packaging Products, that evidence matters. If a shipment arrives with weak seals or misaligned print, the approved sample becomes the reference point. Without it, the conversation turns subjective fast. With it, the facts are sitting on the table.
How Sample Approval Works Before Clear Poly Bag Production
The workflow is straightforward. The buyer sends product dimensions, artwork, material preference, closure style, retail use case, and any compliance requirements. The manufacturer turns those inputs into a physical sample, a digital proof, or both. The buyer tests, marks revisions, and signs off before production begins.
Different sample types answer different questions:
- Stock-size sample: useful for checking film feel, clarity, closure behavior, and rough sizing before custom work starts.
- Blank custom sample: best for fit testing products with unusual thickness, rigid corners, or a specific shelf presentation.
- Printed pre-production sample: used to verify branding, ink opacity, barcode placement, warning copy, and print registration.
- Final approval sample: the signed physical reference for production control and quality inspection.
Clear bags need more scrutiny than opaque packaging because transparency makes defects visible. Scratches, haze, wrinkles, dust, ink misregistration, seal burn marks, and uneven gussets can all show through. Frosted or opaque film may hide small sins. Glossy clear polypropylene will not.
Tolerances need to be stated before approval. A bag listed as 10 inches wide may have an acceptable variance of plus or minus 1/8 inch, sometimes more depending on the process, film, and bag style. That may be fine for soft apparel. It can be a problem for rigid retail kits, peg displays, or shelf-ready packs where a hang hole has to line up within a narrow space.
Approving a sample is closer to test-driving a car than admiring a brochure. Fill it. Close it. Hang it. Scan it. Put it in a carton. Handle it like store staff and customers will. A Clear Poly Retail Bags sample approval checklist forces that practical review before the order moves from idea to inventory.
Key Specs to Check: Film, Size, Seals, Closure, and Print
Start with the film. Most clear retail bags are made from LDPE, LLDPE blends, polypropylene, recycled-content polyethylene, or specialty compostable films. LDPE tends to feel softer and more flexible. Polypropylene often looks crisper and glossier, which can make cosmetics, stationery, cards, and accessories look sharper on a shelf. Compostable films may have different clarity, stiffness, shelf life, and sealing behavior, so they need extra testing before approval.
Gauge matters. A 1.5 mil bag may work for lightweight apparel inserts or small accessories. A 2 mil to 3 mil film often feels more substantial for retail handling. Heavier is not automatically better, no matter how often people pretend it is. A thicker bag can look bulky, resist folding, slow down packing, or cost more than the product margin can justify. The better question is whether the film matches the product, channel, and handling risk.
Inspect clarity and surface quality under realistic lighting. Look for haze, gloss variation, fish eyes, streaks, gel spots, blocking, static cling, scratches, and cloudy patches. Place the product inside. Does the film make the item look cleaner and brighter, or does it dull the presentation? Store lighting can expose flaws that office lighting politely ignores.
Measurements require discipline. Check width, length, flap length, lip, gusset depth, wicket spacing, header area, hang hole placement, and usable interior space. Outside dimensions and usable fill dimensions are not the same thing. If the bag has a resealable flap, the adhesive strip may reduce the practical opening. If it has a header with a hang hole, the sellable display area may be smaller than the flat drawing suggests.
Seal inspection is just as practical. Look for straight seals, consistent seal width, no pinholes, no weak spots, and no melted edges that distort the bag. Insert and remove the product repeatedly. A seal that survives one careful desk test may split after five fast retail handling cycles.
Closure testing depends on the bag style. For adhesive flap bags, confirm that the adhesive grabs firmly but does not tear the film during normal opening. For zipper bags, check alignment, track strength, and whether customers can reclose the package without fighting it. For open-top or wicketed bags, check opening behavior and packing speed. Static cling can turn a simple open-top bag into a tiny production bottleneck.
Print checks should include logo scale, ink opacity, white ink backing, color registration, barcode quiet zones, warning placement, recycling symbols, and country-of-origin statements where applicable. GS1 guidance is useful for barcode basics, but buyers should also test with the scanner or app their warehouse, store, or retailer actually uses. If the design stays readable only while the bag is empty, it is not approved.
| Spec Area | What to Check | Typical Buyer Risk | Practical Acceptance Check |
|---|---|---|---|
| Film gauge | 1.5 mil, 2 mil, 3 mil, or stated micron equivalent | Bag feels flimsy or costs more than needed | Compare against product weight and handling conditions |
| Usable size | Interior fill area after flap, seal, header, or gusset | Product fits on paper but not in practice | Insert the actual product and printed insert together |
| Logo position, opacity, registration, barcode quiet zone | Branding shifts or barcode fails | Scan filled bags from several angles | |
| Closure | Adhesive strip, zipper, flap, wicket, or open top | Closure fails after repeated use | Open and close the sample 5 to 10 times |
| Retail display | Hang hole, header, pack stiffness, shelf fit | Bag droops, tears, or hides product details | Hang or stack it in the intended orientation |
Sample Approval Process and Timeline From Artwork to Sign-Off
A realistic process map usually looks like this: inquiry, spec confirmation, artwork review, sample request, sample production or sourcing, shipping, buyer testing, revision round, final approval, production scheduling, quality control, and shipment. Each step can be short. None should be invisible.
Timelines depend on the sample type. A stock-size sample may ship in a few business days if material is available. A blank custom sample usually takes longer because dimensions, closure, and tooling have to be matched. A printed pre-production sample often takes the most time, especially with multi-color printing, custom film extrusion, imported material, special closures, vent holes, anti-static treatment, or food-contact documentation.
Ask for milestone dates instead of one vague delivery promise. “Ready in three weeks” does not tell a buyer much. Better questions are sharper: When will the sample ship? When is feedback needed? How long does one revision round take? What date can production start after written approval? When will quality inspection happen? When does the shipment hand off to the carrier?
Rushed approval is fake efficiency. A one-day review may look great on a calendar, right up until the finished run arrives with a preventable defect. If the bag will hang on a peg, test it hanging. If it will ship inside a carton, put it in the carton. If it contains a folded garment, fold the garment the same way warehouse staff will fold it.
For buyers also sourcing Custom Poly Mailers, the contrast is useful. Mailers are judged heavily on puncture resistance, opacity, adhesive security, and shipping performance. Clear retail bags are judged on product visibility, presentation, scan reliability, and shelf handling. Different failure modes. Different checklist.
Cost, Pricing, MOQ, and Unit Cost Questions to Ask
Sample approval affects cost because every unchecked detail can become a paid revision, a reprint, an air-freight emergency, or a rejected lot. The price of the bag is not just resin and ink. It includes machine time, setup, waste, packing labor, freight, documentation, and risk.
Common pricing inputs include bag dimensions, film gauge, resin type, order volume, print colors, ink coverage, plate or setup charges, closure style, venting, hang holes, packing method, freight, and testing or compliance documentation. A simple unprinted LDPE bag in a stock size sits in a very different cost category from a Custom Printed Polypropylene retail bag with a reinforced header, suffocation warning, barcode, and peg hole.
For rough planning, buyers may see custom clear retail bags in the range of $0.04 to $0.18 per unit for larger runs, depending on size, gauge, print, closure, and freight assumptions. Smaller branded runs can land higher because setup is spread across fewer pieces. Highly decorated bags, specialty materials, or low minimums can push costs beyond that range. Resin markets move, freight changes, and suppliers quote differently, so treat early numbers as planning estimates until the specification is locked.
MOQ is not random. Minimum order quantity is tied to machine setup, film rolls, print plates, color changes, and labor efficiency. A lower MOQ may sound attractive, but it usually carries a higher unit cost. If a setup charge is $250 and the order is 2,500 bags, that adds $0.10 per bag before the film is counted. Spread the same charge over 25,000 bags, and it adds one cent.
Ask for a quote that separates one-time charges from recurring costs. A clean quote includes sample fees, plate charges, production unit cost, carton quantity, freight estimate, revision cost, and any compliance testing. Keep the sample checklist beside that quote because a small spec change can change the economics.
The useful question is not just “How much is the bag?” Ask: “Which changes would reduce cost without weakening fit, shelf appeal, scan reliability, or compliance?”
Practical cost-saving options may include adjusting to a stock film width, reducing ink coverage, using one print color instead of two, changing from a zipper to a flap closure, or consolidating three similar bag sizes into one approved format. Boring moves. Often profitable ones.
Common Sample Approval Mistakes That Create Retail Bag Problems
The most common mistakes are painfully ordinary: approving from photos only, measuring outside dimensions instead of usable space, ignoring film gauge, forgetting the product’s thickness, skipping barcode scans, and failing to test closures after repeated use. None sounds dramatic. Each can spoil a production run.
The artwork trap deserves special attention. A logo that looks centered on a flat empty bag may shift visually once the product is inserted. Gussets change the viewing panel. Bulky textiles push print forward and sideways. Irregular retail items can create glare across a barcode or stretch warning copy into a curved shape.
Compliance oversights create another set of problems. Clear poly bags may need suffocation warnings, recycling marks, food-contact statements, country-of-origin details, or retailer-specific labels. Requirements vary by product, bag opening, jurisdiction, and sales channel. For environmental claims and recycling language, buyers can review guidance from the U.S. Environmental Protection Agency. For transport testing concepts, the International Safe Transit Association is a useful reference point.
Color approval can go sideways too. Transparent film changes how ink appears depending on the item behind it. Black print over a white T-shirt looks different from black print over a dark accessory kit. White ink underbase may be needed for opacity, especially on colored products. Approving color under dim office lighting is asking for a surprise.
Another mistake: treating the bag as a standalone object instead of a finished package. Customers do not experience an empty bag. They see the product inside it, the glare on the surface, the barcode at checkout, the hang hole on the peg, and the closure after someone opens it. The checklist should force the review into real handling conditions, not a tidy desk inspection.
Practical Testing Tips for a Clear Poly Retail Bag Sample
Use a simple field-test routine. Insert the product. Remove it. Reseal or reclose it if applicable. Hang it. Stack it. Rub the print. Scan the barcode. Place it in a carton. Photograph it under retail-style lighting. Then repeat the same test with two or three more samples if you have them.
The tools do not need to be fancy. A ruler or caliper, a thickness gauge if available, a scale, a barcode scanner app or handheld scanner, the final product insert, a shipping carton, and the written spec sheet will catch most sample issues. For higher-volume retail programs, add a basic pull check on hang holes and a rub test on printed areas.
Document approval like a quality record. Mark the approved sample. Store it flat or boxed so it does not crease. Date it. Photograph both sides. Record measurements. Note the film gauge, closure type, print colors, warning copy, carton count, and approved tolerance. Make sure the factory, distributor, or packaging partner has the same signed reference.
One perfect bag proves less than five consistent bags. If the supplier can provide three to five samples from the same setup, compare them. Are the side seals equally straight? Is the print position consistent within the agreed tolerance, perhaps plus or minus 1/8 inch? Does the adhesive strip land cleanly every time? Do all samples scan after the product is inserted?
Do a quick packing-speed check if the bags will be filled by staff. Some bags look good but are slow to open. Static, tight lips, sticky flaps, and stiff film can drag down packing speed. A few extra seconds per bag may not matter on 200 units. On 20,000 units, it becomes labor.
The math is hard to argue with. If a production run contains 20,000 bags, spending an extra 30 minutes testing a sample is cheap insurance. One rejected pallet, one delayed retail launch, or one rush reprint can cost far more than careful approval.
Next Steps Before You Approve and Release Production
Before signing off, gather the physical sample, final artwork proof, quote, spec sheet, product sample, printed insert, retailer requirements, and compliance notes. Put them in one place. Fragmented approval causes fragmented accountability.
Use a final decision sequence:
- Confirm the product fit using the actual item and insert.
- Confirm clarity, gloss, haze level, and surface quality under retail-style lighting.
- Confirm film thickness against the quoted gauge or micron spec.
- Confirm closure function after repeated opening and closing.
- Confirm seal strength, straightness, and usable fill space.
- Confirm print placement, ink opacity, barcode scan, and warning copy.
- Confirm carton pack count, packing orientation, and written production tolerance.
Send approval notes in writing. Not “looks good.” Use exact language: sample version, date, revision number, approved dimensions, accepted tolerances, artwork file name, closure style, carton count, and any accepted deviations. If a small flaw is acceptable, say so clearly. If it is not acceptable in production, say that too.
For high-volume, deadline-sensitive, or retail-launch orders, request a pre-shipment inspection or production photo set. Photos cannot replace physical approval, but they can catch obvious drift before goods leave the packing area. Ask for images of filled cartons, label details, printed bags, seals, and a ruler beside key dimensions.
A Clear Poly Retail Bags sample approval checklist gives buyers a repeatable way to catch small defects before they turn into expensive inventory, delayed launches, or packaging that quietly weakens the brand. It is not paperwork for its own sake. It is a practical filter between a promising sample and a production run you can defend.
FAQ
What should be included in a clear poly retail bag sample checklist?
Include dimensions, usable fill space, film gauge, clarity, seal strength, closure function, print accuracy, barcode scan results, warning copy, hang hole placement, packing count, and approved tolerance range. Test the sample with the actual product rather than reviewing it empty. Keep the approved sample as the physical benchmark for production quality.
How long does clear poly bag sample approval usually take?
Timing depends on whether the sample is stock, blank custom, or fully printed. Artwork review, tooling, print setup, material availability, shipping, and revision rounds all affect the schedule. Buyers should ask for milestone dates for sample dispatch, feedback, revision, production start, and shipment.
Does sample approval affect the final price of clear retail bags?
Yes. Size changes, film thickness, print colors, closure style, setup fees, MOQ, freight, and documentation can all shift unit cost. Careful approval can prevent reprints, rush freight, and rejected inventory. Ask suppliers to separate one-time setup costs from recurring per-bag pricing.
Can I approve clear poly retail bags from photos only?
Photo approval is risky because it cannot reliably confirm film feel, true fit, seal strength, closure behavior, or barcode scanning. Photos can help with quick visual checks, but physical samples are better for final approval. If a physical sample is impossible, request measured photos, video handling tests, and written tolerance confirmation.
What are the most common clear poly bag sample defects to look for?
Common issues include haze, scratches, weak seals, incorrect usable size, misaligned print, poor ink opacity, static cling, crooked hang holes, and unreadable barcodes. Check whether the bag still looks and functions correctly after the actual product is inserted. Document defects with photos, measurements, and clear revision notes.

