Buyer Fit Snapshot
| Best fit | Branded Packaging for Product Presentation projects where brand print, material claims, artwork control, MOQ, and repeat-order consistency need to be specified before quoting. |
|---|---|
| Quote inputs | Share finished size, material target, print colors, finish, packing count, annual reorder estimate, ship-to region, and any compliance wording. |
| Proofing check | Approve dieline scale, logo placement, barcode or warning zones, color tolerance, closure strength, and carton packing before bulk production. |
| Main risk | Vague material claims, crowded artwork, missing packing details, or unclear freight terms can make a low unit price expensive after revisions. |
Fast answer: Branded Packaging for Product Presentation: Quote Scope, Sample Proof, MOQ, and Lead Time should be specified like a repeatable production item. The safest quote records material, print method, finish, artwork proof, packing count, and reorder notes in one written spec.
Production checks before approval
Compare the actual filled-product size with the drawing, then confirm tolerance on folds, seals, hang holes, label areas, and retail display edges. Reserve space for logos, QR codes, warning copy, and material claims before decorative graphics fill the panel.
Quote comparison points
Review material grade, print process, finish, sampling route, tooling charges, carton quantity, and freight assumptions side by side. A quote is only useful when the supplier can repeat the same color, closure quality, and packing count on the next order.
Two products can be identical down to the last gram and still sell very differently because of Branded Packaging for Product presentation. I’ve watched that happen on factory floors in Dongguan and in a contract packer’s warehouse in New Jersey: one item came in a rigid setup box with a crisp insert, perfectly centered, while the other arrived in plain corrugate with a loose paper wrap. The customer’s face told the whole story before anyone even touched the product. That first look matters more than most teams want to admit, and branded packaging for product presentation is often the quiet reason one offer feels premium while another feels ordinary.
My name is Marcus Rivera, and after two decades around die cutters, glue lines, print rooms, and shipping docks, I’ve learned that good packaging is never just “decoration.” It’s a system. branded Packaging for Product presentation includes the outer mailer, the carton, the insert, the tissue, the label, the finish, and even the way the customer lifts the lid or tears the strip. If that sequence feels considered, the product seems more valuable. If it feels sloppy, the brand pays for it even when the product itself is excellent. Honestly, the number of times I’ve seen a great product hidden inside a box that looked like it got dressed in the dark… painful.
Branded Packaging for Product Presentation: What It Really Means
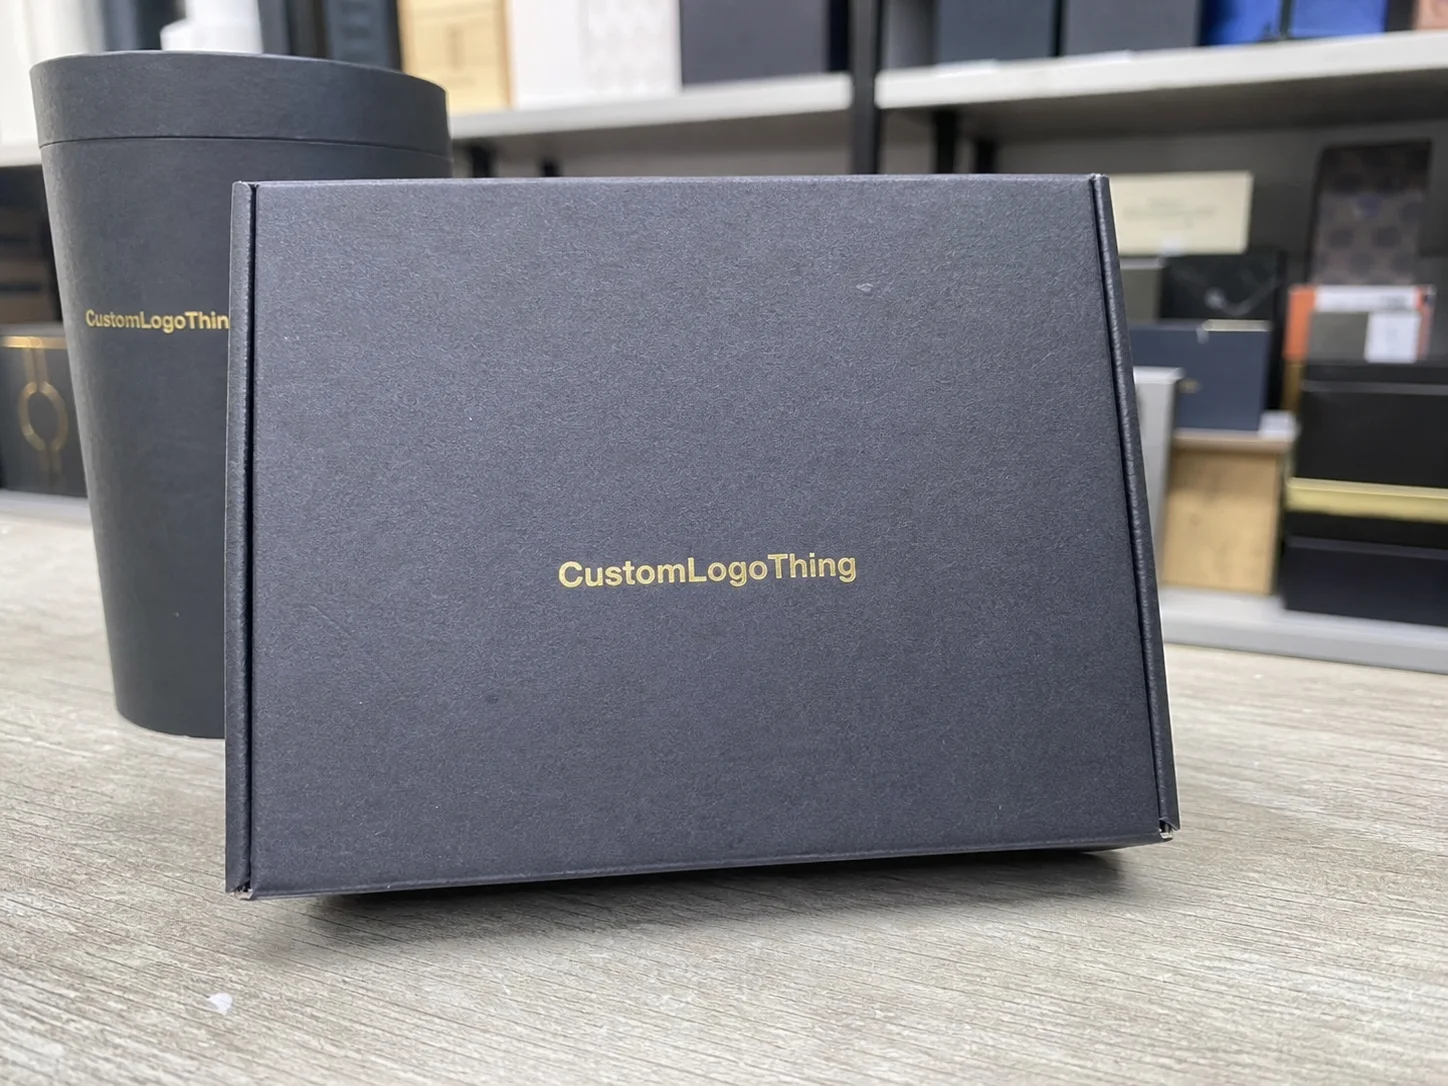
On the shop floor, I’ve seen product teams use the word “branding” when they really meant a logo slapped onto a box. That’s too narrow. branded Packaging for Product presentation is the full visual and tactile frame around the product, and it starts before the customer ever sees the item inside. A folded carton, a rigid setup box, a corrugated mailer, a printed sleeve, or a custom insert made from E-flute, SBS paperboard, or chipboard all send different signals. The board caliper, the print method, the coating, and the opening style all become part of the message. A 350gsm C1S artboard carton with a matte aqueous coating feels very different from a 1.5mm greyboard rigid box wrapped in 157gsm art paper, and customers notice that difference in under five seconds.
Branding reinforces positioning. Presentation guides attention. Those are related, but not the same. A luxury serum might use deep black rigid board, soft-touch lamination, and a gold foil logo because the brand promise is calm, elevated, and refined. A subscription snack brand might use kraft corrugate, one-color flexo print, and a die-cut paper insert because the promise is practical, earth-conscious, and energetic. In both cases, Branded Packaging for Product presentation should support the story rather than fight it. If your product retails for $48, a $0.15 inner insert and a $0.22 printed sleeve can do a lot more than a random shiny finish ever will.
I remember a meeting with a cosmetics buyer who had a product that performed beautifully in testing, yet retail sell-through was weak. We changed nothing about the formula. We changed the pack: a 24pt SBS folding carton with a tighter tuck, a matte aqueous coating, and a clean insert layout. Sales climbed because the shelf presentation finally matched the product’s price point. That is the part people miss. Branded Packaging for Product presentation can close the gap between value delivered and value perceived, especially when the product lands in a Sephora-style aisle in Los Angeles or a pharmacy shelf in Chicago.
And this isn’t only for luxury categories. Cosmetics, electronics, supplements, apparel, candles, and subscription kits all benefit from better presentation. In fact, some of the sharpest gains I’ve seen came from mid-market brands, because their customers are sensitive to whether the package feels thoughtful or generic. If the box feels like an afterthought, the customer often assumes the rest of the business works the same way. That’s harsh, but it’s real. A $12 candle in a $0.18 mailer with a clean belly band can outperform a $12 candle in a fussy $1.40 box that screams “we spent the budget on the wrong thing.”
Factory-floor truth: people judge the package in about three seconds, and they decide whether to trust the brand long before they read the ingredient panel, spec sheet, or instruction card.
How Branded Packaging for Product Presentation Works
branded packaging for product presentation works because it choreographs a sequence. The customer sees the exterior first, then the opening mechanism, then the reveal moment, then the product hold, and finally the closure or reuse. If one of those steps feels clumsy, the whole experience drops in quality. I’ve watched teams spend heavily on print finishes and then forget that the product rattles inside during transit, which defeats the whole presentation. Classic move, unfortunately. A lid that opens at 82 degrees instead of 90, or an insert with a 3 mm tolerance instead of a sloppy 7 mm gap, can make the difference between “premium” and “meh.”
The exterior impression is the first hook. Color, typography, and layout do a lot of work here, but so do finishing choices like embossing, foil stamping, spot UV, and soft-touch lamination. I’ve seen a simple one-color logo on a heavy rigid box outperform a crowded four-color layout because the minimal design felt deliberate. A window cut can help where the product itself is visually strong, especially in retail packaging for accessories, health items, or premium confectionery. branded packaging for product presentation only works if the finish supports the brand voice instead of smothering it. If you’re printing in Guangzhou or Shenzhen, ask for actual coated and uncoated samples, because the same ink looks wildly different on 18pt SBS versus 250gsm kraft.
Structure engineering matters just as much as graphics. The die-cut tolerances, the fit of the insert, the glue tab dimensions, and the closure strength all affect the user experience. A box with a beautiful top print still feels cheap if the lid bows, the tuck flap creases too early, or the insert leaves a 2 mm gap that lets the product shift. When I was reviewing a run of custom printed boxes for an electronics brand, the team had approved artwork but skipped a proper transit test. The first shipment showed corner crush and a 4 percent product movement issue. That’s a small number on paper, but on a packed pallet it becomes a headache fast. One replacement pallet from Shenzhen to Dallas can run $850 to $1,200 by sea-plus-local handling, and suddenly the “cheap” box isn’t cheap at all.
branded packaging for product presentation also has to work in two environments at once: retail and e-commerce. Retail packaging has to grab attention on shelf, while mailer packaging has to survive courier handling, vibration, and the occasional rough drop onto a concrete dock. In the United States, shipping tests often reference ISTA methods, and I always encourage teams to think in terms of real handling, not just studio mockups. If you want a good reference point, the industry standards published by ISTA are worth reviewing alongside your own pack-out trials. On a 500-unit test run, I’d rather spend $120 on extra drop testing than eat a $9,000 return wave later.
Prototype sampling helps here more than most people expect. A digital press proof, a white sample, or a dieline mockup lets you check the opening sequence, the visibility of the product, and the fit of any insert before you commit to a full run. On one supplement project, a team wanted a magnetic closure rigid box, but the sample showed the closure was fighting the thumb notch. We adjusted the lid flap by 3 mm, and the entire presentation felt cleaner. That’s the kind of small change that separates decent packaging from effective branded packaging for product presentation. The sample cycle itself usually takes 3 to 5 business days from file approval if the factory is in Dongguan or Huizhou and already has the paper in stock.
Key Factors That Shape Cost and Pricing
Cost in branded packaging for product presentation usually comes down to six things: material, print method, structure complexity, finish selection, insert requirements, and quantity. If a brand understands those six levers, budgeting becomes far less mysterious. If not, people tend to blame the vendor for a price that was mostly driven by their own spec choices. I’ve seen the same box quoted at $0.42 per unit for 10,000 pieces and $0.79 per unit for 2,000 pieces, with the only change being how the fixed setup costs were spread out.
Material is often the biggest starting point. A standard folding carton in 18pt or 24pt SBS is usually more economical than a rigid chipboard box wrapped in printed paper. Corrugated mailers can be cost-efficient for shipping-first brands, especially when made in E-flute, which gives a nice balance of crush resistance and printability. Specialty papers, recycled boards, and high-opacity stock can all push costs up, but they may be worth it if they support the product story. For example, 350gsm C1S artboard with a matte varnish often lands around $0.15 per unit for 5,000 pieces in a China production run, while a 2mm rigid box with wrapped paper and a foam insert can jump to $1.20 to $2.40 per unit depending on size and finishing. For brands looking to compare options, our Custom Packaging Products page is a useful place to start thinking through formats.
Print method matters too. Offset lithography tends to offer strong detail and color control for larger runs, while digital printing can make sense for shorter orders and faster sampling. Flexographic printing is common on corrugated, especially where practical retail packaging and warehouse efficiency matter more than fine image detail. If you’re doing custom printed boxes with multiple PMS colors, special coatings, or tight registration, the press setup time alone can affect the quote in a noticeable way. In Shanghai, a 4-color offset run with aqueous coating and no special finish can be ready far faster than a short-run UV job with spot foil in Melbourne or Toronto, simply because the press plan is different.
Then there are finishes. Soft-touch lamination, embossing, debossing, foil stamping, spot UV, and aqueous or matte coatings all add labor, tooling, or material cost. A rigid box with foil and embossing can easily land in a different price bracket than a plain printed mailer. I think many brands overbuy finishes before they’ve solved the real presentation problem. One strong finish is usually better than three weak ones fighting for attention. A single blind deboss on the lid can feel more expensive than a parade of effects that cost $0.08 each and look like a craft fair exploded.
Low-volume orders often carry heavier unit costs because setup fees, tooling, and die costs are spread over fewer pieces. That is especially true with custom tooling for inserts, window cuts, or multi-piece constructions. A project for 1,000 units can feel expensive next to 10,000 units, not because the product changed, but because the fixed costs had less volume to absorb them. Here’s a practical way to look at it: a die-cut insert might add $0.03 per unit on a 20,000-piece run, but the same insert can add $0.12 per unit on 3,000 pieces once tooling is allocated. That is why small brands get sticker shock. The math is rude, not magical.
| Packaging Option | Typical Presentation Level | Relative Cost | Best Use Case |
|---|---|---|---|
| Single-color corrugated mailer | Clean, simple, shipping-first | Lower | Subscription kits, apparel, value-focused DTC |
| SBS folding carton with matte coating | Polished retail presentation | Moderate | Cosmetics, supplements, consumer goods |
| Rigid chipboard box with insert | Premium reveal and strong perceived value | Higher | Gifting, electronics, luxury, PR kits |
| Rigid box with foil, embossing, and custom insert | High-impact premium presentation | Highest | Launches, high-margin products, VIP kits |
Quantity changes everything. Once a run gets into larger volumes, unit price often drops because setup is amortized more efficiently and production speeds stabilize. Freight, warehousing, and lead-time planning should be in the budget from the beginning. I’ve seen brands save $0.06 per unit at the factory and then lose that advantage in avoidable air freight because they didn’t build in enough production time. branded packaging for product presentation is never just a print quote; it is a total landed-cost conversation. A 12,000-piece order out of Ningbo might look excellent on paper until you add a $1,450 air shipment because someone approved artwork five days late.
If you want cost reality from the factory side, ask for a spec-based quote rather than a vague ballpark. Include dimensions, board type, finish, insert style, shipping method, and annual forecast if you have it. That gives the vendor room to propose the right structure instead of guessing. It also helps you understand where the money is going, which is half the battle in package branding. If a supplier in Dongguan quotes you $0.28 per unit for 8,000 boxes, ask for the same spec in 18pt SBS, 24pt SBS, and 1.5mm rigid board. The spread will tell you exactly where your budget is leaking.
Step-by-Step Process and Timeline for Production
The production workflow for branded packaging for product presentation usually starts with discovery. The brand shares product dimensions, shipping requirements, audience expectations, and budget. From there, structural design begins, followed by graphic layout, sample development, revisions, prepress, production, finishing, inspection, and shipment. That sounds orderly, but in real life there are usually two or three loops between design and sampling before anyone signs off. In a clean project, the whole process can move from brief to first sample in 7 to 10 business days if the structure is standard and the factory is already running similar jobs in Guangdong or Zhejiang.
A simple printed mailer may move through the process in 10 to 15 business days after proof approval, depending on the plant schedule and material availability. A rigid box with a custom insert and foil stamping can take 20 to 35 business days, and if the artwork is still being revised during sampling, the timeline stretches further. I once worked with a health brand that changed a barcode placement three times after prepress had already started; that small decision pushed their launch back nearly two weeks. Timelines in packaging are often punished by indecision. If the box is shipping from Shenzhen to the Port of Long Beach, add another 18 to 28 days by sea freight, plus customs and domestic delivery.
Approvals matter at every stage. First comes the dieline, which confirms structure and dimensions. Then the artwork proof checks color breaks, text placement, legal copy, and barcode placement. After that, color matching and material selection need sign-off, especially if the board is textured or the brand demands a close PMS match. For branded packaging for product presentation, the prototype is where everyone finally sees whether the concept matches the physical reality. If the brand insists on a Pantone 186 C red, for example, the proof should be checked under D50 lighting, not in a gray conference room under flickering LEDs in Minneapolis.
Here’s the factory sequence I’ve seen most often when the project is well managed:
- Client brief and packaging goals
- Structural dieline creation
- Graphic layout and proofing
- Sample or prototype approval
- Prepress setup and plate/tooling preparation
- Printing, die cutting, and finishing
- Glueing, assembly, and insert packing
- Quality control inspection
- Carton packing and freight booking
On the shop floor, the actual machine sequence may vary. One plant might print first, then laminate, then die cut. Another might cut after coating, depending on the press and the finish. For rigid boxes, wrapping, board forming, and hand assembly often happen in separate stations, which is why labor planning matters so much. A custom insert can be CNC-cut, die-cut, or molded, and each path carries its own timing and tolerance considerations. In a Wenzhou plant I visited, the insert station alone added four operators to handle a 5,000-piece PR kit because the foam puck and paper sleeve had to be nested by hand.
Delays usually come from a few predictable places: late artwork, incomplete spec sheets, missing barcodes, insert redesigns, or last-minute finish changes. If a team decides to add a magnetic closure or swap to a heavier board after the sample is approved, the clock resets faster than most people expect. The cleanest projects are the ones where the brand chooses the structure early and protects the decision through production. I’ve seen a “small” shift from 300gsm artpaper wrap to 157gsm artpaper wrapped over 2mm board add five production days because the glue line and folding sequence had to be reset.
Common Mistakes in Branded Packaging for Product Presentation
The biggest mistake I see is overdesign. A box can become so busy, so layered, and so intent on showing off that the product becomes harder to access, harder to understand, and more expensive than the item inside can support. branded packaging for product presentation should lift the product up, not bury it under five layers of paper, foam, and folds. I’ve watched a team in Jersey City add a ribbon pull, a magnetic closure, a printed insert, and a foil label to a $14 accessory kit. The packaging cost ended up at $1.86 per unit. The product margin was not amused.
Poor fit is another one. I’ve seen beautifully printed boxes where the product moved 8 to 10 mm inside the insert, and the result was a rattle that made the package feel cheap the moment it was picked up. A package may look premium on a desk, but if it fails during shipping and handling, the presentation breaks the instant the customer receives it. That is why product packaging tests matter before you commit to volume. A 2 mm foam cradle or a properly scored paperboard insert can solve a problem that a dozen design meetings will happily ignore.
Color inconsistency can quietly ruin a strong design. If your logo prints too dark on one board, too dull on another, or shifts between runs because the supplier skipped color control, the brand looks less disciplined. Low-resolution artwork and weak typography create a similar problem. An expensive rigid box cannot rescue fuzzy assets. I think people underestimate how fast customers notice sloppy type when the packaging is supposed to feel premium. If the logo is rasterized at 150 dpi and the text is sitting too close to the trim, the box starts looking like a rushed export job from day one.
Finishes also get misused. A glossy spot UV effect might look attractive in a render, but if the package gets fingerprint-heavy in handling or scuffs during carton packing, it can look worn before it ever reaches the customer. Adhesive performance matters too, especially on sleeves, labels, and glued tuck areas. If the glue line fails after a humidity swing or a long freight lane, that “premium” package stops being premium very quickly. I’ve seen hot-melt glue fail on a shipment that went from a 32°C factory in Foshan to a damp warehouse in Rotterdam. Pretty box, ugly result.
The last mistake is skipping real-world tests. Mockups can hide problems that only show up during pack-out, courier vibration, or warehouse stacking. I once saw a subscription kit pass design review with flying colors, then fail a simple shake test because the insert was 2 mm too shallow. The team had spent weeks polishing the artwork while the structure was doing the wrong job. If you want more examples of how brands work through those decisions, our Case Studies page shows the kind of practical tradeoffs that come up in production.
- Do not approve packaging only from a flat proof.
- Do not treat inserts as an afterthought.
- Do not choose finishes without testing scuff and fingerprint behavior.
- Do not ignore the shipping lane your package will actually travel.
Expert Tips for Stronger Branded Packaging for Product Presentation
My first recommendation is simple: design from the inside out. Start with product dimensions, then build the insert, then shape the exterior graphics around the reveal sequence. That order keeps branded packaging for product presentation anchored in reality instead of in a render. If the product is irregular, heavy, fragile, or multiple pieces are involved, the insert should be the first decision, not the last. For a three-piece skincare set, I’d rather spend 30 minutes getting the cavity layout right than spend 30 days fixing a failed pack-out.
Second, pick one hero finish and let it do the heavy lifting. A well-placed foil stamp, a clean emboss, or a refined soft-touch lamination can create more value than a stack of effects that compete with one another. I’ve seen brands turn a modest retail packaging budget into a premium feel simply by focusing on one tactile moment, such as a debossed logo on the lid and a plain interior that frames the product neatly. branded packaging for product presentation often looks stronger when it is disciplined. A single silver foil mark on a matte black rigid box often beats four separate embellishments trying to win the same argument.
Third, test under actual handling conditions. That means vibration, stacking, repeated opening, and shipping through the same courier channel your customers will use. If your cartons go by parcel, test them by parcel. If they are bulk-shipped to a retailer, test for pallet compression and edge crush. When I visited a fulfillment center in Ohio, the packaging that looked best in the design office was the one that failed the hardest in the warehouse because it used a pretty but weak closure. Packaging design has to survive the floor, not just the meeting room. Run 10 units through a shake test, then 10 through a drop test from 36 inches. That small investment can save a whole launch.
Fourth, build consistency across product lines. When a customer can recognize your brand from one SKU to the next, you’ve strengthened package branding without having to reinvent every box. Keep some elements constant: typography, logo placement, a color family, or an opening style. Then allow the product-specific pieces to vary. That approach makes the line feel organized and easier to shop. It also simplifies production, because repeated structures can reduce tooling changes over time. If your primary carton is 78 x 42 x 125 mm and your secondary carton is 80 x 45 x 130 mm, the small size family can often share cutters, inserts, and even carton pack counts.
Fifth, choose materials that match the brand promise. Recycled kraft works beautifully for natural, handmade, or eco-conscious positioning. Rigid board suits premium gifting and high-end launches. Coated SBS gives crisp, precise print for beauty, wellness, and consumer goods. If sustainability matters, check the environmental claims carefully and look for credible certification pathways; the Forest Stewardship Council is a solid reference point for responsibly sourced fiber. I also encourage brands to understand how material choices affect waste and recovery, and the EPA’s packaging and materials resources at epa.gov are a helpful starting place. A kraft mailer in Portland might feel right for one brand, while a 24pt SBS carton in New York feels right for another. The material should match the promise, not the mood board.
Here’s a simple decision rule I use when helping clients evaluate branded packaging for product presentation: if the package is supposed to feel premium, let the structure feel calm and the details feel precise. If it is supposed to feel approachable, keep the reveal straightforward and the print system legible. If it is supposed to feel protective, make the performance visible through stronger board, tighter fit, and less fluff. Good packaging rarely tries to be everything at once. A 2-piece rigid box with a clean lift-off lid can say more about a $120 product than a loud, overbuilt carton ever will.
How do you create branded packaging for product presentation that actually sells?
You start with the product, not the artwork. Measure the item, define the opening experience, Choose the Right insert, and then build the graphics around that structure. If the package supports the product’s price point and brand tone, branded packaging for product presentation can raise perceived value fast. If it fights the product, customers feel that too.
What to Do Next to Improve Product Presentation
If you want to improve branded packaging for product presentation without getting lost in endless revisions, start with one package and audit it honestly. Ask three questions: what does the customer see first, what do they touch second, and where could the product shift, rattle, or feel underwhelming? That single exercise often exposes the weak point faster than a long brainstorming session. On a recent review for a grooming kit, the answer was obvious: the insert was fine, but the opening moment felt dull because the lid had no reveal line and the inside print was blank.
Then write a short packaging brief. Include the product dimensions, target audience, shipping method, budget range, and brand tone. Add a note about whether the pack must work as retail packaging, e-commerce packaging, or both. If the brand is premium, say so plainly. If the product is fragile, weigh the actual item and note the acceptable movement tolerance. Clear input saves time and reduces quote noise. A brief with dimensions like 110 x 62 x 24 mm and a target price of $0.38 per unit at 5,000 pieces is infinitely better than “make it nicer.”
After that, request a dieline, sample, or prototype. Even a white sample can reveal whether the opening feels right and whether the insert is actually doing its job. When the visual and structural choices are all lined up, branded packaging for product presentation becomes easier to evaluate because the team is looking at something physical instead of imagining how it will feel in the customer’s hands. Most factories in Shenzhen, Dongguan, and Ningbo can turn a dieline sample in 3 to 5 business days and a printed proof in about 5 to 7 business days if the artwork is clean.
I also suggest creating a simple internal scorecard with four categories: presentation quality, protection, cost, and timeline. Rate each option from 1 to 5, then compare the totals. That sounds basic, but it helps departments make faster decisions without turning the conversation into a tug-of-war. Finance can see the cost difference, marketing can see the brand impact, and operations can see the handling implications. If one option comes in at $0.92 per unit with a 24-business-day lead time and another lands at $0.57 per unit with a 14-business-day lead time, the tradeoff becomes visible instead of mythical.
Finally, once the structure is approved, keep artwork, inserts, and finishing details aligned all the way to final carton. Too many projects drift because one department updates copy while another changes the insert note and a third revises the finish spec. Consistency is what turns a good concept into actual branded packaging for product presentation. If the mockup says one thing and the shipped unit says another, customers notice immediately. In my experience, those tiny mismatches are exactly what make a brand feel either disciplined or slightly chaotic.
For brands that are ready to move, a practical next step is to review your current formats, compare them against the product’s price point, and then decide where the spend should go: outer box, inner insert, or finishing detail. That is how smart branded packaging for product presentation gets built, one decision at a time, with the product, the customer, and the shipping lane all in mind. If you’re sourcing in Vietnam, China, or Mexico, ask each supplier to quote the same spec sheet so you can compare apples to apples instead of guessing from prettier PDFs.
How does branded packaging for product presentation affect perceived value?
It changes the first impression through weight, print clarity, structure, and the order of the unboxing sequence. When a box feels well made, customers often assume the product inside is more thoughtful, more premium, and more trustworthy before they ever use it. That perception is a real part of branded packaging for product presentation, and a rigid box with a 1.5mm board wrap usually signals more value than a thin 18pt folding carton.
What packaging materials work best for product presentation?
Rigid chipboard boxes work well for premium gifting and higher-end launches, especially when the brand wants a strong reveal. SBS paperboard, corrugated mailers, and custom inserts are also common because they balance presentation and protection. The best choice depends on the product weight, shipping method, and the kind of branded packaging for product presentation the brand wants to create. A 24pt SBS carton with matte coating may be perfect for skincare, while a 1.8mm rigid box makes more sense for a $75 electronics kit.
How much does branded packaging for product presentation usually cost?
Cost depends on the board type, size, print complexity, finishes, insert style, and order quantity. Simple folding cartons usually cost less than rigid boxes with foil stamping, embossing, or custom inserts. For accurate pricing, the factory needs exact dimensions and a clear spec sheet, because branded packaging for product presentation pricing changes quickly with structure and finish choices. A plain printed mailer might come in near $0.18 to $0.35 per unit at 5,000 pieces, while a premium rigid box can run $1.10 to $2.80 per unit depending on the finish stack and where it’s made.
How long does the packaging process usually take?
Timeline depends on the structure and the finishing level. A simple printed mailer can move faster than a rigid box with a custom insert, special coating, and multiple proof rounds. Sampling, revisions, and production scheduling usually drive the lead time, so branded packaging for product presentation projects move best when approvals are made early and kept stable. In practical terms, many projects take 12 to 15 business days from proof approval for simple cartons, while a more complex rigid box often needs 20 to 35 business days before freight.
What is the biggest mistake brands make with presentation packaging?
They focus on appearance and ignore fit, protection, and the real opening experience. A package should look strong, hold the product securely, and guide the customer through a clean reveal. If any one of those pieces fails, the overall effect of branded packaging for product presentation drops fast, even if the artwork itself is beautiful. A gorgeous box from Shenzhen that rattles in transit to Atlanta is still a problem, not a win.