Bucket Hats Material and Sizing Guide for Smarter Orders
A bucket Hats Material and Sizing guide sounds straightforward until two samples arrive with the same size label and behave like different products. One sits high and tidy. The other drops lower on the temples, feels roomier in hand, and changes shape once the brim is sewn and pressed. That is the first clue that fit is not just a circumference number. Crown depth, internal band construction, seam allowance, and brim stiffness all change the way a bucket hat wears.
Good spec work starts with the use case, not the logo file. A giveaway hat has different priorities from a retail style, and a uniform piece has different demands from a fashion drop. Promotional programs usually favor lower cost and easy decoration. Retail buyers tend to care more about finish and fabric hand. Outdoor programs need sun coverage, breathability, and stability. The same body can serve all four, but rarely without tradeoffs.
That is the real value of a bucket Hats Material and Sizing guide: it helps buyers think about fabric, fit, decoration, and packing as one system. If those pieces are handled separately, the hat can look right on paper and still miss the mark on a head.
Bucket hats material and sizing guide: what buyers miss first
Two bucket hats with the same size label can fit differently enough to trigger returns. A deeper crown feels roomier than a shallow one. A firm sweatband tightens the perceived fit. A soft brim collapses slightly and changes the way the hat frames the face. Small differences on a spec sheet can become large differences once a person wears the hat for an hour.
That is why the first pass should always look beyond the size tag. Buyers often focus on small, medium, large, or one-size-fits-most, but the actual fit comes from the shape of the crown, the internal structure, and the way the brim is built. A hat with the same circumference can wear very differently if the side wall is higher, the top panel is flatter, or the inside tape is firmer.
The main buying scenarios usually break down like this. Giveaway programs want value and speed. Retail programs need a cleaner finish and more consistent presentation. Uniform orders need repeatable sizing and enough comfort to survive long shifts. Outdoor events ask for shade and airflow. Fashion collections care more about drape, color depth, and silhouette. No single spec satisfies all five at once.
Decoration belongs in the same conversation. A logo that looks sharp on cotton twill may not sit as cleanly on slick nylon. A woven patch adds presence, but it also adds thickness. Embroidery gives a familiar premium feel, yet it needs stable fabric and enough room for the stitches to hold their shape. If the artwork has fine lines or small text, the wrong body can blur the result before the hats ever reach packing.
A clean sample is cheaper than a second sample, and a second sample is usually cheaper than a reworked production run.
How fabric weight, crown depth, and brim structure change fit
Fabric choice shapes both comfort and appearance. Cotton twill remains a common starting point because it is familiar, breathable, and easy to decorate. Washed cotton softens the look and feels broken in, though it gives up some crispness. Polyester twill holds color well and tends to perform better where sweat, sun, and repeated wear are part of the job. Nylon packs down well and stays light, but it can feel slick if the construction is too minimal. Canvas adds body and a more rugged hand. Blends sit between those poles.
Weight matters just as much. A lighter body, roughly in the 180-220gsm range, drapes more and folds flatter. That works well for travel, events, and lower-cost promotional programs. A heavier body, often in the 240-320gsm range, holds shape better and usually looks more deliberate on retail shelves. Go too stiff, though, and the hat starts to feel more like a shell than an accessory.
Crown depth is one of the easiest variables to overlook and one of the most important in wear testing. A deep crown can feel comfortable, but if the side walls come down too far, the hat may press near the ears or eyebrows. A shallow crown can look neat on a table and still sit awkwardly low or high once worn. Any spec sheet worth using should list both circumference and crown depth.
The brim does more than frame the face. Stitch count, edge binding, and interfacing determine how much the brim stands away from the head and how long it keeps that shape. A lightly structured brim gives a softer, more relaxed silhouette and packs more easily. A firmer brim improves shade and keeps the profile cleaner, especially on retail and uniform styles. The compromise is simple: more structure usually means less softness.
Decoration method needs to follow the fabric choice, not fight it. Embroidery works best on stable cloth with enough body beneath the stitches. Woven patches are more forgiving, but they still need a clean application surface. Heat transfer can perform well on polyester and some blends, though adhesion and wash durability should be tested before approval. A small logo can look elegant on the right fabric and badly proportioned on the wrong one.
Comfort details matter more than most buyers expect. Internal seam tape can reduce rubbing. A proper sweatband helps the hat sit more securely and keeps moisture away from the forehead. Eyelets improve airflow on some styles, though they may not be appropriate for every design direction. None of these details are flashy. All of them affect whether the hat gets worn or left in a drawer.
Cost, pricing, and MOQ factors that move the quote
Pricing moves in layers. Fabric is the obvious variable, but it is only one piece of the quote. Decoration method, logo coverage, custom labels, internal trims, packaging, and any wash or finishing process can move the number just as much. A plain cotton twill bucket hat with a single embroidered mark can price very differently from a washed cotton style with a woven patch, contrast stitching, and branded packaging.
| Spec combination | Typical MOQ | Indicative unit price | What drives the cost |
|---|---|---|---|
| Cotton twill + embroidery | 100-300 pcs | $4.50-$7.50 | Simple setup, stable fabric, moderate stitch coverage |
| Polyester twill + heat transfer | 300-500 pcs | $3.80-$6.20 | Fast decoration, strong color consistency, lower material waste |
| Washed cotton + woven patch | 300-500 pcs | $5.20-$8.40 | More finishing, patch production, softer hand feel |
| Nylon + printed logo | 500+ pcs | $4.00-$6.80 | Lightweight body, print testing, careful placement control |
| Canvas + custom trim and lining | 500+ pcs | $7.50-$12.00 | Heavier fabric, more sewing steps, higher labor content |
MOQ affects price because setup time gets spread across the run. A 200-piece order can be perfectly valid, but it usually carries more overhead per unit than a 1,000-piece order. Pattern prep, color matching, digitizing, thread setup, stitching trials, and inspection all take time regardless of quantity. That fixed work is what makes smaller runs look expensive.
Sample costs vary with complexity. A simple development sample may sit around $30-$80. Add custom embroidery, special washing, or multiple revision rounds, and the cost climbs. The same logic applies to time. One clear approval is cheaper than three small changes spread across the process. Adjusting crown depth or logo size after sampling can reset both the schedule and the quote.
Material availability also changes the math. If the factory already has the fabric in stock, the job usually moves faster and costs less. If a custom dye lot is needed, expect a longer lead time, a higher minimum, and more discussion around shade consistency. Seasonal demand can tighten supply on standard fabrics, so a simple-looking order may still need more time than expected.
Packaging can add cost without adding much visible value if it is over-specified, but the opposite is also true: thin, careless packing can flatten the brim and make an otherwise good hat feel cheap on arrival. A well-built carton, a sensible fold method, and a clean packing format often save more money than they cost. For shipping stability, many programs still rely on corrugated cardboard. If the brief includes retail presentation or sustainability goals, kraft paper, FSC-certified board, or other recycled materials can be specified without overcomplicating the order.
Production process and lead time: what happens after approval
Once the buyer approves the direction, the job usually follows a familiar sequence: quote confirmation, artwork check, sample development if needed, material sourcing, decoration setup, assembly, quality control, and packing. The sequence sounds clean. In practice, the schedule depends on how stable the brief is. Projects move quickly when the decisions stay fixed.
Lead time is won or lost early. Ready artwork, clear placement instructions, and in-stock fabric can keep a run moving. Changes after sampling slow everything down because the factory may need to re-cut, re-stitch, or re-print a revised version. For straightforward programs, a production window of about 12-15 business days after proof approval is common, though custom fabric, complex decoration, or seasonal backlog can extend that.
Decoration method affects timing too. Embroidery requires digitizing and stitch review. A woven patch adds a separate production step and then attachment. Printing or heat transfer brings curing and adhesion checks. Applique introduces extra sewing and a tighter inspection burden because layered pieces can shift. If the logo has small details, the quality bar rises fast.
Quality control should not be treated like a final glance in the packing area. The checks that matter most are simple and repeated: size consistency, stitch density, logo placement, brim symmetry, color consistency, and seam integrity. On bucket hats, a half-centimeter difference in brim turn or crown depth can change how the style feels. That is enough to create complaints even when the carton count is correct.
Shipping assumptions also deserve early attention. Is the quote based on bulk-packed cartons, folded retail-ready units, or individually polybagged hats? Can part of the order ship early if one color is delayed? Is the date tied to production completion or to port or dock arrival? These details sound procedural, but they determine whether a launch feels controlled or rushed.
If the hats are going to retail, the packing standard should be written down with the same care as the product spec. A master carton that is too thin can crush the brim. A loose fold can leave a visible crease. Retail-ready units may need tissue, inserts, hangtags, or sleeves. If the goal is warehouse distribution, the carton count and case size need to fit the handling process instead of fighting it.
Good pre-production signoff covers size range, color standard, logo placement, packaging format, and quantity tolerance. When those five items are locked, the risk of drift drops sharply. That is not glamorous, but it is what keeps a simple hat order from becoming an expensive correction.
Step-by-step: choosing the right material and size range
Start with the wearer, not the mockup. If the hats are for outdoor staff, prioritize shade, breathability, and durability over a soft fashion drape. If the hats are for retail, think about hand feel, photography, and how the fabric reads in strong light. If the order is a giveaway, the budget matters, but the hat still has to fit enough heads to get used.
- Define the wearer - gather real head circumference data if possible, even from a small sample of the target group.
- Choose the sizing method - one size with adjustability, graded sizes, or a measured fit range.
- Shortlist materials - cotton twill for familiar hand feel, polyester twill for color consistency, nylon for packability, canvas for body.
- Match decoration to fabric - embroidery for stable cloth, patches for a more dimensional look, print for simpler graphics, applique for bolder branding.
- Check comfort details - sweatband material, internal seams, ventilation, and lining affect wear after the first ten minutes.
- Set packaging early - decide on tissue, inserts, sleeves, or shipping cartons before final approval.
A useful bucket hats material and sizing guide never stops at circumference. It should also cover crown depth, brim structure, and how the inner band sits against the forehead. A hat can technically fit the number and still feel wrong if the crown is too shallow or the band is too firm. The inverse happens too: a slightly larger hat can feel more secure if the fit geometry is right.
For mixed adult groups, one-size-fits-most is acceptable only if the pattern has enough range and the audience is not too broad. A size run can be a better answer for retail or uniform use, but it adds complexity. Buyers often assume one size is automatically cheaper. Not always. If the return risk is high, a more deliberate fit strategy can save more than it costs.
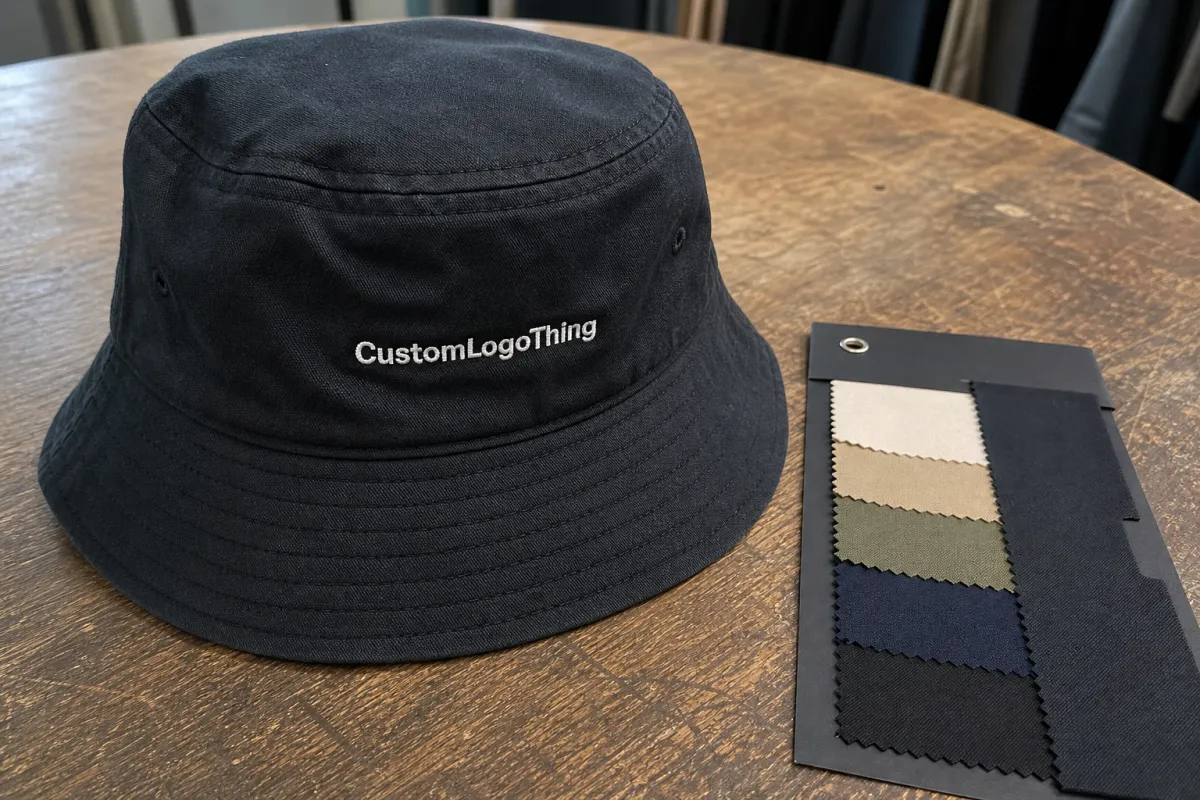
Swatches are worth requesting before final signoff, especially when color or texture matters. Fabric changes under daylight, office lighting, and warehouse LEDs. A black twill hat and a black nylon hat can look close on a screen and noticeably different in hand. Surface texture, stitch visibility, and color depth are easier to judge from a physical sample than from a photo.
Packaging can support the product story without becoming a distraction. A retail carton might use printed kraft paper sleeves. A shipping carton might rely on plain corrugated cardboard. Some brands ask for biodegradable packaging or materials with a clear share of post-consumer waste. Those choices do not change the fit, but they do change the first impression.
Common sizing and material mistakes that cause returns
The most common mistake is choosing fabric for appearance only. A soft-looking cloth may collapse too much under embroidery. A very smooth cloth can make printed graphics slide or distort. A fabric that looks elegant in a mockup can still feel hot, slippery, or too flimsy once worn.
Another frequent miss is ignoring crown depth. Buyers often see a size label and assume the fit is solved, but depth determines whether the hat sits neatly or rides too low or too high. The sweatband matters for the same reason. A firmer band can improve security and shape retention, while a thin band can make an otherwise decent hat feel loose.
One-size orders become risky when the audience is mixed and no adjustment plan exists. A smaller wearer may lose the hat in wind. A larger wearer may feel squeezed after a short period. An internal sizing tape, adjustable cord, or graded size run can reduce that problem, but each option affects construction and price.
Never approve a sample without a real wear test. A bucket hat can look balanced on a table and still feel shallow, tight, or floppy after twenty minutes on a person’s head. A short fit test with a few target wearers reveals more than a stack of screen approvals. That is the kind of practical check a serious bucket hats material and sizing guide should always include.
Spec gaps cause their own problems. Missing logo placement notes, vague scaling instructions, no tolerance for size variation, or no packing format can all lead to avoidable rework. If the product is going to retail or fulfillment, the carton plan should be set before the sample is approved. Even a well-made hat can arrive wrong if the packout is sloppy.
Sustainability details need the same discipline. If the project requires recycled content, say so in the brief. If the mailer must be FSC-certified, write that down before quoting. If the shipment should avoid excess plastic, specify it early. It is much easier to build recycled materials or post-consumer waste targets into the first sample than to rebuild the packout after approval.
Expert tips and order-ready next steps for better results
Ask for swatches when the project has any real color sensitivity or texture concern. A swatch tells you more than a spec sheet about weave density, hand feel, and how a shade behaves under different light. That small step can prevent a lot of unnecessary revisions.
Fit the hat on the actual wearer profile whenever possible. A quick check on a few target heads shows whether the crown depth is right, whether the brim feels balanced, and whether the band stays comfortable after a bit of wear. A size chart is helpful. A real wear test is better.
Lock the decoration path early. If the logo will be embroidered, send vector art and confirm stitch density, minimum line thickness, and backing. If the art needs a patch, agree on shape, edge finish, and application method. If it will be printed, ask about cure behavior and wash resistance. These choices are small on paper and expensive to change later.
Keep packaging and shipping aligned with the spec. Retail programs often need cleaner presentation and tighter carton control. Warehouse programs need case counts that match handling systems. Sustainability-minded programs can use kraft paper, FSC-certified components, corrugated cardboard, and practical biodegradable packaging where it actually fits the order.
For an accurate quote, send a complete brief: quantity, preferred fabric, size range, logo art, decoration method, packaging requirements, and target delivery date. Add a reference sample or a clear fit goal if you have one. The more concrete the brief, the less time is spent correcting assumptions later.
The easiest way to turn a bucket hats material and sizing guide into a usable order is simple: measure the audience, shortlist the fabric, confirm the size strategy, check decoration limits, and approve a sample only after a wear test. That sequence reduces surprises, lowers the odds of returns, and gives the finished hat a better chance of feeling intentional rather than merely produced.
Which bucket hats material and sizing guide choice is best for embroidery?
Choose a stable fabric such as cotton twill or polyester twill so the stitches sit cleanly and do not distort the crown. Avoid very loose weaves, slippery shells, or overly fuzzy fabrics if the logo has fine detail, and confirm backing and placement before final approval.
How do I size bucket hats for a mixed adult group?
Collect head circumference data from a small sample of wearers instead of guessing from standard apparel sizes. Use an adjustable option or a fit range that covers the smallest and largest likely wearer, then test the sample on real heads so crown depth and band comfort are checked, not just circumference.
What affects bucket hat pricing the most?
Fabric type, decoration method, and quantity are usually the biggest pricing drivers. Multiple logos, custom labels, special trim, and premium packaging can raise the unit cost, and small orders often cost more per piece because setup time is spread across fewer hats.
How long does bucket hat production usually take?
Lead time depends on sample approval speed, material availability, and decoration complexity. Stock fabrics and simple branding usually move faster than custom colors or multi-step finishing, and changes after sampling are the most common reason a schedule slips.
What should I send for an accurate bucket hat quote?
Share quantity, preferred fabric, size range, logo art, decoration method, packaging needs, and target delivery date. Include any fit notes or reference samples so the quote reflects the actual project scope rather than an assumed one.


