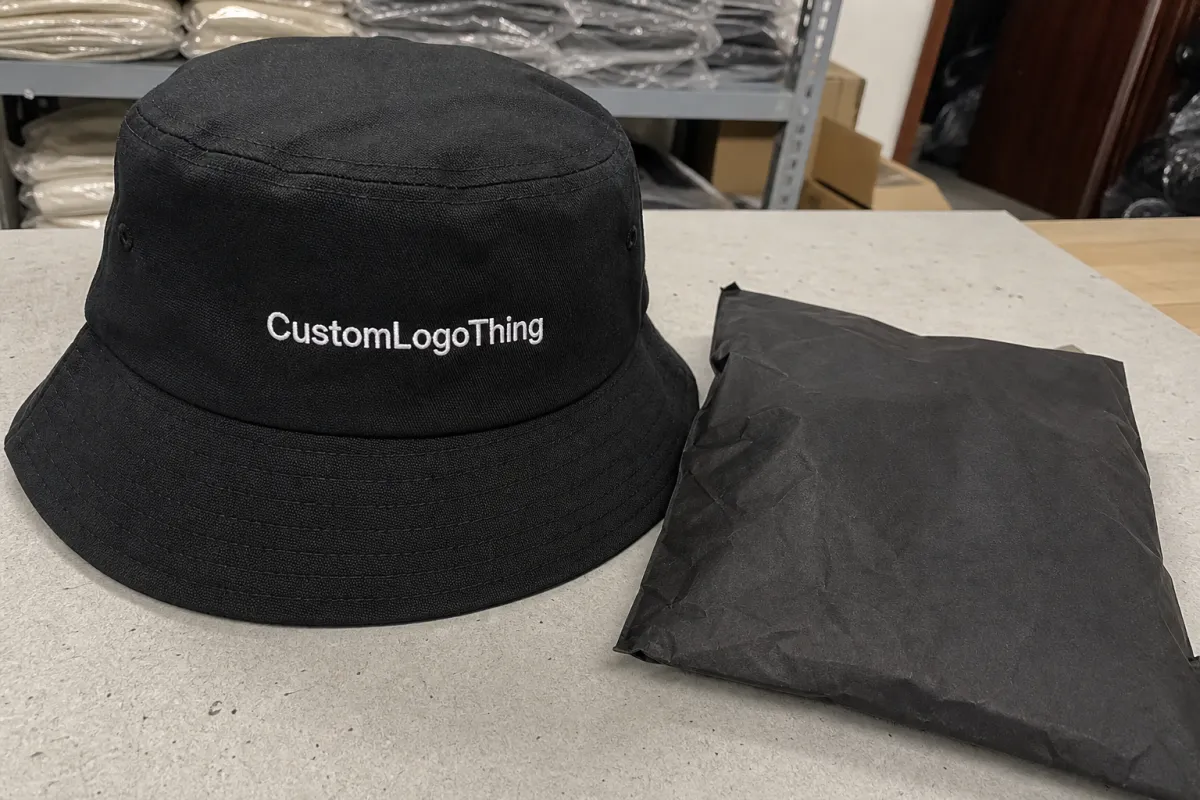
A bucket hat looks simple until production starts pulling it apart line by line. That is exactly why a Bucket Hats Sample checklist matters before anyone signs off on bulk. The sample is not a trophy. It is a stress test for everything that can go wrong later: crown depth that feels off by a few millimeters, stitching that wanders under pressure, a brim that collapses instead of holding shape, or packaging that makes the final product look cheaper than the design ever intended.
From a buyer’s perspective, the sample is the last inexpensive place to catch drift. The first approved sample should match the spec, the artwork proof, the trim callouts, and the packing plan closely enough that production can proceed without guesswork. If the approval depends on hope, the job is not ready.
If a sample only passes the mirror test, it is not a real approval. It is a polite delay.
Why one sample can save a full production mistake
Bucket hats are deceptive. There is not much surface area, which makes people assume there is not much to inspect. In reality, small dimension changes create large visual effects. A brim that is 5 mm wider can read floppy. A crown that sits 8 mm too shallow can feel inexpensive. Dense topstitching can make a hat look structured; loose stitching can make it look rushed, even when the fabric is decent.
Most failures do not appear after 5,000 units are packed. They show up in the sample, right where they should. Buyers who treat sample review as a checkbox tend to pay later in rework, freight delays, and inventory that looks close enough from six feet away but not from a retail shelf. Close enough is a weak standard when the logo is the first thing people notice.
A good Bucket Hats Sample checklist is a buyer tool, not a factory form. The point is not to applaud effort. The point is to see whether the supplier can repeat the approved spec consistently. That means checking shape, handfeel, trim, decoration, labeling, and packaging as one system. A weak point in one area can make the whole order feel off.
That is especially true on custom orders. One factory may interpret “medium brim” as 5.5 cm and another as 6.5 cm. Both can still call the product a bucket hat. Only one matches the line sheet. Samples exist to stop that kind of drift before it becomes expensive.
What the bucket hats sample checklist must verify
A proper checklist needs categories, not vague notes. “Looks okay” has sunk enough orders already. Use pass, fail, revise, or approved, and attach the reason whenever a change is needed.
- Measurements: crown height, brim width, head circumference, sweatband placement, and any grading notes.
- Materials: main fabric, lining, sweatband, thread, interfacing, and any wash or finish effect.
- Decoration: embroidery, woven labels, patches, printing, edge stitching, and placement accuracy.
- Construction: seam quality, panel alignment, brim structure, stitch density, and internal cleanliness.
- Labeling: size labels, care labels, country-of-origin marks, and brand compliance details.
- Packaging: polybag type, insert cards, folding method, carton marks, and master carton count.
Each item protects a different risk. Fit complaints usually start with measurements. Color mismatch usually starts with approving fabric from a screen. Weak stitching shows up when buyers skip inspection because the hat “felt fine.” Branding errors tend to come from labels or artwork that someone assumed were already covered. They usually were not.
Some details can be confirmed from documents, and some need the physical sample in hand. Logo placement, seam finish, crown shape, and decoration quality belong on the sample. Carton marks, care text, and shipping instructions can be verified on paperwork, but the sample should still show those details in context so the factory proves it understands the whole order, not just the hat itself.
Packaging deserves real attention if the product will travel far or sit in retail storage. If the carton spec includes FSC-certified inserts or transit-ready packaging, that needs to be stated early and reflected in the sample phase. For fragile freight lanes, ask whether the carton build aligns with standard transit testing such as ISTA testing. That is not overengineering. It is practical risk control.
Fit, fabric, trim, and decoration checks
Fit starts with numbers, not opinion. Measure crown height, brim width, and internal circumference against the approved spec. If the hat includes a sweatband, check where it sits and whether it eats into headroom. A bucket hat that is technically correct but uncomfortable on real heads will trigger complaints faster than a prettier one with a deeper crown.
Fabric matters more than many buyers expect. A brushed cotton twill, a washed canvas, and a structured polyester blend can look similar in photos, then behave very differently in hand. Check fabric weight, drape, shrink risk, and recovery after pressing or steaming. If the supplier cannot explain what happens after a light wash, that is a sign to slow the process. A hat that warps after one wash is not a success, no matter how clean the logo looks.
Decoration needs a separate review. Embroidery should be sharp and legible, with enough stitch density to hold the design without puckering the crown. Woven labels should sit flat. Patches should not curl at the edges. Printing should stay readable on curved panels, which is harder than it sounds because bucket hats do not present a flat surface like paper or cardboard. Edge stitching should follow the panel cleanly. Sloppy line work makes even good fabric look low grade.
Trims and accessories can create the loudest complaints for the smallest reasons. Eyelets, cords, toggles, lining, seam tape, and closures all need attention. A low-profile buckle can rub. Poor binding can scratch. A cord that is too long becomes a nuisance or a safety issue. Small parts are easy to ignore until they are the part people remember.
If the team wants a visual sanity check, compare the sample against the approved art proof and photograph it with a ruler or caliper in frame. That sounds fussy because it is. Fussy is still cheaper than remake charges.
For buyers concerned about sustainable sourcing, confirm whether any paper inserts, swing tags, or packaging components should use FSC-certified materials. The standard is straightforward, and the paperwork should be too. Guidance is available through FSC.
Material specs also deserve some specificity. A common bucket hat body uses 200-300 gsm cotton twill or canvas for a more structured look, while lighter 160-180 gsm fabrics can feel softer but lose shape faster. Polyester and poly-cotton blends often reduce wrinkling and can improve color consistency, though they may not age with the same softness buyers expect from cotton. None of that is universally better. It depends on the brand position, the weather use case, and whether the hat needs to pack flat.
Sample process and turnaround timeline
The sample process should follow a predictable path: brief, artwork, proto sample, revision sample, final sign-off, and pre-production confirmation. If a supplier skips steps, the timeline may look faster, but the risk simply moves into bulk production, where the fix costs more.
Delays usually begin with preventable issues. Artwork that is not vector-ready needs cleanup. Feedback without measurement notes turns into guesswork. Saying “the brim feels off” is not enough. Say how off. Three millimeters? Five? Wider at the front than the back? Factory teams cannot solve a problem they cannot see in measurable terms.
Typical timing depends on complexity, but rough ranges help planning. A simple proto sample often takes 5-10 business days after artwork and spec confirmation. A revision sample can add another 5-8 business days. If embroidery, custom labels, special washing, or nonstandard trims are involved, the cycle can stretch to 2-4 weeks before final approval. Add your own review time on top. Buyers often underestimate that part.
Rush orders carry hidden costs. A 3-day sample turnaround sounds efficient until it means the factory substitutes available fabric, uses temporary labels, or shortcuts finish details to meet the deadline. That may be acceptable if everyone understands the compromise and documents it. It is not acceptable if the sample gets treated as final without clarification.
Here is a practical way to think about sample rounds:
| Sample stage | Typical cost impact | Best use | Main risk |
|---|---|---|---|
| Proto sample | Lowest, often part of setup | Check shape, materials, and basic logo placement | Spec drift hidden by rough finishing |
| Revision sample | Moderate, sometimes billed per change | Confirm corrections and final decoration accuracy | New issues introduced while fixing old ones |
| Pre-production sample | Highest if rushed or shipped fast | Lock the final approval before bulk run | Skipping it on complex orders |
A complex decorated hat can spend more time in sample development than in actual sewing. That is normal. Every added element, from contrast stitching to custom lining, increases the chance that one small decision affects three other parts of the build. A straight logo hat and a fully branded fashion bucket hat are not the same production problem, even if the silhouette is identical.
Cost, MOQ, and quote traps
Sample pricing is not just sample pricing. It reflects setup work, decoration complexity, fabric sourcing, packaging needs, and how many times the factory expects to rework the piece before it leaves the door. A plain cotton sample with a small woven label is one thing. A structured bucket hat with embroidery, custom trim, and printed packaging is another.
A useful checklist should make pricing easier to compare, not harder. Quotes should be based on the same spec, the same decoration method, the same packaging, and the same shipping terms. If one supplier includes a swing tag, carton label, and freight while another leaves them out, the lower quote is not lower. It is incomplete.
For simple bucket hats, sample fees often sit in the $15-$40 range before shipping, while more involved decorated samples can land around $40-$120 or more depending on setup and revisions. That range is not a law. It is a reality check. A quote that falls far outside it is worth questioning, especially if the factory seems vague about what is included.
MOQ changes the economics quickly. A low sample fee can hide a steep unit price if the factory is setting up for a small order. The opposite also happens: a slightly higher sample cost may buy better development support and a more realistic bulk quote. Landed cost matters more than the number printed in the first email.
Common quote traps include missing setup charges, no allowance for color changes, and sample materials that differ from bulk materials. Sometimes the sample is made with better fabric because it was available. That feels convenient until the bulk run looks and behaves differently. Ask directly whether the sample uses the exact production fabric, the same thread, and the same trim.
Buyer clarity saves money. If the launch depends on a seasonal delivery window or a retail drop, the quote should include a realistic lead time, not a fantasy schedule that only works if nobody sleeps. For custom decoration, an extra week in planning can protect the entire margin.
MOQ should also influence the sample strategy. A 300-piece order often allows more flexibility than a 10,000-piece run, but low quantity can increase unit cost and reduce the room for mistakes. If the order is small and highly customized, the sample phase has to do more of the heavy lifting. There is less room for correction later.
Common mistakes buyers miss on bucket hats
One classic mistake is approving color from a screen. Screens lie. They also vary by device, brightness, and calibration. A second mistake is forgetting to test fit on real heads. If the internal review team all has similar head sizes, you can miss a crown that is too shallow or a brim that sits awkwardly on larger or smaller wearers.
Another common miss is checking decoration once and assuming it stays correct everywhere. It often does not. Embroidery may look perfect on one panel and slightly shifted on another because the hat changes under the needle path. Printing may look fine on a flat proof but distort on curved seams. One check is not a strategy.
Teams also get burned when marketing, sourcing, and operations review different versions of the sample. Marketing approves the look. Sourcing approves the cost. Operations notices the carton count is wrong after the order is already moving. That split is how avoidable mistakes survive meetings. One consolidated review sheet fixes most of that.
Another trap is ignoring the inside of the hat. Buyers spend all their time on the visible surface and miss rough seam ends, poorly trimmed threads, or lining that shifts inside the crown. Customers may never see the inside directly, but they feel it. A scratchy seam can drag down the perceived value of a product that looks premium on a hanger.
Here is the big one: approving a sample because it is “close enough” and the launch date is fixed. That is the most expensive mistake in the process. Deadlines do not excuse bad specs. They only make the consequences arrive faster.
- Do not approve color without a physical swatch or lab dip reference.
- Do not skip a second check on logo placement and stitch density.
- Do not let one department approve only its piece of the puzzle.
- Do not treat a cosmetic flaw as minor if it hides a structural issue.
Expert fixes for better approvals and fewer reruns
A simple scoring system makes approvals cleaner. Rate each category from 1 to 5: fit, fabric, decoration, construction, labeling, and packaging. Anything below a 4 needs a written note. Anything below a 3 needs revision before the order moves. That is not fancy. It is just a way to stop emotional decisions from overriding technical ones.
Ask for annotated photos when the sample is not clearly right. Better yet, ask for measurement photos with a ruler, plus close-ups of the defect. If the review is remote, annotated images reduce arguments fast. “I thought the brim was fine” becomes less persuasive when a ruler shows otherwise.
Keep a short issue log across rounds. If the same seam problem, label error, or decoration shift shows up twice, record it as a root-cause issue instead of a one-off complaint. That forces the supplier to solve the process, not just patch the result. Repeated defects are rarely random. They usually come from a process habit wearing a different shirt.
For buyers working with multiple stakeholders, one person should own the approval note. Everyone can comment, but one consolidated decision avoids mixed messages. The supplier should not receive three emails saying three different things. That turns sample approval into a group exercise in confusion.
If a sample needs three apologies and two explanations, it is not ready.
The best approvals are boring. They match the spec, the measurements, the logo, the packaging, and the packing count. Nothing dramatic. Nothing heroic. Just a correct sample that leads to a correct order.
One more practical fix: compare the sample against the purchase order line by line before sign-off. It takes less time than a remake and catches a surprising number of misses. The most common are label text, carton quantity, and a single measurement that got rounded during the handoff between development and production. Rounding sounds harmless until it lands on a product dimension.
Next steps before you green-light production
Before approval, turn the review into action. Mark each item pass, fail, or revise, then send one consolidated note. Include the exact changes if revisions are needed. The goal is to make the next sample obvious, not mysterious.
Ask the supplier for a final pre-production confirmation that repeats the approved materials, decoration, measurements, and packing details. If the factory sends a new confirmation and it differs from the sample, stop and reconcile it. Do not assume the written spec copied itself correctly.
Set a revision deadline, shipping method, and production start date. That keeps the order from drifting while everyone “checks one more thing.” Once the sample is approved, attach the bucket Hats Sample Checklist to the purchase order or approval record so the decision is traceable later. That matters more than most teams admit when something goes wrong six weeks down the road.
My rule is simple: approve only when the sample matches the written spec and the physical sample tells the same story as the paperwork. If it needs guessing, it needs work. If it needs excuses, it definitely needs work. A strong checklist does not create perfection. It makes weak approvals harder to hide.
What should a bucket hats sample checklist include before bulk production?
Measurements, fabric, decoration, trim, labeling, and packaging should each be listed separately. Every line should have a pass/fail note and the exact spec or photo reference. The checklist should also record revision requests so the final approval is traceable and easy to audit later.
How many sample rounds are normal for a bucket-hat order?
One proto sample and one revision sample is common when the artwork and specs are clean. Complex decoration, special fabrics, or fit changes can add another round. If the same problem repeats twice, stop and fix the root cause before you approve anything.
Which details change bucket hat pricing the most?
Decoration method, fabric choice, trim complexity, and MOQ usually have the biggest effect on price. Extra sample revisions and rush freight can raise the landed cost fast. The cheapest quote is not useful if it hides setup fees or a much higher bulk unit price.
How long should bucket hat sample turnaround take?
Simple samples can move in days, but custom decoration and revisions usually take longer. Artwork delays and unclear feedback are the main reasons timelines slip. A realistic timeline should include your own review time, not just factory time.
What is the fastest way to approve a bucket hat sample without missing defects?
Use one person or one consolidated review sheet to avoid conflicting feedback. Check measurements, fit, and decoration first, then review packaging and labeling. Approve only when the sample matches the written spec, not when it simply looks close.

