Custom cardboard box inserts solve a very specific shipping problem: a carton can look full and still let a product move just enough to scuff a finish, crush a corner, or fail a drop test. That small movement is usually where damage starts. For buyers comparing product packaging options, the right insert can cut claims, reduce returns, and make branded packaging feel deliberate instead of improvised.
People sometimes treat inserts as an afterthought, but they are part of the load path. A good design protects the item, speeds packout, and keeps the unboxing consistent. That matters whether the shipment holds retail packaging for a consumer product, electronics, cosmetics, glassware, or a multi-part kit.
What Custom Cardboard Box Inserts Actually Solve

Custom cardboard box inserts are scored, die-cut, folded, or layered paper-based components that hold items in place, separate components, and reduce empty space inside the shipper. In practical terms, they keep a product where you packed it instead of letting it drift into the side wall of the carton during transit.
That sounds basic. It is not. Most shipping damage does not come from one dramatic failure. It comes from repeat, low-energy contact: a bottle touching a side panel, a housing bouncing inside a carton, a corner edge rubbing through a print surface, or one kit part knocking into another five times before delivery. The package arrives, but the product does not arrive clean.
The business case is straightforward. Better inserts can lower damage claims, reduce repack labor, cut reliance on loose fill like kraft paper, bubble wrap, or air pillows, and improve the unboxing sequence. They also make packout more repeatable, which matters once a team is moving beyond a few hundred shipments and into steady production.
There is no single insert format that fits every SKU. The right design depends on geometry, weight, fragility, handling, and whether the package is being shipped parcel, pallet, or both. A simple display box for a light cosmetic jar needs a different structure than a heavy electronic component or a glass item with sharp load points.
A carton that feels full by hand can still be mechanically empty in the wrong places. Movement control, not just fill volume, is what usually decides whether the product survives.
If you are comparing options across Custom Packaging Products, the useful question is not “Which insert is cheapest?” It is “Which insert controls motion with the least total cost?” That includes damage risk, packing speed, and the amount of waste created on the line. Cheap parts that create expensive claims are not a savings plan. They are a bill that arrives later.
One more practical point: inserts also protect brand perception. A customer may never notice the material callout, but they notice if the product rattles, arrives crooked, or takes two hands and a small amount of patience to remove from the carton. Packaging does not get credit when it works. It gets blamed when it does not.
How the Insert System Works Inside the Carton
The mechanics are simple once you see them. Inserts reduce movement by creating contact points, locking corners, and spreading impact across a wider load path. Instead of a product slamming into one weak point, the insert transfers force to multiple surfaces and slows the motion down.
Buyers usually see a few familiar structures. Trays cradle one item. Partitions separate multiple components. End caps suspend a product away from the outer walls. Sleeves create a snug hold. Retainer tabs keep lids, accessories, or inserts from drifting out of position. Multi-layer cushions combine rigidity and compliance to protect sharper or heavier objects.
The fit matters more than thickness alone. A thick insert that leaves room for the item to rattle is still a poor design. So is a very tight insert that scuffs a glossy finish or makes packout slow because workers have to force the item into place. Good packaging design lands in the middle: secure, but not abrasive; stable, but not annoying to load.
From an operations point of view, a well-built insert can speed throughput. One formed component is easier to place consistently than three loose pieces of void fill. That difference is small on a sample run and obvious on a larger order, especially if the team is handling multiple product packaging formats in the same shift. Labor likes simple. So does the damage log.
For products with more than one part, the insert often does two jobs at once: it protects the main item and it separates accessories so they do not strike each other. That is why custom cardboard box inserts show up so often in electronics, beauty, subscription kits, and Premium Retail Packaging. They are doing containment work and presentation work at the same time.
There is also a hidden benefit: inserts reduce variability. Loose fill depends on operator judgment. A formed insert is more repeatable. That consistency matters when one shift packs orders and a different shift ships them. The carton should not get “better” or “worse” depending on who happened to be on the line.
Fit, Strength, and Material Choices That Change Performance
Size is the first variable to get right. You need the actual product dimensions, not the rounded marketing dimensions. Then you need carton internal dimensions, not the outside size printed on a spec sheet. Clearance matters too: some products need a snug friction fit, while others do better with a controlled suspension fit that keeps edges from touching the outer box.
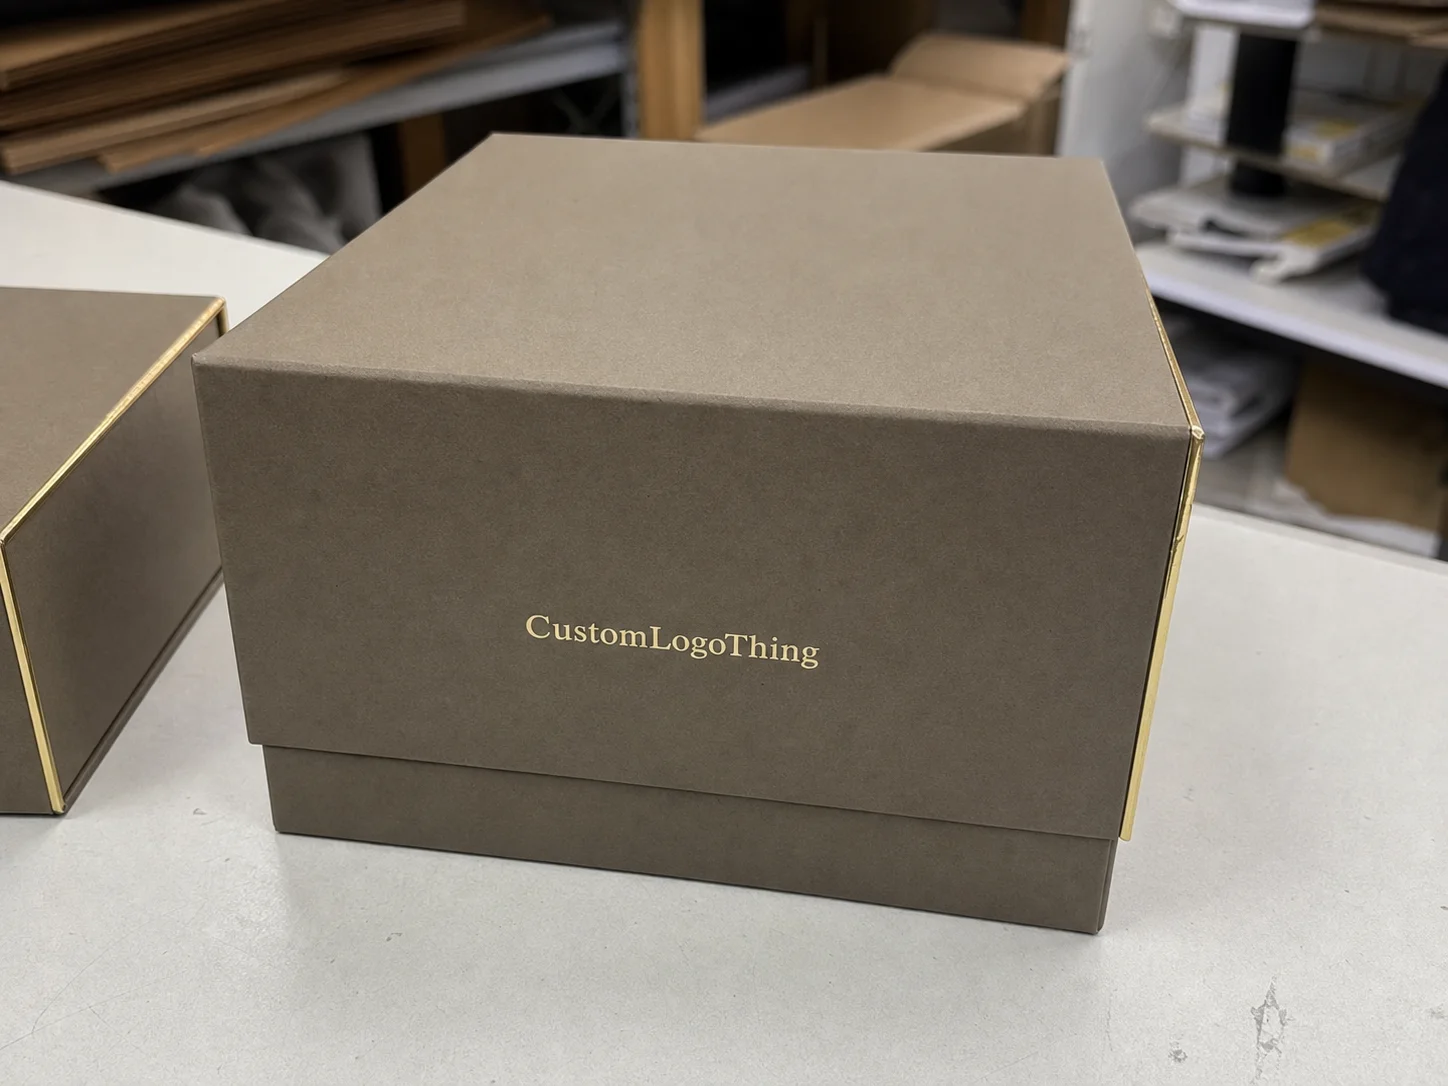
Material choice changes the behavior of the insert in a real way. Single-wall corrugate offers good value and decent crush resistance. For inserts, common corrugated choices are often in the E-flute to B-flute range, depending on the load and the amount of cushioning needed. Heavier board adds stiffness and a cleaner presentation. Chipboard, often in the 18 to 32 point range for lighter applications, is useful when the priority is a tight visual fit and low weight. Laminated constructions can combine a printed outer surface with a stronger inner structure, which is common in branded packaging and premium Custom Printed Boxes.
Finish is another common failure point. Gloss coatings, painted housings, soft-touch laminates, glass, labels, and metallic films can all be marked by friction if the insert is too tight or poorly lined. A buyer may think the box is protecting the product while the insert is quietly abrading it over multiple touch points. That is the kind of failure that slips past an informal bench check and shows up after transit, which is exactly when it costs the most.
Environmental conditions matter too. Humidity can soften board performance. Cold storage can change how a coated surface behaves. Parcel vibration can create creeping movement that only shows up after a few hundred miles. Stacked freight loads can compress a design that looked fine in a sample. That is why packaging teams should not judge fit only by hand feel.
Testing standards are part of the real conversation if the shipment is serious. ISTA test methods are commonly used to validate parcel and transit performance, while ASTM methods often support material testing and strength verification. For fiber sourcing, FSC certification can matter if the brand wants traceable responsible forestry claims. For sustainability guidance, the EPA has useful references on packaging waste reduction and material recovery. Relevant resources include ISTA, EPA packaging guidance, and FSC.
If the package is part of a larger retail launch, the insert should be evaluated alongside the carton, print, and outer shipper. A good insert can make a modest box feel like premium product packaging. A bad one makes even expensive branding look careless. The irony is common: the outside gets budget, the inside gets hope.
There is no substitute for checking the actual contact points. Corners, shoulders, necks, lenses, lids, and buttons are the first places to inspect. If the product has a cosmetic surface, assume the insert will touch it somewhere. Then decide whether that touch is acceptable under vibration, compression, and repeated handling.
Cost, Pricing, and Unit Cost: What Drives the Quote
Pricing for custom cardboard box inserts usually comes down to five things: material grade, structural complexity, number of panels or compartments, print or coating requirements, and whether the design needs new die-cut tooling. Complexity tends to cost more than size alone. A simple flat insert with one fold line may price very differently from a multi-piece assembly with tight tolerances.
Volume changes the math quickly. Simple designs often get cheaper at scale because the tooling and setup are spread across more units. More engineered inserts do not always drop as fast, especially if they require hand assembly or tighter inspection. That is why two projects with similar dimensions can produce very different quotes.
Buyers often miss the hidden costs. Sample revisions take time. Artwork changes can force a new proof. Tight tolerances can raise scrap. Hand assembly can become expensive if the insert is not nesting well on the sheet. Even freight can change if the design is shipped flat in an inefficient layout. A quote can look clean on paper and still be expensive in the warehouse.
| Insert Type | Typical Use | Relative Unit Cost | Common Tradeoff |
|---|---|---|---|
| Simple folded board insert | Lightweight products, basic immobilization | $0.18-$0.35 at 5,000 units | Lower cost, less shock control |
| Die-cut corrugated tray or partition | Multi-part kits, moderate protection | $0.28-$0.55 at 5,000 units | Better control, more tooling and setup |
| Laminated or multi-layer insert | Premium goods, fragile finishes | $0.45-$0.90 at 5,000 units | Stronger presentation, higher material cost |
Those numbers are useful as a rough benchmark, not a promise. Smaller runs usually cost more per piece because setup is spread over fewer units. If a project needs heavy hand assembly, special coatings, or multiple revision rounds, the per-unit cost can rise fast. That is normal. It is also why “cheapest quote” is a weak buying strategy.
The economics should be judged against the alternative, not in isolation. A slightly higher insert cost can still lower total packaging expense if it reduces damage, returns, void fill consumption, and repack labor. That is usually the right lens for Custom Shipping Boxes and the inserts that go inside them.
For brands managing several SKUs, the smartest move is often to standardize a family of insert structures rather than engineer a one-off for each item. That is where package branding and operational efficiency start to reinforce each other instead of competing. Shared tooling, shared sheet size, and shared assembly steps are worth real money.
Process, Timeline, and Lead Time: From Spec to Sample
The workflow should start with intake, not guesswork. A good supplier will ask for product dimensions, weight, photos from multiple angles, carton dimensions, desired ship mode, and damage history if you have it. That information shapes the structural recommendation before anyone cuts board.
Then comes the sample. For a simple insert, a prototype can move quickly once the dimensions are clear. More complex projects usually need a back-and-forth loop: sample, fit check, revision, second sample, then approval. The delay is rarely the cutting itself. The delay is often unclear specs or late design changes.
Lead time depends on tooling, print, and assembly complexity. A straightforward structure might move from proof approval to production in about 10-15 business days. More detailed builds, especially those with multiple components or printed surfaces, can run longer. If you are launching a new SKU, build time into the calendar early; packaging always takes longer than a spreadsheet suggests.
Approval gates matter because they prevent expensive surprises. A clean prototype sign-off is cheaper than discovering a fit issue after the full order has been made. It also protects your brand if the insert is part of customer-facing Custom Printed Boxes or a premium unboxing sequence.
A practical rule: if the item is fragile enough to worry you, do not skip fit testing. Shake tests, drop tests, and simple packing-line trials reveal problems that measurements alone will not catch. That includes rebound, tilt, insertion force, and how the product settles after vibration. Hand pressure is not a test method. It is a guess with confidence.
Good sample review should also check assembly order. If workers need to fold the insert in a specific sequence, make sure the sequence is obvious and repeatable. If the structure needs tape, adhesive, or extra handling, count that time before approving the design. An insert that works only in the sample room may be the wrong insert for the production floor.
How to Spec the Right Insert Step by Step
Start with the product, not the box. Measure the item accurately, note fragile zones, and decide what the insert must do. Is the goal immobilization? Separation? Presentation? Usually it is a combination of all three, but the priority order matters because it affects the structure.
Next, map the shipment conditions. Parcel or pallet? Single item or kit? One-way shipment or returnable packaging? How many times will the pack be handled before it reaches the end customer? A design for local distribution may fail in long-distance e-commerce, even if the carton size is identical.
Then choose the structural direction. Partitions work well for multiple components. End caps fit suspended products. Trays are useful for display-style packaging. Folded inserts suit simple hold-down needs. For heavier or more delicate items, custom cardboard box inserts often benefit from a hybrid structure that uses both stiffness and clearance control.
Finally, test the fit before committing. A good test sequence usually includes pack-out speed, shake testing, a basic drop sequence, and a review of whether the product can be removed without damage or frustration. If the insert slows the line too much, that is a real cost. If it protects beautifully but takes too long to load, that is also a real cost.
- Confirm product dimensions and weight.
- Measure carton internal dimensions, not the outer size.
- Identify fragile surfaces, corners, and load-bearing points.
- Choose the ship mode and handling profile.
- Request a sample and test pack-out speed.
- Verify the design against damage history and transit conditions.
If you are still deciding between insert styles and broader custom packaging products, ask whether the design can ship flat, nest efficiently, or share a die line across multiple SKUs. Those details reduce waste and improve yield without sacrificing protection.
It also helps to think in failure modes. Ask what happens if the carton gets dropped on a corner, if the parcel is upside down for a stretch, or if the product shifts after repeated vibration. If the answer is “probably fine,” keep testing. Packaging should survive bad handling, not just polite handling.
Mistakes to Avoid, Expert Checks, and Next Steps
The most common mistake is overbuilding the insert. A heavier structure does not automatically perform better. If the product is already stable, extra board may only add cost and assembly time. The second mistake is the opposite: underestimating abrasion and assuming that “it fits” means “it protects.”
Another easy error is ignoring carton tolerances. The outer box itself may vary by a few millimeters, and that variation can be enough to change fit. If the design only works when the carton is perfect, it will not be reliable in production. That is especially true for custom cardboard box inserts used in high-volume product packaging where consistency matters more than one perfect sample.
Here is a useful expert check: ask whether the insert can be flat-packed, nested, or made from a shared tool set. A design that improves sheet yield can lower the overall quote more effectively than shaving a few grams of board weight. Ask for material samples. Confirm stack strength. Check vibration performance. Then repeat the test after a temperature or humidity change if the shipment will see those conditions.
There is also a presentation question. If the insert is visible on opening, it becomes part of package branding. That means white fibers, print quality, fold accuracy, and edge finish all matter. A rough insert can make a premium product feel less premium, even if the protection is technically acceptable. Customers may not inspect the structure, but they do register the impression.
One last check that gets skipped too often: assembly behavior. If the insert requires high insertion force, the line will eventually compensate in ways you do not want. Workers may bend panels, skip steps, or force parts into place. That is how a design that passed a clean sample becomes a problem at volume.
For next steps, gather the basics in one file: product dimensions, product photos, carton dimensions, target ship mode, annual volume, and any damage data you already have. Then request a sample and compare not only the unit price but the whole structure of the quote. That is the cleanest way to buy custom cardboard box inserts without paying twice, once for the board and again for the damage they were supposed to prevent.
Bottom line: the best insert is the one that controls movement, protects the finish, fits your packing line, and still makes sense on a cost-per-shipment basis. That is the standard to use before approving custom cardboard box inserts for any serious shipping program.
How do I know if custom cardboard box inserts are better than void fill?
Choose inserts when the product shifts, scratches, or needs to stay in a fixed orientation during shipping. Void fill is cheaper to start, but it usually cannot control movement as precisely or support repeatable unboxing quality. If damage claims or repack labor are rising, inserts often pay back faster than adding more loose-fill material.
What materials are best for custom cardboard box inserts for fragile items?
Use corrugated board for cushioning and crush resistance, especially when the insert must support weight or absorb impacts. Use chipboard or lighter paperboard when presentation matters more than impact protection and the item is not heavy. For glass, cosmetics, or electronics, the right answer is often a hybrid structure that combines stiffness with controlled clearance.
What affects the price of custom cardboard box inserts the most?
Material grade, design complexity, tooling, and volume are the main drivers of unit cost. Tight tolerances, multiple compartments, and print or coating requirements raise pricing faster than simple flat inserts. Packaging efficiency matters too, because a design that nests well can reduce waste and lower the total quote.
How long does it usually take to get samples and production started?
Simple structures can move through sampling quickly when dimensions and artwork are clear. Complex designs take longer because they usually need fit testing, revisions, and approval before production begins. Lead time is usually shortest when the buyer provides exact product measurements, carton specs, and realistic volume targets upfront.
What information should I send for an accurate quote on box inserts?
Send product dimensions, weight, fragility notes, carton dimensions, and photos from multiple angles. Include your annual volume, target ship method, and whether the insert needs print, special finishes, or flat-packing. If you already have damage data or a current packaging sample, include that too because it helps narrow the right structure faster.
Should I standardize inserts across multiple SKUs?
Often, yes. If several products share similar footprints or load points, a family of related insert designs can reduce tooling, simplify ordering, and make packout more consistent. Standardization does create some compromise, so it works best when the product line is stable and the packaging team is willing to optimize around shared dimensions.