Custom Logo Patch Beanies Bulk Order for Teams, Retail, and Seasonal Programs
A custom logo patch Beanies Bulk Order makes sense for a simple reason: knit fabric moves, and logos need stable ground. A patch creates that ground. It gives the artwork a defined border, keeps small details from sinking into rib knit, and makes the brand mark easier to read after the cuff is folded, stretched, worn, and photographed.
That matters more than people expect. On a product photo, a logo can look fine on screen and then lose clarity once it lands on soft yarn. On a team uniform, a patch that reads cleanly from five or six feet away does more work than one that looks clever in a proof but disappears in daylight. Buyers usually learn this after a sample or two. The cleaner option is not always the loudest one; it is often the one that holds its shape.
Patch beanies are popular for employee gifts, school stores, retail assortments, and event merchandise because the branding stays controlled across large quantities. The patch also lets buyers separate the decoration decision from the garment decision. You can choose a practical blank beanie, then use the patch to add contrast, texture, or a more premium finish without overcomplicating the knit itself.
Why Patch Beanies Give Cleaner Branding Than Direct Stitching
Direct embroidery on beanies can look good, but the fabric fights back. Rib knit stretches unevenly, yarn thickness changes the way stitches sink, and cuff folds shift the visible area from one piece to the next. A patch avoids most of that. It gives the logo a fixed surface and a clearer outline, which is why a large run of 300, 500, or 1,000 pieces usually looks more consistent with a patch than with stitching directly into the knit.
The difference becomes obvious on detailed logos. Small text, thin borders, and sharp corners are difficult on soft fabric. Even a skilled embroidery run can lose a letter stem or blur a fine line when the beanie is stretched. A woven patch, by contrast, keeps edges tighter. A faux leather or PVC patch can make bold marks feel more deliberate. That does not mean direct embroidery has no place. It does. But for buyers who care about repeatability, the patch usually wins.
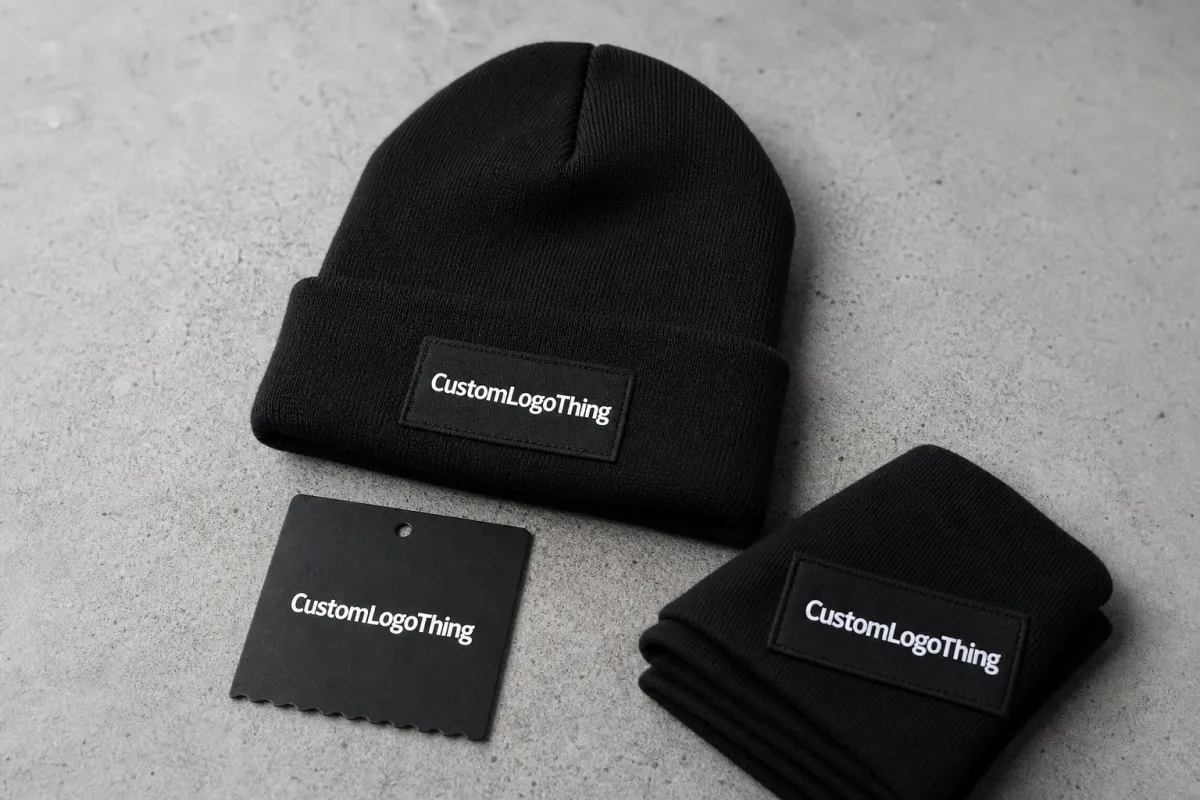
Contrast is another practical reason. A patch can sit in high contrast against a charcoal cuff, a black rib knit body, or a navy crown. That is not only a visual preference. Contrast changes recognition speed. A stronger contrast mark is easier to spot in a retail rack, easier to identify at registration tables, and easier to read in group photos. In bulk programs, those small gains add up.
A useful patch should read clearly from a few feet away, feel balanced on the cuff, and survive wear without curling or cracking. If one of those fails, the whole impression drops fast.
There is also a production advantage. A patch can absorb tiny variations in stitching and blank construction better than direct embroidery can. That does not make it magic. Poor sizing, bad placement, and weak color choices still show. But a patch gives the factory more control over the final presentation, which lowers the odds of a batch looking uneven.
For buyers comparing winter apparel across uniforms, promotions, and retail, patch decoration also supports brand consistency. The same logo can move across beanies, jackets, and accessory programs without needing a different embroidery density every time. That makes the line feel intentional rather than improvised. It also helps when the beanies sit alongside custom packaging or retail presentation pieces, because the visual language stays cleaner from one item to the next.
Patch Materials, Beanie Bodies, and Decoration Styles
Patch material changes the product more than most buyers expect. It affects detail, hand feel, durability, and how premium the beanie looks once it is on a shelf or on a person’s head. In a custom Logo Patch Beanies bulk order, the right choice usually comes down to logo complexity and the kind of impression the brand wants to make.
| Patch Style | Best For | Look and Feel | Typical Bulk Add-On |
|---|---|---|---|
| Woven | Fine text, small lines, compact logos | Flat, crisp, highly readable | $0.28-$0.60 per unit |
| Embroidered | Simple marks, classic texture, traditional branding | Raised, familiar, slightly dimensional | $0.32-$0.70 per unit |
| Faux leather | Minimal logos, lifestyle branding, cleaner front panels | Warm, premium, understated | $0.25-$0.55 per unit |
| PVC | Bold graphics, outdoor use, high-durability programs | Dimensional, durable, modern | $0.45-$0.95 per unit |
| Silicone | Sporty marks, soft-touch finishes, flexible branding | Flexible, clean, slightly raised | $0.40-$0.85 per unit |
Woven patches usually give the best readability for tight artwork. If a logo has fine text or thin outlines, woven construction tends to preserve those details better than embroidery on a knit surface. Embroidered patches feel more classic and can add texture, but they work best on simpler marks. Faux leather is often chosen for minimal branding, especially if the buyer wants the product to feel more retail than promotional. PVC and silicone are better for buyers who want a stronger shape and a more weather-resistant finish.
The beanie body matters just as much as the patch. Cuffed beanies remain the easiest placement option because the cuff gives a stable zone and keeps the logo visible. Uncuffed beanies can look more relaxed, but the patch location has to be planned carefully so it does not sit too low when worn. Rib knit is common because it holds shape well. Acrylic stays popular because it is cost-effective and easy to source in volume. Recycled yarn blends are a good fit for brands that need a clearer sustainability story. Fleece-lined styles add warmth, though they can reduce stretch at the cuff and change how the patch sits.
Placement shifts the tone. Center-front on the cuff is the most common choice because it feels balanced and easy to read. A slightly offset patch can look more retail-driven. Side placement can feel cleaner on fashion-led programs, especially when the goal is understatement rather than loud promotion. Some buyers use a small patch on the front and a woven label at the back so the beanie carries branding without becoming visually crowded.
There is one more practical point: patch style and body style need to match. A thick PVC patch on a very soft, slouchy beanie may feel out of proportion. A delicate woven patch on a heavy cuff might disappear. The best combinations look as though the decoration and the blank were chosen together, even if they were not.
For buyers building winter kits or retail sets, that consistency matters. The beanie does not have to stand alone. It can sit beside custom packaging or other branded items and still feel like part of the same collection.
Sizing, Color Matching, and Artwork Specs Buyers Should Confirm
Before a proof is approved, check the sizing. Adult, youth, and one-size beanies may share the same general shape, but the final look changes once the cuff is folded and the patch is placed. Crown depth, cuff height, and stretch recovery all affect where the logo lands. A patch that looks centered on a mockup can sit too high or too low once the knit is on a real head.
Artwork also needs more care than people expect. Vector files are the safest starting point because they preserve shape cleanly. AI, EPS, or layered PDF files are easier to work with than a flat image pulled from a website. If the logo includes tiny text, thin lines, or tight spacing, those details should be reviewed early. A design that looks sharp at screen size may need a stronger border, a simplified line, or a slightly larger patch to survive production.
- File type: AI, EPS, or layered PDF gives the cleanest proof.
- Text size: Small lettering should be checked for legibility on the chosen patch style.
- Color count: Decide whether the logo needs one-color, two-color, or full-color treatment.
- PMS references: Use them for patch color, thread color, and yarn color whenever possible.
- Placement dimensions: Confirm patch width and height so the logo stays balanced on the cuff or front panel.
Color matching deserves a physical conversation, not a guess based on a monitor. Screens vary. So do materials. A charcoal beanie can look close to black online and slightly heathered in hand. A tan faux leather patch may shift warmer under indoor light. Thread, substrate, and yarn all influence the final result. If the logo depends on contrast, the wrong background can flatten it fast. A black-on-black patch may look elegant in a proof and nearly vanish on a rack. That is a failure of visibility, not style.
Buyers also need to think about use. Uniform beanies are often washed more often than retail beanies. That pushes the specification toward sturdier patch materials, stronger attachment, and simpler color setups. Retail pieces may prioritize hand feel and visual polish instead. Both are valid, but they lead to different decisions about patch type, backing, and finish.
A useful quality-control habit is to ask for the patch size in millimeters or inches, not just “large” or “small.” That one habit prevents a lot of confusion. It also makes reorders easier, because the approved dimension becomes a fixed reference instead of a fuzzy memory.
Custom Logo Patch Beanies Bulk Order: Cost, MOQ, and Quote Factors
Pricing usually comes down to five variables: patch style, blank quality, color count, quantity, and finishing. Add woven labels, private tags, hangtags, individual polybags, or special folding, and the quote shifts again. None of that is unusual. The real mistake is comparing quotes that do not include the same line items.
A simple Custom Logo Patch Beanies Bulk order can start at a lower minimum than a more complex one, but there is no single MOQ that fits every program. A straightforward woven patch on a stocked blank may allow a smaller run. A molded PVC patch, special thread matching, or a premium recycled yarn can push the minimum upward. In practice, the more custom the product becomes, the more a supplier wants scale to absorb setup time.
| Run Size | Typical Unit Range | What Usually Drives the Price |
|---|---|---|
| 100 pieces | $5.50-$9.00 | Setup cost spread across fewer units, higher blank share |
| 250 pieces | $4.50-$7.50 | Better spread on setup, still some small-run handling cost |
| 500 pieces | $3.85-$6.25 | Stronger volume pricing, more efficient production flow |
| 1,000 pieces | $3.10-$5.20 | Best spread on setup, usually the most room for savings |
Those numbers are planning ranges, not promises. A heavier blank, a specialty yarn, or a patch with unusual shape details can move the price up. So can extra finishing steps. On the other hand, buyers often spend more than they need to because they request changes that do not improve the end product: a second color that does not add contrast, a patch outline that is too intricate for the size, or a packaging upgrade that no one will see. Removing that kind of excess can bring the cost down without weakening the beanie.
If budget control matters, ask for a line-item quote. Separate the blank beanie, patch build, setup, freight, sampling, and optional packaging. That gives you a real comparison point across suppliers and avoids the trap of a low headline price with hidden add-ons. It also helps if the beanies need to sit beside other branded items in a larger merchandising or packaging program.
One caution: the cheapest quote is not always the best value. If the sample arrives with weak adhesion, off-center placement, or poor contrast, the apparent savings disappear quickly. A slightly higher unit cost can be cheaper than rework.
Production Steps and Lead Time From Artwork to Delivery
The production sequence is usually straightforward: submit artwork, review the proof, approve size and color, produce the patch, apply it to the beanie, inspect the finished goods, then pack and ship. The process itself is not mysterious. The slowdowns usually happen during approvals, especially when the artwork is incomplete or the buyer keeps changing the spec after the proof is already out.
Lead time depends on quantity, patch complexity, blank availability, and whether a sample or strike-off is needed. A simple order with final artwork and fast approval can move quickly. A more custom program needs more room, especially if it includes multiple patch colors, special backing, private labeling, or retail packaging. Buyers planning for a launch date or event should leave a buffer. Weather, freight timing, and approval delays have a way of appearing at the least convenient moment.
There are also a few common mistakes that cost time. Sending a raster logo instead of vector artwork. Approving a proof before checking patch size. Changing a color after the sample is already in motion. Forgetting to confirm whether the beanies need individual polybags or fold instructions. Each one seems minor on its own. Together they can turn a tidy order into a scramble.
For transit planning and packaging consistency, standards matter. The ISTA testing methods are useful if you care about how finished goods move through the supply chain, and the FSC certification framework is relevant if paper packaging, hangtags, or inserts are part of the brand story. Buyers who think carefully about packaging usually understand that the product and the box cannot be treated as separate worlds.
A realistic timeline usually looks like this: a fast, stock-based run moves in a shorter window once the proof is approved, while more custom builds need a longer schedule with signoff points built in. That approach protects both the delivery date and the final appearance. Cutting corners on approvals rarely saves time in the end.
- Send clean artwork, quantity, and target date.
- Review the proof for size, placement, and contrast.
- Approve any sample or strike-off if required.
- Move into production and final inspection.
- Pack, label, and ship to the confirmed address.
Good production is often boring. That is a compliment. The best runs are the ones where the sample matches the bulk order closely enough that nobody has to guess what happened between proof and shipment.
How We Keep Reorders Consistent Across Seasonal Programs
Repeat buyers care about spec memory. If the patch size, placement, yarn color, and artwork file stay the same, the next run feels like part of the same program instead of a new product. That matters for employee uniforms, school stores, retail restocks, and event merch that returns each season.
The safest way to protect consistency is to keep a clean approval record. Save the final mockup, the approved artwork, the patch dimensions, the placement notes, and the material references. If the blank color changes because of supply, that should be communicated before production begins, not after the cartons arrive. Buyers should never have to reverse-engineer a reorder from a guess.
Documentation helps more than memory. A saved sample photo, a file naming system, and a simple history of what was approved make the next run faster and less vulnerable to drift. That is one reason many teams stay with the same spec once the first order is right. They are not being sentimental. They are avoiding preventable variation.
- Patch alignment: Keep the same horizontal and vertical placement.
- Yarn or blank color: Match the approved reference, not a screen image alone.
- Artwork file: Use the same vector source for every restock.
- Finish quality: Check stitching, edge trim, and patch adhesion on each carton.
Seasonal programs also benefit from knowing what can change and what should not. If the brand wants to swap packaging for a holiday promotion, that can be fine. If the patch color, logo size, and cuff placement are also changing, the order starts drifting away from the approved identity. Consistency is not a luxury here. It is the thing that keeps the product recognizable from one run to the next.
For brands that sell apparel alongside packaging or other merchandise, the beanie should look like it belongs to the same family. That means the decoration cannot be treated as an afterthought. The patch, the blank, and the packaging all tell the same story, or they do not.
What to Send for a Fast Quote and Clean Approval
If you want a fast quote, send the logo file, estimated quantity, beanie color, patch style, target delivery date, and shipping ZIP code together. That gives the supplier enough information to price the order accurately instead of filling gaps with assumptions. Missing details create more revisions than most buyers expect.
It also helps to mention Packaging and Labeling needs early. Retail hangtags, size splits, individual polybags, private labels, and multiple ship-to locations can all change both cost and schedule. The earlier those details show up, the less likely they are to interrupt proofing or production later.
- Logo file: AI, EPS, or a clean layered PDF.
- Quantity: Total pieces and any size split if needed.
- Beanie color: One color or several options.
- Patch style: Woven, embroidered, faux leather, PVC, or silicone.
- Target date: Include the real event or launch deadline.
- Shipping info: ZIP code, freight preference, and delivery notes.
Ask for a mockup that shows patch size, placement, and color callouts before you approve the run. A clear proof reduces back-and-forth and protects the schedule. If the proof looks off, fix it before production starts. That is cheaper than correcting finished goods, and it is much easier than explaining a mistake after the cartons have shipped.
For teams ordering a custom logo patch beanies bulk order as part of a winter kit or retail drop, that first round of information does most of the heavy lifting. A complete brief makes the quote cleaner, the proof faster, and the finished product easier to live with.
Frequently Asked Questions
What is the minimum for a custom logo patch beanies bulk order?
Minimums usually depend on patch style, blank beanie choice, and the amount of setup required. Simpler builds often allow smaller quantities, while premium patch materials or more custom details usually require a larger run. The cleanest path is to ask for the MOQ tied to the exact spec, not a general estimate.
Which patch type works best for logo detail on bulk beanies?
Woven patches are usually strongest for fine text and tight line work because they preserve detail well on a small surface. Embroidered patches work better for simpler marks with stronger shapes. Faux leather, PVC, and silicone are better choices for bold branding that can handle a more dimensional look.
How long does production usually take after approval?
Timing depends on quantity, decoration complexity, and whether a sample or revision is needed. Faster schedules happen when the artwork is final, the proof is approved quickly, and shipping details are confirmed before production starts. More custom builds need more room, especially if packaging or labeling is part of the order.
Can brand colors be matched on patch beanies?
Yes, but color matching should be checked against physical material, not only a screen preview. Provide PMS references where possible and review the proof for patch color, yarn color, and logo contrast together. Some combinations look close online and drift noticeably in hand.
What should we prepare before requesting a quote?
Have the logo file, quantity breakdown, beanie color, patch style, target date, and shipping location ready. If the order needs retail packaging, labeling, or multiple ship-to addresses, include that in the first message so the quote is complete. That keeps the approval cycle shorter and reduces the chance of a spec change later.

