Buyer Fit Snapshot
| Best fit | Custom Mailer Boxes Selection Box Specs projects where brand print, material claims, artwork control, MOQ, and repeat-order consistency need to be specified before quoting. |
|---|---|
| Quote inputs | Share finished size, material target, print colors, finish, packing count, annual reorder estimate, ship-to region, and any compliance wording. |
| Proofing check | Approve dieline scale, logo placement, barcode or warning zones, color tolerance, closure strength, and carton packing before bulk production. |
| Main risk | Vague material claims, crowded artwork, missing packing details, or unclear freight terms can make a low unit price expensive after revisions. |
Fast answer: Custom Mailer Boxes Selection Box Specs: Film, Print, MOQ, and Carton Packing should be specified like a repeatable production item. The safest quote records material, print method, finish, artwork proof, packing count, and reorder notes in one written spec.
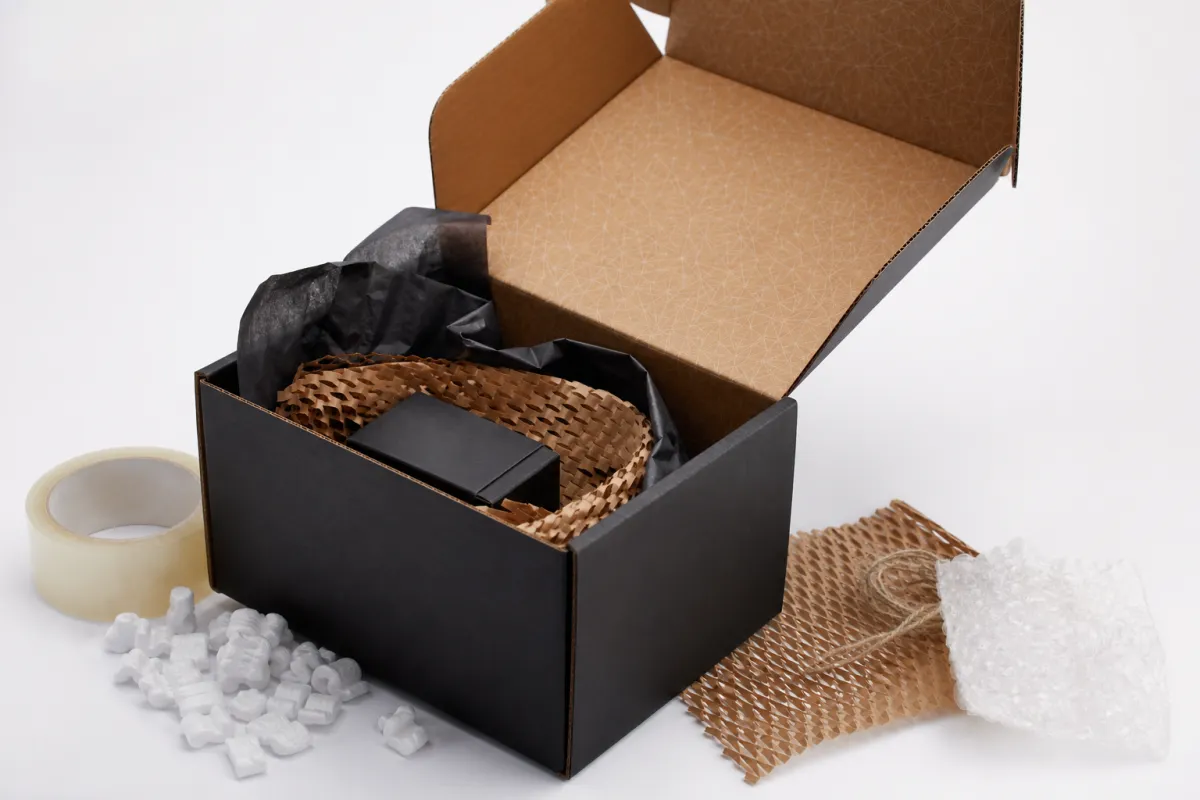
Production checks before approval
Compare the actual filled-product size with the drawing, then confirm tolerance on folds, seals, hang holes, label areas, and retail display edges. Reserve space for logos, QR codes, warning copy, and material claims before decorative graphics fill the panel.
Quote comparison points
Review material grade, print process, finish, sampling route, tooling charges, carton quantity, and freight assumptions side by side. A quote is only useful when the supplier can repeat the same color, closure quality, and packing count on the next order.
Custom Mailer Boxes How to Choose the Right Box Specs
Custom Mailer Boxes how to choose sounds simple enough until the freight bill shows up and the carton that looked efficient on a screen starts adding dimensional weight, packing labor, and damage risk. I've sat through enough packaging reviews to know that the cheapest box on paper can turn into the most expensive box in the warehouse. The real job is not picking a pretty shipper. It is balancing product protection, brand presentation, and carrier cost in one spec that actually holds up once real orders start moving.
Custom Mailer Boxes are folding corrugated or paperboard shipper boxes used for ecommerce orders, subscription kits, retail fulfillment, and gift packaging. They sit between plain brown cartons and rigid presentation boxes, which is exactly why people misread them. That middle ground is useful, but it is also easy to oversimplify. A box can look premium in a render and still ship badly, build slowly, or crush at the wrong point in transit. So the question of custom mailer boxes how to choose needs a practical answer, not a glossy one.
The goal here is straightforward: help you compare size, board strength, print options, Cost, and Lead Time without getting buried in packaging jargon. Buying custom printed boxes rarely turns on one feature alone. The better approach is to treat the decision like a spec sheet, because that is where the tradeoffs live.
Custom Mailer Boxes How to Choose: Start With the Hidden Cost
The hidden cost usually starts with size. Carriers do not care that a carton looks compact in a mockup if the empty space inside forces you to ship air. Many parcel agreements use dimensional weight calculations tied to divisors around 139 or 166, so even a small change in height, width, or depth can move a shipment into a higher billing tier. That is why custom mailer boxes how to choose begins with the product, not the catalog.
A low unit price can also be misleading if the box is heavier than the contents need. Thicker board can be the right call for fragile items, but a lightweight skincare kit or apparel set does not need extra material just because it feels safer on paper. Extra ounces matter when they are multiplied across thousands of shipments. By the time a team is packing day after day, a few ounces per order can become a meaningful freight line item. In a lot of cases, the least expensive carton is the one that fits tightly, ships cleanly, and needs less filler.
Custom mailer boxes show up everywhere, from subscription boxes to influencer kits to light retail packaging. That range is helpful and confusing at the same time. A mailer that works beautifully for a candle set can be overbuilt for socks and underbuilt for ceramic drinkware. The first question is not, "What looks premium?" The first question is, "What job has this box got to do?"
A box that saves five cents can cost fifty cents later if it increases transit damage, packing time, or dimensional weight. That is the trap most first-time buyers miss.
Assembly labor is another hidden cost that often gets ignored until the boxes reach the line. If the closure fights back, the savings disappear fast. A clean tuck design with the right score depth can shave seconds off every pack. That sounds minor until a team is building 2,000 units in a day. Then seconds start turning into shifts.
The box is also part of the brand story. Customers notice how it opens, how it holds its shape, and whether the item arrives looking cared for. A good mailer supports the reveal without slowing fulfillment. It protects the product and gives the customer a clear signal that the brand paid attention to the details. That is why custom mailer boxes how to choose is never only a procurement question. It is a packaging and brand decision at the same time.
For brands still building a packaging program, it helps to compare the mailer against the wider system. You can browse broader Custom Packaging Products if you need inserts, retail-ready cartons, or outer shipping solutions that coordinate with the mailer. The strongest box choice usually sits inside a larger packaging plan rather than standing alone.
Custom Mailer Boxes How to Choose: Process, Timeline, and Lead Time
Most delays happen before production even starts. The converting run is often not the slowest part. Proofing, dieline approval, artwork revisions, and sampling can eat more calendar time than printing and die-cutting. That is why custom mailer boxes how to choose should include a timeline check from the beginning.
The path usually starts with product measurement and a dieline selection. Artwork placement comes next, followed by proofing, sampling, press setup, finishing, folding, packing, and freight booking. Each step brings its own risk. Custom sizing and structural changes take time because the dieline or tool has to be checked. Specialty coatings add curing or finishing time. Complex print, including full-bleed graphics, multiple spot colors, or metallic effects, often stretches setup and approval.
Repeat orders move much faster. If the dimensions, board grade, print coverage, and finish already exist, a reorder can move through production far more quickly than a new development run. Fully custom tooling tends to add days or weeks depending on schedule and artwork complexity. Rush options can help, but they do not erase the basics. An urgent order still needs approved artwork, confirmed dimensions, and a clear insert layout.
A useful way to think about timing looks like this:
- Stock-size modification: usually the fastest path when the structure is close to a standard dieline and the main change is print.
- Fully custom mailer: slower because the structure, board, and graphics all need to be checked together.
- Repeat reorder: often the quickest option when the same spec sheet and approved sample can be reused.
Work backward from launch day, then add buffer for artwork revisions, sample transit, and any insert or finish changes. A launch can fall apart because a carton shows up after inventory is already in the warehouse. That stops being a packaging issue and becomes an operations issue, which is usually the expensive kind.
One useful comparison is between mailers and lighter shipper formats. If a brand is still deciding between a rigid paperboard style and a lighter mailer, the product mix matters more than the sales page. Apparel, supplements, and light accessories may also make sense in Custom Poly Mailers, since the fulfillment workflow, branding goal, and freight profile are very different from corrugated options.
For transit performance, many brands use third-party standards as a reality check. The ISTA test methods are widely referenced for distribution simulation, especially when a box will move through rough parcel networks. Material claims need the same discipline. If recycled fiber or forestry language is part of the pitch, the FSC framework carries more weight than vague "eco-friendly" copy attached to a mockup.
Key Factors That Shape Custom Mailer Box Performance
Size comes first because internal dimensions determine fit, not the other way around. The product should sit securely with enough room for tissue, inserts, or protective fill, but not so much room that it slides around during transit. Too much space leads to scuffed corners, crushed sleeves, and damaged seals. Too little space makes assembly frustrating and can weaken the closure. That balance sits at the center of custom mailer boxes how to choose.
Board grade comes next. For most ecommerce shipper applications, single-wall corrugated is common, especially E-flute and B-flute. E-flute usually prints cleaner and keeps a slimmer profile, which helps with branding and storage. B-flute gives more cushion and compression resistance, which can be a better fit for heavier contents or longer shipping lanes. A lightweight blouse kit does not need the same board spec as a glass bottle set. Buyers still overbuild when they are nervous, even when the product does not call for it.
Closure style matters more than many teams expect. Tuck tabs, locking corners, dust flaps, and crash-lock bottoms all change how the box feels in the hand and how quickly it can be packed. A beautiful structure that takes an extra 20 seconds to build is not efficient at scale. A simple design that closes reliably can save labor every single day. In packaging, elegance is often boring. That is not a criticism.
Print and finish should be treated as functional tools. A matte aqueous coat can help reduce scuffing. A soft-touch finish can elevate the unboxing, though it may show fingerprints more easily on dark ink coverage. Spot UV can make a logo pop, but it also adds cost and a tactile change that not every brand wants. Decoration for its own sake rarely carries the day. The better goal is branded packaging that survives transit and still looks sharp when the customer opens it.
Common material and structure choices compare like this:
| Option | Best Use | Typical Strength | Typical Cost Impact | Notes |
|---|---|---|---|---|
| E-flute mailer | Light apparel, cosmetics, kits | Good print surface, moderate crush resistance | Lower to moderate | Often chosen for premium-looking custom printed boxes with compact profiles |
| B-flute mailer | Heavier products, more fragile items | Better cushioning and stacking strength | Moderate | Can add a little bulk, which may affect shipping cost |
| Paperboard mailer | Light, presentation-first retail packaging | Lower impact protection | Lower board cost, higher risk for shipping abuse | Works better when the journey is gentle and the product is low-risk |
| Mailer with insert | Fragile or multi-item sets | Improved product control inside the carton | Higher | Often worth it if damage rates are already eating margin |
Sustainability belongs in performance conversations too. Recycled content, curbside recyclability, and ink coverage all shape the real-world story, not just the marketing copy. If the brand wants to claim recycled or FSC-certified fiber, the spec has to support it. Otherwise the packaging claim becomes a liability. One of the easiest mistakes in package branding is a carton that says one thing while the structure tells a different story.
My own rule of thumb is simple: ask what the box will look like after it has been stacked, shipped, and opened by a real customer. That question beats, "What looks best on a render?" because it pushes the conversation toward product packaging performance instead of wishful thinking.
Custom Mailer Boxes How to Choose on Cost, Pricing, MOQ, and Quote
Price is more than a number per unit. A real comparison needs setup charges, printing method, finishing, inserts, freight, and any structure changes that require a new dieline. If one quote includes a prototype and another does not, the lower quote may not be lower at all. custom mailer boxes how to choose gets easier once the pricing structure is broken apart.
MOQ, or minimum order quantity, matters because it shapes risk. Lower quantities reduce inventory exposure, which helps with a new product or seasonal kit. Higher quantities usually lower the per-box price because setup and waste are spread across more units. The right point depends on sales velocity. A brand shipping 500 orders a month faces a very different risk profile than one moving 20,000.
Here is a realistic way buyers often see price bands for custom mailer boxes, assuming similar artwork complexity and a corrugated structure:
| Order Type | Typical Qty | Approx. Unit Cost | Typical Lead Time | Why It Changes |
|---|---|---|---|---|
| Short-run custom mailer | 250-1,000 | $1.10-$2.75 | Often 10-18 business days after proof approval | Setup costs and material waste are spread across fewer units |
| Mid-run custom mailer | 1,000-5,000 | $0.55-$1.35 | Often 12-20 business days after proof approval | Economies improve, especially if print is simple and the structure is standard |
| Large-run custom mailer | 5,000+ | $0.18-$0.95 | Often 15-30 business days after proof approval | Better material and press efficiency, but freight and storage planning become more important |
Those numbers are directional, not promises. Heavy ink coverage, premium finish, inserts, and unique structures can move pricing more than most buyers expect. White ink on dark board, foil, lamination, and complex die cuts all change the economics. Freight can shift the result too, especially if the boxes ship flat in one lane and arrive assembled in another. A quote that leaves freight out is not really a quote. It is a teaser.
Hidden charges trip people up more often than the headline price. Sample fees. Plate charges. Artwork edits. Insert tooling. Rush freight when the schedule slips. Those are the line items that make a vendor look like it changed the price overnight, even when the original scope was incomplete. The cleaner the buyer's spec, the less room there is for that confusion. That is why custom mailer boxes how to choose always starts with a complete spec sheet.
A low first order can feel safe, but if the product sells through quickly, the second purchase may arrive at the worst possible time, with tighter deadlines and less room to negotiate. Sometimes a slightly larger order creates a lower all-in cost across the quarter. That matters most for branded packaging used across launch kits, subscription renewals, and retail packaging resets.
Compare quotes only after the specs match. Same size, same board, same print coverage, same finish, same inserts. Anything else is apples and oranges with a spreadsheet costume.
Step-by-Step Guide to Selecting the Right Mailer Box
Step 1 is measurement. Measure the product exactly, then add only the clearance needed for inserts, tissue, or movement control. Guessing from the outer packaging is a common mistake. A product may fit on a bench and still fail once the insert, seal, and top flaps are added. For custom mailer boxes how to choose, the product dimensions should drive the spec.
Step 2 is deciding the job. Does the box need to be presentation-first, protection-first, or balanced? A gift box for a premium candle line can prioritize the unboxing. A shipping carton for a fragile hardware component may need stronger board and a more secure closure. A balanced ecommerce shipper lands between those two extremes. That choice affects nearly everything else.
Step 3 is matching material and structure to the shipment. Lightweight apparel often works with slimmer corrugated profiles. Heavier contents may need a sturdier flute or a better closure. Add inserts if the product can move. Add dividers if there are multiple pieces that could collide. Add void fill only if the structure cannot control movement by itself. The box should do the work first, not filler.
Fit the box to the product, not the other way around
A snug interior is better than a dramatic empty cavity. There should be enough room for safe handling, but not enough for the product to skate around during transit. If the item has sharp corners or a glossy surface, even small movement can create scuffing. That is why custom printed boxes should be checked with the real product, not only with a paper mockup.
Sample before approving the run
Step 4 is sampling. Request a sample or prototype and test it with the actual contents. Check closure force, print placement, assembly speed, and whether the product stays centered after a shake test. If the box will be used in a fulfillment line, watch how quickly one person can build it for 15 minutes straight. A box that looks elegant at first can turn annoying at volume. Speed matters.
Step 5 is final approval. Confirm the spec sheet, the artwork file, the board grade, the finish, the insert shape, and the freight plan. Then verify the details again. Most mistakes are not dramatic. They are small. A 1/8-inch dimension miss. A logo placed too close to a fold. An insert that blocks the flap. Those small errors are enough to derail a launch.
If the project touches package branding across multiple channels, keep the mailer aligned with the rest of the system. Typography, ink colors, and material tone should sit comfortably beside the primary shipping carton, any retail packaging, and the inserts inside. A consistent look usually persuades more than a flashy one that ignores the rest of the kit.
For brands building a broader packaging plan, the best workflow is to choose the mailer first, then shape the rest of the customer experience around it. That might include tissue, labels, inserts, and outer transit protection. The box is only one part of the story, though it is usually the part the customer sees first.
Common Mistakes When Choosing Custom Mailer Boxes
Overboxing is the first mistake. It happens when a brand picks a larger size or thicker board than the product actually needs. The result is higher freight, more filler, and often a less polished unboxing. A large box can look impressive in a render. In transit, it is often inefficient. That is why custom mailer boxes how to choose has to include dimensional weight, not only visual appeal.
The opposite mistake is undersizing. A box that is too tight can crush the product, weaken the tuck, and create edge wear. If the contents are fragile, compression is not a small issue. It becomes a return rate problem. Damage claims cost money in layers: replacement product, customer service time, and sometimes re-shipping. A box that fails once can become a margin leak for months.
Another common problem is approving artwork before the dieline is final. Graphics shift around folds. Flaps hide copy. Glue areas are not printable in the same way as display panels. If the brand signs off too early, the finished box may look cluttered or awkward. This is one of the easiest mistakes to avoid in packaging design, and it still survives because the render looks good and nobody wants to slow the schedule.
Many teams also forget assembly labor. They choose a visually pleasing structure, then discover the box takes too many hand motions to build. That can be painful at scale. If the packing line needs 12 extra seconds per unit, the impact is not theoretical. It shows up as overtime, bottlenecks, and less flexible fulfillment. Custom mailer boxes get treated like a marketing tool, but they are also a labor tool.
Skipping performance testing gets expensive. A desk mockup cannot simulate vibration, humidity, stacking pressure, conveyor handling, or parcel corner impacts. Real transit is rougher. A practical test plan should include at least a fit check, a drop check, and a shake check. For more demanding routes, follow a recognized method such as an ISTA procedure so the comparison is based on something sturdier than instinct.
One more mistake deserves attention: making sustainability claims without proof. If the carton is not sourced or specified correctly, a recycled-content claim can become a trust problem. If a brand wants credible environmental messaging, the material choice has to match the claim. The packaging itself needs to carry the message, especially for retail packaging that sits on a shelf or gets photographed during unboxing.
In short, custom mailer boxes how to choose is rarely blocked by one big failure. It is usually a cluster of small ones: wrong size, wrong board, wrong artwork timing, wrong labor assumption, wrong test. Fix those, and the order gets easier.
Expert Tips and Next Steps for a Better Order
Start with a one-page spec sheet. Include product dimensions, shipping weight, target board grade, print method, finish, insert needs, quantity, and target delivery date. That one page saves time in every conversation. It also forces the internal team to make decisions before requesting quotes, which prevents comparison chaos. If you are serious about custom mailer boxes how to choose, you need a written spec rather than a memory.
Get at least three quotes on the same specification. Not a similar spec. The same one. If one supplier quotes an E-flute box with matte aqueous and another quotes a different board with no finish, the price gap means very little. The only useful comparison comes from aligning the variables. Then the quote tells you something real about value, service, and process maturity.
Ask for samples that reflect the actual production plan. A flat proof helps with placement, but it cannot show closure feel, scuff resistance, or assembly speed. If the box needs a premium surface, sample the finish. If the box needs an insert, sample the insert. If the product is odd-shaped, test it with the real item. That is the fastest route to fewer surprises.
Set a reorder threshold before inventory gets low. A good threshold protects against stockouts, freight spikes, and rush fees. Many brands wait too long because packaging feels secondary until it blocks sales. Then the box becomes the bottleneck. It should be boring by the time it is working well. Boring is profitable.
Here is a simple decision checklist:
- Confirm the product fit and measure the interior space needed for inserts or tissue.
- Choose the board and structure based on weight, fragility, and shipping distance.
- Match the print and finish to the brand experience and handling requirements.
- Compare quotes on identical specs, including freight and setup charges.
- Test the sample before approving the full run.
- Plan reorder timing before inventory gets tight.
That checklist looks basic, and basic is often where the money gets saved. The sharper the buyer, the less drama the process creates. Less drama usually means better packaging performance.
For teams comparing several packaging formats at once, it helps to view the mailer as part of a larger branded packaging family rather than a one-off purchase. A box that works with inserts, labels, and a complementary outer shipper usually creates a smoother fulfillment path and a stronger customer experience. That is true whether you are building subscription kits, DTC launches, or retail packaging that also ships direct to customers.
So if you are still weighing custom mailer boxes how to choose, keep coming back to the same four questions: does it fit, does it protect, does it cost the right amount to ship, and can the team produce it on time? If those four answers hold up, the rest of the decision gets a lot easier.
Frequently Asked Questions
How do I choose custom mailer boxes for fragile products?
Start with a snug internal fit and add an insert, divider, or protective fill if the item can move during transit. Choose a stronger board grade or a more protective corrugated structure when the product is heavy, breakable, or traveling long distances. Then test the sample with a real product using a drop check and a shake check before you approve the full run. That is the cleanest way to approach custom mailer boxes how to choose for fragile items.
What size should custom mailer boxes be for ecommerce shipping?
Measure the product first, then add only the clearance needed for tissue, inserts, and safe handling. Keep the outer size as compact as possible so you reduce dimensional weight charges and avoid wasted void space. If you sell multiple SKUs, a small family of box sizes usually works better than forcing one oversized format to fit everything. That approach is often cheaper, faster to pack, and easier to scale.
How much do custom mailer boxes usually cost per unit?
Unit cost depends on size, board grade, print coverage, finish, and order quantity. Small runs usually cost more per box because setup and material waste are spread across fewer units. A quote is only useful if it separates the box price, inserts, setup, and freight so you can compare vendors accurately. For many buyers, the real answer to custom mailer boxes how to choose is not the lowest unit price but the best total landed cost.
How long does the custom mailer box process take?
The timeline depends on artwork approval, structural changes, sampling, production capacity, and shipping method. Simple repeat orders usually move faster than first-time custom projects with new dielines or finishes. Build in buffer time for revisions so packaging does not become the bottleneck in a product launch. If the box is supporting a seasonal or retail deadline, that buffer is not optional.
What is the best way to compare quotes for custom mailer boxes?
Make sure every quote uses the same dimensions, material, print method, quantity, and finishing details. Check whether the price includes samples, plate charges, freight, and inserts because those can change the real total. Choose the supplier that balances cost, lead time, and print quality rather than the lowest number alone. That is the practical version of custom mailer boxes how to choose, and it usually leads to fewer mistakes, fewer surprises, and a better box on the dock and at the door.

