Buyer Fit Snapshot
| Best fit | Custom Rigid Boxes with Embossing projects where brand print, material claims, artwork control, MOQ, and repeat-order consistency need to be specified before quoting. |
|---|---|
| Quote inputs | Share finished size, material target, print colors, finish, packing count, annual reorder estimate, ship-to region, and any compliance wording. |
| Proofing check | Approve dieline scale, logo placement, barcode or warning zones, color tolerance, closure strength, and carton packing before bulk production. |
| Main risk | Vague material claims, crowded artwork, missing packing details, or unclear freight terms can make a low unit price expensive after revisions. |
Fast answer: Custom Rigid Boxes with Embossing: Board, Finish, Dieline, and Unit Cost should be specified like a repeatable production item. The safest quote records material, print method, finish, artwork proof, packing count, and reorder notes in one written spec.
Production checks before approval
Compare the actual filled-product size with the drawing, then confirm tolerance on folds, seals, hang holes, label areas, and retail display edges. Reserve space for logos, QR codes, warning copy, and material claims before decorative graphics fill the panel.
Quote comparison points
Review material grade, print process, finish, sampling route, tooling charges, carton quantity, and freight assumptions side by side. A quote is only useful when the supplier can repeat the same color, closure quality, and packing count on the next order.
Two boxes can carry the same logo and still tell opposite stories. Put a flat-printed carton beside Custom Rigid Boxes with embossing, and the raised mark usually gets the first glance and the first touch. The hand notices depth before the mind starts naming materials. The eye catches the shadow that follows. I have watched that happen in press checks more times than I can count. A sample that looked modest on screen suddenly became the loudest object on the table once the logo lifted off the surface.
That small change shifts how premium a product feels, which is why Custom Rigid Boxes with embossing matter in branded packaging, retail packaging, and product packaging where perception can steer the sale. Packaging buyers tend to like things that work twice. A rigid structure protects the contents. Embossing adds a tactile cue that says the brand cared enough to shape the surface, not just print on it.
That pairing shows up often in cosmetics, candles, jewelry, spirits, apparel accessories, and tech gifts, where a modest jump in perceived value can support a much higher shelf price. Compare custom rigid boxes with embossing with simpler Custom Printed Boxes and the difference is rarely about ink coverage alone. It is about how the surface behaves once a customer picks it up.
Here, I will trace how Custom Rigid Boxes with embossing are made, what changes the final look, what pushes the price up or down, and how to plan a premium finish without overbuilding the spec. I will also flag the mistakes that flatten the effect, because a raised logo only helps if the structure, artwork, and finish all point in the same direction.
What Custom Rigid Boxes with Embossing Actually Deliver
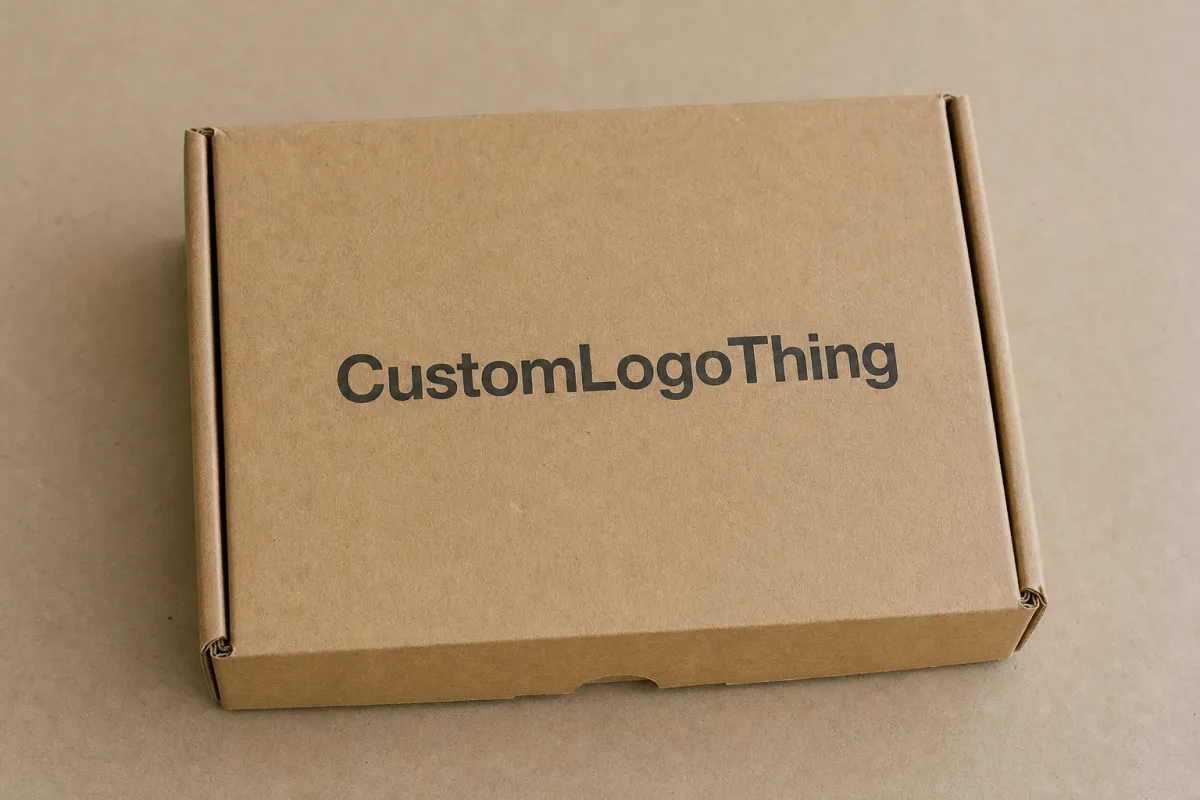
Custom rigid boxes with embossing are usually built from thick paperboard wrapped in printed or specialty paper, then pressed with a matched die so selected artwork rises above the surface. The result sounds subtle on paper and feels decisive in hand. The box has more mass than a folding carton, and the mark feels intentional rather than incidental. Buyers notice that, even if they do not have the words for it.
Embossing does more than decorate. It changes hierarchy. A flat full-surface print can feel busy, but an embossed logo gives the eye a place to land with less noise around it. A monogram can start to feel architectural. A simple line mark can feel editorial. If the goal is package branding that reads as thoughtful instead of crowded, custom rigid boxes with embossing often outperform more complicated graphics.
The strongest results usually appear in categories where unboxing has real commercial weight. A fragrance set may sit on a vanity for months. A candle box may be gifted before it is opened. A jewelry box may survive long after the purchase itself fades into memory. In those settings, custom rigid boxes with embossing do more than carry the item; they extend the product story. That is why buyers often choose them for premium launches, limited editions, corporate gifts, and seasonal gift packaging.
A raised logo does not need to shout. Quiet compositions often feel more expensive because they leave room for shadow, texture, and restraint.
Another useful distinction sits between visual decoration and tactile branding. A foil stamp catches light. A spot UV patch reflects light. Embossing changes the plane itself. That physical shift tends to stay in memory. A customer may not use technical language, but they often describe the box as better, heavier, or more finished. For a packaging team, that response matters because the package starts doing part of the selling before the product appears.
If you are still building a packaging system, compare custom rigid boxes with embossing against the rest of your range at Custom Packaging Products. A rigid setup is not necessary for every SKU, yet hero items, higher-margin sets, and launch pieces often justify the extra structure. A box like that can shift the conversation from acceptable to memorable.
There is a durability angle too. Rigid boxes stay structurally stable, so the face area can handle a controlled press better than a flimsy paperboard. That is one reason custom rigid boxes with embossing often hold sharper detail than lighter packaging styles. When the board resists movement, the raised image stays cleaner and the edges read with more authority.
One more practical point: embossing looks best when the artwork gives it room to breathe. A crowded face panel can make the raised area feel accidental, almost lost in the noise. During package reviews, I usually look for one visual anchor, not three. That restraint tends to age better too. A box that relies on one strong tactile cue is easier to remember than one that tries to impress from every angle.
Process and Timeline for Custom Rigid Boxes with Embossing
The production path for custom rigid boxes with embossing starts with the dieline, not the artwork. That sounds obvious, yet it is where many jobs drift. The structural drawing defines fold lines, seams, tuck areas, lid overlaps, and the safe zones for raised detail. Once the layout is approved, the supplier can prepare the embossing die, confirm the material stock, and set the order of operations for wrapping, pressing, and assembly.
In a typical run, the sequence moves from dieline review to artwork prep, embossing die creation, material selection, sample build, sample approval, full production, inspection, packing, and shipment. A straightforward project can move through that chain in about 12 to 15 business days after proof approval, though first-run tooling, special papers, or overseas freight can stretch the calendar. More customized custom rigid boxes with embossing often need extra time for tooling and sample revisions. Add foil stamping, magnets, windows, or inserts and the schedule stretches again, because each added element creates another alignment checkpoint.
Embossing itself comes from a matched male die and female counter-die pressing together under controlled heat or pressure. Depth matters. Surface area matters. Placement matters even more. A broad raised field needs steadier pressure than a small logo. Fine type needs cleaner art files and a more stable substrate. That is why custom rigid boxes with embossing can look dramatically different from one design to the next even when the structure looks nearly identical from a distance.
Delays usually come from the same four places: late dieline changes, unclear artwork, material backorders, and slow approvals from multiple stakeholders. One person wants a deeper press. Another wants a larger logo. A third asks for a color tweak after the sample is already built. Each revision may look minor in isolation, yet together they can consume days or even a full week. For that reason, custom rigid boxes with embossing benefit from a tighter approval chain than ordinary custom printed boxes.
The best schedule advice stays plain: lock the structure early, approve artwork in vector format, and make sure the sample reflects the final material rather than a placeholder. If you are comparing suppliers, ask whether they build a white dummy first or go straight to printed sampling. A white sample helps with fit, closure tension, and emboss placement. It proves useful for premium product packaging where a tight lid or a magnet closure could interfere with the raised area.
For distribution-focused projects, transit performance deserves attention before the order ships. If the box must survive parcel networks, ask how the sample relates to testing such as ISTA distribution testing or ASTM D4169-style protocols. Not every premium box needs formal testing, but the logic still helps. Compression, drop risk, and vibration should be considered before the order goes live. A beautiful surface only matters if it reaches the customer intact.
Many buyers underestimate the amount of coordination required once the finish becomes tactile. Custom rigid boxes with embossing are not difficult for a capable supplier, but they reward organized input. Clear specs save time. Vague feedback burns it.
Key Design Factors That Change the Final Look
The first design choice that affects custom rigid boxes with embossing is board thickness. A more stable board usually supports a cleaner press because the surface does not flex as much under pressure. Thicker is not automatically better. The board, wrap, and art need to work together. A strong shell with a well-chosen wrap often gives a sharper impression than an oversized design forced onto a weak substrate.
Emboss depth is the next variable. A shallow press can feel subtle, almost like texture. A deeper press reads more dramatically and throws stronger shadows. The right answer depends on the brand voice. Jewelry and fragrance packaging often benefits from restrained depth. Gift sets and limited editions may call for a bolder raise. In either case, custom rigid boxes with embossing look best when the raised area feels purposeful rather than decorative for its own sake.
Artwork choice is where many brands overcomplicate the job. Fine serif type, thin strokes, tight counters, and crowded logos can all work against the press. Bold shapes, generous spacing, and clean vector edges usually emboss more cleanly. If the design needs a mixed finish, registered embossing with foil stamping can look elegant, but the registration must be exact. A slight misalignment becomes obvious because the tactile edge and the metallic edge no longer sit together.
Surface finish changes the read too. Matte wraps and soft-touch laminations usually make the raised area feel more pronounced because light breaks across the surface unevenly. Glossy surfaces can still work, yet they produce a different effect: more reflection, less shadow. If the goal is understated luxury, many teams choose uncoated or lightly coated wrap papers for custom rigid boxes with embossing. The touch feels quieter, and the raised detail stands out in a more natural way.
Structural placement matters just as much as artwork. Do not crowd the embossed area near folds, seams, magnets, or edges. Those stress points can distort the impression or create a weak spot in the wrap. On a lid-and-base setup, the most reliable emboss location is usually a central face area with enough margin to breathe. On a book-style rigid box, the spine and flap area may need extra caution because repeated opening can fatigue the wrap.
Think about the box as a whole rather than the lid alone. If the insert is foam, paperboard, or molded pulp, its color and fit will affect the premium impression before the customer even gets to the product. For high-end product packaging, the best custom rigid boxes with embossing feel complete because every layer follows the same visual discipline.
One useful rule of thumb: if the surface is crowded, emboss less. If the layout is restrained, emboss more confidently. The box should not fight itself. A single tactile focal point usually reads stronger than three competing effects.
There is also a practical reason to keep the artwork simple. Fine detail may look attractive in a comp file, but once the board is wrapped and pressed, tiny lines can close up or lose edge definition. I have seen elegant logos turn fussy under pressure, while a plain wordmark held beautifully. The finish rewards clarity more than ambition.
Cost and Pricing for Custom Rigid Boxes with Embossing
Pricing for custom rigid boxes with embossing usually comes down to five main drivers: tooling, setup labor, board grade, wrap material, and quantity. A die charge is often a fixed cost. So is the time spent aligning the press and checking the sample. Board and wrap choices move the unit price. Quantity changes everything because the fixed costs get spread across more boxes.
That is why a small order can feel expensive even when the per-box price is reasonable. If you are ordering 500 units, the setup burden sits heavily on the quote. At 5,000 units, the same die and setup may be diluted enough to bring the unit cost down sharply. For custom rigid boxes with embossing, the economics become easier to read once you separate the quote into two buckets: fixed and variable.
Here is a realistic comparison for planning purposes. These are broad ranges, not a promise, because print coverage, insert design, and finishing choices can move the numbers.
| Order Size | Typical Unit Range | Setup / Tooling | Common Notes |
|---|---|---|---|
| 500 units | $5.50-$9.50 | $250-$600 | Best for prototypes, launches, and controlled test runs |
| 1,000 units | $4.20-$7.25 | $250-$600 | Often the sweet spot for premium retail packaging |
| 3,000 units | $3.10-$5.80 | $300-$750 | More efficient if the design is finalized early |
| 5,000 units | $2.75-$4.95 | $350-$900 | Better absorption of tooling and press setup |
Those numbers move fast if foil stamping is added, because foil usually adds another pass, another alignment check, and sometimes a more specialized die. Magnetic closures and custom inserts can also push the price upward. A rigid structure with a velvet-lined tray is not priced like a plain lid-and-base box. The difference is structural and labor-related, not cosmetic.
There are also budget items that first-time buyers miss. Sample courier fees. Artwork revisions. Rush charges. Storage if the goods arrive before the shelf date. Freight if the cartons are bulky and the destination sits far from the factory. On a project with custom rigid boxes with embossing, freight can matter more than expected because rigid packaging consumes space quickly.
If sustainability claims are part of the brief, ask for proof rather than vague language. Paper sourcing can often be specified through FSC certification or equivalent chain-of-custody documentation. If the supplier cannot explain the claim clearly, treat that as a warning sign. The same applies to recyclability statements; they should match the structure and local recovery conditions, not generic marketing copy. For broader environmental context, the EPA recycling guidance can help frame what consumers actually encounter after disposal.
A transparent quote should separate tooling, setup, materials, finishing, and shipping. That makes it much easier to compare custom rigid boxes with embossing across vendors without getting lost in bundled numbers. A cheap quote that hides the die charge is not cheaper if the landed cost ends up higher.
One practical caution: unit price alone can be misleading when the order is small. A supplier may look expensive on paper, but if their sampling is cleaner and their production files are better managed, the project can save time and rework. I have seen that happen on launches where the lowest quote turned out to be the most expensive path once revisions and delays were counted.
Step-by-Step Guide to Planning the Box
Start with the product, not the finish. Measure the item accurately, including height, width, depth, and any protrusions. Note the weight, fragility, and whether the product will ship alone or with accessories. That sounds basic, but it prevents expensive mistakes later. A well-built box for a fragrance bottle is not the same as a well-built box for a multi-piece grooming kit. The strongest custom rigid boxes with embossing begin with product reality, not visual wish lists.
- Define the use case. Decide whether the box is for shelf display, e-commerce shipping, gifting, or long-term storage.
- Choose the structure. Pick lid-and-base, book style, shoulder neck, drawer style, or a hybrid format that suits the product.
- Place the embossing. Identify one face or lid area where the tactile mark can support the brand story without crossing seams.
- Select the materials. Choose the board, wrap, and insert together so the finish feels coherent.
- Approve a sample. Review a white dummy or printed sample before committing to full production.
The embossing location should be decided early because it affects the dieline. If you want the raised mark centered on the lid, the design must respect fold lines, wrap overlaps, and closure hardware. If you want a repeating pattern, make sure the repetition does not collide with corners or stress zones. For custom rigid boxes with embossing, the cleanest results usually come from one clear focal point rather than multiple embossed zones competing for attention.
Choose the wrap and board as a pair. A luxurious paper wrap can improve the tactile feel, but a delicate paper may show grain, scuffing, or cracking if the press is too heavy. A stronger wrap can hold detail better, but it can also change the look under light. That is why sampling matters. A material that looks great on a swatch card can behave differently once wrapped around a rigid shell.
Artwork preparation should be production-minded. Use vector files. Keep type sizes generous. Avoid hairline details unless the supplier confirms they can hold them. Leave enough negative space around the raised area so the embossing reads cleanly from a distance and up close. If you are planning custom rigid boxes with embossing for retail packaging, remember that the shelf read and the hand feel both need to work.
Then build the sign-off process. A good approval checklist usually includes color, emboss depth, alignment, finish sheen, insert fit, closure strength, and packout method. It is also smart to define how many cartons go into each shipper and whether the cartons need corner protection. For custom packaging products sold through multiple channels, that small logistics detail can prevent real damage later.
Finally, keep the team aligned on the business goal. Is the box meant to increase conversion, support a higher price point, improve gifting, or reinforce package branding across a line extension? Different goals call for different levels of finish. Custom rigid boxes with embossing can look expensive even with a restrained budget if the decisions stay disciplined. The reverse is true too: too many effects can make an otherwise strong package feel cluttered.
If you need to compare format options before you commit, review the available custom packaging products and narrow the choice to the box styles that fit your product and shipping model. Then ask for a sample that shows emboss placement in the real structure, not a stand-alone artwork proof.
One extra step pays off more often than people expect: create a simple pass-fail sheet before production starts. If the emboss depth, lid fit, paper color, and closure tension all have written targets, the sample review becomes much faster. That keeps decisions from drifting into subjective debate.
Common Mistakes That Undercut the Embossed Effect
The most common mistake is trying to emboss too much at once. A surface packed with logos, textures, foil, and pattern work can become visually noisy, which weakens the tactile impact of the raised area. In custom rigid boxes with embossing, restraint usually reads more premium than complication. One confident mark beats five competing effects.
Another frequent issue is material mismatch. Thin wraps, unstable boards, or poorly chosen laminations can flatten the impression or cause distortion after pressing. Sometimes the embossed area looks acceptable in the sample, then softens during assembly because the material does not recover well. That is why the substrate matters just as much as the die. A great press on a weak surface still produces a weak result.
Alignment problems show up often too. If the artwork sits too close to a seam, fold, magnet, or edge, the raised image may shift visually or press unevenly. The result can look slightly off-center even when the dieline was technically followed. With custom rigid boxes with embossing, even a small offset can be visible because premium packaging trains the eye to expect symmetry.
Screen-only approvals are risky. A digital proof cannot show how paper grain, pressure, and lighting will behave. A design that feels balanced on a monitor can become overbuilt in real life. That is why physical sampling is essential. A good sample reveals what the file cannot: shadow depth, finger feel, and how the emboss catches under retail lighting.
Shipping and storage mistakes can undo the premium effect before the product reaches the customer. Rigid boxes are sturdy, but they are not indestructible. Corner crush, scuffing, and insert movement all affect the perception of quality. For e-commerce, ISTA-style thinking helps even if you do not run formal lab tests. If the box cannot survive the journey, the embossing never gets a fair chance to matter.
One more trap: forgetting the unboxing sequence. The embossed lid may be beautiful, but if the insert is loose or the contents rattle, the premium illusion breaks. Product packaging is a system. The lid, the tray, the print, the closure, and the product share the same first impression. Custom rigid boxes with embossing work best when every piece contributes to a calm, controlled reveal.
My practical rule is simple. If you are unsure whether a design is strong enough, reduce it by 20 percent and test again. Less clutter usually gives the emboss more room to do its job.
A second mistake is skipping a real-world lighting check. Embossing can look refined in a studio shot and underwhelming under harsh retail LEDs. I have learned to place samples under different light sources before approving a run. It takes a few extra minutes, and it saves a lot of disappointment later.
Expert Tips and Next Steps for Better Orders
Choose one tactile focal point and let it carry the package. That may be a logo, a monogram, a wordmark, or a single emblem. For custom rigid boxes with embossing, this is often the cleanest path because the press gets room to breathe and the brand gets a stronger visual hierarchy. If the face already feels busy, remove something before adding another finish.
Use contrast with intention. A restrained color palette plus a raised mark can look far more expensive than a busy composition with several competing accents. If you want a little extra drama, pair embossing with a subtle foil accent or a soft-touch wrap. The strongest luxury packaging usually depends more on control than spectacle. That is especially true for custom rigid boxes with embossing, where the tactile element should feel like a decision rather than a flourish.
Ask for three types of sample if the project matters commercially: a white dummy for structure, a printed sample for color, and a production proof for final sign-off. Those three versions answer different questions. Does the size fit? Does the artwork read? Does the press depth feel right under the actual wrap? Buyers who skip one of those steps usually find the gap too late.
It also helps to compare suppliers on the same worksheet. Ask for MOQ, tooling charges, material specs, finishing options, lead time, and freight assumptions in the same format. If one vendor quotes a lower unit price but hides setup or shipping, the comparison is distorted. For custom rigid boxes with embossing, apples-to-apples comparison is the only fair comparison.
Here is a quick checklist worth keeping in front of the team before approval:
- Product measurements are final.
- Emboss placement avoids seams and closures.
- Artwork is vector-based and readable at real size.
- Wrap and board are confirmed together.
- Sample depth and alignment are approved in hand.
- Shipping assumptions are written into the quote.
If you want a practical next move, shortlist the box dimensions, request a detailed quote, and compare samples before you approve the run. That sequence saves money more often than aggressive negotiation does. It also gives you a cleaner answer to the real question: which version of custom rigid boxes with embossing makes the product feel worth more without making the order harder to manage?
For buyers building a broader packaging system, this is also a useful moment to review adjacent formats in Custom Packaging Products and decide which items truly deserve a rigid presentation. Not every SKU needs the same level of finish. The strongest brands usually reserve the premium structure for the products that carry the most margin, the most gifting potential, or the most visible shelf value.
My final view is straightforward: custom rigid boxes with embossing are worth the effort when the box itself is part of the product promise. If the packaging has to signal quality before the lid lifts, the tactile detail earns its place. If it cannot do that, simplify the spec and spend the budget where it will matter more. The best decision is not always the most decorated one; it is the one that makes the product feel right in the hand and still holds up in transit.
Frequently Asked Questions
What makes custom rigid boxes with embossing feel more premium than standard packaging?
The raised detail creates depth and shadow, so the brand is perceived through touch as well as sight. Rigid construction adds structure and weight, which signals higher value before the box is opened. A restrained emboss can also make simple branding look more deliberate than a full-surface print.
How much do custom rigid boxes with embossing usually cost?
Pricing depends on tooling, board quality, wrap material, quantity, and whether the design includes foil or other finishes. Higher quantities usually lower unit cost because setup fees are spread across more boxes. Ask for a quote that separates fixed costs from per-box costs so you can compare vendors accurately.
Is embossing better than debossing for rigid boxes?
Embossing raises the artwork, while debossing presses it inward, so the better choice depends on the look you want. Embossing often reads as more decorative and attention-grabbing on gift and luxury packaging. Debossing can feel quieter and more editorial, especially when the brand wants subtlety.
What is the typical turnaround time for custom rigid boxes with embossing?
Simple projects move faster, but samples, tooling, and approval cycles usually add time before production starts. Complex designs with foil, inserts, or multiple finishes need extra alignment and inspection steps. The fastest way to protect the schedule is to approve the dieline and artwork early and avoid late revisions.
What MOQ should I expect for custom rigid boxes with embossing?
MOQ varies by supplier, box size, and tooling complexity, so there is no single standard number. Embossing can raise setup costs, which is why some vendors prefer larger runs to keep pricing efficient. If volume is uncertain, ask about tiered pricing, prototype runs, or a first production batch sized for testing.

