Buyer Fit Snapshot
| Best fit | custom rigid boxes for branding design for packaging buyers comparing material specs, print proof, MOQ, unit cost, freight, and repeat-order risk where brand print, material, artwork control, and repeat-order consistency matter. |
|---|---|
| Quote inputs | Share finished size, material target, print colors, finish, packing count, annual reorder estimate, and delivery region. |
| Proofing check | Approve dieline scale, logo placement, barcode or warning zones, color tolerance, and any recyclable or compostable wording before bulk production. |
| Main risk | Vague material claims, crowded artwork, or missing packing details can create delays even when the unit price looks attractive. |
Fast answer: Custom Rigid Boxes for Branding Design: Dieline, Finish, Proof, and Buyer Review should be specified like a repeatable production item. The safest quote includes material, print method, finish, artwork proof, carton packing, and reorder notes in one written spec.
What to confirm before approving the packaging proof
Check the product dimensions against the actual filled item, not only the sales mockup. Ask for tolerance on folds, seals, hang holes, label areas, and retail display edges. If the package carries a logo, QR code, warning copy, or legal claim, reserve that space before decorative graphics fill the panel.
How to compare quotes without losing quality
Compare board or film grade, print process, finish, sampling route, tooling charges, carton quantity, and freight assumptions side by side. A lower quote is only useful if the supplier can repeat the same color, closure quality, and packing count on the next order.
Custom Rigid Boxes for branding can outperform a lot of paid media once the product is actually in a buyer’s hands. That sounds blunt because it is. The box is often the first surface people touch, the first thing they open, and the first thing they post. Before the product even gets a sentence, custom rigid boxes for branding have already started framing the story.
Buyers read that signal faster than brands usually expect. A rigid box is not just packaging. It is branded packaging with structure, weight, and intent. It tells a customer whether the product belongs in the premium lane, the gift lane, or the bargain-bin lane nobody wants to claim. That judgment lands in seconds, not minutes.
A box is not decoration. It is the first sales rep most products ever meet.
Good Custom Rigid Boxes for branding do three things at once. They protect the product, present it with clarity, and make the price feel justified. Get the proportions right, Choose the Right surface, and the box becomes part of the product itself. Miss those details and the packaging quietly drags the whole brand down.
I have seen that happen in real product reviews more than once. One cosmetics launch I looked at had strong formulas, strong photography, and a forgettable folding carton. The brand spent heavily on traffic but still struggled to create a premium first impression. A later packaging refresh, built around a rigid presentation box, changed the conversation almost overnight. Not because the box “sold” the product by itself, but because it made the rest of the brand easier to believe.
Custom rigid boxes for branding: what they are and why they matter
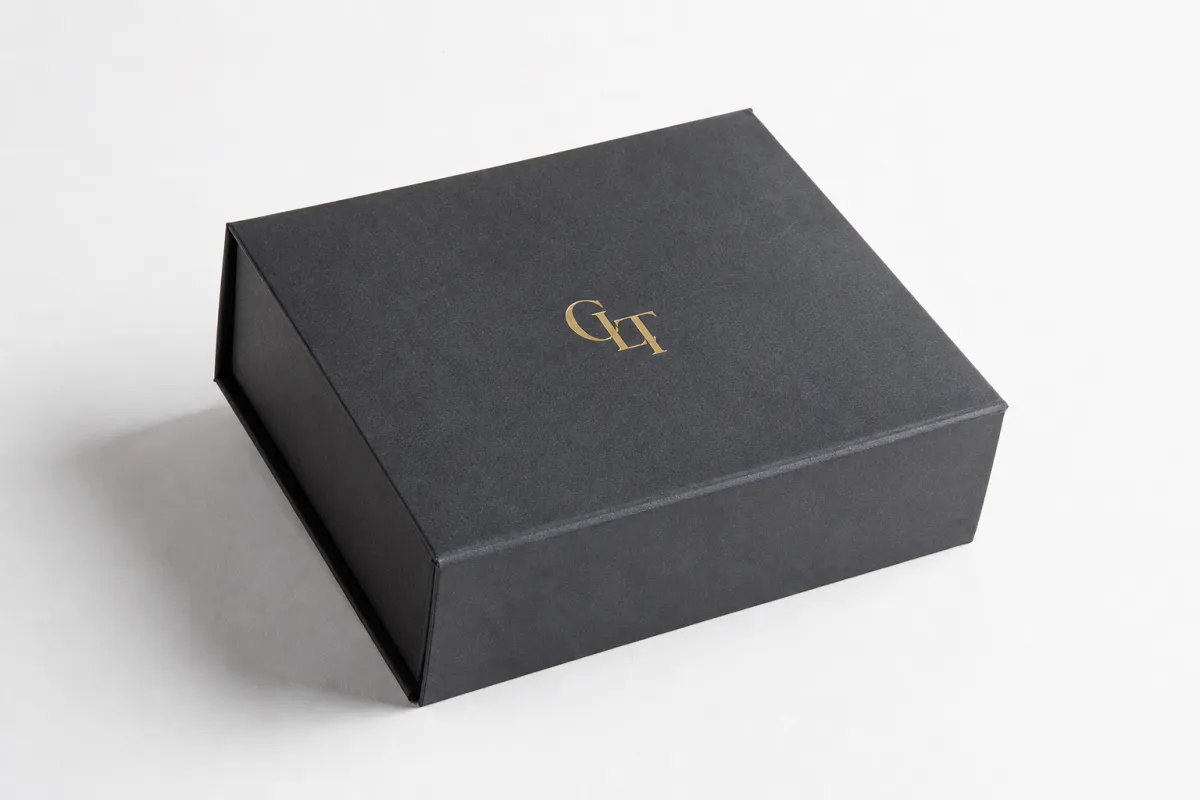
Custom Rigid Boxes for branding use thick paperboard, usually wrapped in printed or specialty paper, to create a sturdy package with a premium feel. The board does not fold like a standard carton. It is assembled from panels, wrapped, and finished so the box keeps its shape and carries more visual weight. That stiffness is not a side effect. It is part of the message.
People usually notice the difference before they can explain it. A folding carton can still be the right answer for plenty of products, but custom rigid boxes for branding send a different signal from the first glance. They suggest more value, more care, and more room for design. That is why they show up in cosmetics, electronics, candles, jewelry, gift sets, and limited-run retail packaging where perceived value can move real revenue.
Branding is more than a logo on the lid. Shape matters. Paper texture matters. The lift of the lid matters. Even the way an insert holds the product can reinforce package branding. A restrained box can say calm, confident, expensive. A bold box with metallic foil can say polished and high-energy. Both can work. The wrong one just looks like a brand trying too hard, and that is a very expensive kind of awkward.
That is why custom rigid boxes for branding matter. They influence three things buyers care about:
- Perception - The box changes how expensive the product feels.
- Protection - The structure helps resist crushing, scuffing, and movement.
- Repeat exposure - A box people keep on a shelf keeps the brand visible longer.
Compare a standard mailer with a well-built rigid presentation box. One tends to disappear the moment the order is unpacked. The other can stay on a vanity, in a drawer, or on a desk for months. That long tail matters. It is part of the return on custom rigid boxes for branding, and it is one reason packaging can behave a little like media. Kinda sneaky, honestly.
Brands that are tightening their product packaging system often find rigid boxes to be the highest-impact upgrade. They also work well alongside other packaging elements such as Custom Packaging Products and Custom Labels & Tags, which helps the whole line look like one system instead of a pile of unrelated decisions.
How custom rigid boxes for branding are built
Custom rigid boxes for branding are usually built from four layers: a paperboard core, a printed wrap, an insert or liner, and a closure style. Each layer affects cost, durability, and the final feel. Remove one layer or weaken it too much, and the box starts looking cheaper than the brand intended.
The core board is the skeleton. Common thicknesses usually sit around 1.5 mm to 3 mm, depending on the box size and product weight. Thicker board gives more rigidity and a heavier hand-feel, but it also increases material use and shipping weight. The wrap is the visible face. It can be printed paper, coated stock, textured paper, or specialty material like linen or soft-touch laminate over paper.
The inside matters more than many teams expect. A plain white interior can feel clean and efficient, but a colored liner, flocked insert, or molded tray can push custom rigid boxes for branding into a more gift-ready lane. Inserts do more than decorate. They reduce movement, protect edges, and keep the unboxing experience from feeling loose or careless.
Popular formats include:
- Magnetic flap boxes - Common for luxury retail packaging, tech accessories, and gift sets.
- Lift-off lid boxes - Clean, classic, and easy to stack for shipping or storage.
- Drawer style boxes - Good for products that benefit from a reveal moment and a reusable shell.
- Book-style boxes - Strong for presentation kits, influencer mailers, and premium launches.
The closure style changes the user experience almost as much as the graphics do. A magnetic flap feels deliberate and modern. A drawer box adds a slow reveal, which can be a feature rather than a delay. A lift-off lid can feel traditional and trustworthy. That is why custom rigid boxes for branding should match the product personality, not just the mood board sitting in a slide deck.
Print and finishing are the details people tend to obsess over, which is fine as long as the structure underneath is not ignored. Offset printing is common for larger runs. Digital print can make smaller orders possible without ugly tradeoffs. Foil stamping, embossing, debossing, spot UV, and soft-touch lamination all change the surface story. One finish can sharpen a box. Three finishes piled together can make it look like the design team ran out of discipline halfway through.
For buyers comparing options, the better question is often custom printed boxes versus structural upgrades. A stronger paper stock can create more visible value than another layer of foil. A tighter insert can do more for customer satisfaction than a flashier exterior. That tradeoff separates thoughtful packaging from expensive clutter.
Key design factors for custom rigid boxes for branding
The best custom rigid boxes for branding start with the product, not the artwork. Dimensions, weight, fragility, and presentation goals should shape the structure. If the box is too loose, the product slides around and the package feels careless. If it is too tight, the user struggles to remove the product and the box starts looking badly engineered. Both mistakes show up constantly. Both are avoidable.
Fit comes first. Measure the product at its widest points, then decide how much clearance the insert should allow. A glass item may need extra room for protective padding. A rigid accessory case may need a snug pocket. In a lot of product packaging projects, the line between premium and cheap is not the print. It is a 2 mm tolerance issue nobody caught early enough.
Visual hierarchy matters next. Where should the eye go first? Usually the logo, but not always. In some branded packaging systems, a centered mark on a clean lid works best. In others, a small logo on one edge and a larger reveal on the inside create more tension and more interest. Negative space is useful. Restraint is useful too. For premium packaging, emptiness can feel more expensive than decoration.
Custom rigid boxes for branding also need to fit the place where they will live. Shelf retail packaging has different demands than e-commerce packaging or press kits. A box on a store shelf gets only a few seconds to stop a buyer. A box on video has to look clean from multiple angles. A gift box needs to open well in a room full of people. The same structure does not always serve all three jobs equally well.
Sustainability deserves a serious look as well. Recyclable board, paper-based inserts, and FSC-certified paper are practical ways to improve the story without pretending the box has no footprint. Heavy lamination, mixed materials, and oversized magnets can make recycling harder. If the goal is a more honest sustainability angle, keep the structure simple and ask the supplier what can be separated easily. For broader material guidance, the FSC site is useful, and for packaging and recovery context, the ISTA resources are worth reading if the product has to survive shipping abuse.
There is a brand identity angle here too, and it gets missed more often than it should. The box should connect to the rest of the system: logo usage, color palette, typography, and supporting assets like Case Studies that show what the brand stands for. If the packaging feels disconnected, the product can look like it came from four different companies. That is not a flattering result for custom rigid boxes for branding, and it costs more to fix later.
Custom rigid boxes for branding process and timeline
The process for custom rigid boxes for branding looks simple on paper and gets messy quickly in practice. It usually starts with a brief: product size, quantity, target price, finish preferences, insert type, and launch date. Leave those details vague and the conversation drifts into the word premium, which sounds productive and solves almost nothing.
A realistic workflow looks like this:
- Brief and specs - 1 to 3 business days if your dimensions and goals are clear.
- Dieline or structural plan - 1 to 3 business days for standard builds; longer for custom shapes.
- Artwork and layout - 2 to 5 business days depending on revision count.
- Prototype or sample - often 5 to 10 business days.
- Approval and adjustments - 1 to 3 business days if feedback is focused.
- Production - usually 10 to 25 business days after approval.
- Quality check and packing - 2 to 4 business days.
- Freight and delivery - varies widely by route and season.
That timeline is realistic, though it depends on complexity. A simple box with one print method and a standard insert can move faster than a foil-heavy design with a magnetic closure and custom tray. Custom rigid boxes for branding slow down when teams keep changing finishes after sampling starts. That is a classic production trap: the structure gets approved, then someone decides the embossing should feel a bit richer, and the schedule starts to slip.
The usual delay points are predictable. Missing artwork files. Late sample feedback. Structural revisions after the insert has already been designed. Color changes after proof approval. A launch date can survive one of those. It rarely survives all four. Good packaging timelines include buffer time, not wishful thinking dressed up as planning.
If the box is part of a retail launch, trade show, or influencer drop, work backward from the due date and keep a safety margin of at least 2 to 3 weeks. Seasonal programs need more room. Factories get busy, freight gets strange, and everyone suddenly remembers they want custom rigid boxes for branding at the same time. The calendar has a way of making that painfully obvious.
One habit saves a lot of trouble: order the sample early and treat it as a decision tool, not a souvenir. A sample shows whether the closure feels strong, whether the insert tolerances work, whether the color reads correctly, and whether the opening motion supports the unboxing experience. Those are the details good packaging buyers use to avoid expensive do-overs.
Custom rigid boxes for branding cost, pricing, and MOQ
Custom rigid boxes for branding are not cheap packaging, and pretending otherwise helps nobody. The price depends on board thickness, wrap stock, print method, finish complexity, insert type, and quantity. If a quote looks strangely low, check whether the supplier left out the wrap upgrade, the insert, or the finishing line item. Sometimes the cheapest quote is just the one missing half the work.
MOQ means minimum order quantity, and it matters more than first-time buyers usually expect. A lower MOQ usually means a higher unit cost because setup work gets spread across fewer boxes. Larger orders usually cut the unit price sharply, but only to a point. After that, freight, storage, and inventory risk start eating the savings. That is the real tradeoff, and it is usually where the budget conversation gets honest.
Here is a broad pricing comparison for common styles. The numbers are rough, but they are realistic enough to anchor a conversation. Assume standard board, printed wrap, and typical commercial production.
| Box style | Best use | Typical MOQ | Rough unit cost at 1,000 units | Cost note |
|---|---|---|---|---|
| Two-piece lift-off lid | Cosmetics, gifts, apparel accessories | 500-1,000 | $1.20-$2.20 | Usually the simplest premium option |
| Magnetic flap | Tech kits, luxury retail, launch sets | 500-1,000 | $2.80-$5.50 | Magnets and hinge work raise cost quickly |
| Drawer style | Jewelry, fragrance, collector items | 1,000+ | $2.00-$4.80 | Track fit and pull strength carefully |
| Book-style box | PR kits, bundles, premium presentations | 500-1,000 | $3.20-$6.20 | More assembly time, more surface area for finish work |
Those ranges move quickly once you add foil, embossing, spot UV, soft-touch lamination, or a custom insert. A simple lift-off lid can stay near the lower end if the artwork is restrained and the wrap is standard. The same box with multiple finishes can jump by 30% to 60% without much warning. That is why custom rigid boxes for branding should be quoted from the same spec sheet, not from a fuzzy email that says make it luxe.
To compare quotes properly, match these items exactly:
- Dimensions - Outer and inner size, plus product clearance.
- Board thickness - A 2 mm core is not the same as a 3 mm core.
- Wrap stock - Plain art paper, textured stock, or laminated wrap.
- Finish list - Foil, embossing, soft-touch, UV, or none.
- Insert type - Paperboard, EVA foam, molded pulp, or velvet tray.
- Packing method - Bulk packed, shrink-wrapped, or individual cartons.
That kind of comparison is dull for a minute and extremely useful for the next six months. It also keeps the conversation on facts instead of sales language. The same rule applies if you are buying labels, cartons, or sleeves. Unit economics should line up across the full product packaging system, not just one box.
Do not compare a plain rigid box to a foil-heavy magnetic box and call the first supplier expensive. That is like comparing a sedan to a truck and pretending the price gap is suspicious. Same category, different build. Custom rigid boxes for branding can sit in a wide range of price points, but only if the specs are truly comparable.
Common mistakes with custom rigid boxes for branding
The most common mistake is treating custom rigid boxes for branding as an afterthought. The product gets approved, the campaign gets planned, and the packaging brief arrives at the last minute. That usually produces a box that is technically acceptable and strategically weak. It protects the product. It does very little for brand memory.
Design mistakes tend to repeat. Too many finishes. Logos that are too large. Typeface choices that look elegant in a mockup and unreadable at arm’s length. Colors that drift from the brand system because nobody checked the proof under the same lighting the box will face in retail packaging. The box starts shouting instead of presenting. That is rarely a good exchange.
Structural laziness causes another round of problems. Custom rigid boxes for branding need accurate measurements, yet teams sometimes estimate by eye or reuse old specs from a different product. Then the insert arrives slightly loose, the lid sits unevenly, or the closure pops open during transit. Tiny errors. Expensive consequences. A prototype would have caught them.
Production mistakes usually come from rushed approval. Someone signs off on the artwork before the structure is fully checked. Someone else decides the gloss should be matte after samples have already been cut. The factory has to rework materials, and the schedule slips. The lesson is plain, which is probably why people keep ignoring it until they are forced not to.
Business mistakes can hurt even more. A low quote looks attractive until the board grade is thin, the print is uneven, or the supplier cannot actually hit the delivery date. A slightly higher quote from a team that understands custom rigid boxes for branding is often cheaper in the long run because it avoids reprints, delays, and damaged product. That is not sentiment. It is arithmetic.
Here is a short checklist that keeps a lot of trouble away:
- Verify dimensions with the final packed product, not a prototype guess.
- Request a sample before full production.
- Confirm finish choices before artwork lock.
- Check if the insert allows for normal user handling, not just lab-perfect fit.
- Ask whether the supplier has handled similar custom printed boxes in your category.
Some brands also forget that the packaging has to work with the rest of the identity system. If the box feels premium but the label looks sloppy, the presentation weakens. Coordinating with Custom Labels & Tags can tighten the final package branding so the details do not feel random.
Expert tips and next steps for custom rigid boxes for branding
If you want better results from custom rigid boxes for branding, start with the product goals, not the finish menu. Decide whether the box needs to increase shelf appeal, protect a fragile item, create a gift moment, support influencer content, or do all four. Once that is clear, build the packaging design around the goal instead of stacking features because they sound premium.
My practical workflow is direct. Gather the product dimensions, target quantity, shipping destination, brand assets, and a rough budget before requesting quotes. Then ask suppliers for a spec sheet that includes board thickness, wrap stock, insert type, finish options, and timeline. Vague requests produce vague answers. Vague answers make terrible boxes. Nobody needs that loop.
Order a prototype or sample round early, even if the final quantity is modest. That one step catches fit issues, weak closures, color mismatches, and awkward opening motion before the full run gets committed. If the launch depends on the box looking right on camera or in store, sample approval is not optional. It is the price of not regretting the release later.
Compare at least three quotes using the same spec. Not a similar spec. The same one. That is the only fair way to judge custom rigid boxes for branding because small changes in finish, insert, or packing method can hide real price differences. If one supplier is dramatically cheaper, ask which line item changed. Usually something did.
For brands balancing premium effect with real budget limits, here is the order I would prioritize:
- Fit and structure - The box has to hold the product correctly.
- Surface clarity - Clean print, readable type, and accurate color.
- Closure and opening feel - The user should not fight the box.
- One strong finish - A single foil, emboss, or coating effect can be enough.
- Extra decoration - Add only if it helps the brand story.
That order keeps spend where buyers notice it. It also avoids the classic mistake of buying expensive visual noise while skipping the structural details that actually protect the product. Good custom rigid boxes for branding are not about doing everything. They are about doing the right few things very well.
If you want examples of how different packaging choices behave in real programs, a review of actual launch work in Case Studies usually teaches more than scrolling through polished mockups. Real projects show which finishes held up, which inserts failed, and which styles earned their cost.
The next step is straightforward: choose the box style, write a spec, and ask for a sample plan, unit cost breakdown, and schedule. Then judge the result like a packaging buyer, not like a mood board. That is how custom rigid boxes for branding justify their place in the budget.
Are custom rigid boxes for branding worth it for small brands?
Yes, if the product has enough margin or perceived value to support the packaging cost. Custom rigid boxes for branding work especially well for launches, gift sets, limited editions, and products that are photographed or unboxed on camera. If the SKU is low-margin, keep the structure simple and spend on fit, print clarity, and a clean opening experience instead of chasing every finish under the sun.
What is a realistic MOQ for custom rigid boxes for branding?
A common starting point is 500 to 1,000 units, although some suppliers can go lower depending on the structure and finish. Lower MOQ usually means a higher unit price, especially if the box needs custom inserts or special surface work. Ask whether the MOQ is driven by structure, print method, or finishing, because that detail changes the actual economics of custom rigid boxes for branding.
How long do custom rigid boxes for branding usually take?
Prototype or sample stages often take about 5 to 10 business days. Production usually takes around 10 to 25 business days after approval, depending on quantity and complexity. Freight, customs, and holiday congestion can add more time, so build buffer days into the plan. That buffer is not wasted time; it is what keeps custom rigid boxes for branding from colliding with your launch date.
What affects custom rigid boxes for branding cost the most?
Quantity, board thickness, wrap material, and finish complexity usually drive the biggest swings in price. Magnetic closures, foil stamping, embossing, and custom inserts tend to push the number up quickly. The easiest savings usually come from standardizing size, reducing special effects, and consolidating SKUs. That is the boring answer, which is also why it works for custom rigid boxes for branding.
Can custom rigid boxes for branding be sustainable?
Yes, if you use recyclable board, paper-based inserts, and keep plastic to a minimum. FSC-certified board and water-based inks are practical ways to improve the sustainability story without pretending the box has zero impact. Heavy lamination, mixed materials, and oversized magnets can make recycling harder, so it is smarter to discuss those tradeoffs early. Sustainability is possible, but it is not automatic with custom rigid boxes for branding.
If you want the short version: good custom rigid boxes for branding are worth the money when the structure fits the product, the finish supports the brand identity, and the supplier can hit the schedule without drama. Get those three pieces right, and the box stops being packaging noise and starts doing real brand work. The clearest takeaway is simple: start with the product, lock the spec early, and let the box earn its keep through fit, feel, and consistency.

