Buyer Fit Snapshot
| Best fit | Custom Side Seam Boxes projects where brand print, material claims, artwork control, MOQ, and repeat-order consistency need to be specified before quoting. |
|---|---|
| Quote inputs | Share finished size, material target, print colors, finish, packing count, annual reorder estimate, ship-to region, and any compliance wording. |
| Proofing check | Approve dieline scale, logo placement, barcode or warning zones, color tolerance, closure strength, and carton packing before bulk production. |
| Main risk | Vague material claims, crowded artwork, missing packing details, or unclear freight terms can make a low unit price expensive after revisions. |
Fast answer: Custom Side Seam Boxes: Design, Pricing, and Process should be specified like a repeatable production item. The safest quote records material, print method, finish, artwork proof, packing count, and reorder notes in one written spec.
Production checks before approval
Compare the actual filled-product size with the drawing, then confirm tolerance on folds, seals, hang holes, label areas, and retail display edges. Reserve space for logos, QR codes, warning copy, and material claims before decorative graphics fill the panel.
Quote comparison points
Review material grade, print process, finish, sampling route, tooling charges, carton quantity, and freight assumptions side by side. A quote is only useful when the supplier can repeat the same color, closure quality, and packing count on the next order.
Custom Side Seam Boxes: Design, Pricing, and Process
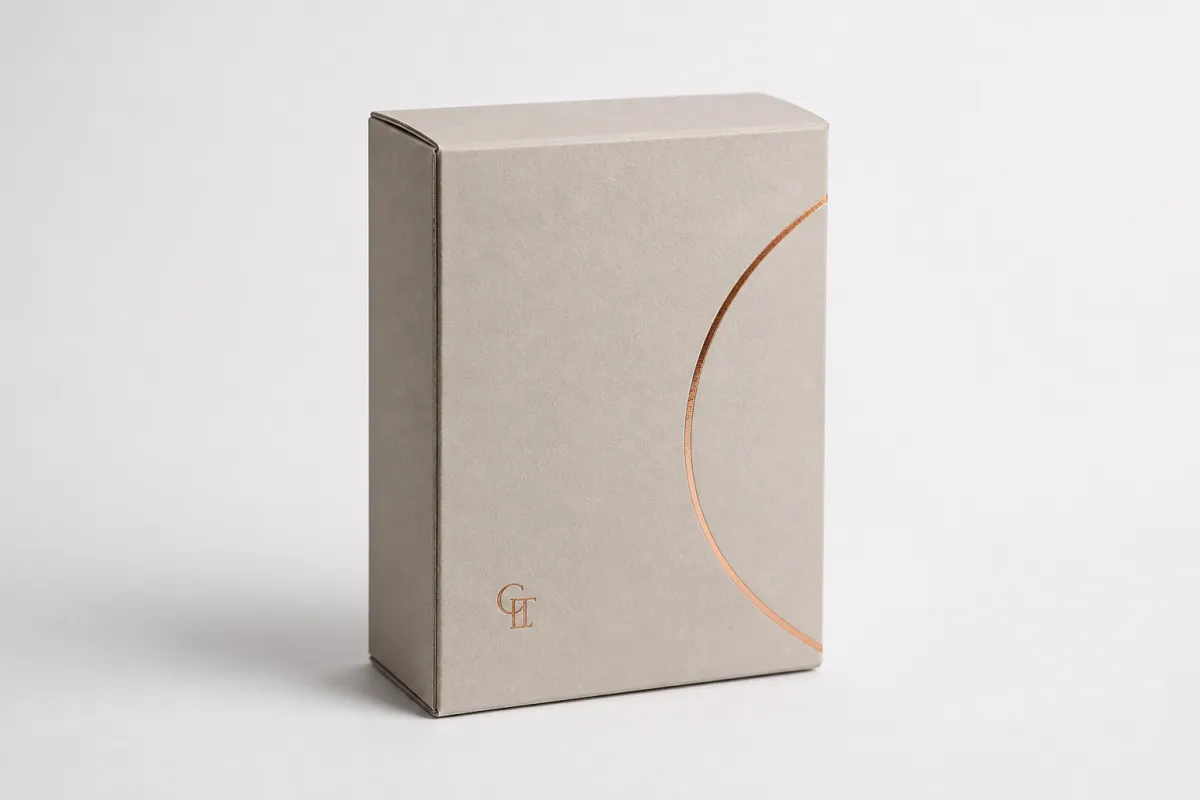
People usually judge custom side seam boxes by the print first. That is the part everyone sees, approves, and photographs, so it gets the attention. The seam, the score quality, or a carton that is 1.5 mm too tight for the product is what usually causes trouble later, and that trouble shows up fast on a packing line.
For brands that want clean product packaging without turning the structure into a science project, custom side seam boxes are a practical format. They ship flat, stack neatly, and give designers broad exterior panels for package branding. If you are comparing carton styles, finishes, and related formats, the Custom Packaging Products page is a useful place to line up options before you commit.
Custom Side Seam Boxes: What They Are and Why Brands Use Them
Custom side seam boxes are cartons built from a die-cut blank that folds into shape and joins along one continuous side seam. That seam is glued, the box is flattened for shipping, and the finished structure is assembled later by hand or on a packing line. The idea sounds simple. The production details are where the real work lives.
In plain terms, a side seam box is a paperboard carton with one long glue joint on the side panel. You see this structure in retail packaging, subscription kits, lightweight mail-ready cartons, cosmetics, supplements, and other product packaging that needs to look tidy on shelf. The appeal is easy to understand: a clean rectangle, broad front and back panels, and no odd structural clutter interrupting the artwork.
Brands use custom side seam boxes because they are efficient. They store flat, assemble quickly, and give designers a broad canvas for Custom Printed Boxes with strong visual impact. For a buyer, that matters. A box that loads fast on a line and stacks cleanly in a warehouse saves labor and reduces the kind of packing slowdown that gets old fast.
There is a limit, though. Custom side seam boxes are not the answer for every product. Very heavy items, oversized glass, or packs that need serious crush resistance may be better served by a reinforced structure, a corrugated mailer, or a tuck style with stronger retention. If the carton has to survive rough parcel distribution, the conversation should include board grade, caliper, flute profile, and test expectations, not just graphics.
That is the part a lot of buyers miss. The box is easy to describe, but the details decide whether it feels premium or cheap. Board thickness, print coverage, seam placement, closure style, and fit tolerance all change the result. Two boxes can look similar on a screen and behave very differently on a packing table.
Practical rule: if the artwork is the only thing being discussed, the box is not fully specified yet. You are still talking about the wallpaper.
If the goal is retail packaging that looks polished without wasting material, custom side seam boxes are often a good balance. They can support matte, gloss, soft-touch lamination, foil, embossing, and spot UV, while still staying familiar to teams that need to fold, fill, and ship at a decent pace. Familiarity matters more than people admit, especially on repeat runs.
How Custom Side Seam Boxes Work in Production
The production flow for custom side seam boxes is straightforward on paper. A die-cut blank is printed, finished, cut, scored, folded, and glued along the side seam. Then the boxes are packed flat and shipped. In practice, each step can introduce a small problem that turns into a visible defect later.
The first variable is the blank itself. A well-made dieline accounts for the product size, board thickness, closure method, and any insert or partition. If the structural drawing is off by even a small amount, the box can open too loosely, hold too tightly, or show stressed corners after assembly. That is why experienced packaging teams obsess over measurements before they obsess over the artwork.
Then comes the glue seam. A strong seam depends on adhesive choice, adequate glue area, grain direction, and accurate folding. Many converters use PVA or hot-melt adhesives depending on line speed and board type. If the board grain is fighting the fold, the carton can spring open or bow out of square. If the glue area is too narrow, the seam can pop under pressure. If the score is shallow or crushed, the paperboard can crack. None of that is glamorous, and all of it matters.
Common formats for custom side seam boxes include tuck-end cartons, reverse tuck, mailer-style cartons, and product cartons with a straight side seam. Each version changes how the box opens, how quickly it can be packed, and how it behaves in transit. A tuck-end version is often faster for hand assembly. A mailer-style structure can feel more secure and more premium. A product carton may be better for shelf presentation than for shipping abuse.
Print and finishing choices also affect production. Full-coverage artwork is fine, but it is less forgiving than a light design with generous white space. Soft-touch lamination adds a rich feel to branded packaging, yet it can slow make-ready and raise cost. Foil and embossing add visual depth, but they also add registration demands. Spot UV looks sharp when used with restraint, and it looks off when it is used to cover up weak packaging design.
One detail that gets overlooked quickly is where the seam lands. If your logo, barcode, or key copy crosses the glue zone, the box can look uneven or misprinted even if the press run was technically fine. Tiny text near folds is another trap. A 6 pt disclaimer sitting on a score line is not a design choice; it is a future complaint.
For carton testing and shipping reality, the standards matter more than marketing fluff. The ISTA testing methods are useful if the box needs to survive distribution, vibration, or drop handling. For fiber sourcing, the FSC certification system helps buyers choose paperboard with a clearer chain of custody. Those references do not make a bad box good, but they do keep everyone speaking the same language.
Here is the honest truth: custom side seam boxes can fail even when the print is gorgeous. A crisp seam, clean scores, and sensible board selection usually matter more than a fancy finish nobody asked for. That sounds boring. It is also how good packaging survives production.
For brands comparing custom printed boxes across different structures, the production method should shape the design file, not the other way around. If the structure is locked late, the artwork has to bend around it, and that usually ends in wasted proofs and a rushed approval cycle.
Custom Side Seam Boxes Cost, Pricing, and MOQ Factors
The price of custom side seam boxes is driven by a few stubborn variables: board stock, dimensions, print method, finish, quantity, and any structural extras like inserts or windows. If someone quotes a price without asking about those five things, they are guessing. Not always maliciously. Just carelessly.
Material choice is usually the biggest driver. A simple uncoated folding carton on 14 pt or 16 pt SBS will usually cost less than a thick premium board with soft-touch lamination and foil. Add heavier paperboard, specialty coatings, or a window patch, and the unit cost climbs quickly. Add a corrugated component, and the project moves into a different category entirely.
Minimum order quantity matters because setup costs do not disappear just because the order is small. Plates, die cutting, press setup, finishing setup, and glue-line adjustment all get spread across fewer units on short runs. That is why a 500-piece order can feel annoyingly expensive per box, while 5,000 pieces often bring the unit price down to something more rational.
Here is a practical pricing range to keep in mind for custom side seam boxes. These are broad examples, not promises:
| Option | Best Use | Typical MOQ | Rough Unit Cost at 1,000 | Rough Unit Cost at 5,000 | Notes |
|---|---|---|---|---|---|
| Plain SBS carton, one-color print | Simple retail packaging | 500-1,000 | $0.35-$0.70 | $0.18-$0.32 | Best for low visual complexity and faster production |
| Full-color custom printed boxes with gloss or matte coating | Branded packaging with stronger shelf presence | 1,000 | $0.55-$1.10 | $0.25-$0.45 | Artwork coverage and coating choice affect make-ready |
| Premium finish with soft-touch, foil, or embossing | High-end product packaging | 1,000-2,000 | $0.85-$1.80 | $0.40-$0.80 | Nice on shelf, but the cost jump is real |
| Heavier board or insert-based structure | Stronger support or display-ready packs | 1,000+ | $0.95-$2.20 | $0.55-$1.20 | Use when product weight or protection is a concern |
Those numbers move with size, artwork coverage, and supplier setup. A tiny cosmetic carton and a larger supplement box are not priced the same way, even if both are technically custom side seam boxes. Bigger panels consume more board. Full bleed artwork takes more press attention. Finishes add labor. None of that is mysterious, even if some quotes make it sound that way.
Hidden costs show up in the boring places. Dieline revisions can add prepress time. Printed samples or structural samples can add another round of charges. Special coatings may require extra drying time. Freight can climb quickly because cartons are bulky, not dense. If the boxes ship flat by the thousand, cubic space becomes expensive in a hurry.
For buying decisions, ask for at least three quantities. A good quote should show you the difference between 500, 1,000, and 5,000 pieces so you can see where the unit cost drops. That gives you real planning power, unlike vague “better pricing at volume” talk that tells you almost nothing.
If your use case is ongoing product packaging, the cost conversation should include reorders. A box that is cheap on the first run but expensive to repeat can become a headache. Reorder-friendly custom side seam boxes usually have a stable dieline, a straightforward finishing spec, and a board choice that is easy to source again without surprises.
There is also a quality-versus-cost tradeoff that buyers should say out loud. An uncoated carton might save money, but it can scuff more easily in transit. A high-gloss finish can pop visually, but fingerprints and glare can be an issue. Soft-touch feels premium, but it may not be ideal for every retail packaging line. Good packaging design is choosing the right compromise, not pretending every upgrade is automatically worth it.
Custom Side Seam Boxes Process and Timeline: From Quote to Delivery
The timeline for custom side seam boxes usually moves through the same stages: quote, dieline confirmation, artwork prep, proofing, sampling, production, finishing, packing, and shipping. If all the information is clear from the start, the project can move smoothly. If not, the schedule starts to wobble.
Most delays happen before production begins. Missing dimensions force a second round of questions. Unclear artwork files slow prepress. Slow approvals push the whole job back. Last-minute changes after proof sign-off are especially expensive because they disrupt plate work, press scheduling, and finishing slots. That is how a neat packaging project turns into a calendar problem.
A standard lead time for custom side seam boxes often lands somewhere around 12-18 business days after final proof approval, depending on quantity and finish complexity. Simpler jobs can move faster. Premium finishes, heavier board, or special inserts take longer. Rush production is possible in some cases, but shorter timelines leave less room for complexity.
Here is the kind of information that helps a quote stay accurate:
- Exact product dimensions, including clearance for inserts or internal wraps
- Product weight and whether the carton is retail-only or ship-ready
- Board preference, if known, such as 14 pt, 16 pt, or a heavier stock
- Print coverage, including full bleed, one-color, or multi-panel artwork
- Finish preference such as matte, gloss, soft-touch, foil, or spot UV
- Quantity by size, so the price breakpoints are visible
- Shipping destination and whether freight is required
If the supplier has to chase that information across five emails, the timeline gets mushy. A single spec sheet is better. One approved file beats three “just checking something” messages from three different people who all think they are the only one asking a question. Packaging projects reward clarity. Everything else adds drag.
For teams juggling multiple SKUs, a simple internal approval checklist helps a lot. Confirm size. Confirm board. Confirm finish. Confirm seam placement. Confirm barcode position. Confirm ship method. That checklist is not glamorous, but it keeps custom side seam boxes from being approved on the wrong assumptions.
There is one more practical point. Freight conditions can change the delivered price more than people expect, especially for larger carton orders that occupy volume rather than weight. If a quote seems oddly low, ask whether shipping is included. If the answer is fuzzy, assume the number is incomplete until proven otherwise.
Brands that already use Custom Packaging Products often save time because they have a standard spec library for repeat runs. That matters if you are managing multiple product packaging formats, not just one hero SKU. The less reinvention, the fewer production surprises.
Step-by-Step: Specifying Custom Side Seam Boxes Without Mistakes
Step 1 is fit. Measure the actual product, not the optimistic one. If the item includes a dropper, insert, cap, shrink band, or internal tray, account for all of it. Custom side seam boxes fail in the field when buyers design to outside dimensions only and forget that board thickness and internal components eat usable space.
Step 2 is structure. Choose the carton style based on the product’s weight, shelf life, and handling pattern. A lightweight cosmetic or supplement box may do fine with a standard folding carton. A sturdier item may need a more rigid board or a stronger closure. The wrong structure does not just look off; it bends, pops, or stacks poorly.
Step 3 is artwork placement. Keep logos, key text, and barcodes away from the seam and score lines. That is basic, but it still gets missed. If the design needs a full wrap, the seam should be treated like a no-print zone or at least a low-risk area. Tiny type should never straddle a fold. It makes the box feel sloppy, and nobody is fooled by a beautifully rendered PDF that ignores the real carton.
Step 4 is finish. Decide whether the carton needs matte, gloss, soft-touch, foil, embossing, or a protective coating. Each finish changes the feel of the box and the total cost. The right finish depends on the product, the channel, and the buyer expectation. For high-end branded packaging, soft-touch and foil can lift presentation. For fast-moving retail packaging, a cleaner matte or gloss build can be more practical.
Step 5 is sample review. Always inspect a structural sample if the fit is tight or the carton has inserts. A printed proof is useful, but a real folded sample tells you more. You can see how the seam behaves, whether the box sits square, and whether the product rattles around or barely fits. Screen previews are not the same thing as hands-on testing. That should not be controversial, but somehow it still is.
Step 6 is real-world assembly. If the box is going onto a line, simulate the packing process before you approve final production. Time the fold. Check whether the glue line interferes with filling. See whether the closure stays closed under light handling. A box that looks excellent on a proof can still be annoying in a production environment.
One buyer habit I recommend: approve the spec sheet before approving the artwork. That order keeps everyone honest. Custom side seam boxes are a structural product first and a graphic product second. If the structure is wrong, the graphics are just expensive decoration on a box that misbehaves.
For teams with multiple stakeholders, the cleanest process is often this:
- Confirm dimensions and product fit.
- Choose the board grade and closure style.
- Lock the dieline and glue zone.
- Place the artwork on the approved template.
- Review a structural sample or printed proof.
- Sign off only after checking the real box in hand.
That sequence sounds obvious because it is. The reason people skip it is speed. The reason they regret skipping it is cost. A few extra minutes in approval can save a full reprint later, which is the sort of “saving time” everyone likes right up until the production team starts muttering.
Common Mistakes With Custom Side Seam Boxes
The first common mistake with custom side seam boxes is sizing to the outer dimensions only. Buyers sometimes forget the insert, board thickness, and tuck depth. The result is a carton that is technically the right size on paper and annoyingly wrong in the hand. Product packaging should fit the product, not the spreadsheet.
The second mistake is crowding the design near the seam, folds, or glue zone. It can create visual breaks, ghosting, and misalignment that make the box look cheaper than it should. If the brand is paying for custom printed boxes, the print should support the structure, not fight it.
The third mistake is choosing the wrong material for the actual load. If the carton is too light for the product, corners crush, seams stress, and stacking becomes unreliable. If the board is too heavy, the box may feel premium but become wasteful or difficult to fold. Good packaging design is a weight problem as much as a visual problem.
The fourth mistake is buying finish upgrades just because they sound premium. Not every option improves the customer experience. A metallic foil panel can look great in a sample and do very little in a crowded retail channel where the box is seen from three feet away for half a second. That is a real tradeoff, not an aesthetic theory.
The fifth mistake is approving files too fast. Typos, barcodes, missing copy, wrong bleed, and color mismatch are all easier to catch before production starts. After the run begins, every fix becomes a cost issue. Custom side seam boxes are not forgiving of sloppy prepress, and printers are not in the business of mind reading.
There is also a branding mistake that shows up often: trying to say too much. The side seam box has strong panels, but it still needs hierarchy. One clear message, one strong logo treatment, and a reasonable amount of whitespace usually creates better package branding than cramming in every claim, icon, and slogan you can fit before the glue line.
If the project includes sustainability goals, make sure those claims are supportable. FSC-certified board, recyclable coatings, and clear disposal language can help, but only if they are accurate. Nobody needs a packaging claim that causes more questions than it answers.
For brands building a wider lineup of custom side seam boxes across multiple SKUs, consistency matters too. A box family should feel related across sizes. Same typography system. Same finish logic. Same panel hierarchy. If every size is designed differently, you do not have a packaging system; you have a stack of unrelated arguments.
Expert Tips and Next Steps for Custom Side Seam Boxes
Start with samples, not assumptions. A plain structural sample tells you whether the fit works. A printed proof tells you whether the graphics survive the dieline. The final production run tells you whether the whole thing holds together under real use. For custom side seam boxes, that staged approach catches more issues than any one-off file review ever will.
Use quantity planning to your advantage. If demand is predictable, larger runs often reduce unit cost and keep repeat setup charges under control. If volume is uncertain, it may make more sense to test a smaller run first and refine the design before scaling. There is no medal for over-ordering cartons that sit in a warehouse for 18 months.
Keep the design clean if the box is supposed to sell the product on shelf. Strong typography, one core message, and good contrast usually beat noisy layouts. That is especially true for retail packaging where the box has maybe two seconds to communicate what it is, who it is for, and why anyone should care. Custom side seam boxes do not need to shout. They need to read clearly.
A simple approval checklist can prevent most problems:
- Does the box fit the product with the actual insert or wrap included?
- Is the seam away from major graphics and text?
- Are board grade and finish appropriate for the channel?
- Has the barcode been placed and tested on the final layout?
- Does the folded sample sit square and open as expected?
- Are shipping and storage needs accounted for?
Another practical tip: ask for pricing at two or three quantities before you commit. If the jump from 1,000 to 5,000 pieces is modest, the larger order may save money quickly. If the jump is steep, you may be paying for an upgrade that is not actually buying much. That is why a quote should show the breakpoints instead of hiding them in a neat little total.
For brands that need related packaging options, the Custom Packaging Products page can help compare structures before you lock a carton style. That is especially useful if you are balancing custom side seam boxes against other custom printed boxes that may be better suited for shipping, display, or shelf presentation.
My practical advice is simple: measure carefully, Choose the Right board, protect the seam, and keep the print file respectful of the structure. Those four decisions do more for custom side seam boxes than any trendy finish ever will. Get those right, and the box does its job without drama. Get them wrong, and you will notice every time a carton comes off the line looking almost right, which is the most expensive kind of wrong.
Before you approve the next run, measure the product, mark the seam zone, and test one folded sample in hand. If those three checks pass, the carton is usually ready for production. If one of them fails, stop there and fix the structure first; the graphics can wait.
What are custom side seam boxes used for?
They are commonly used for retail products, lightweight shipping, promotional kits, and subscription packaging. The side seam construction gives a clean front panel for branding and a compact flat-pack format for storage. They work best when the product does not need extreme crush resistance or heavy-duty shipping protection.
How much do custom side seam boxes cost per unit?
Unit cost depends on material, print coverage, finish, size, and quantity. Simple runs can be affordable at higher volumes, while premium finishes or short runs push the price up quickly. Ask for pricing at several quantities so you can see the real breakpoints instead of guessing.
What is the MOQ for custom side seam boxes?
MOQ varies by supplier, printing method, and material selection. Short-run orders are usually possible, but the per-box price is typically higher because setup costs are spread across fewer units. If the project is ongoing, ordering a larger batch usually makes more sense financially.
How long does the custom side seam boxes process take?
The timeline usually includes quoting, dieline approval, artwork prep, proofing, production, finishing, and shipping. Delays most often come from slow approvals, file corrections, or changes after proof sign-off. Rush production may be possible, but simpler specs usually move faster and cost less.
What files do I need to order custom side seam boxes?
You usually need final dimensions, print-ready artwork, logo files, color specs, and any barcode or compliance text. A clear spec sheet helps the supplier quote accurately and avoid rework. If you are unsure about the dieline, ask for a template before finishing the artwork.

