Buyer Fit Snapshot
| Best fit | custom window pouches benefits costs uses for packaging buyers comparing material specs, print proof, MOQ, unit cost, freight, and repeat-order risk where brand print, material, artwork control, and repeat-order consistency matter. |
|---|---|
| Quote inputs | Share finished size, material target, print colors, finish, packing count, annual reorder estimate, and delivery region. |
| Proofing check | Approve dieline scale, logo placement, barcode or warning zones, color tolerance, and any recyclable or compostable wording before bulk production. |
| Main risk | Vague material claims, crowded artwork, or missing packing details can create delays even when the unit price looks attractive. |
Fast answer: Custom Window Pouches Benefits Costs Uses: Cost, MOQ, Proof, and Reorder Checks should be specified like a repeatable production item. The safest quote includes material, print method, finish, artwork proof, carton packing, and reorder notes in one written spec.
What to confirm before approving the packaging proof
Check the product dimensions against the actual filled item, not only the sales mockup. Ask for tolerance on folds, seals, hang holes, label areas, and retail display edges. If the package carries a logo, QR code, warning copy, or legal claim, reserve that space before decorative graphics fill the panel.
How to compare quotes without losing quality
Compare board or film grade, print process, finish, sampling route, tooling charges, carton quantity, and freight assumptions side by side. A lower quote is only useful if the supplier can repeat the same color, closure quality, and packing count on the next order.
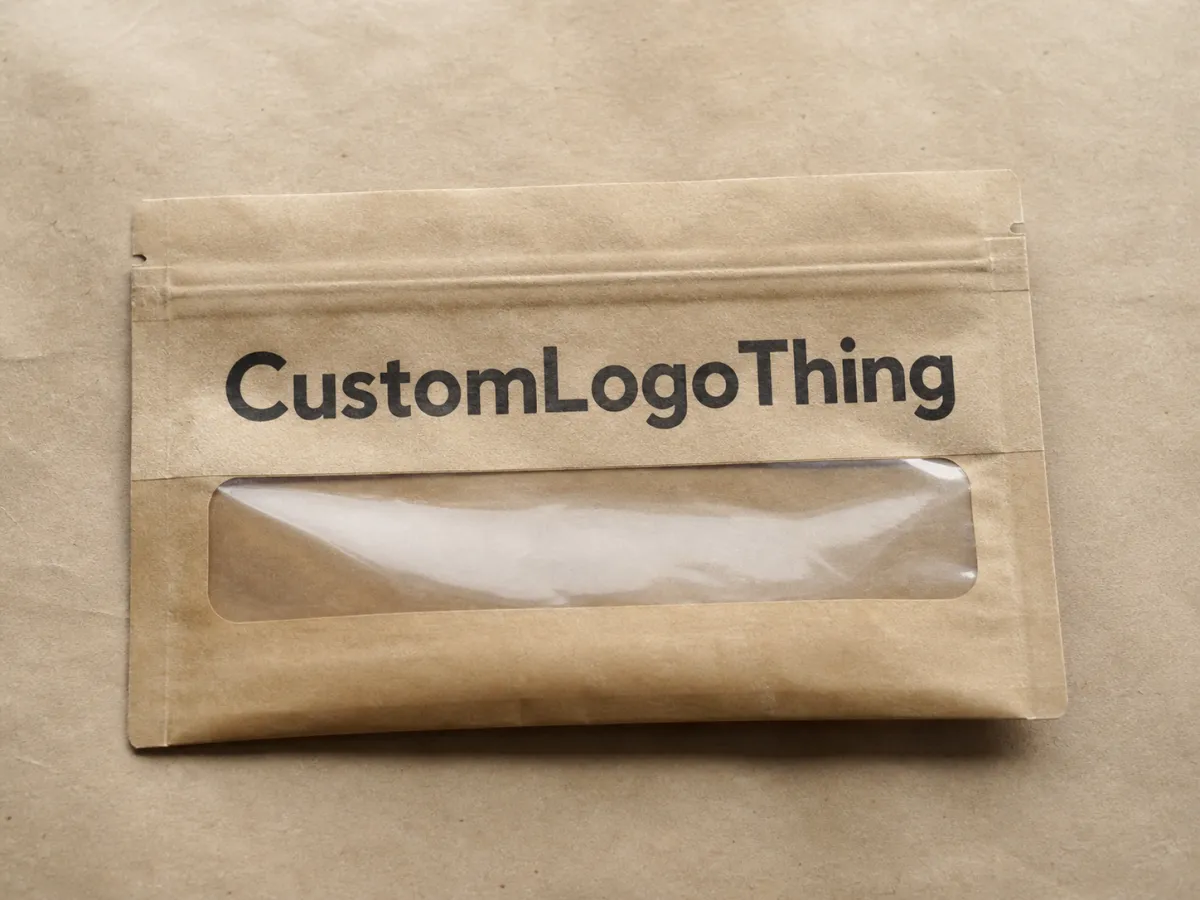
Custom Window Pouches: Benefits, Costs, and Best Uses
Custom window pouches look straightforward right up until the quote lands, the dieline gets checked, and the product actually goes into the bag. Then the details start acting like they matter, because they do. A shopper can judge freshness, texture, and quality in about two seconds, which is exactly why custom window pouches often do more selling than the copy printed on them.
That is the appeal: product visibility, shelf trust, and a flexible package that still protects against handling, dust, and the rough treatment retail always seems to provide. The tradeoff is real too. More window area can mean less printable space, narrower material choices, and a spec that demands more discipline than an opaque pouch. For food, pet treats, cosmetics, coffee, and even small hardware, those tradeoffs are worth sorting out before artwork is approved and production starts.
What Custom Window Pouches Actually Do
On a shelf, the window has a plain job: it lets shoppers see the product before they buy it. That sounds basic, almost too basic, until you watch how much faster people decide once they can verify what is inside. Dry snacks look crisp instead of stale. Coffee looks fresh instead of brown and anonymous. Pet treats look portioned and clean. Small hardware feels less risky when the buyer can confirm size and shape through the pack.
That is why custom window pouches work so well in categories where appearance affects trust. The printed side carries the brand, but the window supplies the evidence. For private label programs and newer brands, evidence usually matters more than a clever line of copy. From a packaging buyer’s point of view, the window is not decoration. It is a sales tool that lowers uncertainty.
The strongest use cases usually share one trait: the product benefits from a fast visual check.
- Snacks like granola, trail mix, crackers, dried fruit, and cookies.
- Coffee and tea, especially when bean color, grind, or leaf quality helps tell the story.
- Pet treats where texture and size influence the purchase.
- Cosmetics and bath products where color, shape, or fill level matters.
- Small hardware and craft goods, where visibility helps reduce confusion and returns.
The branding effect matters too. A good window package can carry strong packaging branding without burying the product under graphics. Used well, it reads as more honest than loud. That matters in retail packaging because shoppers have learned to ignore marketing theater. They can see the product. They know what they are getting. That alone can change the sale.
A window promises honesty, and honesty has a sharp edge. If the fill looks sloppy, the pouch will not hide it.
If you are comparing formats, look at the entire product packaging system rather than the pouch in isolation. For many brands, the right choice sits somewhere between labels, branded cartons, and flexible options from Custom Packaging Products. A window pouch is strongest when shelf appeal and visibility need to work together.
How Custom Window Pouches Work in Packaging
At the structural level, a window pouch is a layered flexible package with a transparent section built into the front or back panel. Depending on the construction, that window may be a cutout in the printed layer with a clear barrier film behind it, or a transparent laminate section that becomes part of the pouch wall. Both are common. Both can work. The right choice depends on how much protection the product needs and how the final package should look.
Window styles you will see
The main structures are easy to separate. A die-cut window uses an opening in the printed layer, then covers it with a clear barrier film so the product stays visible and protected. A transparent film panel uses a clear section as part of the pouch wall. The first option often feels more editorial and premium. The second can be simpler to spec and can create a cleaner visual field.
No single structure wins every time. If the product itself has strong visual appeal, the opening should frame it cleanly. If the item is small, irregular, or visually fragile, the window may need to be smaller and placed more carefully. Controlled visibility is the goal. A messy peek into the pouch helps nobody.
How protection still works
The window does not automatically weaken shelf life. That assumption shows up a lot, and it usually comes from ignoring the rest of the film structure. Outer laminate, barrier layer, seal quality, and product sensitivity all matter. A well-built pouch can still resist moisture, oxygen, and puncture issues while keeping the window in place.
For food packaging, the difference between a solid pouch and a weak one often comes down to barrier performance. Better protection may call for metallized film, higher-grade polyethylene layers, or laminated structures with stronger oxygen barrier. If the product is shelf-stable and visually driven, a simpler construction may be enough. The product decides that, not wishful thinking.
Shipping deserves attention too. A pouch can look perfect on a screen and fail when it goes through distribution. Ask about transit testing and package integrity if the line will travel far or move through rough channels. The ISTA resources are useful for distribution test methods. For paper-based components, the FSC site explains chain-of-custody and responsible sourcing claims.
In practice, the window has to do three jobs at once:
- Show the product clearly so the shopper trusts what they see.
- Protect the product with the correct barrier and seal structure.
- Fit the packaging layout so the pouch still stacks, hangs, and prints properly.
The third point gets ignored more often than it should. A window can be physically possible and still be a poor design decision if it breaks the logo, crowds regulatory text, or makes the pouch look unstable on shelf. Good packaging design does not force every idea onto the front panel. It decides what deserves that space first.
Key Factors That Affect Appearance and Performance
Once the concept is clear, material selection becomes the real work. Kraft-laminated, matte, gloss, clear, metallized, and compostable structures all behave differently. They print differently. They seal differently. They age differently on shelf. They also price differently. A buyer who treats them as interchangeable usually pays for that mistake later.
Kraft-laminated pouches create a natural, earthy look that suits organic snacks or artisan goods. Gloss film makes color pop and tends to read as more retail-forward. Matte film feels softer and more premium, although it can show scuffs depending on the finish. Metallized layers improve barrier and add reflective impact. Compostable structures can support sustainability goals, but they need careful scrutiny on barrier, sealing, and actual end-of-life claims. If sustainability is part of the brief, ask for proof, not a nice green badge.
Window size and placement matter just as much as material choice. A larger window increases visibility, but it cuts into print space and can expose product flaws the brand would rather keep out of sight. Loose snacks can look messy when the window is too big. Coffee beans may look excellent through a narrow vertical opening. Pet treats often need a window that frames the product without making the pouch feel crowded. The design should make the product look deliberate, not dropped into the bag at the last minute.
Performance after filling matters too. Dense products can tolerate larger windows because they hold shape better. Loose or uneven products need more restraint. If the fill settles badly, the window may show an awkward gap at the top or a clump at the bottom. That is not a window problem. That is a planning problem.
Finish and branding should be selected with the window in mind. Spot gloss, foil accents, strong typography, and clean negative space can make a pouch feel premium even when the window is modest. In branded packaging, restraint often does more than crowding the front with every possible claim. A strong package branding system uses the window as one element among several, not the whole performance.
Food and retail packaging also brings compliance details that can quietly wreck a design if nobody checks them early:
- Food-contact expectations for the film and seal area.
- Barcode placement so scanners do not fight with the window or seam.
- Ingredient and nutrition panels that need readable space.
- Retailer specs for hanging, shelf standing, or carton pack-out.
- Closure choices such as zippers, tear notches, or reseal features.
If you are comparing these against other formats, review our Custom Packaging Products lineup early. The best pouch spec often becomes obvious once it sits beside the rest of the line. That is especially true if the brand also uses Custom Printed Boxes for secondary packaging or presentation.
| Structure | Best For | Typical Strength | Tradeoff |
|---|---|---|---|
| Kraft pouch with clear window | Natural snack brands, coffee, tea, artisanal goods | Warm, earthy presentation | Less print impact than glossy film |
| Gloss printed pouch with window | Retail products that need strong shelf pop | Bright color and high contrast | Shows fingerprints and scuffs more easily |
| Matte printed pouch with window | Premium food, cosmetics, specialty retail packaging | Soft, upscale look | Can mute color slightly |
| Metallized barrier pouch with window | Moisture-sensitive or oxygen-sensitive products | Strong protection and shelf-life support | Usually higher cost and less natural appearance |
| Compostable-style pouch with window | Brands prioritizing sustainability messaging | Clear story for eco-minded buyers | Barrier and sourcing claims need careful validation |
The main lesson is simple: visibility should support the product, not overpower it. The wrong material makes the window look cheap. The right one makes the whole pouch feel intentional.
Custom Window Pouches Process and Lead Time
The ordering process is predictable if you give the supplier real information. It gets messy when you send a vague idea and expect packaging magic. A good order starts with a clear brief: product type, fill weight, pouch size, finish, window placement, and closure type. If the supplier has to guess, the quote will be fuzzy and the production schedule will be fuzzy too.
Here is the usual flow for custom window pouches:
- Brief and specs - You define the product, dimensions, quantity, and performance goals.
- Material selection - You choose the film stack, barrier level, and finish.
- Artwork setup - The supplier maps the dieline, window location, and print zones.
- Proofing - Digital proofs confirm layout, copy, and placement before production.
- Sampling - If needed, a physical sample or mockup checks fit and visual balance.
- Production - Printing, laminating, cutting, and finishing happen after approval.
- Shipping - The completed order is packed and sent to your destination.
The fastest jobs usually have complete specs and very little back-and-forth. Simple pouch runs with standard materials can move quickly. A custom structure, specialty finish, or unusual window shape adds time. That is not a delay so much as a reminder that manufacturing has a schedule of its own.
For planning purposes, these are reasonable lead-time ranges for many packaging runs:
- Digital proof approval: often within 1-3 business days.
- Physical sample or mockup: often 5-10 business days, depending on complexity.
- Standard custom production: often 12-20 business days after proof approval.
- Specialty materials or new tooling: often 18-30 business days or more.
The time risks are usually unglamorous, which is part of why they cause so much damage. Late artwork changes. Unclear dielines. Missing barcodes. Material substitutions. Sample revisions. Any one of those can push the schedule if it arrives too late. I have watched more deadlines disappear because of “small edits” than because of serious technical problems. Packaging has a cruel sense of humor.
What should you send up front? At minimum:
- Product dimensions and fill weight
- Target shelf life and storage conditions
- Whether the pouch needs a zipper, tear notch, or valve
- Window size and approximate placement
- Artwork files in the requested format
- Preferred shipping destination and delivery window
The more specific the brief, the less interpretation your supplier has to do. That saves money and cuts down on revisions. It also helps if the pouch needs to sit beside other product packaging in the line, especially when you are balancing pouches against labels, cartons, or Custom Printed Boxes.
Custom Window Pouches Cost, MOQ, and Quote Basics
Cost is the part where buyers either get disciplined or start telling themselves stories. Window pouches are not priced by mood. The main drivers are size, material structure, barrier performance, print complexity, finish, zipper type, window style, and quantity. A large pouch with heavy ink coverage and a premium zipper will not cost the same as a simple pouch with a small clear panel. That would be convenient, which is probably why it is not true.
MOQ, or minimum order quantity, matters because setup costs need to be spread across the run. Fewer pouches mean a higher unit cost. That can still be the right decision for a launch test or a limited run. What you should not do is expect a low quantity to price like a large production order. It will not.
Here is a practical pricing snapshot for common custom runs. These are broad ranges, since exact numbers depend on dimensions, film stack, print coverage, and supplier setup.
| Order Type | Typical MOQ | Typical Unit Range | Common Use |
|---|---|---|---|
| Simple window pouch, lower print coverage | 1,000-3,000 pcs | $0.16-$0.32 | Launches, trial runs, small retail programs |
| Fully custom printed window pouch | 3,000-5,000 pcs | $0.24-$0.55 | Core retail packaging and repeat orders |
| High barrier pouch with zipper and window | 5,000+ pcs | $0.30-$0.70 | Coffee, specialty food, moisture-sensitive goods |
| Compostable or specialty material structure | 5,000+ pcs | $0.35-$0.85 | Eco-positioned brands and premium product lines |
Those numbers are useful because they show something important: the lowest unit price is not always the best deal. A pouch that saves a few cents and fails on shelf is wasted money. So is a premium structure that exceeds the product’s real needs. The best value usually sits at the lowest-cost package that still protects the product and performs well in retail.
When a supplier sends a quote, make sure it includes the details that tend to get lost:
- Dimensions and pouch style
- Quantity and MOQ break points
- Material structure and barrier level
- Window style and size
- Print method and color count
- Closure such as zipper or tear notch
- Sampling fees or pre-production mockups
- Setup, plate, or tooling costs if they apply
- Freight to your destination
Quote comparisons only work if the specs match. A cheaper offer can hide a smaller window, lighter barrier, simpler closure, or less durable print finish. That does not make it the best offer. It makes it a different offer.
If you need to compare these pouches with other Custom Packaging Products, look at total landed cost instead of unit price alone. Include the product, freight, sampling, and the risk of rework. Packaging budgets are usually damaged by surprises, not by the print run itself.
Common Mistakes to Avoid When Ordering Window Pouches
The most common mistake is also the most visible one: making the window too large. Buyers want visibility, so the cutout keeps expanding until the pouch starts looking awkward, imbalanced, or inconsistent from one unit to the next. Big window, yes. Aquarium front panel, no. Visibility should feel selective.
Wrong barrier choice causes another layer of trouble. A pouch can look excellent and still be a bad package if it admits too much oxygen or moisture. That matters a lot for coffee, baked snacks, dried fruit, and any product with a defined shelf-life target. Good retail packaging protects the item first. The pretty part comes after that.
Artwork mistakes create plenty of headaches as well. Important text should stay away from the window and the seal area. Barcode placement matters. Nutrition and ingredient panels need room. If the layout is crowded, the pack will feel busy even before the window steals space from the front panel. Packaging design is not about filling every inch. It is about making the right information easy to find.
Skipping sampling is another reliable mistake. The empty pouch on a screen is not the same as a filled pouch on a shelf. A sample tells you whether the window frames the product correctly, whether the pouch stands well, whether the zipper closes cleanly, and whether the fill settles in an ugly way. That small test prevents expensive regret.
One more reality check: window packs are brutally honest. If the fill is uneven, the product is dusty, or the color varies from batch to batch, the window will expose it. That is not a flaw in the packaging. It is the package doing its job. Either you control the presentation or the pouch embarrasses you in public.
To avoid the usual problems, keep these checks in place:
- Confirm window placement on a physical mockup before full production.
- Verify barrier needs based on shelf life, not guesswork.
- Review the final dieline for text, barcodes, and seal clearances.
- Test with the actual product, not an empty pouch.
- Check shelf presentation under real lighting and real stack conditions.
Expert Tips and Next Steps for Better Orders
If you want a smoother order, build a one-page spec sheet before asking for quotes. Include product dimensions, fill weight, desired pouch size, window size, closure type, shelf-life requirements, finish preference, and artwork format. That one page keeps every supplier quoting the same thing. Without it, you are collecting opinions with price tags.
It also helps to compare at least two material stacks and two window sizes. That gives you a real decision instead of a fake one. A smaller window may preserve more branding space while keeping the product more controlled. A larger window may boost shelf appeal while showing more variation. Buyers who test both usually make better decisions than buyers who fall in love with the first mockup.
Sampling should be done with the actual product inside the pouch. Empty samples can mislead. A pouch that looks balanced on a table may feel different once the product is filled, sealed, and standing next to competitors on a crowded shelf. In retail packaging, the shelf is the judge that matters.
Test the pack in the real environment if you can. Look at it under store lighting. Stack it. Hang it. Photograph it. Check whether the window still looks clean after handling. If the pouch is part of a broader launch, compare it with the rest of the line so your package branding does not drift into random territory. Consistency matters more than people like to admit.
For brands ordering a first run, I usually recommend this sequence:
- Lock the pouch size and fill weight.
- Choose the material based on barrier needs first, appearance second.
- Set the window placement with a real product sample.
- Approve the proof only after checking all text and seal clearances.
- Place the order once the sample and proof both make sense.
If the line includes other formats, compare the window pouch against your broader product packaging plan instead of treating it as a one-off. That is where Custom Packaging Products can help you keep the visual system coherent across launches and reorder cycles. Smart buyers think in systems, not isolated SKUs.
Custom window pouches are worth the effort when visibility, protection, and shelf appeal all matter at the same time. Get the structure right, keep the window honest, and do not let a cheap-looking spec sabotage a good product. If you need one practical takeaway, start with the product itself: confirm barrier needs, then size the window around the fill, not the other way around. That is the most reliable path to custom window pouches that look credible on shelf and perform well after shipment.
What are custom window pouches used for?
They are used when product visibility helps sell the item, such as snacks, coffee, tea, pet treats, cosmetics, and specialty retail goods. They let shoppers inspect color, texture, shape, or fill level without opening the package. They work best when you want shelf appeal plus protection in a flexible package.
Are custom window pouches good for food packaging?
Yes, if the film structure provides the barrier your food needs for moisture, oxygen, and light protection. They are especially useful for dry goods, baked snacks, granola, candy, coffee, and other shelf-stable products. The window should never replace proper food-safe materials and sealing.
How much do custom window pouches cost?
Price depends on size, material structure, print complexity, barrier level, window style, closure type, and quantity. Smaller runs usually have higher unit costs because setup fees are spread over fewer pouches. For an accurate quote, you need specs, artwork details, quantity, and your shipping destination.
What is the lead time for custom window pouches?
Lead time depends on proof approval, sampling needs, material availability, and order quantity. Simple jobs can move faster, while custom structures or specialty finishes take longer. Late artwork changes are one of the fastest ways to delay production.
What should I check before ordering custom window pouches?
Check pouch size, product fill weight, barrier requirements, window placement, closure type, and print layout. Ask for a sample or mockup with real product if appearance matters on shelf. Make sure the design leaves room for compliance text, barcode placement, and sealing areas.

