A one-millimeter shift in seal placement can change how a mailer feels before the customer even opens it. That is a small measurement with a large effect. For a fitness studio, where packaging often carries memberships, retail merch, welcome kits, or front-desk pickup orders, the sample stage is where those tiny issues show themselves.
The fitness studio custom poly mailer bags Sample Approval Checklist is not paperwork for the sake of paperwork. It is the point where a buyer checks whether the artwork reads clearly, whether the bag actually fits the folded items, and whether the closure behaves the way staff need it to during a rushed handoff. That is a much cheaper lesson to learn on one sample than on a production run of thousands.
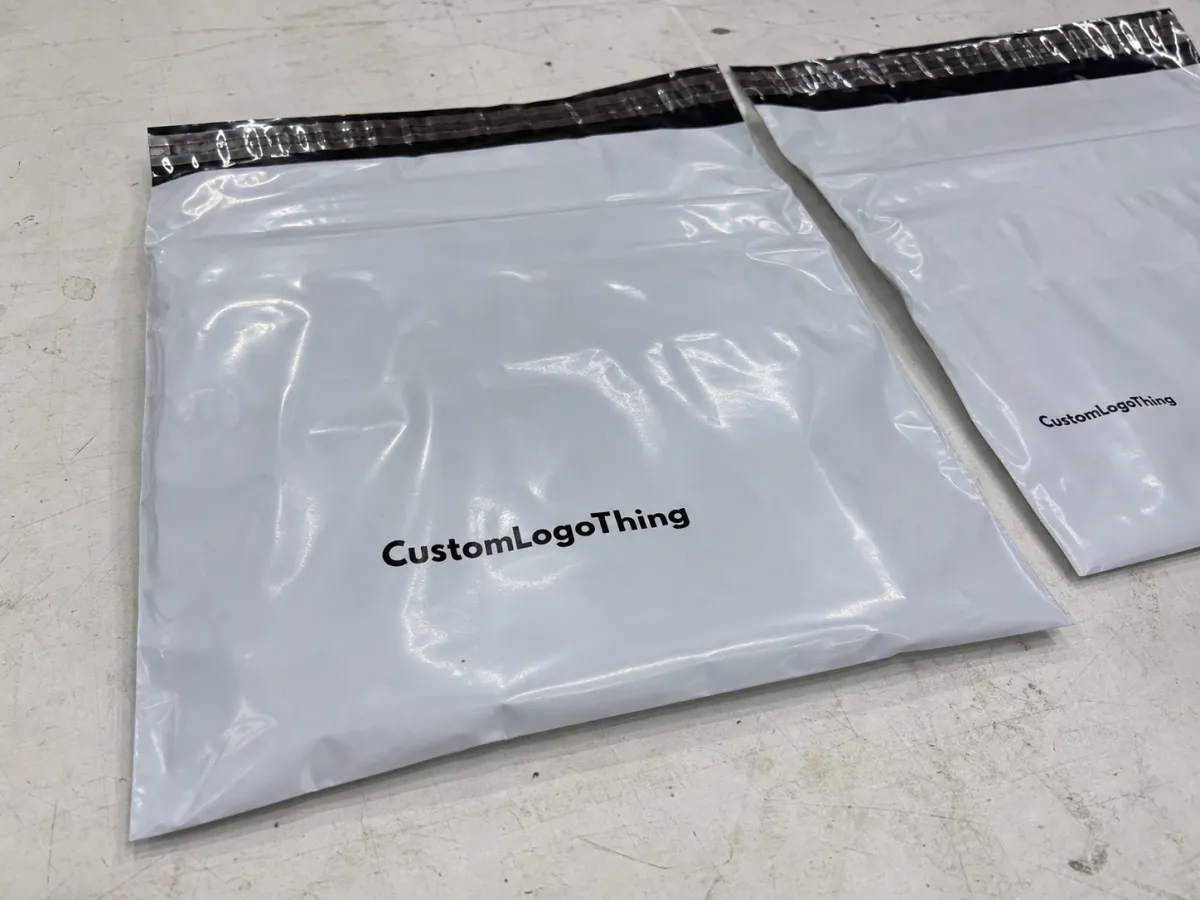
Packaging inside a studio is not background material. It is part of the brand experience. A bag that looks crisp, closes cleanly, and holds up under handling supports the same premium feeling a studio tries to create on the floor. A bag that is too thin, too glossy, or slightly off-color does the opposite.
Why a small print mismatch can stall an entire mailer order
Most buyers start with the obvious questions: What is the price, what is the minimum order quantity, and how fast can it ship? Fair enough. But the problems that slow an order usually hide in the details. A logo edge printed soft, a white film that runs warmer than expected, or a seal that sits just a bit too high can make the whole bag feel wrong under bright front-desk lighting.
That matters because these bags are often seen up close. A customer may carry one past the desk, slide a folded hoodie into a tote, or receive a welcome packet at check-in. There is no long viewing distance to hide mistakes. The closer the interaction, the more noticeable the print quality, thickness, and closure feel become.
Sample approval protects the budget in a very practical way. A change to logo placement or film tone on a sample is manageable. A change after production starts can mean wasted material, extra setup, and a delayed launch. Once the film is printed and cut, every adjustment costs more.
Think of it the way buyers think about Custom Poly Mailers generally: the details feel ordinary until one of them is off. Then that one detail becomes the only thing anyone sees.
A sample that looks right on a screen can still fail in hand. Flat art approval is only half the job.
Fitness Studio Custom Poly Mailer Bags Sample Approval Checklist
The Fitness Studio Custom Poly Mailer bags Sample Approval Checklist should function like a working tool. It needs to cover the items that actually affect the final result: artwork, logo placement, dimensions, safe zones, adhesive closure, film thickness, finish, and any extras such as tear strips or dual adhesive.
- Artwork: confirm the correct logo file, approved colors, and any text that must remain legible at the finished size.
- Dimensions: compare the sample against the spec sheet, not just against the visual proof.
- Print placement: check centering, orientation, and the distance from edges, seals, and folds.
- Closure: test tack strength, reseal behavior if relevant, and how easily staff can use it in a hurry.
- Film and finish: verify thickness, opacity, gloss or matte level, and the way the bag feels in hand.
- Actual use: load the sample with the real items the studio will ship most often.
That last point is where many teams get surprised. A mailer can look fine when empty and still fail when folded leggings, a towel stack, a shaker bottle, and a card are inside. The sample should be judged with the real product mix, not with paper scraps or air. If the bag belongs to a larger Custom Packaging Products program, the sample should also fit the broader visual language so it does not feel disconnected from the rest of the brand.
Written approval should be explicit. A clear yes or no is better than a vague “looks good.” If the studio accepts a slightly darker navy, a shifted barcode area, or a looser adhesive feel, that exception should be recorded. Otherwise the conversation gets messy later, especially when the next reorder happens months down the line and nobody remembers what was approved.
Three questions usually settle the issue faster than anything else: Does it look right, does it fit right, and does it close right? If one of those is uncertain, the sample is not ready.
How the sample approval process and timeline usually work
The process is usually straightforward, even if the back-and-forth around it is not. Artwork is submitted first. The supplier reviews the file and prepares a proof or sample plan. A plain mockup or printed sample is produced. The buyer inspects it. If changes are needed, they go back into the file before final signoff. Only after that does production begin.
- Artwork submission: send final vector files, Pantone targets if available, and exact dimensions.
- Prepress review: confirm bleed, safe zones, and print method before anything is made.
- Sample build: produce a plain or printed sample depending on the stage of the project.
- Physical review: inspect the sample under real lighting and with actual inserts or apparel.
- Revision loop: document changes clearly if anything is off.
- Final approval: lock the spec and release the order.
Timing depends on the request. A plain mockup may arrive in 3-6 business days. A printed sample often takes 7-12 business days. A revised version can add another 3-7 business days, depending on the complexity of the change and how busy the line is. Special finishes, unusual sizes, or more complex closures can stretch that further.
For shipments that will travel through multiple handling points, some teams also look at ISTA guidance for handling and transit checks. That is useful when the goal is not just to approve the art, but to understand how the bag survives transport and receiving.
A clean internal review helps more than people expect. One person should check brand details, one person should check operations, and one person should check purchasing and budget. That keeps the process from turning into a crowded thread where everyone notices different issues after the order is already moving.
Cost, pricing, MOQ, and quote details that change the plan
Price on a Custom Poly Mailer is driven by a handful of levers. Size matters. Film gauge matters. Print coverage matters. One-sided print is usually cheaper than two-sided print. Simple logo placement costs less than full-panel artwork. Closure style, tear strips, and other extras also affect the quote.
MOQ matters just as much. A lower minimum order quantity can help a new studio, a seasonal apparel drop, or a short-run welcome kit. A larger MOQ usually reduces per-unit cost, but it also increases the risk if the studio later changes its logo, color direction, or product mix. That tradeoff is worth thinking through before anyone approves the sample.
In many orders, buyers see something like $0.12-$0.30 per unit at 5,000 pieces, with sample fees often ranging from $50-$200 depending on whether the request is a simple mockup or a printed sample. Freight, plate charges, and revision costs are separate. Those numbers can move fast if the spec changes after the first proof.
| Sample or order type | Typical use | Typical price range | Typical timeline | Best for |
|---|---|---|---|---|
| Plain mockup | Size and closure check | $35-$90 | 3-6 business days | Early fit review |
| Printed sample | Artwork and color review | $80-$180 | 7-12 business days | Final visual approval |
| Production-like sample | Most accurate pre-run check | $120-$250 | 8-14 business days | High-confidence signoff |
The lowest quote is not always the best value. A cheap line item can hide a thin film, weak seals, or print that softens once it hits the substrate. Those problems do not stay hidden for long in a studio environment, where staff handle packaging quickly and customers notice details immediately.
Artwork, sizing, and material choices that affect the bag
Artwork should be built around the final bag size, not dropped into a generic template and hoped for the best. That is how logos end up too close to a seal or text gets crowded near a trim line. A proper proof leaves a safe zone so the print still looks balanced after cutting and sealing.
Material choice is just as practical as artwork. A thinner bag may work for lightweight apparel and paper inserts. A thicker film is often better for heavier bundles or mailers that will be handled frequently at the front desk. Common film thicknesses for poly mailers sit around 2.5 to 4 mil, depending on the load and the durability target.
Opacity, finish, and surface feel all affect presentation. A bright white matte mailer reads differently from a glossy off-white one, even before the logo is seen. That difference can matter more than some teams expect, especially when the bag is part of a membership kit or a retail purchase.
Fit testing should use the actual items being shipped. Will the bag hold folded leggings without stretching? Can it take a towel bundle plus a small supplement pouch? Does a welcome kit slide in without forcing the adhesive strip? Those questions sound basic, but they are the ones that prevent costly corrections later.
Color management deserves real attention on film. Ink can appear brighter, softer, or darker depending on the substrate and print method. A navy logo that looks clean on screen may print flatter on film. A pale gold can disappear against a warm white bag. If the broader package includes paper inserts or labels, those components can be brought into alignment through controlled paper and finish choices. For paper sourcing standards, see the FSC framework.
One common mistake is judging the sample by appearance only. That misses the part that matters just as much: how the bag behaves when someone is moving fast behind a counter and handling multiple orders at once. Print matters, but so does the physical feel of the bag under real use.
Production steps from approved sample to final shipment
Once the sample is approved, the job shifts from review to execution. The art files are locked. Prepress confirms the final setup. The press or extrusion line is prepared. Then the bag is printed, cured or dried as needed, slit or cut, sealed, inspected, and packed into cartons for shipment.
The approved sample becomes the production reference. That sounds simple, but it prevents a lot of confusion. If the sample had a slightly warmer film tone, a narrower logo lockup, or a different adhesive feel, those details need to be known before the first production sheet runs. Otherwise the buyer and the production team may be talking about two different targets.
Quality checks should happen during the run, not just after cartons are full. Color consistency, seal integrity, print alignment, and count verification all deserve attention while the machine is running. That is especially true on repeat orders, because a reorder can drift if artwork, dimensions, or material specifications are not carried forward exactly.
Shipment planning matters too. A studio opening a new location or running a promotion often has a fixed date that cannot move. Build in time for freight and receiving. If the order is going to multiple locations, carton labels and case counts should match the delivery plan. That saves a lot of unnecessary opening and sorting on the wrong floor or in the wrong room.
At this point, a well-documented sample record becomes part of the production history. That is useful for the next order, especially if the studio is rolling out several packaging pieces at once and wants the mailer to match the rest of the program.
Common mistakes that cause rework or delayed approval
Most delays are ordinary, which is exactly why they keep happening. People approve from a screen only. They skip the physical inspection. They forget to test the closure. They sign off before checking the actual product inside the bag. Then the real sample arrives and the conversation starts over.
- Screen-only approval: digital proofs do not show film texture, seal behavior, or true color on substrate.
- No packed-bag test: an empty sample can hide fit and stress problems.
- Vague feedback: comments like “make it pop” do not tell the supplier what to change.
- Late artwork changes: even a small text adjustment can trigger another proof cycle.
- Unclear ownership: if nobody owns final signoff, the order can sit unresolved.
- Assuming silence equals approval: it does not. Approval should be written and deliberate.
The better approach is to document exactly what changed and who approved it. If the team wants a stronger adhesive, a slightly shifted logo panel, or a different finish, that should be written down before release. It protects the buyer, the supplier, and the timeline. It also makes the next reorder easier, because the old notes become the starting point instead of a buried email chain.
One more practical point: do not assume a sample still represents the order if the buyer later changes dimensions, artwork, or material requests. Once the spec moves, the old sample is no longer the right benchmark.
Next steps for a cleaner approval and smoother reorder
The simplest way to reduce stress on future orders is to use a one-page approval form every time. Record the dimensions, material, print setup, closure type, sample date, decision status, and any approved exceptions. That page becomes the memory of the project, and it saves time when the studio needs a reorder six months later.
It also helps to keep the approved artwork, sample photos, and supplier notes in one shared folder. When the next run comes up, nobody has to guess which file was final or which bag size passed the test. That reduces specification drift, especially if the studio works across several locations or keeps seasonal versions in rotation.
A real-world handling test is worth doing before final signoff. Pack the bag with the actual merchandise, hand it off the way staff will hand it off, and see whether the closure feels right and the print still looks clean under normal lighting. One minute of handling often reveals problems that a flat table review misses.
For studios building a larger branded packaging system, the mailer should stay aligned with the rest of the line so the experience feels deliberate from the first touchpoint to the last. A clear sample approval process keeps that alignment intact without turning the project into guesswork.
Frequently Asked Questions
What should I check on a fitness studio custom poly mailer sample before approval?
Check logo placement, colors, bag size, seal strength, and closure performance against the approved spec sheet. Then test the bag with the actual items you plan to ship, such as apparel, towels, or welcome kits. If anything changes, document it before final signoff.
How long does the custom poly mailer sample approval process usually take?
Timing depends on whether you need a plain mockup, a printed sample, or a revised version after feedback. Delays usually come from incomplete artwork, slow internal review, or extra changes after the first proof. A clear checklist helps shorten the back-and-forth.
What affects pricing for fitness studio poly mailer bags?
Size, film thickness, number of print colors, finish, and special features all affect the unit price. MOQ can lower or raise the per-bag cost depending on order size and setup needs. Freight, sample fees, and revision charges should also be included in the quote review.
Can I request changes after approving the sample?
Yes, but any post-approval change can affect cost and lead time because production may already be locked in. Even small changes can require updated artwork, new setup, or a revised run schedule. It is best to confirm every detail before final approval.
Why does a physical sample matter more than a digital proof?
A physical sample shows how the print actually looks on film, which a screen cannot fully predict. It also lets you test fit, seal quality, texture, and how the bag feels during real handling. That hands-on check helps prevent rework and expensive surprises later.

