Garment packaging looks easy until the first real product goes into the bag. Then the problems show up: a hoodie that barely fits, a seal that pinches the opening, artwork that looked fine on screen but reads badly on clear film, or a warning panel that lands in the wrong place after folding. That is why the Garment Poly Bags for apparel brands sample approval workflow deserves the same discipline as the garment spec. If the bag is part of presentation, protection, and compliance, the sample has to prove all three before production starts.
The sample is not a checkbox. It is the last controlled chance to catch the issues that turn into reprints, delays, and warehouse complaints. A good approval tells you whether the bag fits the folded item, opens cleanly, holds its shape in carton packing, and still looks acceptable after handling. A bad one just creates expensive confidence.
There is a reason experienced buyers are picky here. Poly bags are cheap in isolation, then suddenly not cheap at all once the wrong spec forces a second run, expediting, or labor spent reworking packed units. Small misses become real costs fast. The workflow only looks tedious from the outside.
Why a sample matters before a bag ever ships
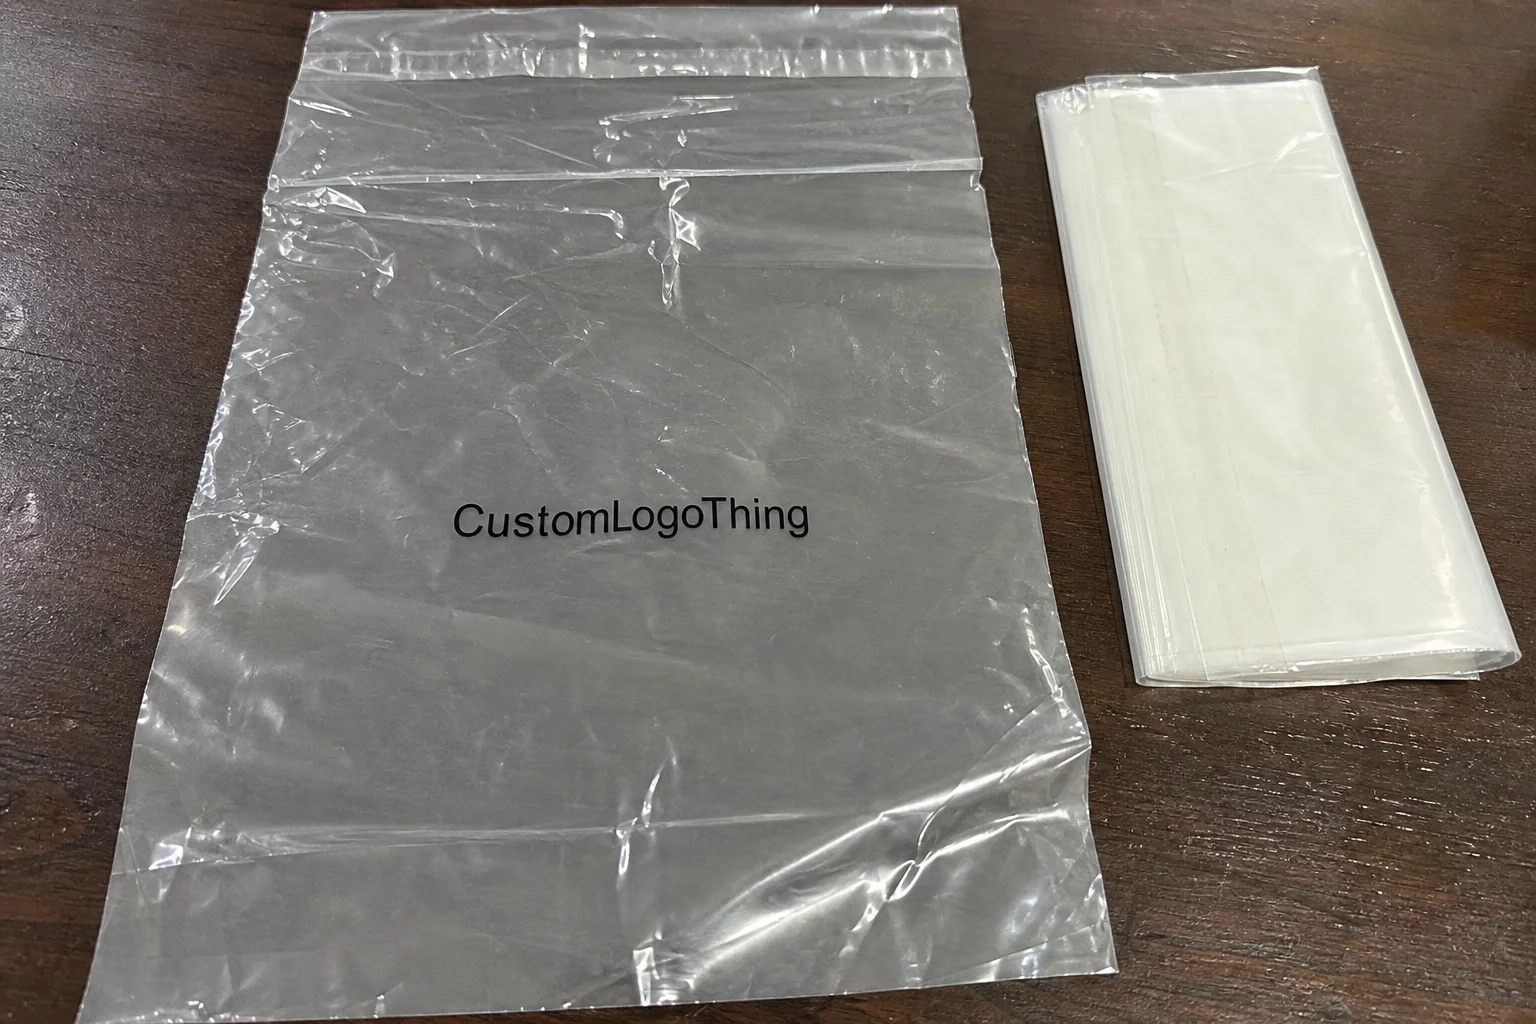
A poly bag can look fine in a proof and still fail in hand. Film thickness changes how it folds. Seal width changes how it closes. A vent hole can sit in the wrong place once a garment is folded and tucked with tissue or a hangtag. That is why the Garment Poly Bags for Apparel brands sample approval workflow should be treated as a fit test for packaging, not just a print proof.
Dimensional problems are usually the first surprise. A bag that is technically wide enough may still be too shallow for a hoodie with a size sticker, barcode, and folded sleeves. A bag with crisp artwork can still cloud over because of the film blend, anti-static additive, or recycled content. Some defects are cosmetic. Some are operational. Both matter if the bag has to move through a packing line without slowing people down.
Good approvals confirm the whole package: fit, clarity, seal quality, warning placement, and how the bag behaves once it is stacked, compressed, and handled by warehouse teams.
The sample also exposes how the packaging will present the brand. Clear film that looks polished in a sample room may turn slightly hazy under warehouse lighting. A glossy film may look premium on a photo table and cheap once it picks up scuffs in transit. If the bag is part of the retail experience, that gap matters. A sample is the only place to see it before the run is locked.
Most teams need one more check than they expect: the actual garment inside the sample. Empty bag approvals are a shortcut to bad assumptions. The sample should contain the folded item, plus anything that changes its volume, such as tissue, a hangtag string, a security tag, or a folded insert. Otherwise, the approval is theory dressed up as production control.
How the approval process and timeline usually work
The workflow usually starts with a spec sheet. That should list the bag dimensions, film type, gauge, print requirements, closure style, warning copy, and pack count. If the bag has a hanger hole, perforation, gusset, or resealable flap, that needs to be explicit too. Ambiguity at this stage is just delayed confusion.
From there, the supplier usually prepares a layout or dieline, then sends an artwork proof. If the bag is unprinted and standard size, a physical sample can move quickly. Once the order includes custom print, the schedule gets longer because there is more to check: color matching, registration, ink density, film behavior under heat, and whether the artwork still reads cleanly on clear or frosted material.
For a plain unprinted bag, sample turnaround is often measured in a few days once the spec is confirmed. Printed samples take longer. A realistic path is usually one round for layout review, one physical sample for fit and appearance, and one final sign-off if adjustments are needed. Shipping time adds its own delay, especially if the buyer and supplier are in different regions. If a team is trying to rush a holiday drop, that transit time matters more than the pretty spreadsheet says it does.
Some bags need extra tuning before approval. Custom flap lengths, unusual widths, perforation patterns, reinforced headers, or vent placement can all change the way film handles on the machine. The first sample often reveals a subtle issue: the seal is too tight, the opening is hard to access, the bag curls at the edge, or the warning panel gets squeezed into the fold. None of those are dramatic. All of them are annoying enough to slow production.
The cleanest approval sequence looks like this:
- Share the spec sheet and artwork files.
- Confirm the bag dimensions against the folded garment and accessories.
- Review the digital proof for text, logos, barcode placement, and warnings.
- Check the physical sample with the real product inside it.
- Record the approved sample and freeze the specification.
There is also a difference between a “reference sample” and a “production standard.” The first sample can show the concept. The signed master sample is what the factory should match. If those two get mixed up, nobody knows what was actually approved once the order is on the floor.
Film gauge, clarity, and fit choices that change the final look
Gauge, or thickness, changes almost everything about the feel of the bag. A 1.5 mil film is lighter and usually cheaper, but it wrinkles more easily and can tear if the garment has sharp trim, hardware, or a bulky fold. A 2.0 mil or 2.5 mil film feels sturdier, keeps its shape better, and usually looks more premium. The tradeoff is cost and stiffness. There is no universal right answer. The garment and the brand presentation decide that.
Material also matters. LDPE and LLDPE are common for apparel because they balance flexibility and toughness. Polypropylene can look clearer and crisper, but it may behave differently in sealing and folding. Recycled content changes the conversation again, since it can affect clarity, haze, and the way the film seals. If the brand cares about shelf appearance, the sample has to be viewed under more than one light source. Bright warehouse light, office light, and direct overhead light will show different things.
Fit is where packaging either earns its keep or wastes time. The bag has to account for folded depth, tissue, hangtags, size stickers, and carton count. Too tight and the garment gets forced into a bent shape or the film balloons. Too loose and the bag looks sloppy, slides around in the carton, and makes the pack feel cheap. The right fit is usually just generous enough to allow insertion without leaving a lot of dead space.
Ask the supplier to confirm these details early:
- Whether the bag needs a hanger hole or euro slot
- Whether a resealable flap or adhesive strip is required
- Whether vent holes are needed for folded apparel
- Whether the film should be punched, perforated, or side-gusseted
- Whether the bag has to match a carton count or inner bundle target
Packaging buyers often skip the packing test and regret it later. A bag can look great in the hand and still stack badly in a 24-count inner carton, or resist compression when the master case is closed. The sample should be tested the way the warehouse will use it, not the way a photo shoot will display it. That is a basic sanity check, not a luxury.
For teams that validate shipping performance, common transit and distribution tests are often used as a framework. The point is not to turn poly bags into a lab project. The point is to avoid approving a film that looks good for five minutes and fails once cartons move through the actual supply chain.
Pricing, MOQ, and unit cost levers to compare on quotes
Comparing quotes by unit price alone is a good way to buy the wrong bag. A better comparison is exact spec for exact spec: dimensions, gauge, film material, print coverage, closure style, carton count, and whether the quote includes packaging and freight. The difference between a stock clear bag and a custom printed retail bag is not subtle once setup costs enter the picture.
MOQ is usually driven by setup economics. Film conversion, plate or cylinder preparation, machine changeover, waste allowance, and print calibration all have to be absorbed somewhere. That is why smaller orders often cost more per piece, especially when the film is not a stock size or the print has multiple colors. A plain unprinted bag may cost only a few cents per piece at scale. Add custom print and low volume, and the unit cost can rise fast.
Practical buying questions help here:
- Are sample charges credited back on the production order?
- Does the quoted price include cartons, inner bundles, and labels?
- Is freight included, or is it a separate line item?
- How much waste is built into the run?
- What happens to unit cost if the order is split across sizes?
Those details matter because packaging quotes often look clean until the extras show up. A competitive price that excludes packing labor, freight, or setup can become expensive once the full landed cost is calculated. Buyers who compare only the headline number usually discover the real number later, which is a predictable way to lose time.
For a rough planning range, stock clear bags are generally the cheapest option, custom sized unprinted bags sit in the middle, and custom printed or feature-heavy bags cost more because the setup is doing more work. Add special features such as reseal strips, perforation, or reinforced headers and the price moves again. None of this is mysterious. It is just manufacturing math.
| Option | Typical Use | Price Driver | Usual Buyer Tradeoff |
|---|---|---|---|
| Stock clear poly bag | Simple apparel packing, low decoration | Standard size, no artwork setup | Lowest unit cost, least brand control |
| Custom sized unprinted bag | Better fit for folded garments | Size conversion, gauge choice | Cleaner presentation, moderate MOQ pressure |
| Custom printed poly bag | Retail presentation and branding | Print colors, artwork setup, waste | Higher MOQ, stronger visual identity |
| Special feature bag | Vents, reseal, hang hole, perforation | Tooling and process tuning | Best functionality, longest approval path |
One more reality check: printed samples can take time and money even when they are not the final order. That is normal. What is not normal is approving a spec without knowing whether the supplier can actually hold the tolerances you need at the MOQ you can afford. Those two things should be discussed together, not one after the other.
Artwork, warnings, and label placement that prevent rework
Artwork needs version control from the beginning. If the logo file, barcode, size callout, and warning text are still moving while the sample is being made, the approval process turns into a target that keeps changing shape. That is how production ends up with a sample that looks acceptable but no longer matches the purchase order.
Clear bags are less forgiving than they look. Any printed element sits on a highly visible surface, so font size, contrast, and safe margins matter more than they do on a paper insert. White ink, metallic ink, and heavy solid panels all need to be checked on the actual film, because what looks saturated in a PDF may print thin or patchy on plastic. The proof is a promise. The sample is the truth.
Suffocation warnings deserve special care. They should be readable, visible, and appropriate for the destination market. Tucking them into a tiny corner to “save space” is how people create future problems for the warehouse, the retailer, or the compliance team. If the bag is used across multiple channels or countries, the warning placement should be approved against the strictest requirement in the mix, not the most convenient one.
Branding decisions matter too. A logo printed directly on the bag creates a cleaner presentation and can reduce loose labels, but it adds setup effort and makes revisions slower. An insert label is cheaper to change and easier to test, but it can shift around or create a less finished look. There is no single correct choice. There is only the choice that fits the program.
Before approving artwork, check these points on the sample:
- Barcode scans correctly and does not sit too close to a fold
- Logo has enough contrast to read on clear film
- Warning copy is legible at real viewing distance
- Text stays inside the safe area after sealing
- Size labels do not overlap with seams, vents, or closures
If the artwork has to be revised after sample approval, the schedule usually slips. That is not the supplier being difficult. That is the cost of changing the file after the reference point was already set. Packaging has the same version-control problem as garment development, and it deserves the same discipline.
Common approval mistakes that stall production
The biggest mistake is approving the digital proof and assuming the physical bag will behave the same way. It will not. A PDF can confirm layout and copy. It cannot tell you how the film opens, how stiff the seal feels, how much haze appears under warehouse lighting, or whether the bag folds neatly after insertion. That is why a physical sample is non-negotiable for custom size or print.
Another common miss is reviewing the sample without the real garment inside it. That hides the things that actually matter: sleeve bulk, zipper pulls, hangtags, tissue, security tags, and the way a folded hoodie pushes against the opening. An empty sample can look oversized. Add the product, and suddenly the same bag is tight in all the wrong places.
Late edits create their own mess. If the size changes, the warning text changes, or the artwork is updated after sign-off, the supplier may need a new proof, a new sample, and a fresh approval trail. That extra loop is avoidable. Someone has to own the final file and stop the casual “one more small change” routine before it turns into a new round of production.
Warehouse handling gets ignored more often than it should. Carton count, bundle count, pallet pattern, and receiving inspection criteria should be confirmed before release. A bag can be technically approved and still become a nuisance if the pack configuration does not match how the factory or distribution center works. Packaging is not just a visual spec. It is an operational one.
Other easy mistakes show up at the tail end:
- Not checking print against the actual film color
- Failing to confirm seal integrity after a carton test
- Accepting a sample with vague tolerance notes
- Skipping the master sample archive after approval
- Forgetting to align the approved bag spec with the PO
Best practice: keep one signed master sample with the purchase order, then compare the first cartons against that standard before the full run is released.
That written record matters because memory is a bad control system. Emails get buried. Messages get forwarded. The approved sample is the only thing that reliably settles a dispute when a shipment arrives and somebody swears the bag is not what was agreed.
Next steps after the sample is signed off
Once the sample is approved, freeze the specification sheet immediately. Dimensions, gauge, closure, print details, warning copy, and pack configuration should all be locked. Leaving one item open after approval is how teams accidentally authorize the wrong version and then spend the next week explaining why production drifted.
Request a master sample with a clear approval record so sourcing, production, and warehouse teams are working from the same reference. Then define acceptable variation ranges before the order starts. Small changes in seal width, print position, or haze are normal in packaging production, but the acceptable window needs to be agreed in advance. Otherwise every carton becomes a debate.
Set the production window, freight plan, and receiving inspection method together. A bag can be made correctly and still cause trouble if it arrives after the apparel line needs it, or if the warehouse does not know what to inspect against. Timing is part of quality. So is handoff discipline.
Here is a practical closeout checklist after approval:
- Approved sample filed with the PO
- Final artwork saved with version number
- Material, gauge, and dimensions frozen
- Carton and bundle counts confirmed
- Freight method and delivery window set
- Receiving inspection criteria shared internally
The strongest apparel programs treat the Garment Poly Bags for Apparel brands sample approval workflow as a formal bridge between sourcing and production, not a side task. Keep the approved sample, inspect the first cartons against it, and problems usually surface early enough to fix without derailing the order.
That discipline does more than avoid reprints. It tightens lead times, reduces warehouse friction, and keeps packaging aligned with the garment itself. The result is less drama, fewer surprises, and a final product that looks intentional instead of improvised. Packaging should not be the thing that slows a good apparel program down.
FAQ
How long does sample approval take for garment poly bags?
Plain unprinted samples can move quickly once the spec is final, often within a few business days. Printed bags usually take longer because artwork review, setup, color checks, and shipping add steps. If the bag needs a new size or a revision after the first sample, add time for another approval loop.
What should apparel brands check before approving a poly bag sample?
Check fit with the real folded garment, opening ease, seal strength, print clarity, warning placement, and whether the bag still looks clean after handling. Also verify pack count, carton fit, barcode placement, and whether the bag behaves properly when stacked or compressed.
Does MOQ change when garment poly bags are printed?
Yes. Printed bags usually need a higher MOQ because setup, plate or cylinder cost, and waste have to be spread across the run. More colors, custom dimensions, and special features typically push MOQ higher and increase unit cost.
Can a digital proof replace a physical sample for approval?
No. A digital proof is useful for artwork and copy checks, but it cannot confirm clarity, stiffness, sealing quality, or real fit. Use it as one step in the process, not the final approval if the bag has custom dimensions or print complexity.
What causes the most sample delays in apparel packaging?
Missing specs, late artwork changes, and unclear approval authority are the biggest causes. Version control problems across design, sourcing, and production also slow things down because the supplier has to verify which file is actually final.
What material specs matter most for poly bags?
For apparel, buyers usually watch gauge, clarity, seal behavior, and whether the film suits the folding and handling requirements of the product. LDPE, LLDPE, polypropylene, and recycled blends all behave differently, so the sample has to prove the material choice under real packing conditions.


