Garment Poly Bags for Nonprofit Campaigns Artwork Proof Checklist
Garment Poly Bags look straightforward until the artwork hits the actual material. Clear film reflects light, folded apparel changes the visible area, and a logo that reads cleanly on screen can become hard to read once the garment is inside the bag. For nonprofit campaigns, that matters because the packaging is usually tied to a fixed date: event day, donor mailing, volunteer pickup, sponsor kit distribution, or all of the above.
Artwork proof review is the last practical checkpoint before production. It is where the team confirms that the bag size, imprint area, text, and pack-out method all work together. If the proof is weak, the correction usually costs time and money that the campaign does not have.
These bags are typically used for folded shirts, hoodies, uniforms, and donation kits. They protect the item, keep it clean, and present the branding neatly when the package is handed out or shipped. The bag is not decorative filler; it is part of the delivery system.
Nonprofit orders also tend to involve more reviewers than a standard apparel run. Marketing wants the logo right, operations wants the pack-out efficient, development wants sponsor names correct, and finance wants the unit cost controlled. The proof needs to settle those questions without creating a separate approval project.
A useful proof answers one question clearly: will this bag look right, pack right, and ship right with the actual garment inside?
What the Proof Needs to Catch
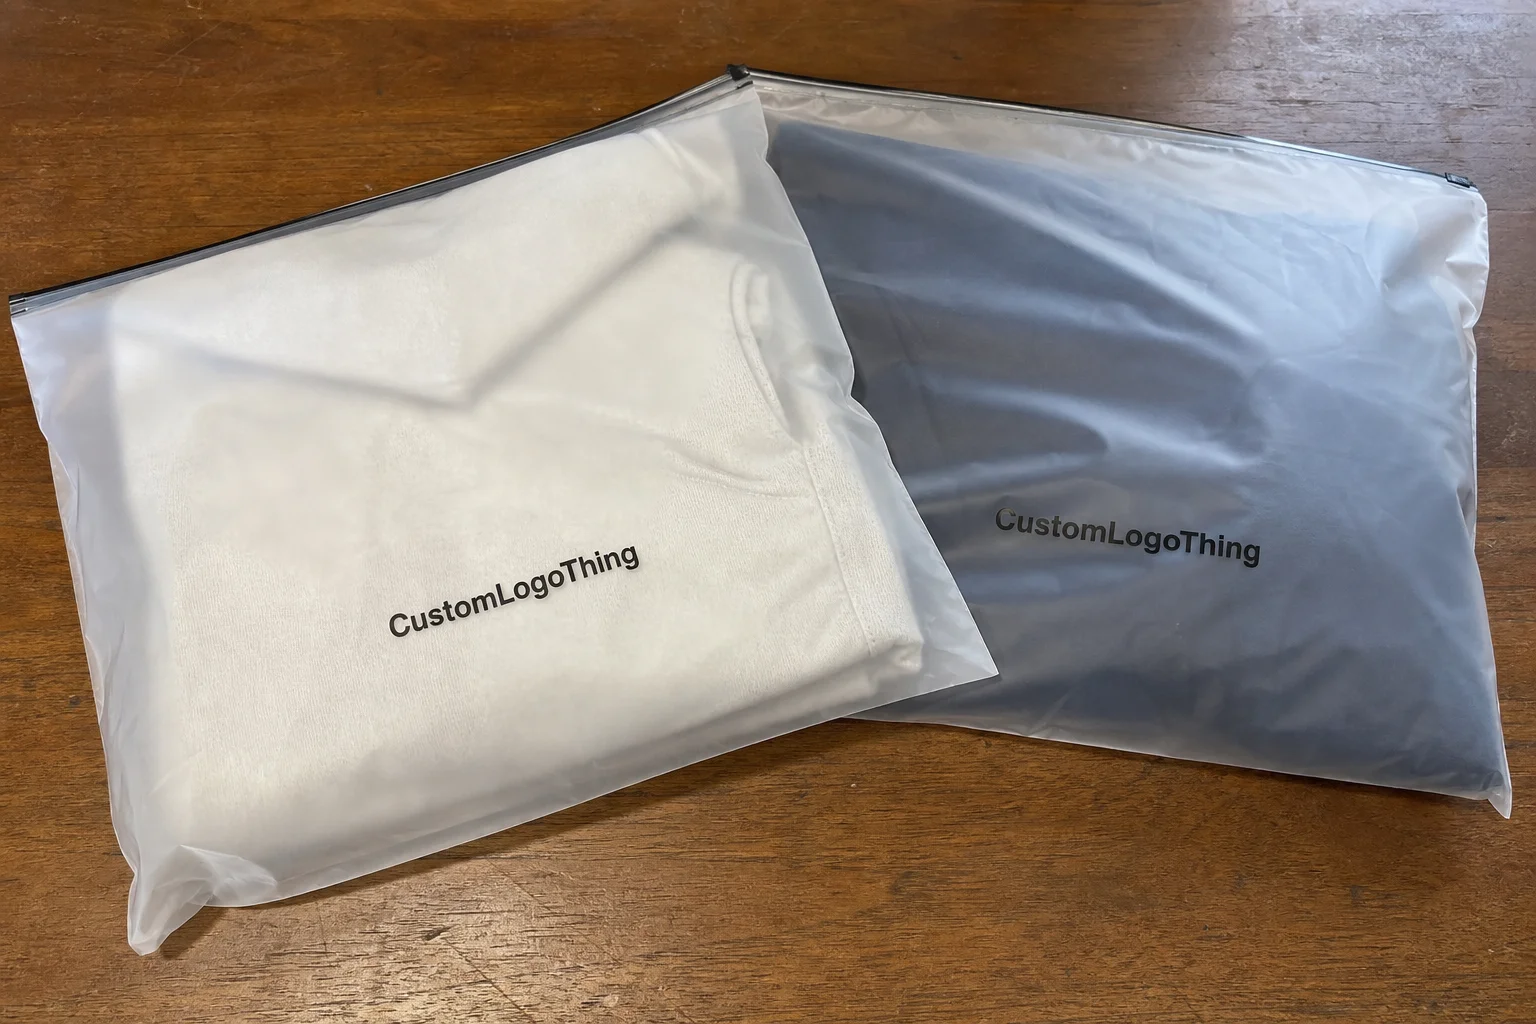
The proof should compare the artwork to the real bag, not just the design file. That means checking bag width, length, gusset depth, imprint area, and the distance from folds, seals, and trims. A logo centered on a flat PDF can shift once it lands on a narrow bag with a heat seal or closure strip taking up part of the edge.
Clear and translucent poly bags need extra attention. Film changes contrast, and gloss changes readability. A dark logo may hold up well, while light gray type, thin scripts, or reversed copy can disappear once the garment is inside the bag and the surface catches overhead light. QR codes, legal copy, recycling instructions, and sponsor lines should all be checked at actual size.
The proof also creates a shared reference point for everyone approving the order. Without it, comments spread across email threads and chat messages, and the final version becomes harder to track. One approved layout is easier to manage than five near-identical files with different opinions attached.
Proof checklist essentials
- Bag width, length, and gusset depth.
- Exact logo placement and imprint area.
- Ink colors, white underlay, and transparency effects.
- Safe zones, bleed, and distance from trims or seals.
- Required copy: nonprofit text, care notes, recycling instructions, sponsor lines, or disclaimers.
- Closure style, wicketing, or pack orientation if it affects visibility.
If the campaign is comparing apparel packaging formats, it helps to weigh the use case against Custom Poly Mailers. A mailer protects a shipment in transit. A garment bag is usually about cleanliness, presentation, and fast pack-out. They overlap, but not enough to treat them as the same product.
How the Artwork Proof Process Works
The process usually starts with artwork submission, then moves to a digital mockup mapped to the actual bag dimensions. A strong proof should show the bag size, imprint area, color count, and any text that must remain readable after folding and packing. If the bag is wicketed, folded, or sealed in a specific direction, the proof should show that too.
A proof is not the same as a sample. A proof confirms layout, spacing, and technical fit. It does not always show the exact final appearance of gloss, transparency, or white ink coverage. A production sample gives a more realistic view, but it costs more and usually takes longer. For most nonprofit campaigns, a digital proof is enough unless the artwork is unusually complex or color accuracy is critical.
One person should own final approval. That sounds obvious, which is why it gets missed. When several reviewers are editing from separate threads, conflicting changes are easy to approve by accident. One owner, one backup reviewer, one written approval trail is the clean version.
If the bags are part of a transit-heavy fulfillment plan, it can help to sanity-check the packaging against standards from the International Safe Transit Association. ISTA testing does not replace an artwork proof, but it does help teams think about how the packed item behaves under compression, vibration, and handling.
Specs That Change the Proof
Bag specs affect the proof more than many buyers expect. Film thickness is one of the biggest factors. A 1.5 mil low-density polyethylene bag behaves differently from a 2.0 mil bag, and that affects drape, clarity, and how the garment sits inside. Width and length determine how much of the print area remains visible once the item is packed. Gusset depth matters too, because a hoodie does not present like a folded tee.
Print method and artwork style matter just as much. Simple one-color art usually reads better on clear film than multi-color artwork with tiny type and decorative details. White ink can improve contrast, but it also changes the visual weight of the design. On translucent material, pale inks and thin scripts are the first things to suffer.
Readability needs a direct check. QR codes need enough quiet space to scan reliably. Reverse type should be reviewed at actual size. Legal copy, sponsor acknowledgment, and recycling instructions should not sit too close to a fold or edge where they can distort. The proof should expose those risks before print.
Material finish also changes the result. Matte film reduces glare and usually improves readability for text-heavy artwork. High-clarity film shows the garment more cleanly, but it also exposes uneven folds and contrast problems. There is no universal best choice. The right one depends on whether the campaign values presentation, readability, or both.
If the package includes paper inserts, backing cards, or shipper cartons, procurement may also ask about FSC-certified paper components. The FSC system applies to paper-based items, not the poly itself, but it can still matter when sustainability language is part of the campaign.
Cost, Pricing, and MOQ Tradeoffs
Pricing for Custom Garment Bags usually depends on quantity, bag size, film thickness, print coverage, and whether the order starts from stock or needs a more custom structure. For nonprofit campaigns, a standard one-color run may land around $0.12 to $0.30 per unit at 5,000 pieces. Heavier film, extra colors, or lower quantities can raise the price. Setup charges, art prep, and freight can matter almost as much as the unit price on small runs.
Proof changes can also affect budget. A revised logo position may require another proof. A late switch from one color to two can trigger new setup. If the artwork is still moving, it is usually cheaper to pause than to approve a version that will need to be reworked later.
| Proof type | Typical added cost | Typical use | Main advantage | Main limitation |
|---|---|---|---|---|
| Digital mockup | $0-$75 | Most standard nonprofit orders | Fast and low cost | Color is only an approximation |
| Press proof | $75-$250 | Color-sensitive artwork or sponsor-heavy layouts | Better confidence on appearance and placement | Slower and usually unnecessary for simple runs |
| Production sample | $150-$500+ | High-visibility campaigns, repeat programs, complex artwork | Closest view of the finished bag | Highest cost and longest lead time |
MOQ pressure is real. A supplier may price 10,000 bags much more favorably than 2,500, and the difference can justify buying extra if the nonprofit has multiple events ahead. But overbuying creates its own problem: storage, aging inventory, and leftover bags that never get used. The right quantity is the one that fits campaign volume, expected reorders, and available space.
If the packaging decision is still open, it helps to compare the bag against other options in Custom Packaging Products. Some campaigns need a garment bag. Some need a mailer. Some need a stock bag with branded labels. The simplest option is often the one that keeps the schedule and budget intact.
Production Steps and Timeline
The workflow is predictable: quote, spec confirmation, artwork submission, proof review, approval, production, packing, and shipment. The part that stretches the schedule is usually the human side, not the machinery. Clean files and fast approvals move quickly. Missing fonts, low-resolution images, unclear copy, or a proof sitting in someone’s inbox for four days do the opposite.
Typical production timing after proof approval often lands around 12 to 15 business days for standard runs. Custom structures, special print effects, or multi-location shipping can extend that. Add buffer time if the bags are part of an event pack-out, donor kit, or scheduled mailing. The safest timeline usually includes several business days of cushion before the apparel is needed.
Most delays come from a few predictable issues: logos pulled from web graphics, fonts not outlined, copy pasted into the wrong place, or sponsor language that was not settled before the proof was sent. Another common issue is silence. The proof sits while everyone assumes someone else reviewed it.
One good habit is to tie each revision to a single written comment list. No scattered edits across multiple threads. No verbal “just one more change” that never makes it into the file. If the campaign uses multiple garment sizes, the proof should match the exact packed item for each SKU. A youth tee and a heavyweight hoodie do not create the same presentation.
For donor kits and bundled event packages, build the schedule around the slowest component, not the fastest one. If shirts arrive late, the bags are waiting. If inserts are delayed, the bag proof may be approved and still useless for packing. Packaging is rarely the bottleneck people think it is, but it is often the thing blamed first.
Mistakes That Cause Reprints
The biggest mistake is approving the proof without comparing it to the actual packed garment or insert. A folded hoodie needs more space than a thin tee. A thicker garment can change how much artwork remains visible through the film. If the proof was reviewed against the wrong product, the finished bag may look cramped even when the dimensions were technically correct.
Another easy miss is trusting screen color on clear or translucent plastic. Screens emit light. Film reflects it. That changes the way color appears. Dark inks usually hold up well, but lighter logos may need an opaque white base to stay readable. Gloss adds glare, which can make fine text look weaker in the hand than it did in the PDF.
Bleed and safe zones also deserve real attention. If artwork sits too close to the edge, trimming can clip it. If type sits too close to a fold or seal, it can distort. These are small issues in a file and very visible issues in the finished run.
Process mistakes cause just as much trouble as design mistakes. Revisions sent through separate threads get missed. Questions are answered after approval instead of before it. Sponsor language gets interpreted differently by different people. A proof approved before all decisions are made is not really approved.
The safest approach is boring discipline: one file, one owner, one approval record. It is not glamorous, but it reduces mistakes better than optimism ever will.
What to Prepare Before You Request the Quote
Before requesting the final quote, gather the bag dimensions, quantity, film thickness, print colors, artwork files, delivery date, and the exact garment or kit that will be packed. If the campaign has multiple sizes, list them separately. If the bag needs a specific opening direction, a matte finish, or a mailing-friendly format, say that early. Better information up front usually means fewer proof revisions and a more accurate quote.
It also helps to assign one approval owner and one backup reviewer. That avoids the common stall where marketing wants one change, operations wants another, and nobody wants to be the person who says yes. If the nonprofit has a sponsor review or legal sign-off requirement, fold that into the schedule before the proof is sent.
Check the artwork against the campaign use case, not just the logo file. A donor mailer is not the same as a conference giveaway. Volunteer shirts are not the same as retail merch. If the garments will be packed with inserts, cards, or other printed pieces, review the packaging as a full kit rather than as disconnected parts.
The proof checklist is the point where specs, copy, and budget finally meet. That is the cleanest place to catch mistakes before production starts. Once the order is approved, the schedule tightens, and every correction gets more expensive.
Frequently Asked Questions
What should a garment poly bag proof include for nonprofit campaigns?
It should show bag size, imprint area, ink colors, white underlay if needed, safe zones, trim or seal details, and any copy that must stay readable after packing. If the film is clear or translucent, the proof should make readability issues obvious.
Why does the artwork proof look different on clear poly bags?
Clear film changes contrast, and glossy plastic reflects light differently than a monitor does. Colors can appear lighter, and thin type can lose clarity. White ink or an underprint may be needed to keep the artwork legible.
How can nonprofits reduce proof revisions and speed up turnaround?
Submit print-ready art with outlined fonts and clean vector logos, keep comments in one thread, and assign one decision-maker to approve the proof. If the quantity, size, or delivery date keeps changing, the proof cycle usually slows down.
What drives the unit cost of custom garment poly bags?
Quantity, film thickness, bag size, print complexity, setup, and freight drive most of the cost. On smaller runs, setup and shipping can matter almost as much as the unit price.
What is the best next step after approving the proof?
Lock the shipping address, receiving contact, and delivery window before production starts, then keep the approved proof on file for reorders. That makes it easier to repeat the same decisions without rebuilding the job from scratch.


